


*Go to page three for another, more complex tutorial example*
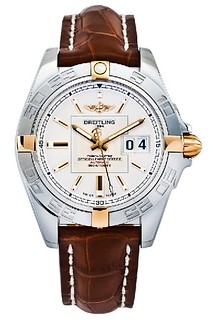
Ever wondered how those almost unreal press images of watches are taken, like this one?
Its a time consuming type of image to get, but nevertheless it is very possible to achieve without spending professional levels on your camera equipment.
It all starts with the lighting:
This complete lighting set can be assembled for less than £1000, yet will give excellent control and power for watch photography. The lighting kit is mainly Lencarta. The camera is a Nikon D90 with a Sigma 150mm macro lens.
The key to lighting a watch, particularly a curved, reflective one such as the Breitling Galaxy, is to do it in stages. First, we compose the shot by positioning the watch on our white paper background with c clips and white tack and framing it up on the camera. You can't see it in the image, but the dial of the watch is facing up.
We then use the two softboxes to light the sides of the case, using the modelling lamps to get an idea of the reflections caused. Set the camera to live view for a real time update of the lighting setup.
The third light with honeycomb grid is used to shine a spotlight on the watch from above and behind, lighting the dial. The translucent reflector diffuses the light - experiment with the angles to pick out detail on the dial and get the watch looking how you want.
We then use pieces of black and white card to minimise unwanted reflections on the watch and bounce light back onto the underside. Being curved and polished, it wants to reflect everything, so propping up the card will help us control that. We can't control every reflection, but we can minimise the amount of work we need to do in post production.
Lastly, we can use more pieces of white card held between the translucent reflector and the watch itself (known as a gobo) to add some gradients to the reflective surface. Holding a thin strip (long enough so your hands arent reflected), see how you can control the tone and gradient of the metal on the case and hands to create a pleasing shape to them.
Now we can take the shot. I shoot in RAW, using live view, and the camera set to manual, aperture around f16. The shutter speed and lighting power on the flashes is then adjusted to suit. A remote shutter release is handy, because it leaves your hands free to hold pieces of card, and you don't knock the camera when you shoot. Some press images are made up from several images, building up a composite of the dial and various elements of the case with varied lighting to create a perfect (although often unbelievable) image. In this instance, just the one shot was taken.
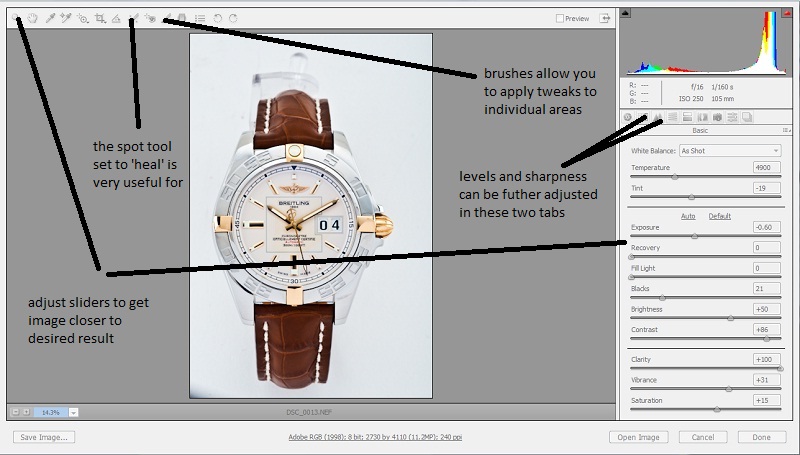
Once you're happy with the image, open it up in Camera RAW:
Adjust the sliders until you see the image 'pop.' RAW images are very flat, awaiting the adjustments to be made in post production, so don't be afraid to whack sliders like contrast and clarity right up.
The great thing about Camera RAW is the ability to edit the image non destructively, ie, the original data is never lost. Do as much work as you can in Camera RAW as it makes the workflow a lot simpler.
The spot tool in Camera RAW is great once you've got the hang of it, allowing the removal of dust blobs (which are inevitable) quickly and easily. I prefer it set to 'heal' mode rather than clone, as it blends the change in. It's a clever tool because if there is a definite line though the part you are trying to heal, as long as you set the target point as an area with the same line, it won't blur the line, but it will heal the dust blob.
The last part of Camera RAW to use is the brushes tool. This allows similar adjustments to the first part of Camera RAW, but in select areas, allowing some further adjustment to the image, again in a non destructive way.
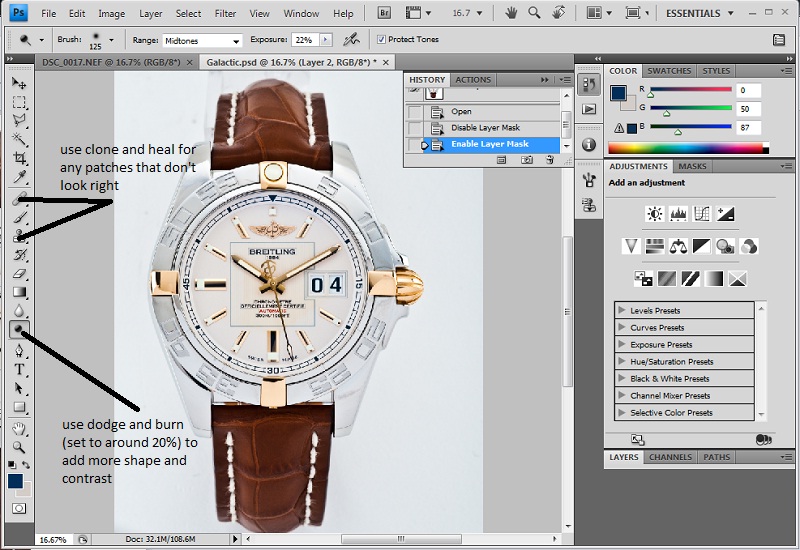
Once happy, we can open the image in Photoshop:
Use the clone and heal tools for any patches too complex for the Camera RAW tools. As well as dust, you can also use it to clean up any unwanted reflections too. Then you can use Dodge and Burn (set very low) to add some more shape and contrast to the watch, darkening the darker areas and lightening the lighter ones. Plain chrome can be quite flat, so it makes it pop a little more.
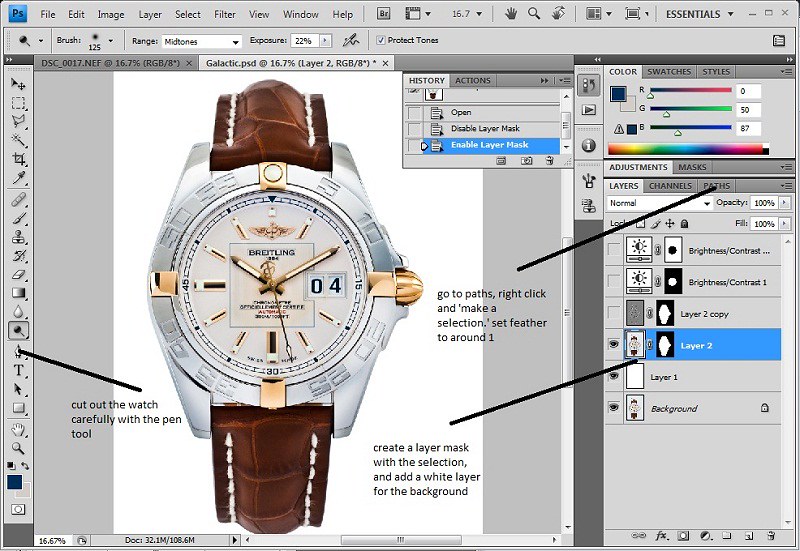
Next we cut the watch out:
Set a solid white layer below your watch layer, then use the pen tool to carefully cut the watch out. The pen tool can be quite tricky to master, but the click and drag to create arcs makes it very quick and accurate when you get the hang of it. Once you've made your path, go to the 'Paths' tab, right click and 'make a selection' from it, with feather set to 1. Use the selection to make a layer mask, and voila, one cut out watch.
Now we can make the final tweaks:
For added definition and contrast, we create a high pass layer. Duplicate your watch cutout, layer mask and all, and desaturate it. Then, go to 'filter,' 'other,' 'high pass,' and select 10. Set the layer blending mode to 'soft light' and opacity to 50%.
Lastly, we can balance out the dial and case with two layer masked brightness/contrast adjustments, bringing them more into line.
And that's it!


 Reply With Quote