closing tag is in template navbar
timefactors watches


TZ-UK Fundraiser
Page 1 of 2 12 LastLast
Results 1 to 50 of 71

Thread: Refinishing a Rolex Explorer II bezel - a pictorial

  1. #1
    Master Omegary's Avatar
    Join Date
    Apr 2006
    Location
    Oxfordshire
    Posts
    8,841

    Refinishing a Rolex Explorer II bezel - a pictorial

    This thread compliments the one about a lapping machine on the link below.

    http://forum.tz-uk.com/showthread.ph...pics-on-page-3

    There's going to be a fair few pics and I'll endeavour to talk though each stage clearly but succinctly.

    Here's the candidate for a little TLC, a fairly beaten Rolex Explorer II bezel. You'll see that there's lots of surface scratches, some fairly deep dings, the edges have lot of nibbles and the paint is faded and worn away in places.

    Before


    The refinishing process

    First off the polished surfaces have to be restored to their former glory. This is a three stage process, first getting them level again, then an intermediate polish and finally a high polish.

    There's two polished areas on an Explorer bezel the flat top and the bevelled sides. Let's start with the flat top as that's the easiest of the two.

    Into the chuck that holds the bezel


    Then present the bezel to the medium grained wheel to take off the worst of the scratches. Obviously you have to ensure that the bezel is presented to the wheel completely flat.


    Then to the fine grained wheel for the intermediate polish


    Now the same process for the bevelled outer edge. The time consuming part here is matching the angle of the bezel, you don't want to change the profile at all. Plus you need to know exactly how much metal you can afford to lose, take off too much and the bevelled edge gets too close to the numbers. For these reasons this process needs constant inspection and evaluation.

    Accessing the angle


    Ready to start the polishing


    When these two surfaces have had the intermediate polish it's off to the buffing wheel for a final polish. At this stage you also polish out any graining on the rest of the bezel so you can regrain from a blank canvass. Sorry my battery died during this process so I've no pics.

    Battery replaced it's on to the next step. Having a perfectly smooth bezel you know re-instate the graining to the shallow angled top. Again time is needed to work out the precise angle to present the bezel to the wheel. Once you're happy with the angle refinishing can begin, this done on the course grained wheel.


    Again it takes a skilled eye and hand to know exactly how much you can remove from the bezel.

    I'm about to hit the 10 picture limit so more to follow...
    Last edited by Omegary; 29th November 2012 at 21:12.

  2. #2
    Master Omegary's Avatar
    Join Date
    Apr 2006
    Location
    Oxfordshire
    Posts
    8,841
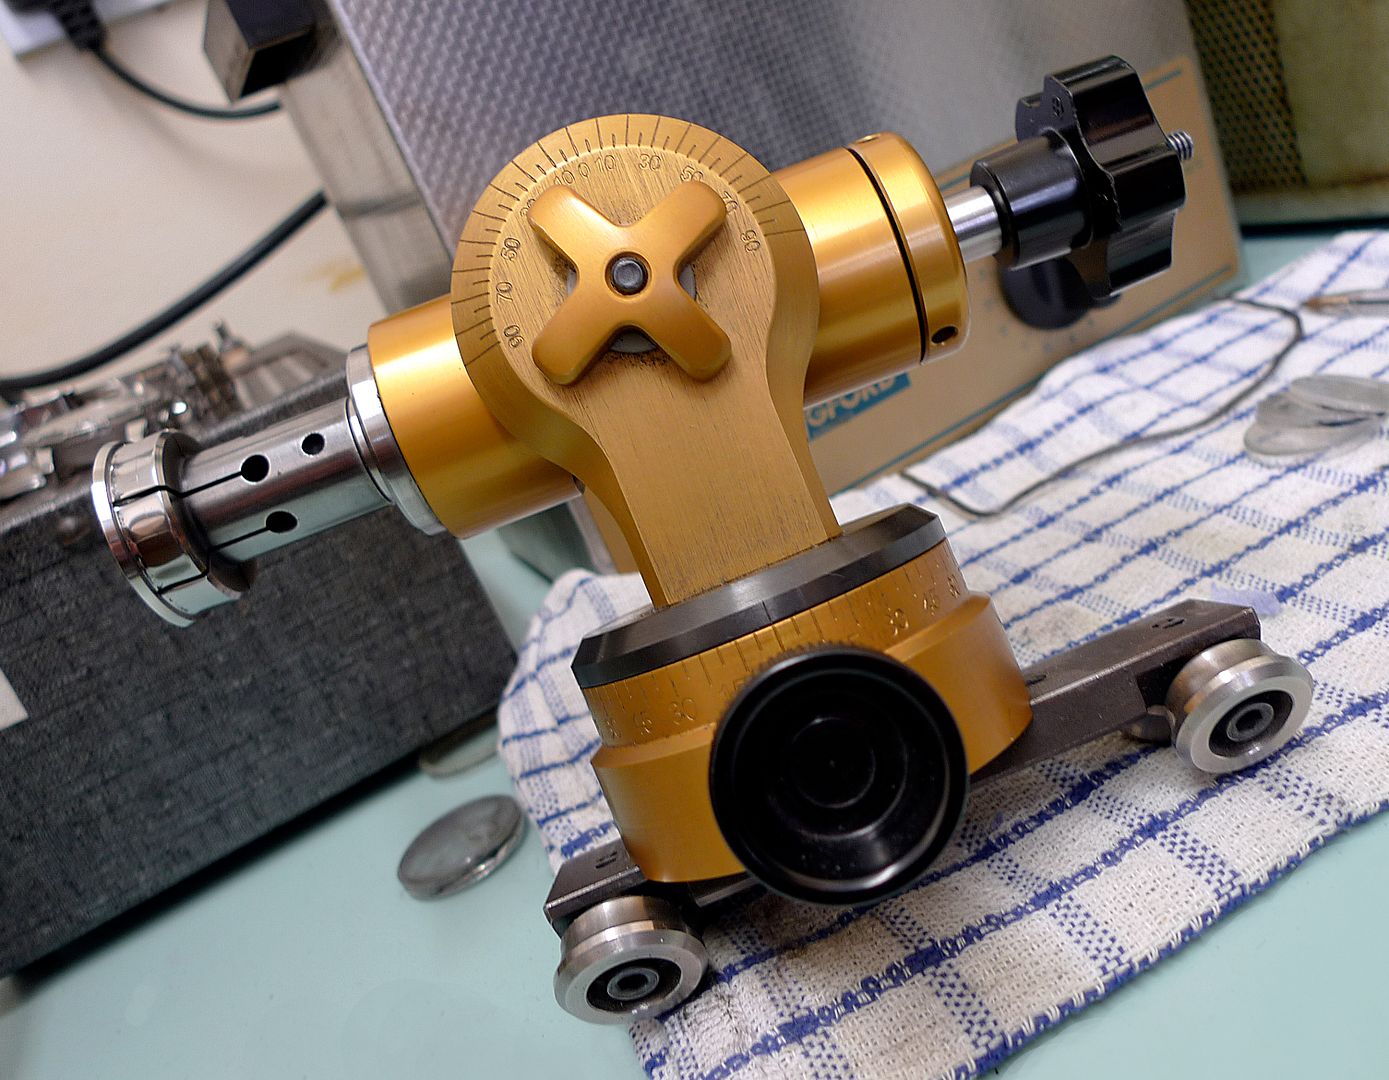
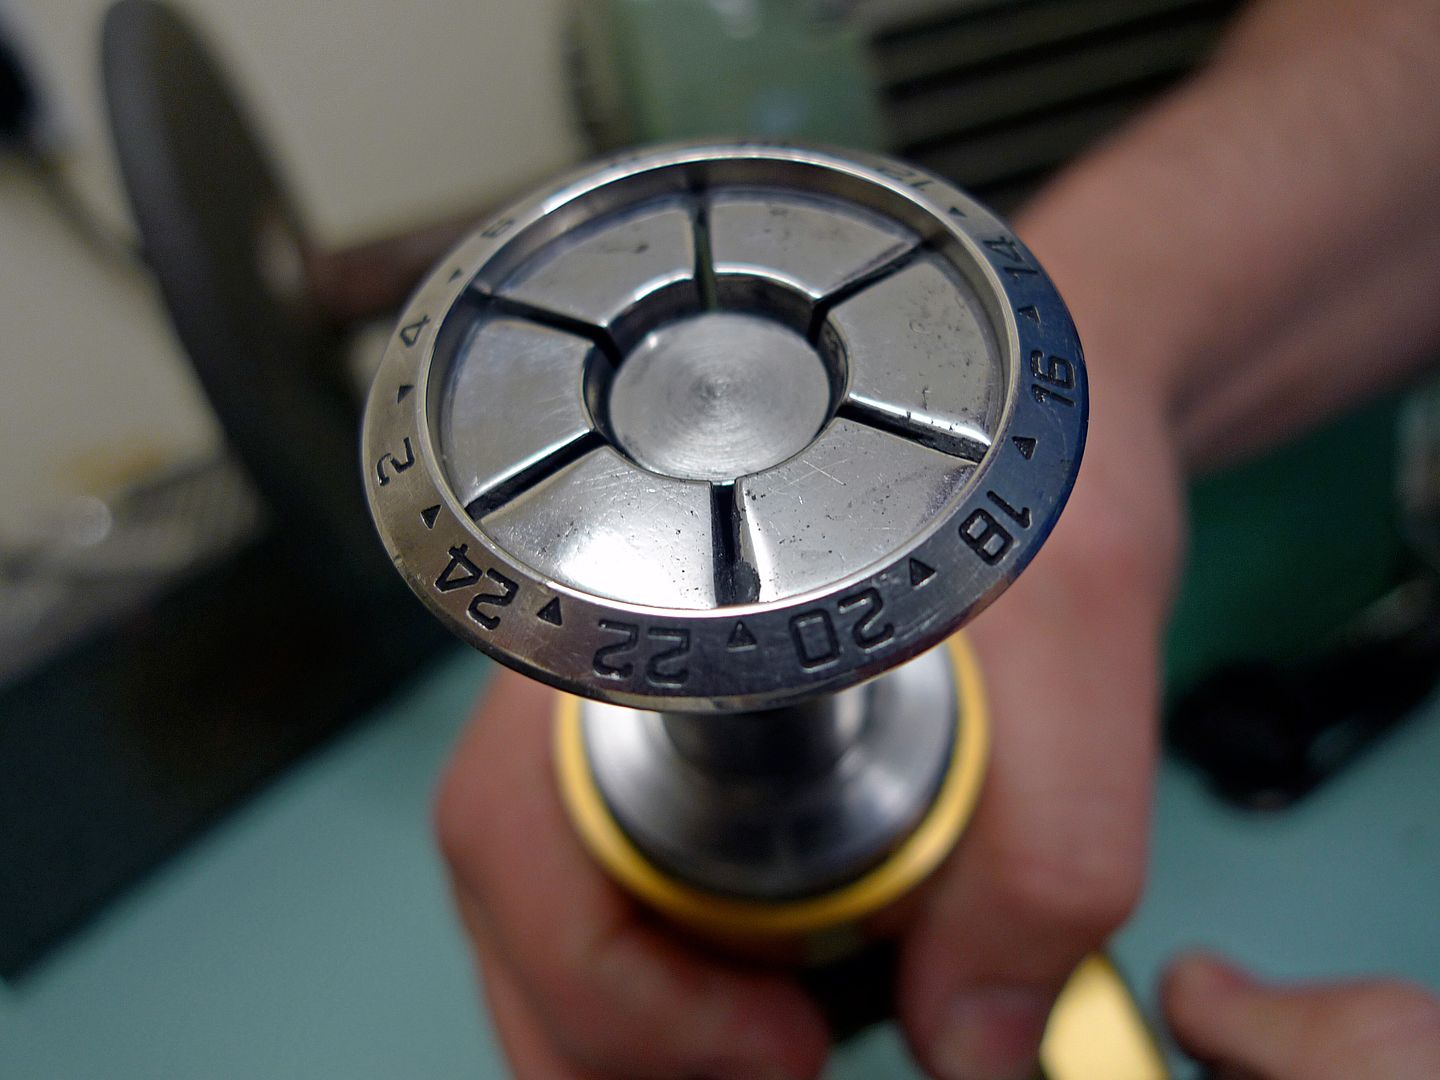
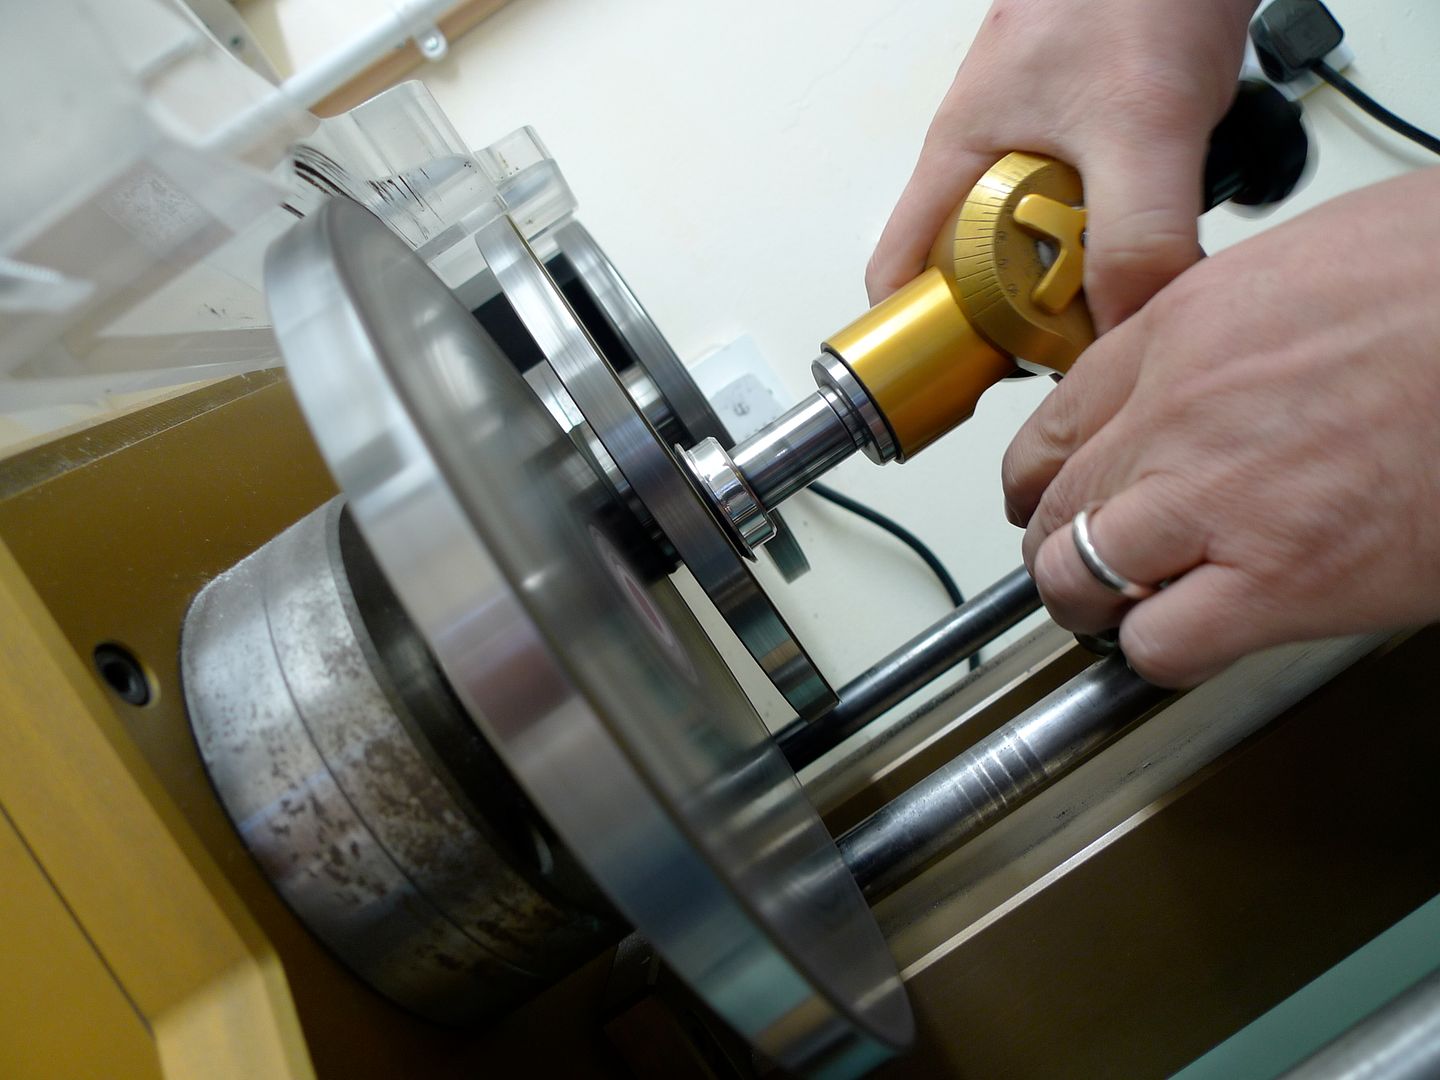
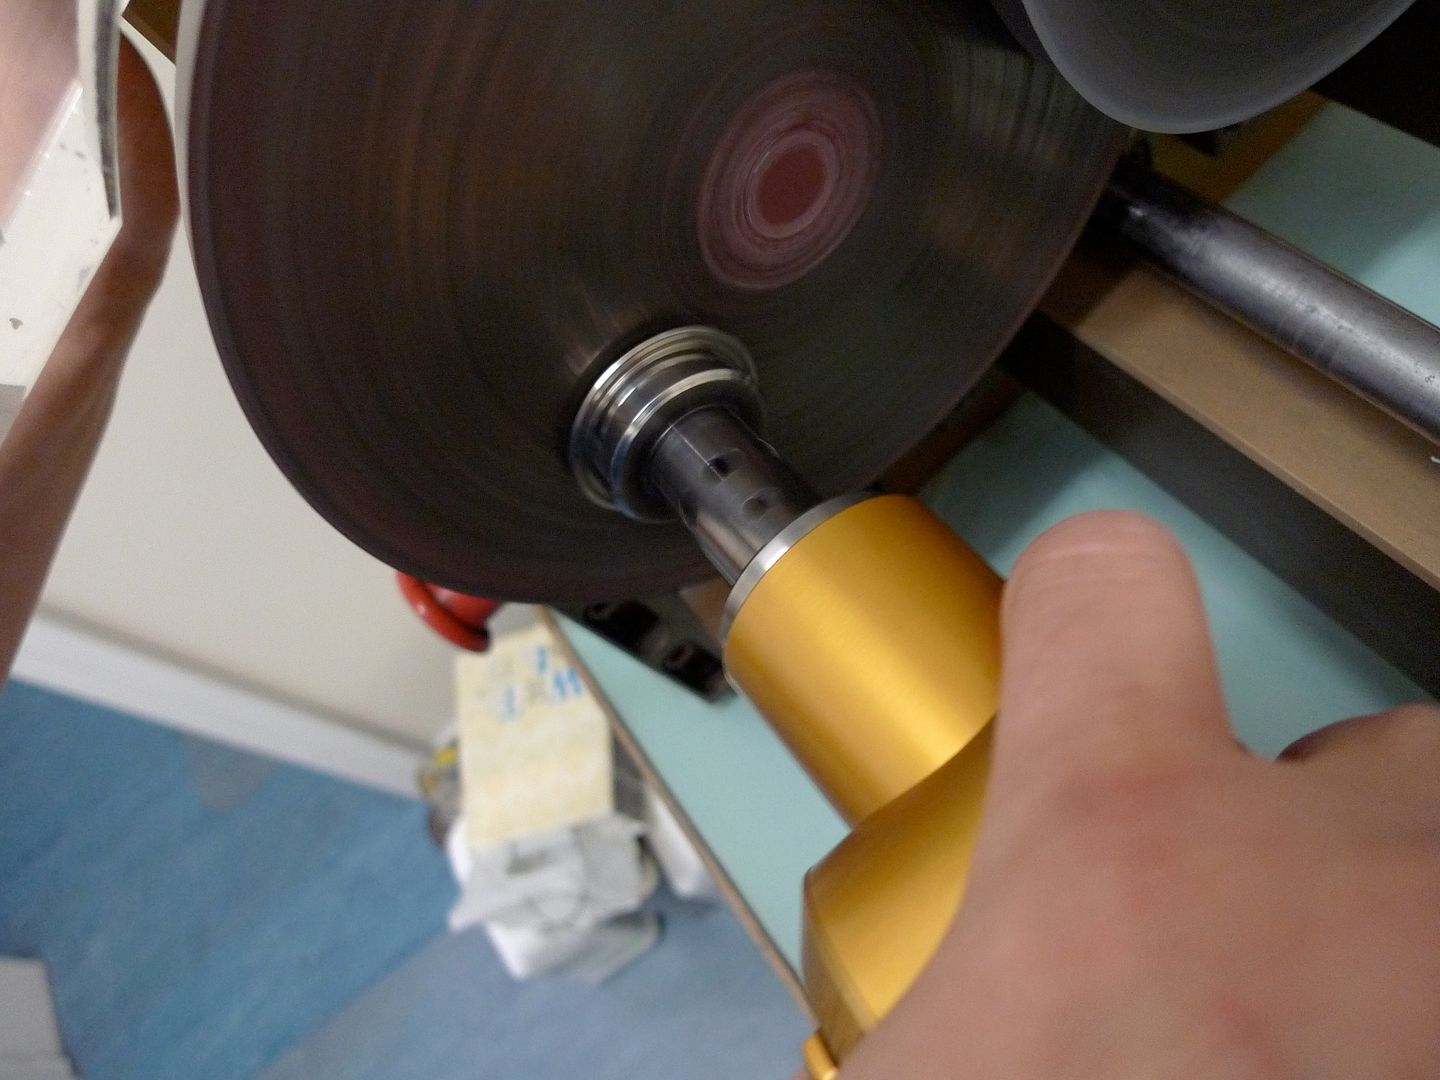
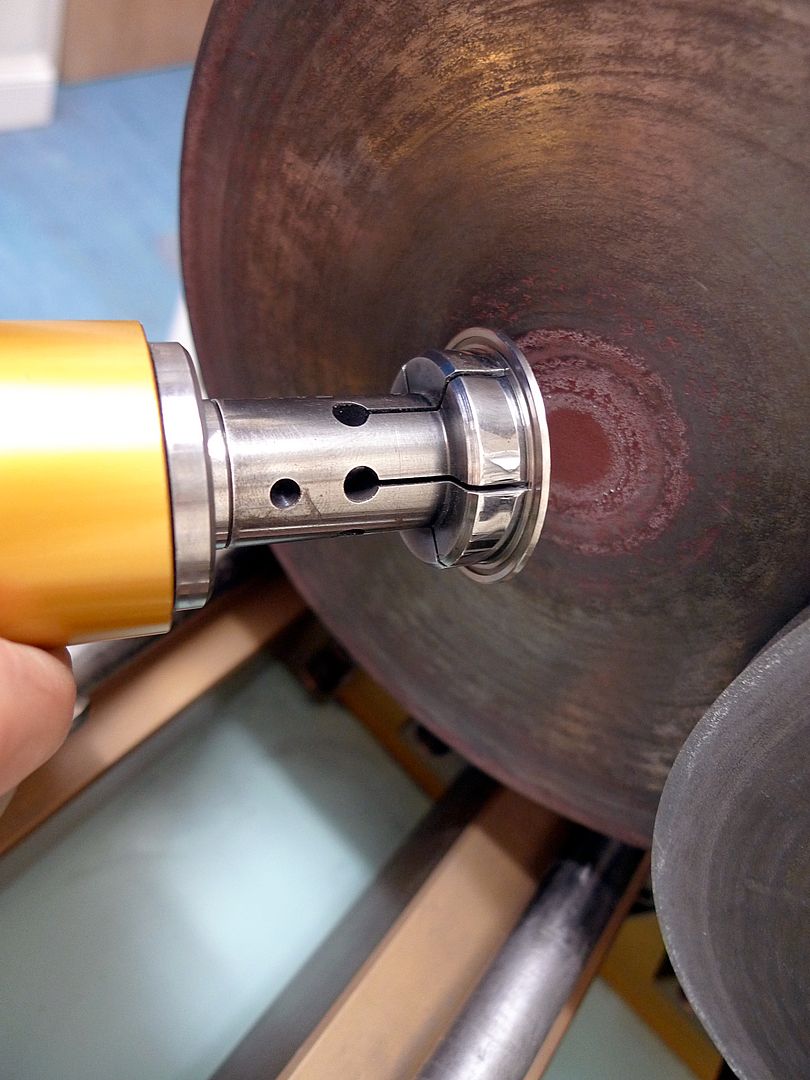
    A quick pic of the results so far


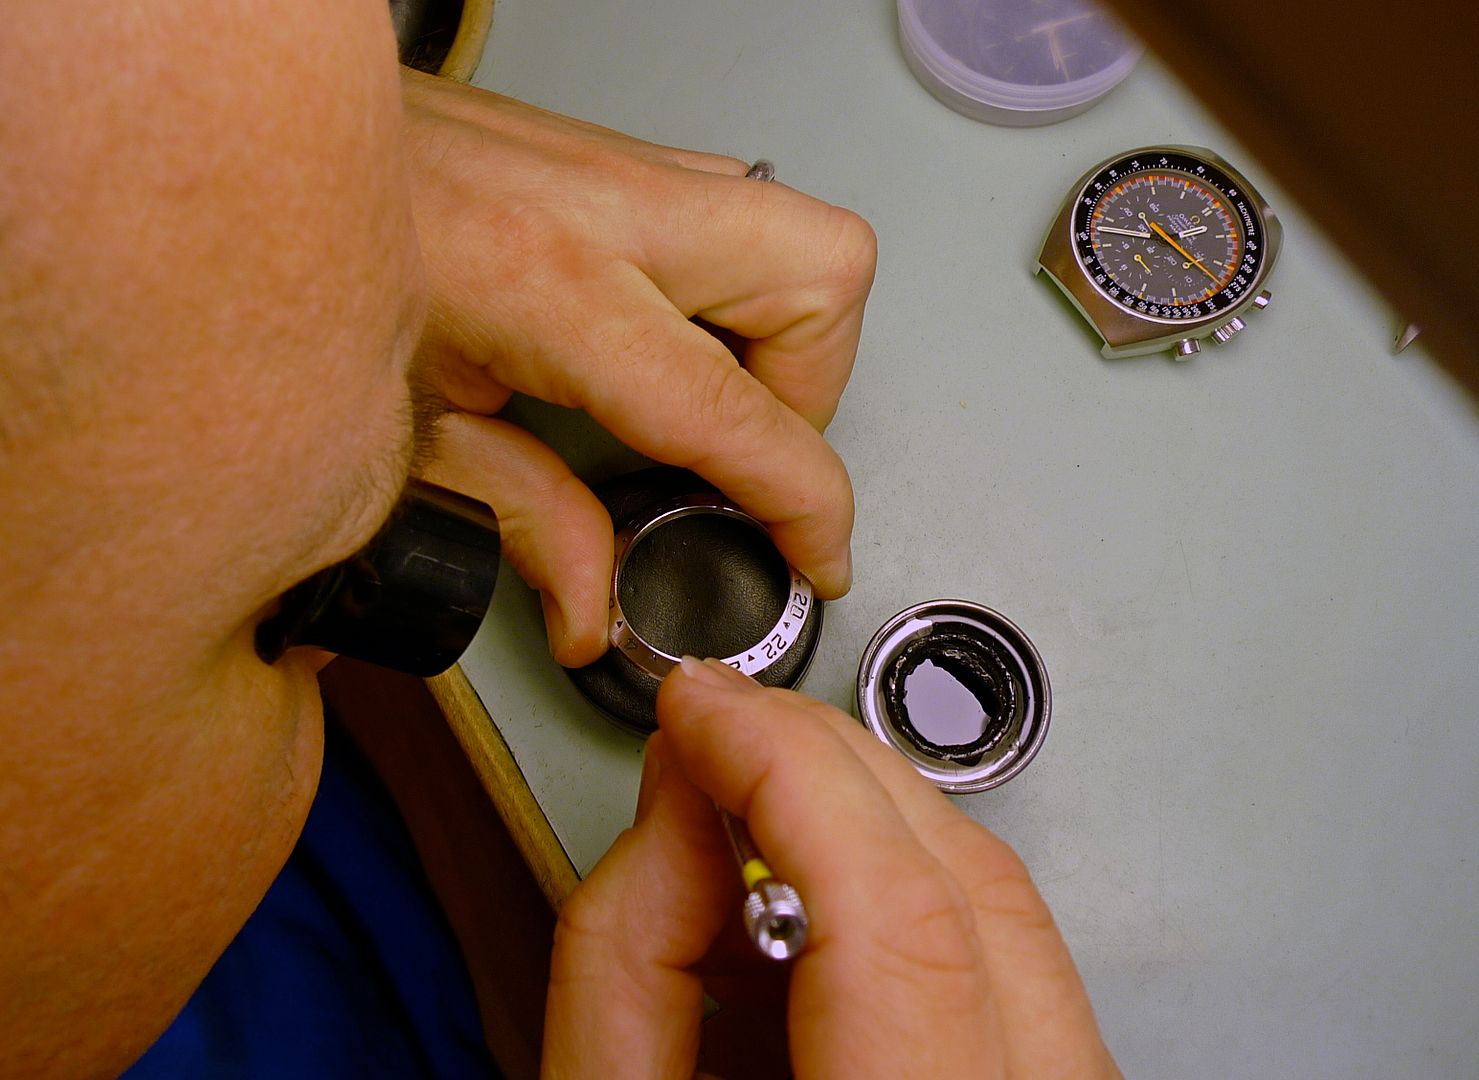
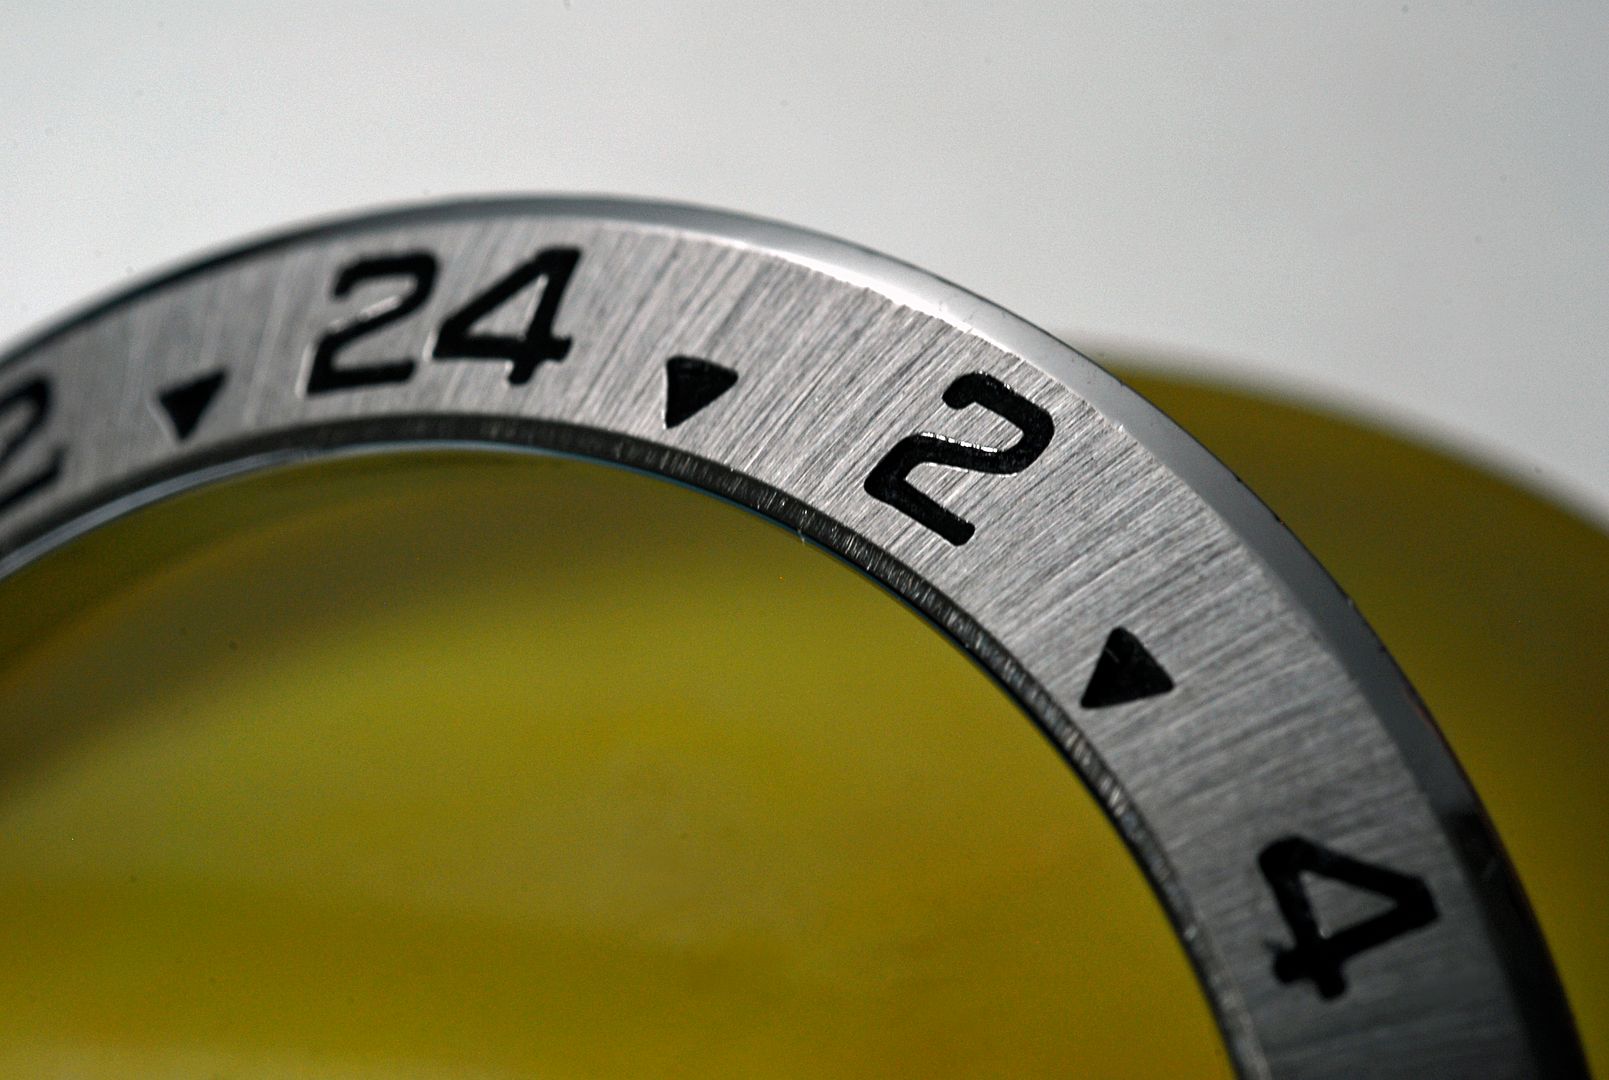
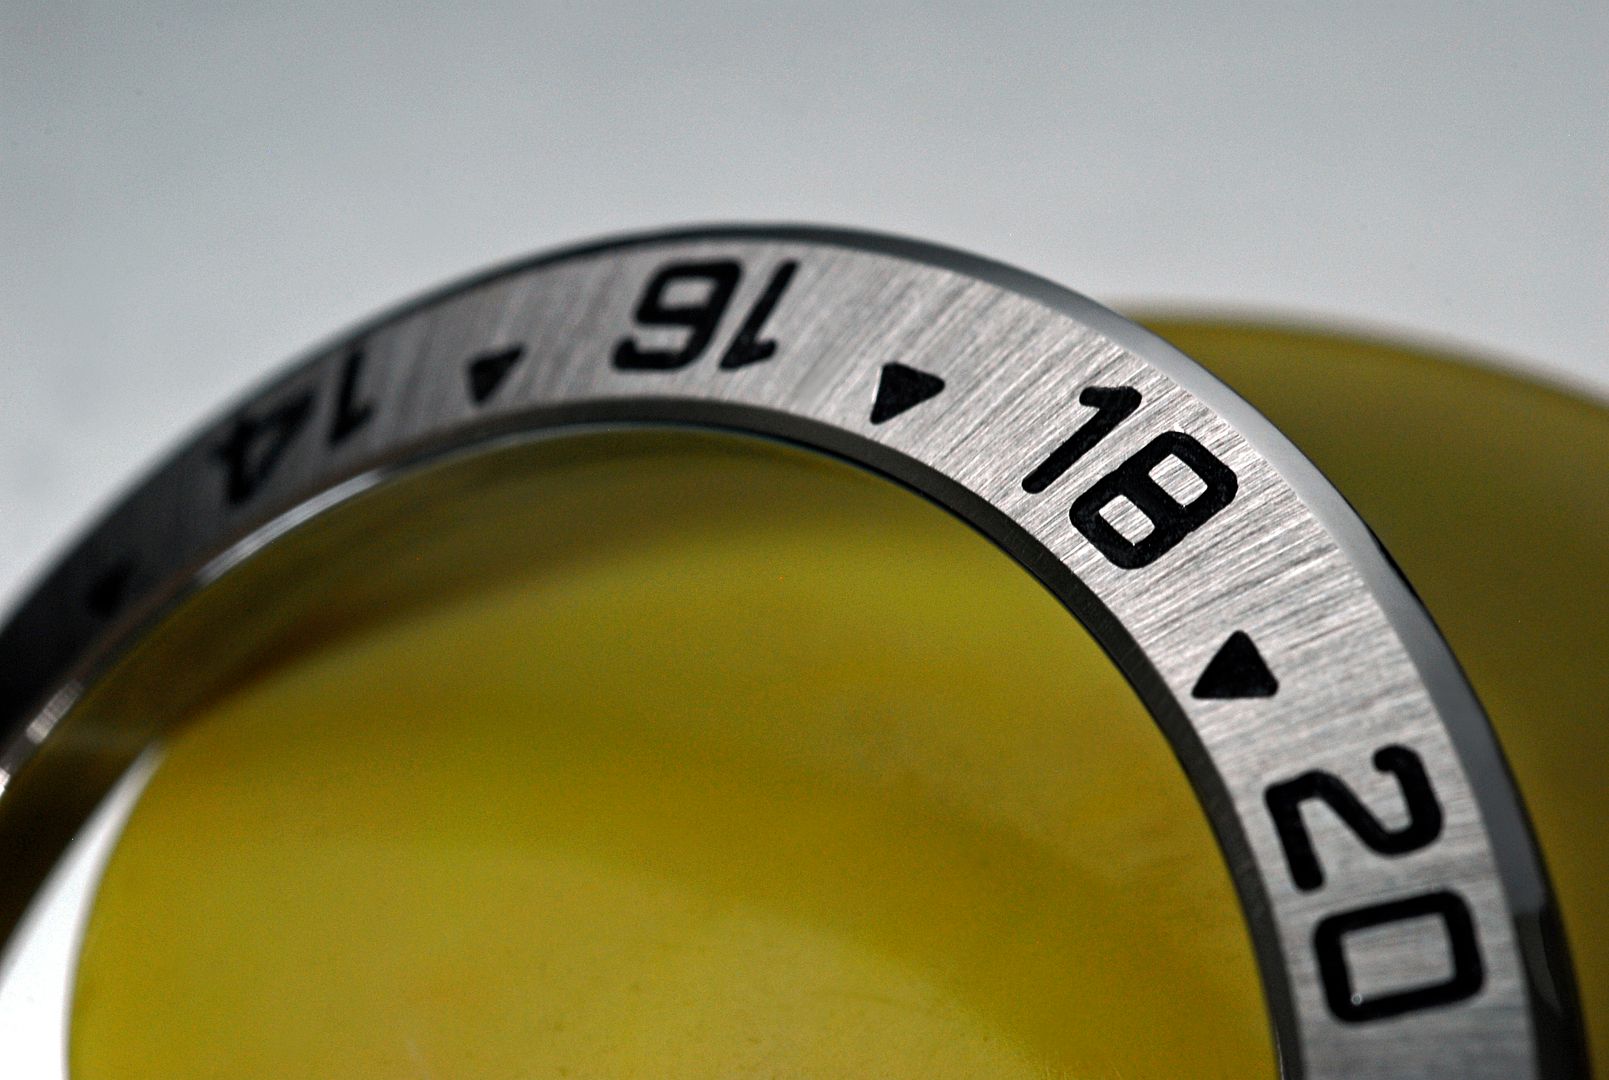
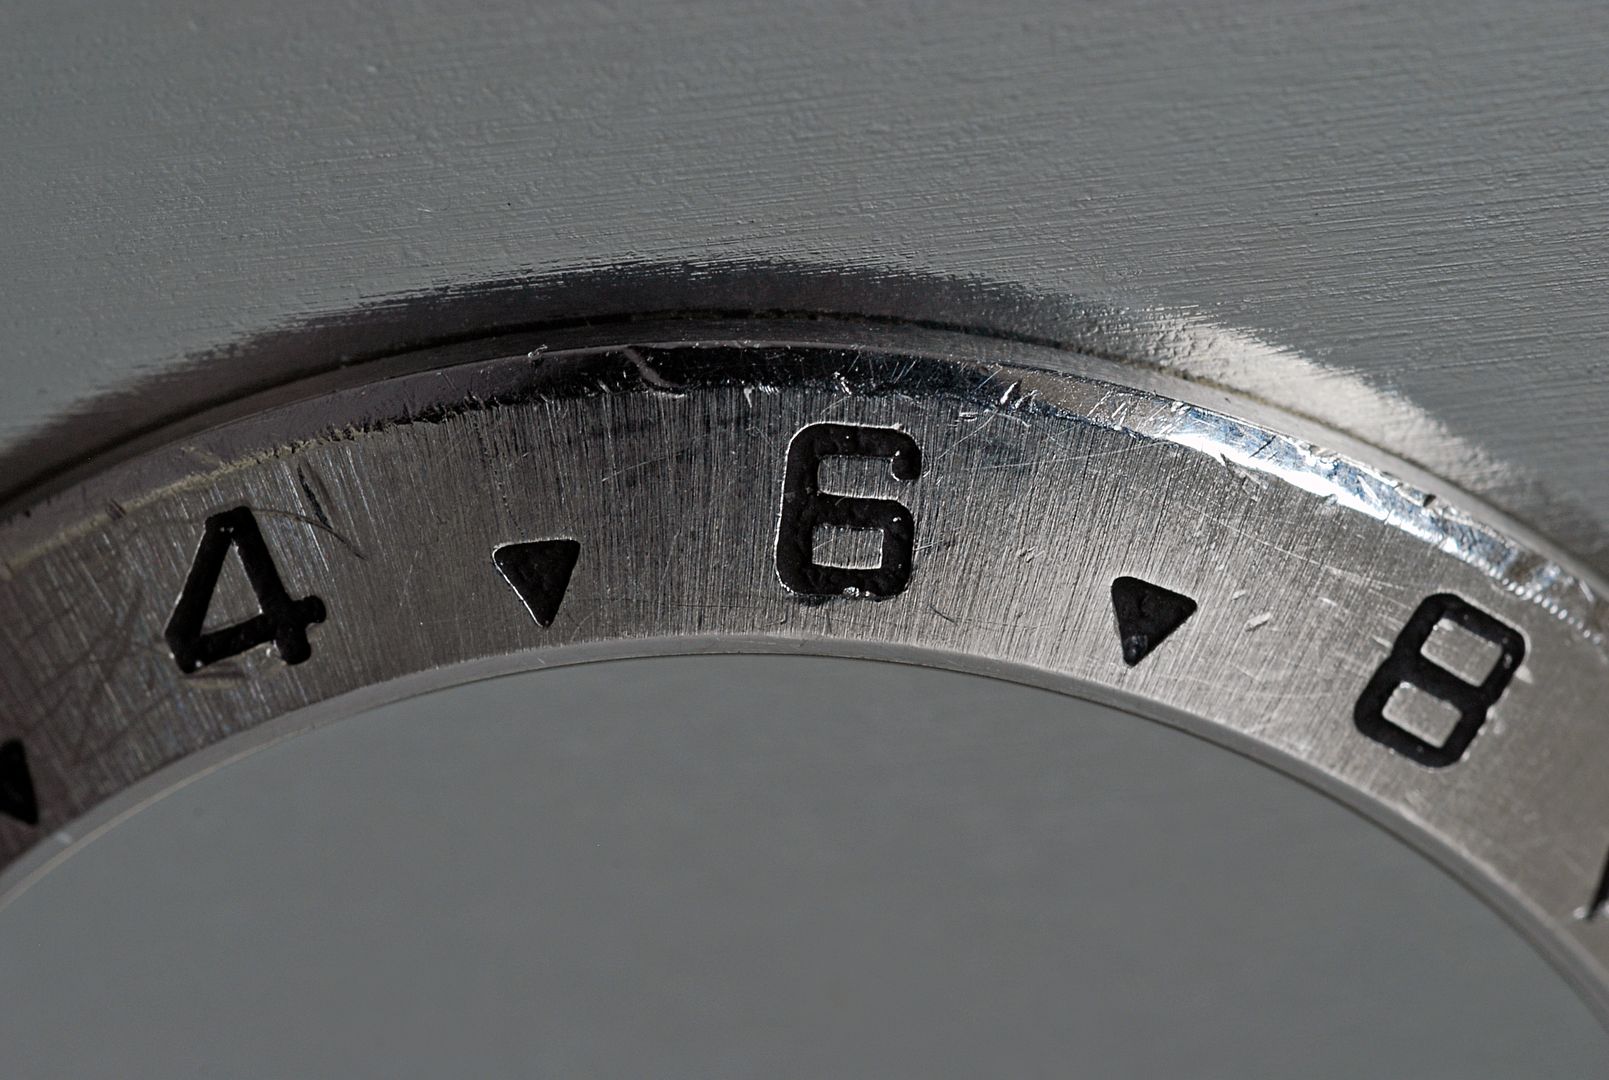
    Next up it's time to refresh that faded paint. A fine screwdriver is used and capillary action draws the paint into the recesses.


    Let the paint dry a little then wipe off any excess. Then bake until the paint is dry and hard.


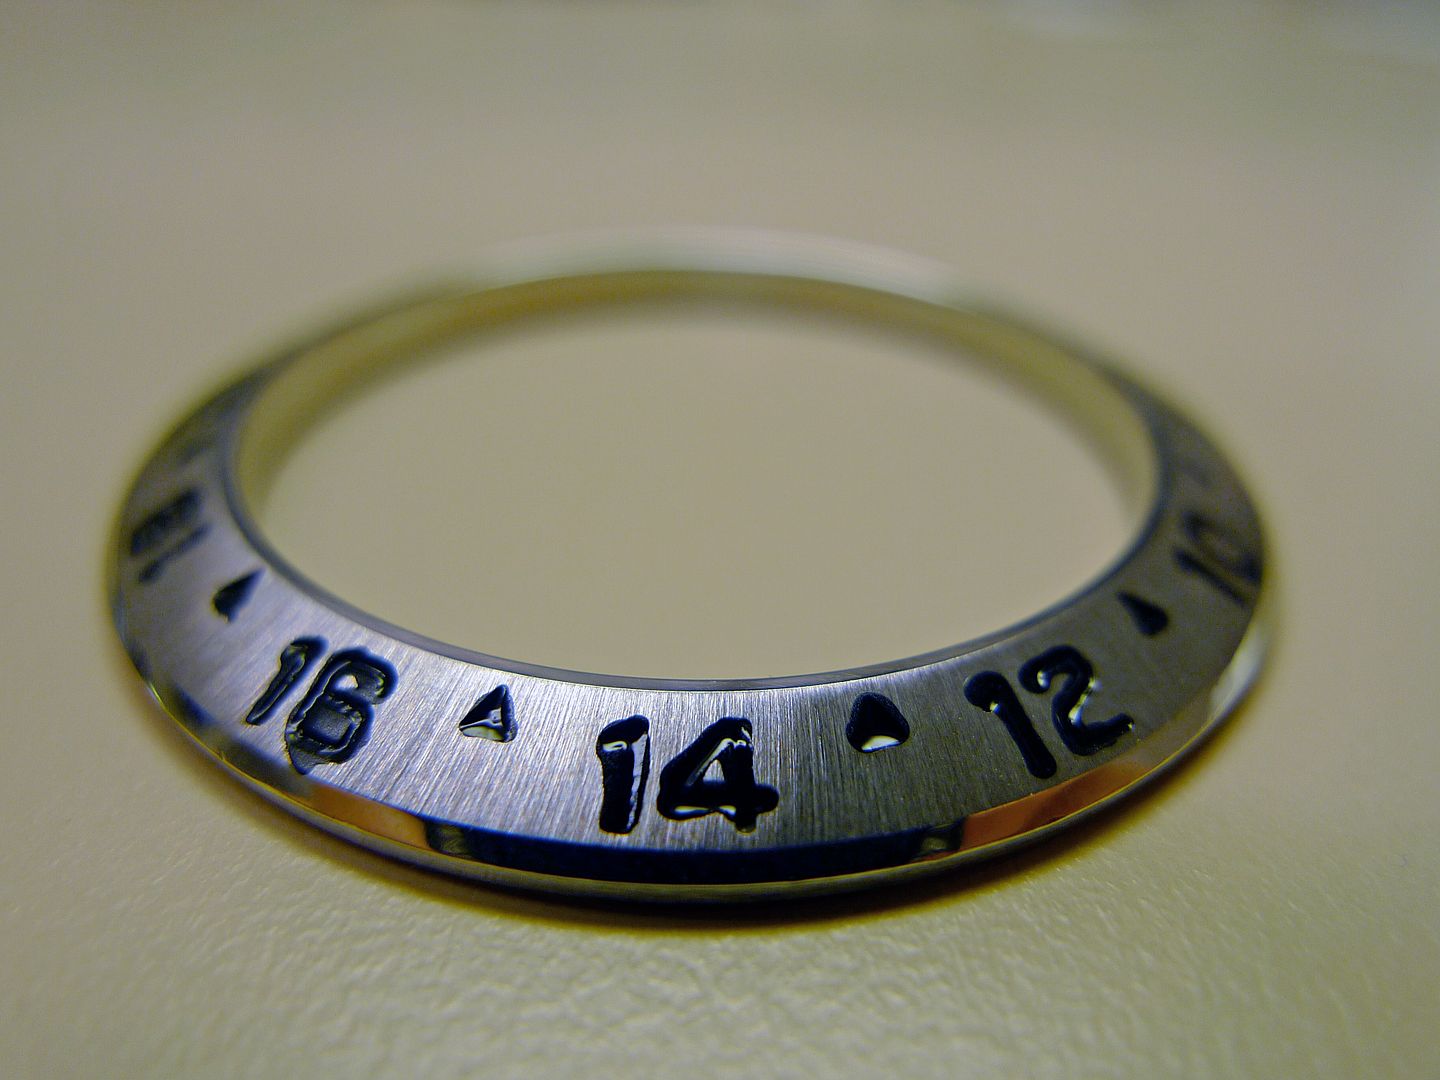
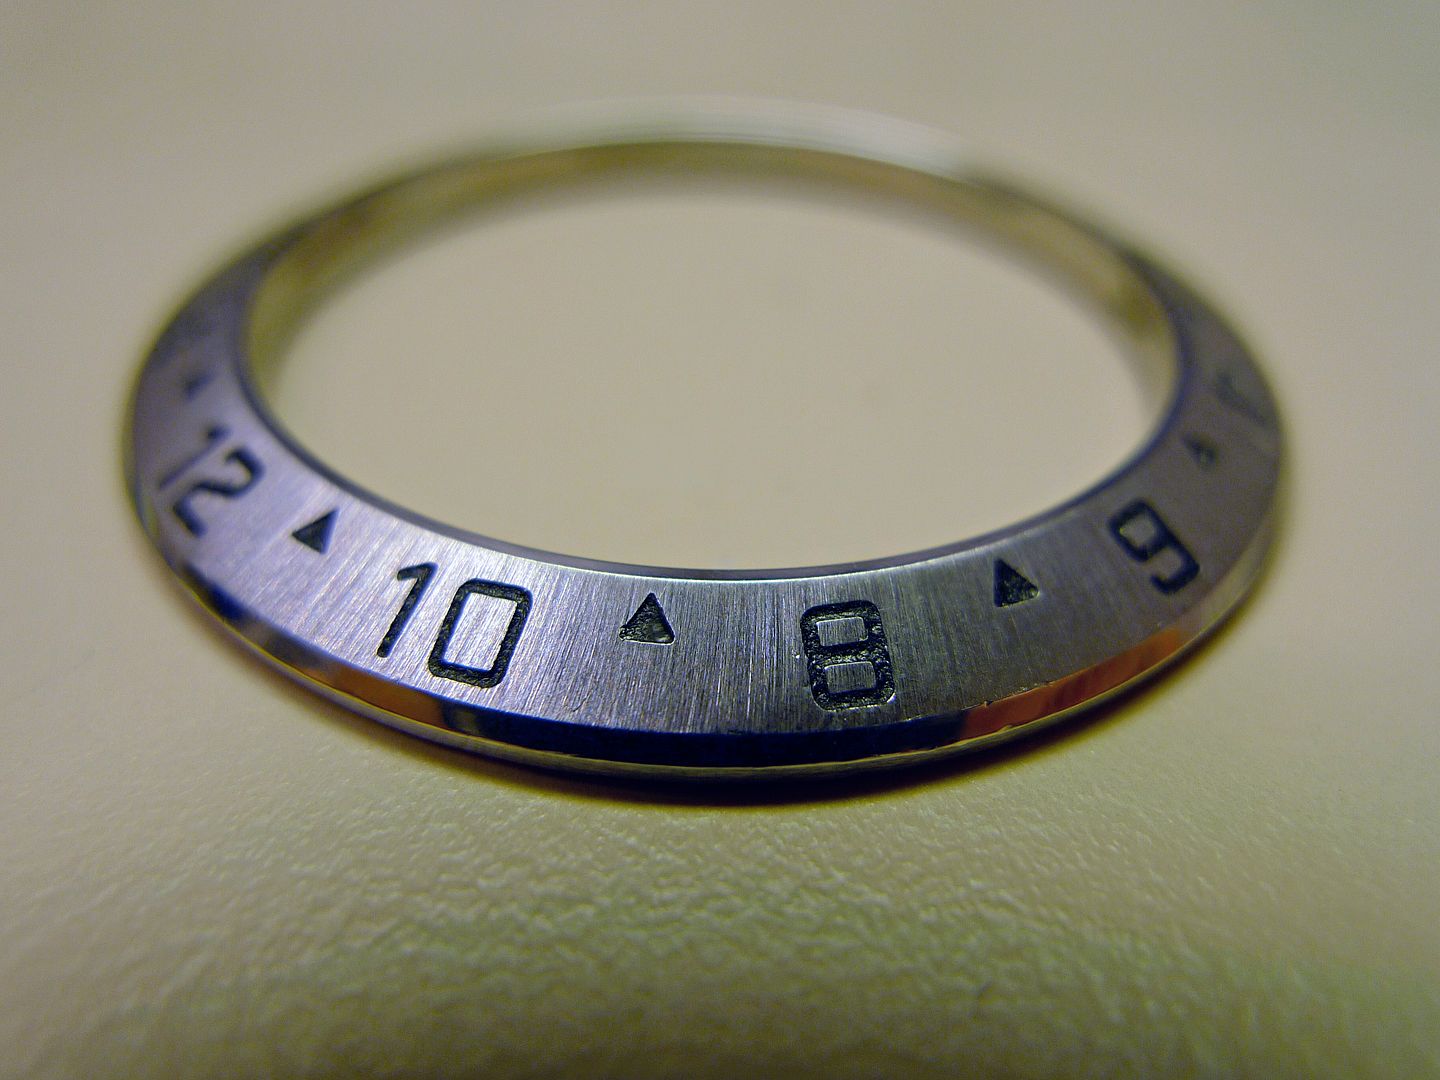
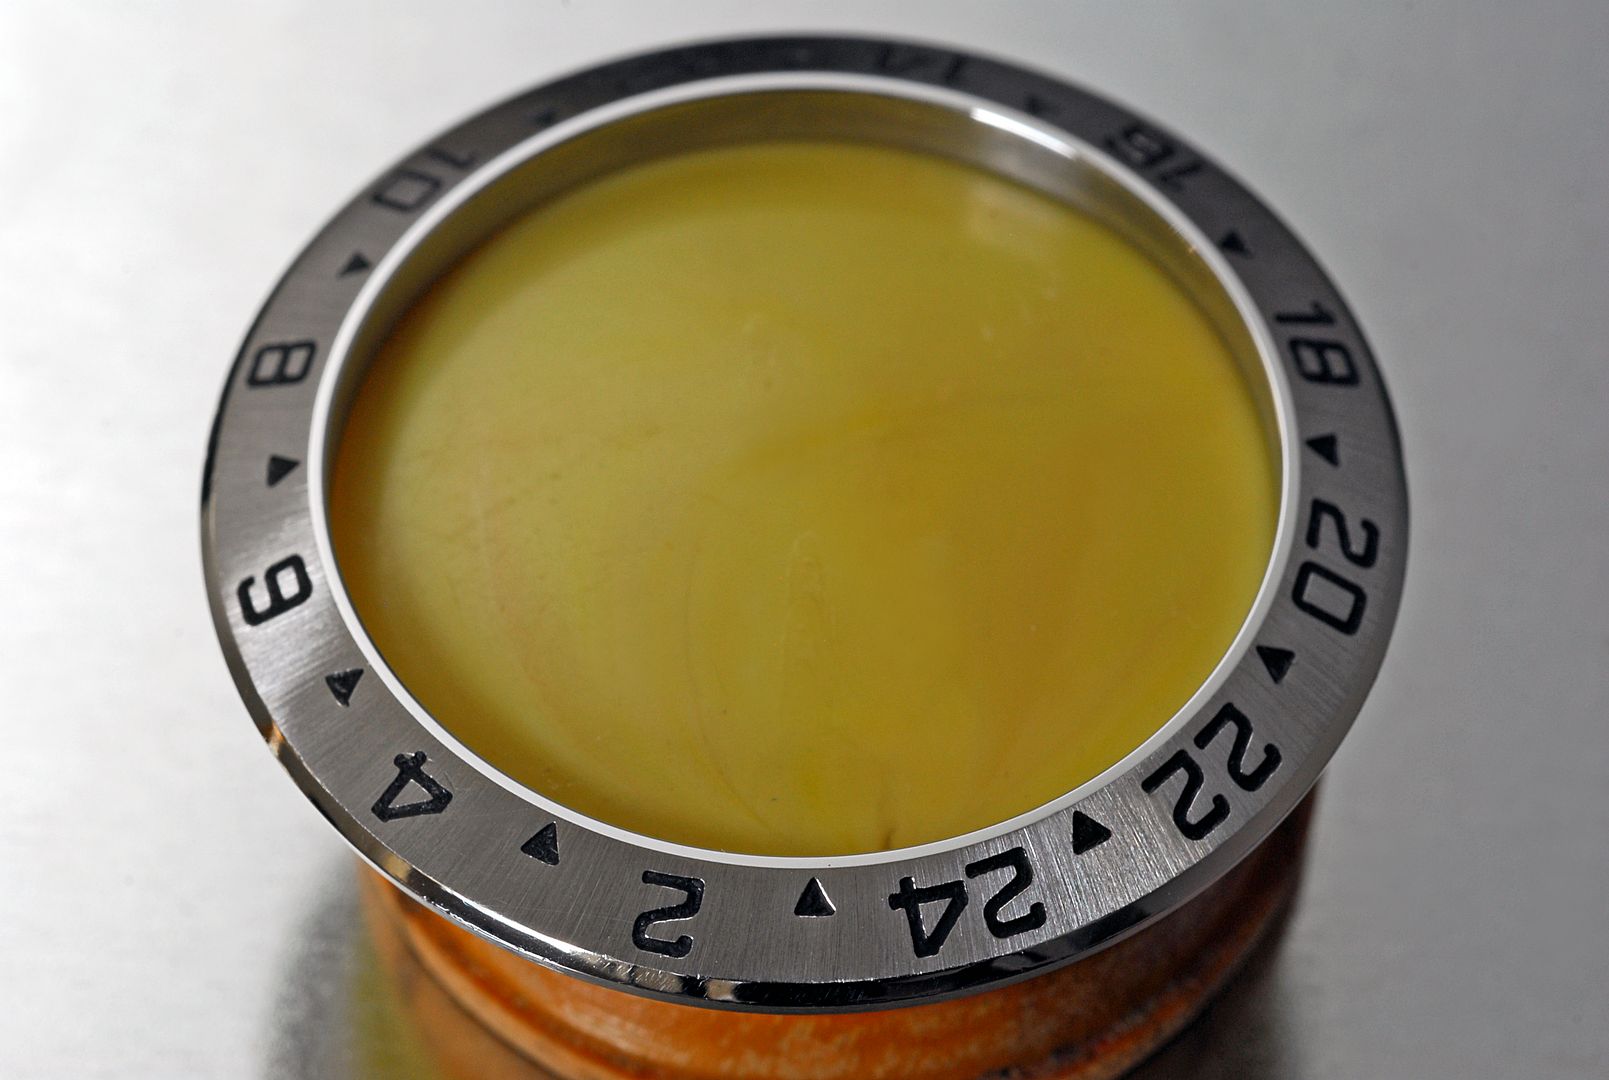
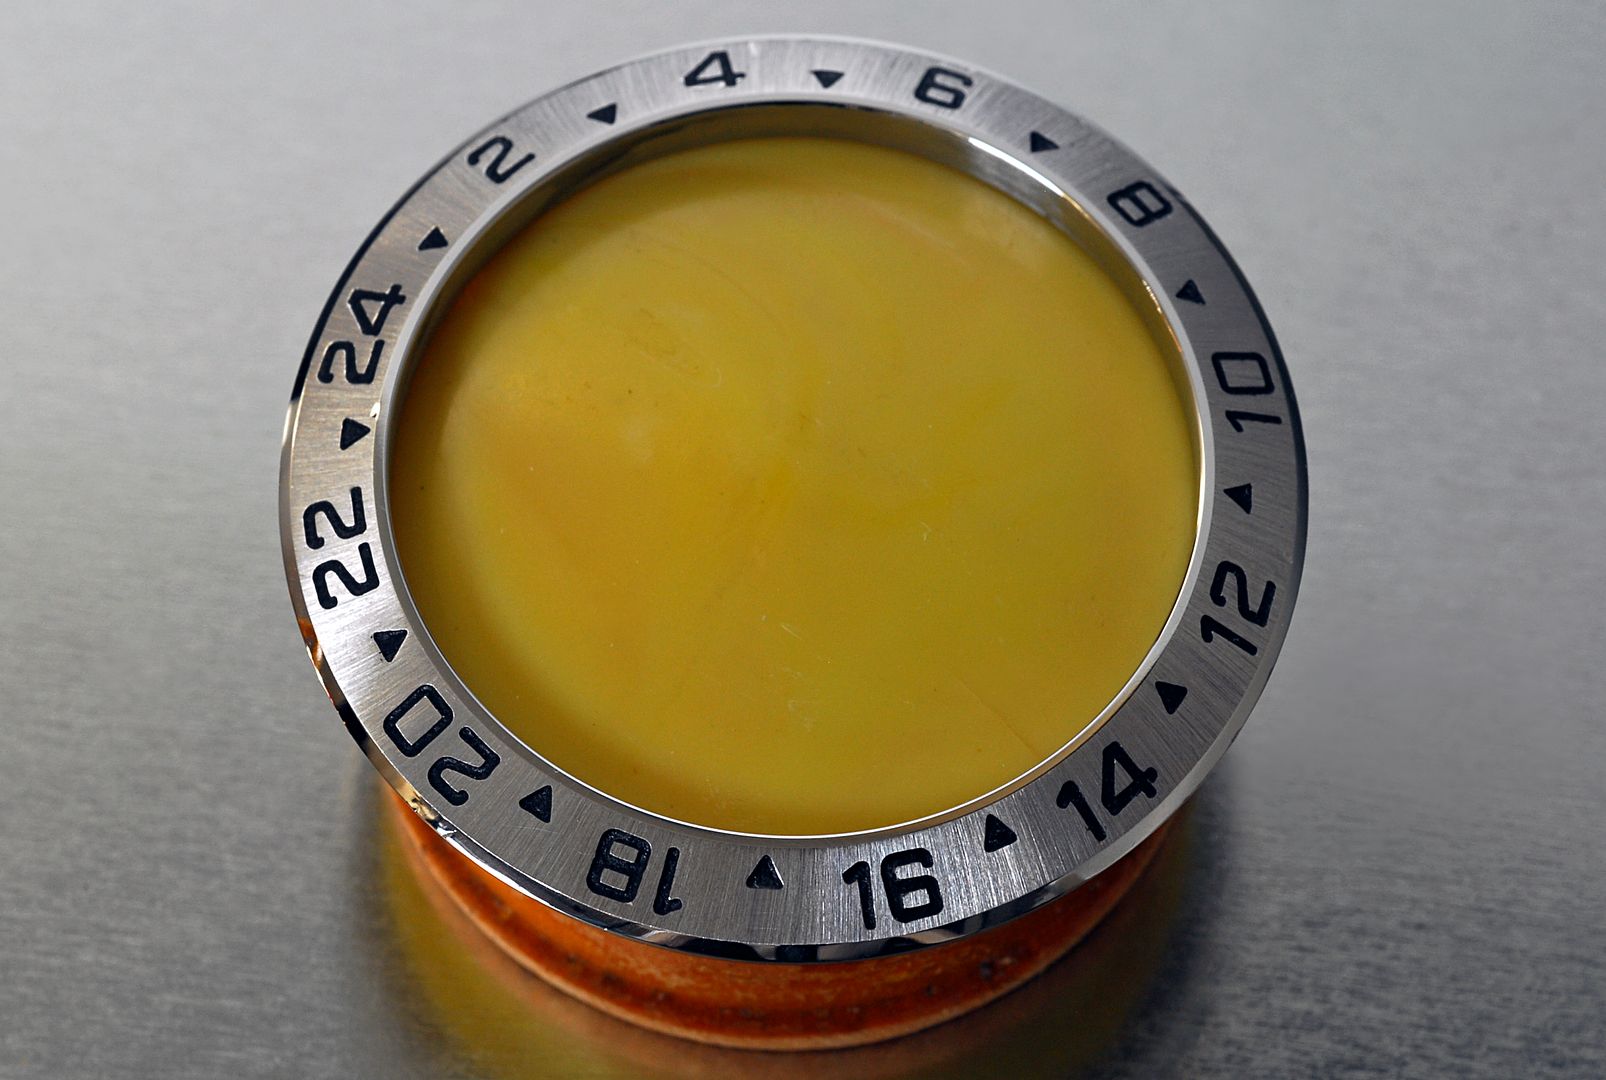
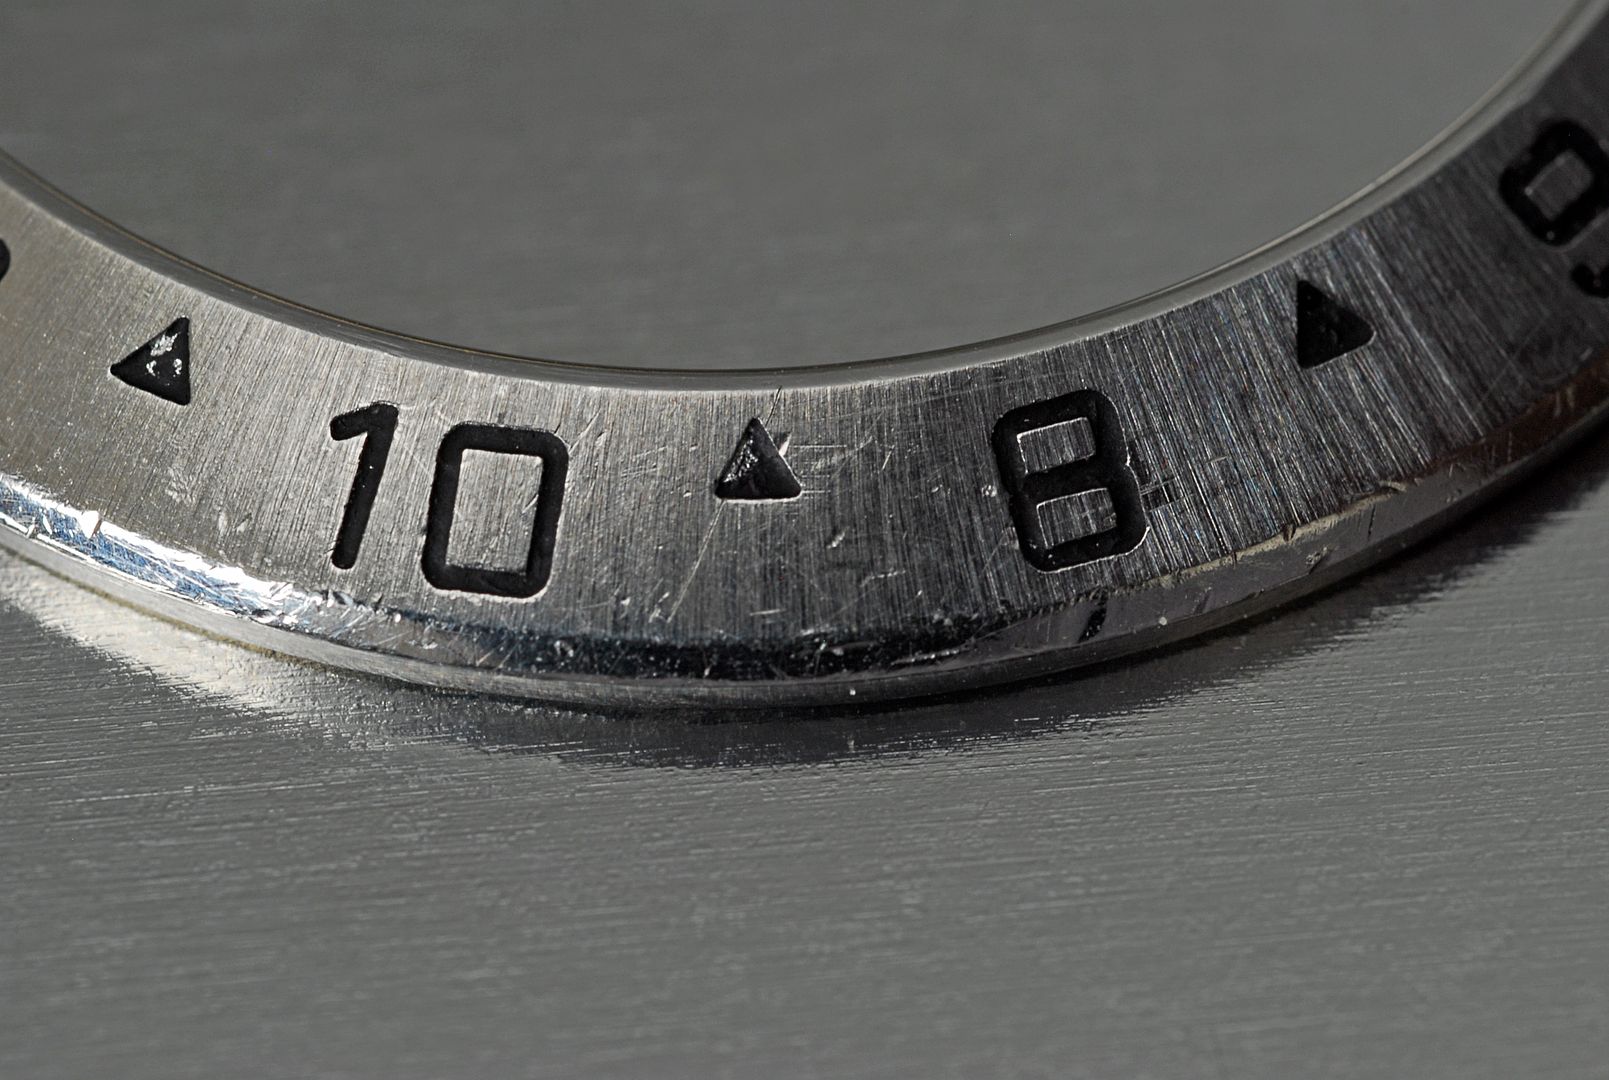
    And finally the end result


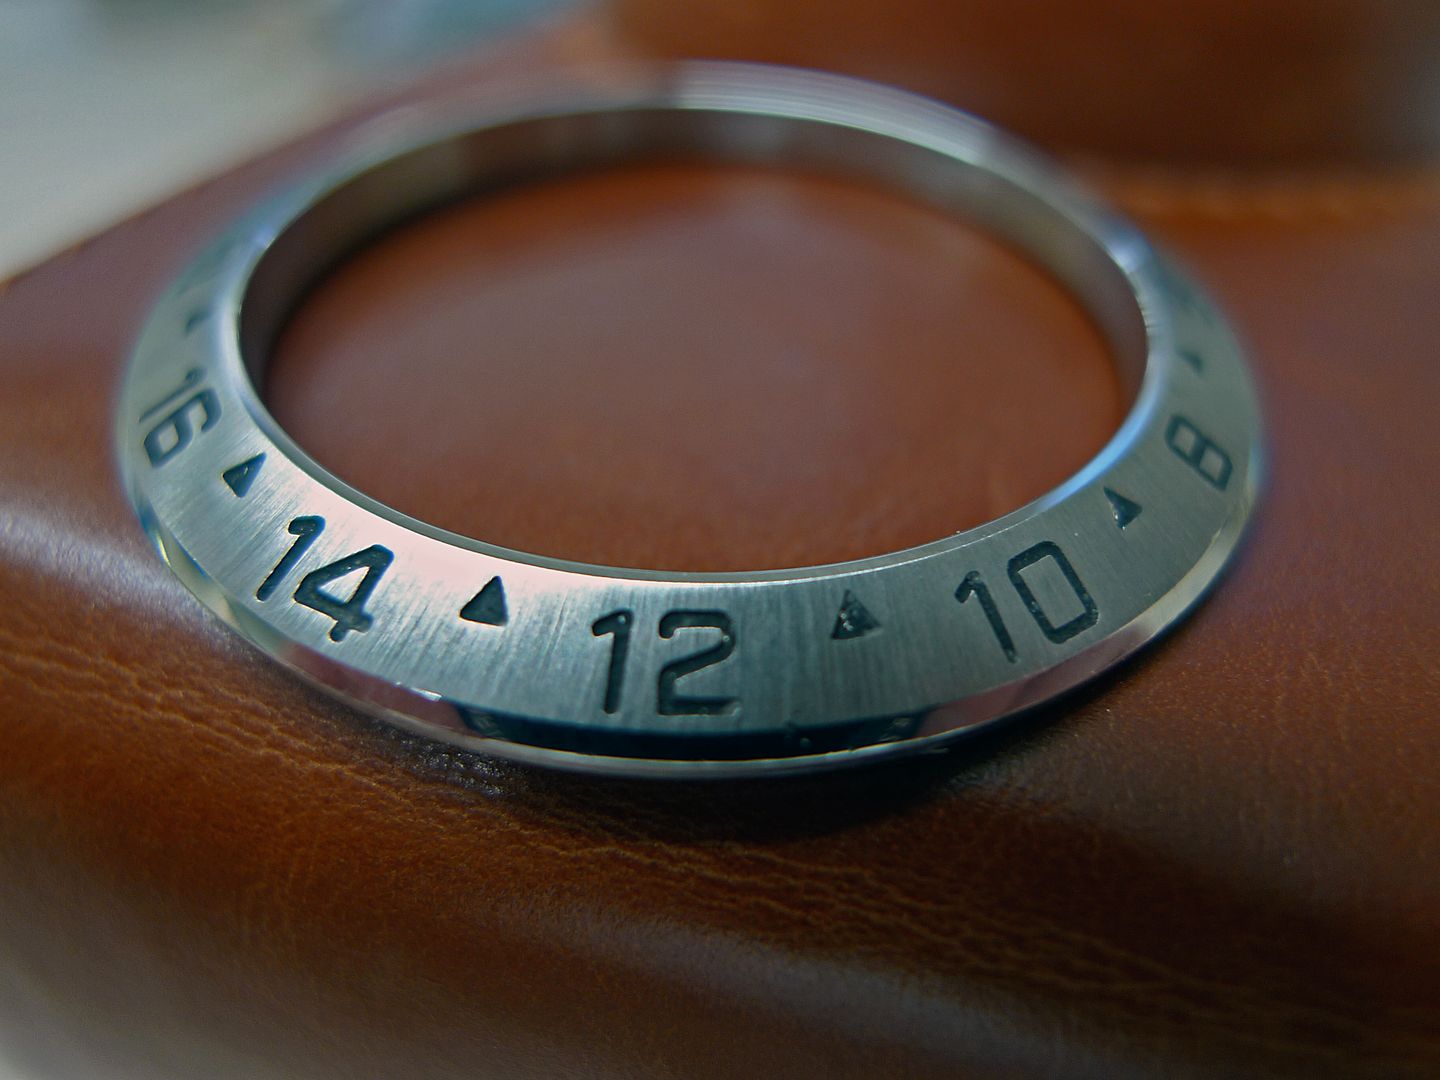
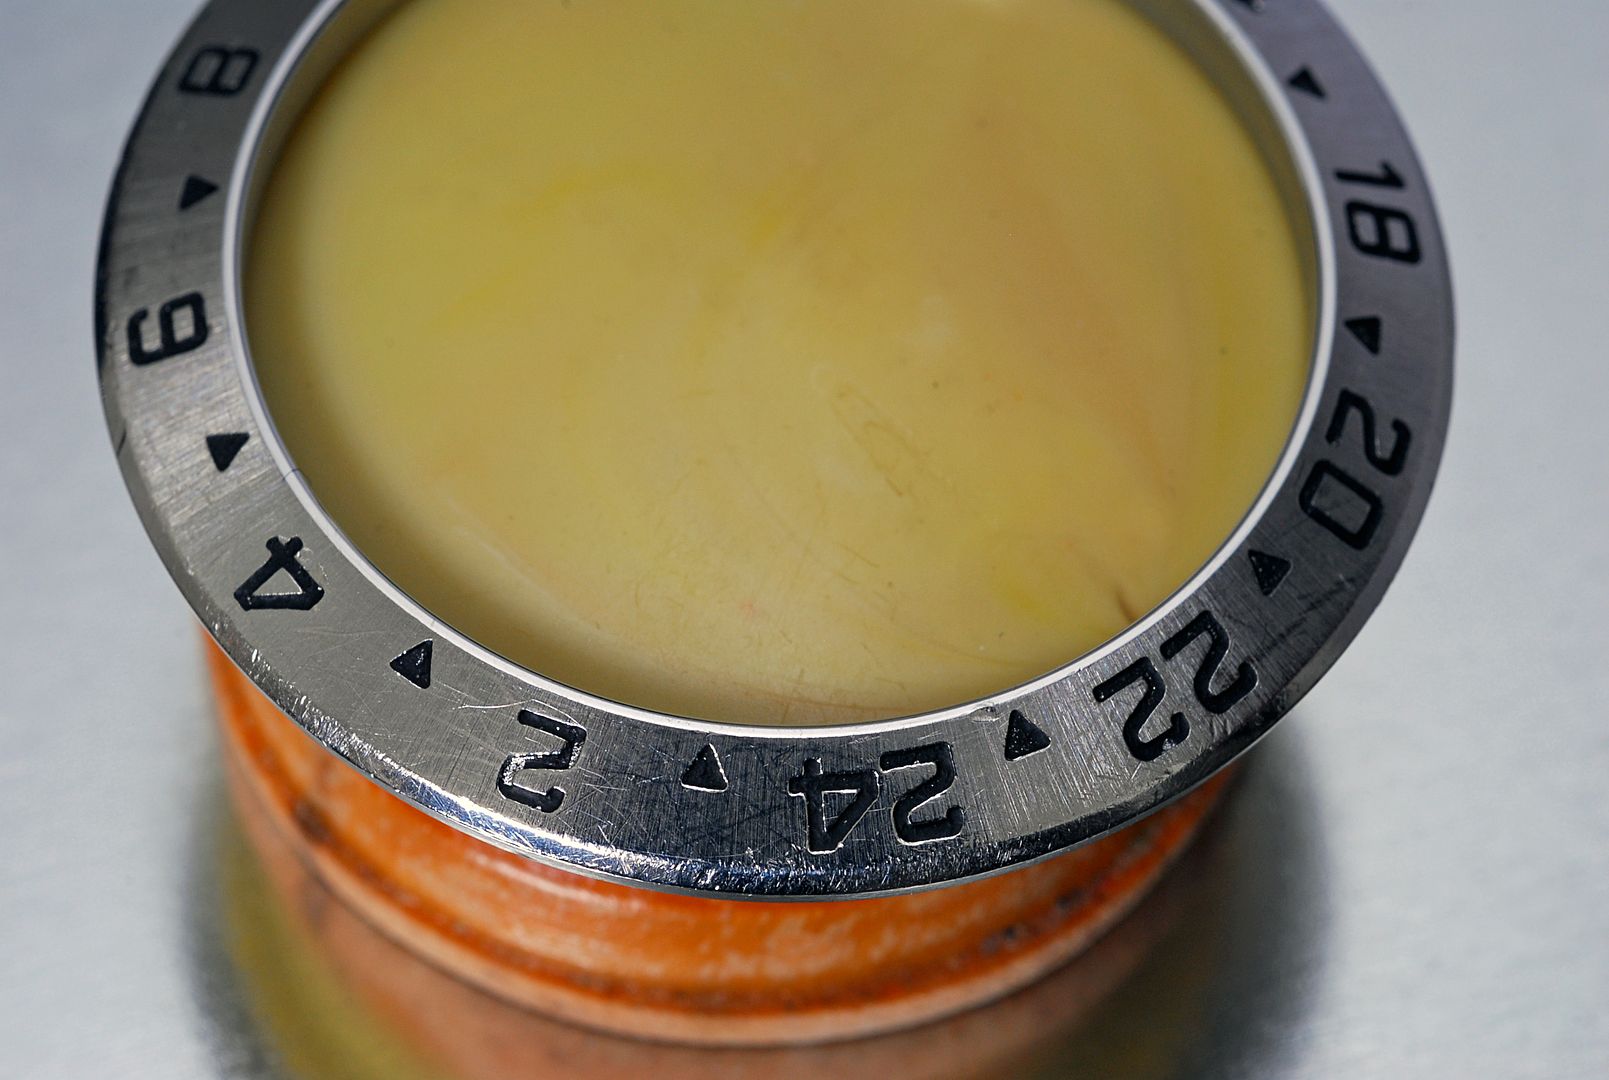
    Some of the deeper dings are still evident. They could have been laser filled and then refinished but the customer didn't deem in necessary.

    Hope that was interesting and any questions just yell.

    Cheers,
    Gary

    P.S. A huge thank you to my local watchmaker for letting me be privy to this plus allowing me to take pictures and sharing them.
    Last edited by Omegary; 29th November 2012 at 22:17.

  3. #3
    Rocco by any chance?

  4. #4
    Great and informative post Gary, thanks for sharing

  5. #5
    Banned
    Join Date
    Nov 2008
    Location
    Here and there
    Posts
    7,948
    Blog Entries
    1
    Great post. Thank you very much.

  6. #6
    Really interesting. Thanks.

  7. #7
    Master
    Join Date
    Aug 2008
    Location
    SE
    Posts
    3,410
    Very nice job. It'd be interesting to see how rolex finish the original bezels, as the lines on the refinished bezel are not 100% radial like the original, but have a slight radius.

  8. #8
    Master golfg60's Avatar
    Join Date
    Feb 2009
    Location
    Home
    Posts
    2,797
    Blog Entries
    13
    I'm after getting my 16550 explorer bezel done
    Can I have his number or website
    And do you know the cost
    Cheers Jason

  9. #9
    Master Omegary's Avatar
    Join Date
    Apr 2006
    Location
    Oxfordshire
    Posts
    8,841
    Quote Originally Posted by mattmillard View Post
    Rocco by any chance?
    Got it in one Matt.

    Cheers,
    Gary

  10. #10
    Craftsman
    Join Date
    Nov 2008
    Location
    Leeds, UK
    Posts
    345
    Very interesting post Gary, thanks. I guess this sort of insight helps to explain the service costs that many manufacturers charge.

    Cheers
    Jim

  11. #11
    Master Omegary's Avatar
    Join Date
    Apr 2006
    Location
    Oxfordshire
    Posts
    8,841
    Quote Originally Posted by golfg60 View Post
    I'm after getting my 16550 explorer bezel done
    Can I have his number or website
    And do you know the cost
    Cheers Jason
    Just sent you a PM Jason, hope it helps.

    Cheers,
    Gary

  12. #12
    Craftsman Stuart D's Avatar
    Join Date
    Feb 2008
    Location
    Mid-Wales
    Posts
    646
    Very very informative Gary.
    Post of the year for me.
    Thanks for sharing.

  13. #13
    Great stuff Gary!!

    How do you 'assess' the angle? Do you just get the angle right as far as measuring goes, then blue up and touch on, adjusting until touching right across?

    Also, I assume the chuck is turned by hand? As touched on above, how is a perfectly straight radial finish achieved? If the lapping wheel is spinning and you are slowly touching the chuck would you get a slight spiral effect? Or do you set the chuck up to a deadstop, touch on, retract, rotate, touch on, etc?

    I've been practcing my (much more amateur than yours!) case refinishing by hand and with a lathe. We have lapping machines here, but I'd need to get a nice adjustable chuck to go with it, even then ours are the sort where you would put parts between two wheels so probably not a lot of good really.

    Anyway - great stuff :)

  14. #14
    Master Omegary's Avatar
    Join Date
    Apr 2006
    Location
    Oxfordshire
    Posts
    8,841
    Quote Originally Posted by JimH View Post
    Very interesting post Gary, thanks. I guess this sort of insight helps to explain the service costs that many manufacturers charge.

    Cheers
    Jim
    Absolutely Jim. Having serviced movements and done some bracelet refurbs myself, I know how much time and effort goes into the process.

    When people question the cost I use a car analogue. If every time your car was serviced how much would your local garage charge to strip the engine down to its constituent parts, clean them all thoroughly and then rebuild, lubricate and make sure it's running perfectly. That's exactly what a watchmaker is doing to your watches movement every time it's service.

    Cheers,
    Gary

  15. #15
    Master Omegary's Avatar
    Join Date
    Apr 2006
    Location
    Oxfordshire
    Posts
    8,841
    Quote Originally Posted by amh82 View Post
    Great stuff Gary!!

    How do you 'assess' the angle? Do you just get the angle right as far as measuring goes, then blue up and touch on, adjusting until touching right across?
    In essence yes. I can't really elaborate as I've promised not to divulge too much.

    Quote Originally Posted by amh82 View Post
    Also, I assume the chuck is turned by hand? As touched on above, how is a perfectly straight radial finish achieved? If the lapping wheel is spinning and you are slowly touching the chuck would you get a slight spiral effect? Or do you set the chuck up to a deadstop, touch on, retract, rotate, touch on, etc?
    The chuck isn't turned by hand, the friction of it touching the wheel is enough to make it rotate. You adjust the pressure on the chuck and the revs to control the grain. The chuck itself it an incredible piece of kit, I'm pretty sure it's oil filled as it turns on all axis so smoothly. Here's a quick pic.


    The wheels on the bottom run on rails which you can adjust the height of, this way you know you're presenting the chuck to the dead centre of the height of the wheel. If it's off centre then the result is a spiral effect.

    Quote Originally Posted by amh82 View Post
    I've been practcing my (much more amateur than yours!) case refinishing by hand and with a lathe. We have lapping machines here, but I'd need to get a nice adjustable chuck to go with it, even then ours are the sort where you would put parts between two wheels so probably not a lot of good really.

    Anyway - great stuff :)
    Thank you and good luck with your refinishing.

    Cheers,
    Gary

  16. #16
    Master adzman808's Avatar
    Join Date
    Apr 2012
    Location
    Porto & the UK
    Posts
    2,736
    great thread Gary,

    years back I did an engineering apprenticeship, which involved some lathe work & setting things up using DTIs, flat levels etc so i know for a fact that the level of skill it takes to shape metal properly by hand has to be seen to be truly beheld (my mentor had been in the game for 50 yrs)

    I really enjoy the way your threads are very fly-on-the-wall / de-mystifying for watchmaker tasks and show us all exactly what's involved

    thanks for sharing

  17. #17
    Master AIDM's Avatar
    Join Date
    Jan 2012
    Location
    Somerset.
    Posts
    2,323
    Blog Entries
    22
    Thanks for posting this up, Gary. An extremely interesting insight into how the lapping machine is used to great effect. I've had a few vintage Omega with lapped cases, in fact my 1045 could do with a bit of a refresh and I've had work done by Rocco before. May have to pay a visit.

    My sister lives 2 mins walk from his shop up by the memorial ground, Rooco once changed a battery in one of her watches gratis while she waited after dropping my old SM300 in for a service.

    Proper gent.

    Cheers,

    Rob

  18. #18
    Craftsman Retep's Avatar
    Join Date
    Dec 2009
    Location
    The Netherlands
    Posts
    675
    Great thread and pics, very educative. Thanks for sharing!

  19. #19
    Grand Master gray's Avatar
    Join Date
    Jul 2003
    Location
    New Brighton
    Posts
    11,555
    That certainly beats attacking it with an eBay refinishing pen and a tube of Peek

    Very interesting and a lesson in caution for would be refinishers, great job Gary
    Gray

  20. #20
    Great write up. Thanks for posting.

  21. #21
    Great work, it come out very nice.

  22. #22
    Master Omegary's Avatar
    Join Date
    Apr 2006
    Location
    Oxfordshire
    Posts
    8,841
    Quote Originally Posted by adzman808 View Post
    great thread Gary,

    years back I did an engineering apprenticeship, which involved some lathe work & setting things up using DTIs, flat levels etc so i know for a fact that the level of skill it takes to shape metal properly by hand has to be seen to be truly beheld (my mentor had been in the game for 50 yrs)

    I really enjoy the way your threads are very fly-on-the-wall / de-mystifying for watchmaker tasks and show us all exactly what's involved

    thanks for sharing
    Thank Adam.

    I'm not sure I'm de-mystifying anything really. Tbh the more I learn about watchmakers and their practices the more I'm in awe of their skills. Rocco's accumulative knowledge of movements is immense, I've never seen him stumped and I've presented him with some bizarre old stuff over the years

    Cheers,
    Gary

  23. #23
    Thanks for the great post Gary. Very informative.. pictures really are worth a thousand words.

  24. #24
    Is the bezel 'noticeably' thinner ie how much metal has been removed ?

  25. #25
    Master Omegary's Avatar
    Join Date
    Apr 2006
    Location
    Oxfordshire
    Posts
    8,841
    Quote Originally Posted by UKWatchGuy View Post
    Is the bezel 'noticeably' thinner ie how much metal has been removed ?

    There's no noticeable difference in thickness as the metal removed was very minimal. Obviously you can't take too much of the top as the numbers aren't that deeply set anyway. If you put a new and re-lapped bezel side by side I doubt anyone could say one was thinner.

    Cheers,
    Gary

  26. #26
    Very, very interesting thread. Great restoration job.

  27. #27
    Grand Master Neil.C's Avatar
    Join Date
    Sep 2003
    Location
    SE England
    Posts
    27,083
    Another interesting post Gary.

    I had an idea how those lapping machines work but your illustrative tutorial was just the ticket.

    This sort of stuff is of real WIS interest and I look forward to your next input.
    Cheers,
    Neil.

  28. #28
    Nice work and great to see the process.

    I'd have thought it would be easier and cheaper for the manufacturer to simply replace bezels during service, mine certainly looked brand new when I got it back.

    Cheers,
    Andy

  29. #29
    Master Omegary's Avatar
    Join Date
    Apr 2006
    Location
    Oxfordshire
    Posts
    8,841
    Quote Originally Posted by andy111s View Post
    Nice work and great to see the process.

    I'd have thought it would be easier and cheaper for the manufacturer to simply replace bezels during service, mine certainly looked brand new when I got it back.

    Cheers,
    Andy
    You might well be right Andy, tbh I've no idea how much a replacement bezel would cost.

    This was done to help out a loyal customer and as a relatively simple demonstration that I could share. Hopefully it gives a good idea of how a lapping machine works and what's possible in the right hands.

    Cheers,
    Gary

  30. #30
    Master IAmATeaf's Avatar
    Join Date
    Nov 2011
    Location
    NW London
    Posts
    4,757
    Amazing, I always find these sorts of things amazing and am in awe of your patience.

  31. #31
    Quote Originally Posted by Omegary View Post
    You might well be right Andy, tbh I've no idea how much a replacement bezel would cost.

    This was done to help out a loyal customer and as a relatively simple demonstration that I could share. Hopefully it gives a good idea of how a lapping machine works and what's possible in the right hands.

    Cheers,
    Gary
    Oh absolutely Gary - I didn't mean he was wasting his time or anything, more referring to a manufacturers approach. I think it's good to keep the original parts if possible, and recycling is very green.... :)
    I've seen some of his work before and all I can say is that he is a skilled gentleman.

    Andy

  32. #32
    Wow!!! Great result. I wouldn't expect it could be fixed so good, but the tools also help a lot. I tried to restore couple of old watches from scratches and it wasn't easy.

  33. #33
    Craftsman
    Join Date
    Aug 2009
    Location
    Earth
    Posts
    433
    Gary, Thanks for taking the time and effort to do the write up with the pictures, I love to tinker with things so I appreciate the skill involved.

    Would you be able to post up the watch makers details or PM me if you'd rather not as I have an old Maurice Lacroix that is worthless to all bar me as if was my engagement present from my wife and it's in need of a service and after seeing your man at work, I'd like to get it off to him.

    Thanks again
    Gary

  34. #34
    This is fantastic. Thanks for posting. Almost gives me the confidence to actually wear some of my watches ;)

  35. #35
    I have to say the close up on the number 8 looks not too good? looks like the old paint being removed fully first would have given a smoother finish.

    I'm guessing it will not be noticeable in real life?.

  36. #36
    Master
    Join Date
    Jan 2007
    Location
    Wild West Oxon
    Posts
    2,148
    Fascinating - that's a proper post, that is!

    Real watchmaking skill.

  37. #37
    Journeyman
    Join Date
    Jul 2009
    Location
    Liverpool
    Posts
    161
    Really informative thread, Thanks :)

  38. #38
    Master Omegary's Avatar
    Join Date
    Apr 2006
    Location
    Oxfordshire
    Posts
    8,841
    Quote Originally Posted by jegger View Post
    I have to say the close up on the number 8 looks not too good? looks like the old paint being removed fully first would have given a smoother finish.

    I'm guessing it will not be noticeable in real life?.
    That particular pic was taken under hard artificial lighting on a watchmakers bench, which doesn't really do the bezel (or any other subject for that matter) any favours. The last four macro shots are a better representation of how it looks in reality.

    Cheers,
    Gary

  39. #39
    Master Omegary's Avatar
    Join Date
    Apr 2006
    Location
    Oxfordshire
    Posts
    8,841
    Thanks for all your responses gents, I'm glad you enjoyed the post and hope it was informative.

    I guessed that, like me, most of you would like to see 'behind the scenes'. I consider myself very fortunate to have access to all this and I'll hopefully share a few more insights in the future.

    Cheers,
    Gary
    Last edited by Omegary; 30th November 2012 at 21:15.

  40. #40
    Master Thewatchbloke's Avatar
    Join Date
    Dec 2010
    Location
    Oxfordshire UK
    Posts
    7,245
    I love these type of posts Gary, and it's fantastic that Rocco doesn't mind us watching him ply his trade. Excellently presented Gary and great photographs

  41. #41
    Grand Master
    Join Date
    Jul 2007
    Location
    Wakefield, West Yorkshire
    Posts
    22,513
    Super thread, Gary. Answers a lot of questions for me re. the lapping machine and how it works. Clearly there's a lot of skill needed and there's scope for things to go seriously pear-shaped!

    I`d love one of these! However, they are not the panacea and there will be jobs they can`t do. Food for thought, though.

    I refinish watches by hand, using a 4" polishing mop in an old drill sometimes, and small mops in a Dremel. I have a number of tricks I`ve learnt for keeping edges sharp; these also require skill and judgement! A lot of my work is done using emery paper wrapped around small wooden or rubber blocks to get the heavy damage out.....I even resort to a stone at times and fine files.

    Doing a bezel like this by hand would take me approx 2-3 hrs. I`m sure the lapping machine is much quicker.......but I`m trying to imagine that sinking feeling when you've taken too much metal off!

    Re-applying the radial brushed finish is tricky and it isn`t obvious at first how to do this. It looks easy till you try! When you look under a strong glass, the factory finish isn`t perfect inasmuch as the lines aren't perfectly concentric; basically I think it's impossible to do this, there will always be some loss of concentricity. I`ve done a couple of similar bezels and I now have a technique that gets it right but it still requires a lot of care. I`ve thought about building a jig to do this but I haven't done so yet.


    I`m trying to imagine putting a fairly delicate 18ct gold bezel from a vintage watch on the lapping machine..........bezel, what bezel....where's that pile of golddust come from...........oh shit!

    Keep up the good work, Gary......be careful with that lapping machine!

    Paul

  42. #42
    Just bought an Exp II, so a very handy post!

  43. #43
    Master Omegary's Avatar
    Join Date
    Apr 2006
    Location
    Oxfordshire
    Posts
    8,841
    Quote Originally Posted by walkerwek1958 View Post
    ...I`m trying to imagine putting a fairly delicate 18ct gold bezel from a vintage watch on the lapping machine..........bezel, what bezel....where's that pile of golddust come from...........oh shit!

    Keep up the good work, Gary......be careful with that lapping machine!

    Paul
    Lol, thanks Paul.

    It's really not that aggressive a procedure, certainly nowhere as bad as I was led to believe reading posts on the forums. Obviously care is needed as is constant inspection, assessment and judgement calls. But then, as you know, that's true of pretty much anything related to repairing/refinishing watches.

    Good to hear you're developing your own tools and techniques. Only practice and patience can build up that store of hands on experience that you need to do this kind of work and I'm full of admiration for anyone who can do it well.

    Keep up your excellent work mate.

    Cheers,
    Gary

  44. #44
    Master j111dja's Avatar
    Join Date
    Jan 2004
    Location
    Glasgow, Scotland
    Posts
    6,922
    I will just comment and mirror some of the previous comments by saying what an impressive and informative post this is.

  45. #45
    Craftsman simonsays's Avatar
    Join Date
    Oct 2010
    Location
    London
    Posts
    975
    i am hoping Rocco gets round to that speedmaster on the bench. It looks familiar ;o)

  46. #46
    Craftsman
    Join Date
    Sep 2012
    Location
    London
    Posts
    676
    Great post ! very interesting. Love it!

  47. #47
    Master
    Join Date
    Dec 2008
    Location
    Winchester
    Posts
    2,205
    Thanks for sharing

  48. #48
    Master bokbok's Avatar
    Join Date
    Dec 2010
    Location
    sunny yorkshire
    Posts
    3,276
    Very impressed mate

  49. #49
    Banned
    Join Date
    Dec 2012
    Location
    hampshire
    Posts
    59
    my favourite thread so far - i like stuff like this
    totally unrelated but does anyone know why the thread sequence is up side down on all the posts i read?!?

  50. #50
    Journeyman
    Join Date
    Dec 2012
    Location
    NL
    Posts
    54
    Impressive indeed!

Posting Permissions

  • You may not post new threads
  • You may not post replies
  • You may not post attachments
  • You may not edit your posts
  •  

Do Not Sell My Personal Information