Reply With Quote
There was much angst in the SimonH household when I cleaned the carburettors of my RD350 in the kitchen...


Reminds of when the future Mrs SJ moved in in my small Parisian flat. 2 Rooms, the living room with a Peugeot 125cc in bits occupying 70% of the room.
I thought I had her trained there and then: how more wrong can one be I still wonder...

There was much angst in the SimonH household when I cleaned the carburettors of my RD350 in the kitchen...
Westfield update 2015
I have to admit that this has dragged on somewhat. ;-)
Primarily the weather has taken its toll on progress as I can no longer function outdoors working on the car in the cold weather and so Ive been retired to the man-cave since the last update. There has been some progress on the Westy, but only on items I can work on indoors and am now at the point where everything I can do off the car has now been done: Ive now got an Omex for the engine management system (Ive never seen soooo many wires sprouting out of a box of electronics), the fuel tank is secured to the chassis and all the hoses, connectors and sundry items are present for the next phase. The plan is to recommence outside in late March as Im abroad for a while and the weather here should hopefully allow me to get on with the car when Im back, but if it isnt Ive arranged the use of a garage for me to use then so either way itll get worked on.
So no pics of the Westy progress to show, but the bike has been the parallel project indoors and so heres some photos of that
Bike lift: one of the best investments EVER
Over the years the looms rubber sheathing had disintergrated and expose the wires to abrasion against the bodywork (now recovered in cloth self-amalgamating tape)
The pathetic OEM horn has been replaced with a proper one: this boy could wake the dead - and deafen anyone working on the bike who accidentally fires it (DAMHIK)
Fuse-block indstalled for the usual bike add-ons: GPS, aux lights, horn, ....
SWMBO was out, so the repainted calipers got 50 minutes at 90c
The Boxer engine cylinder heads, unchanged in 50 years
my indoor paint booth
Not bad I reckon
So (hopefully) Ill be (finally) able stick to the post topic hereafter and show a running Westy sometime around Easter.
(Mind, Im not saying which Easter) ;-)
R
Ignorance breeds Fear. Fear breeds Hatred. Hatred breeds Ignorance. Break the chain.
It's always great to see progress! And man, those cylinder heads looks great. BMW knows how to engineer their parts!
Menno

Bike lift: THE best thing I ever bought without doubt. Saves my old bones from the garage floor and allows for my OCD to go into overdrive!
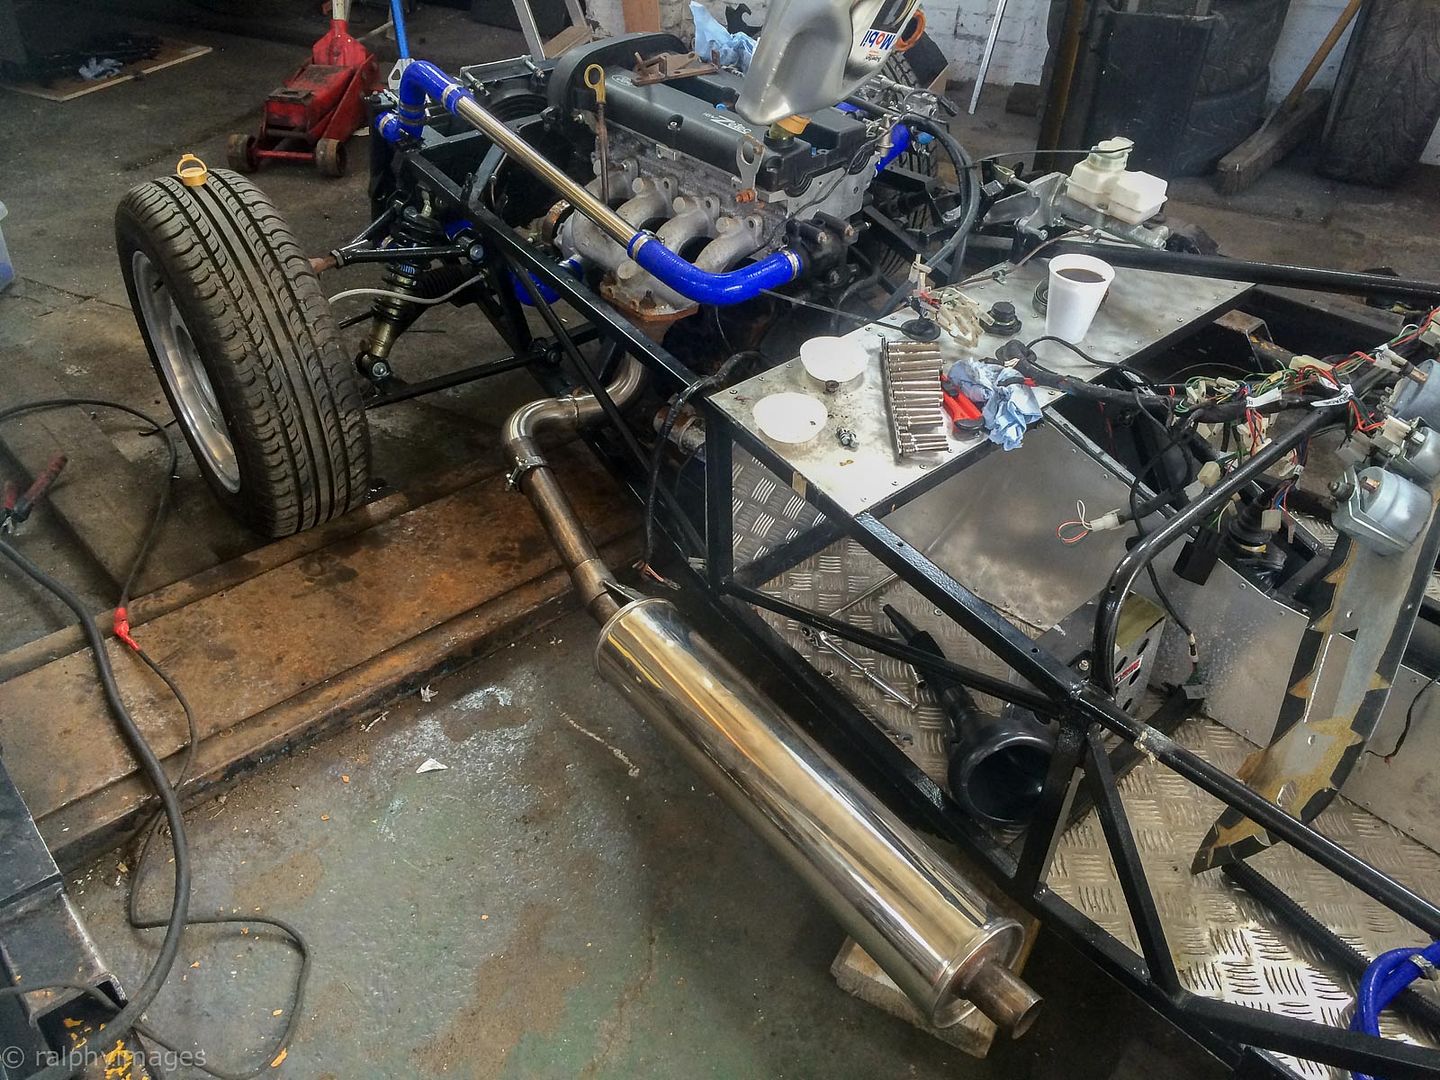
So, its Easter-time and finally Ive been able to get back onto the Westy and make some progress.
Yesterday I trailered it to my pals workshop to get stuck into it, it was a full-on day and by tea-time wed:
- fabricated the down-pipe and fitted the exhaust
- made a couple of brackets to mount the alternator
- connected up the fuel lines
- re-ran the dipstick tube
Back to the workshop today to connect up the throttle bodies, only to discover that the jubilee clips for the pipes were too small :-( but thankfully Euro Car Parts were open today :-) so a trip out in the holiday traffic to pick up the right ones and back to fit the TBs.
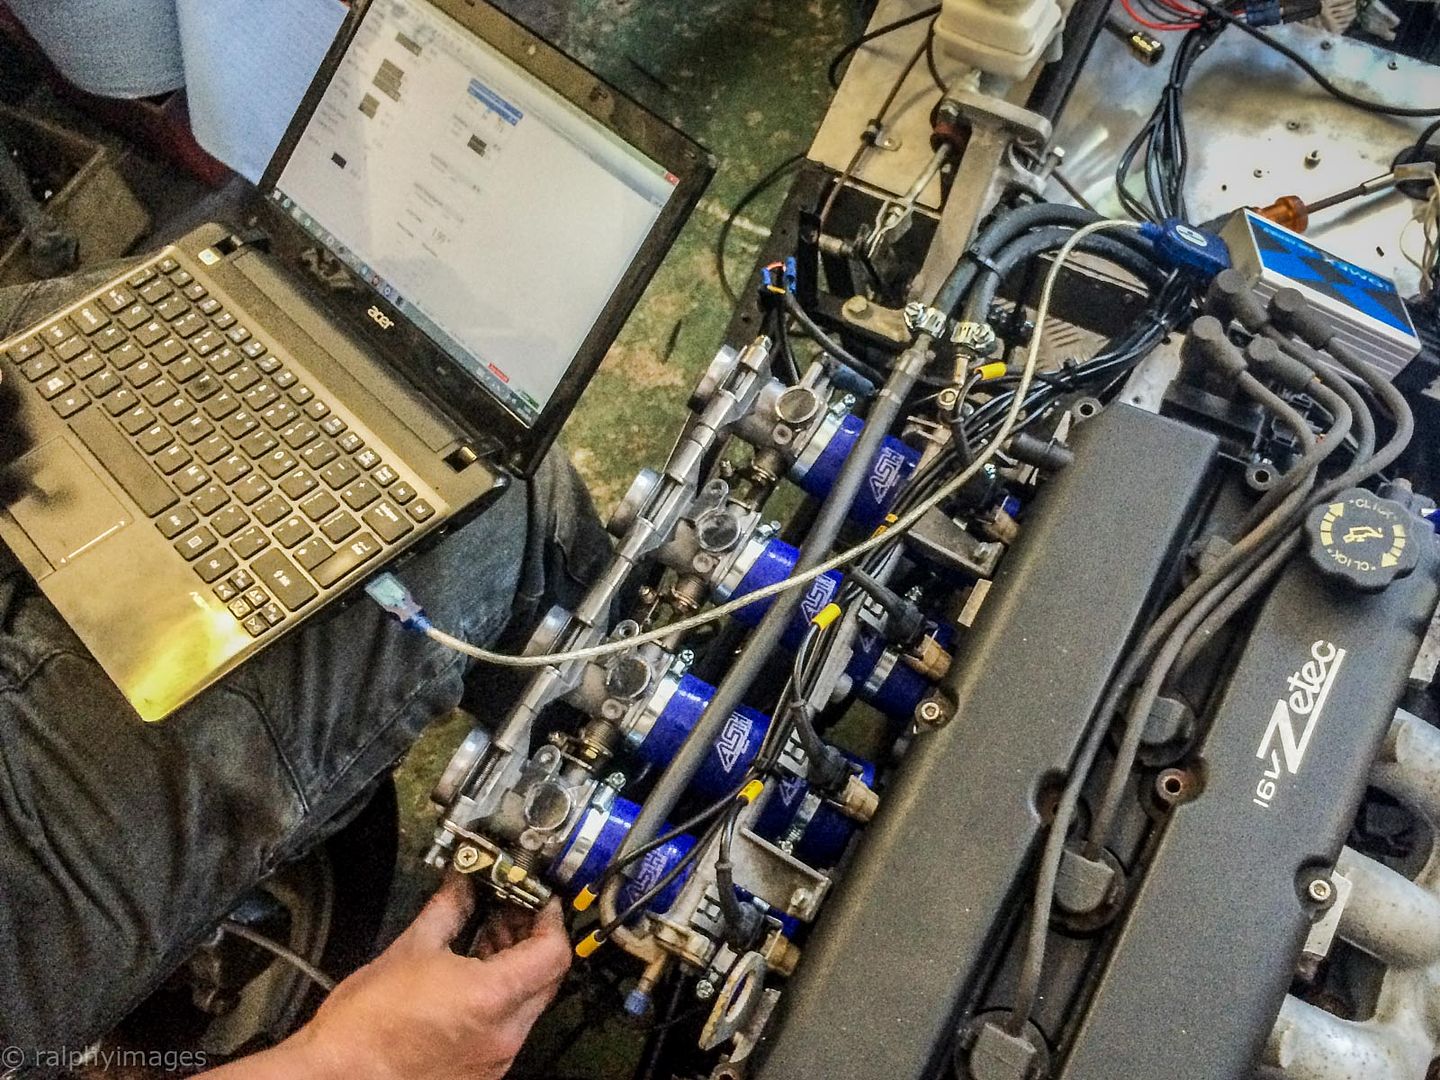
And then the fun really began: the fitting of the Omex ECU. This took ages as some of the Omex cable connectors had to be modified, but eventually it was over to my pal for the downloading and subsequent transfer of the mapping (a complete black art to me I readily admit).
Engine turned over initially without plugs in and all was looking good, so some fuel into the tank and it was time for a trial fire-up, only to discover that the (brand new) fuel pump wasnt working... Double-checked my wiring but that was ok, so we borrowed another pump and that worked - however the battery was now low enough to not turn over the engine!
Time was up for the day so the next opportunity to get onto the car will now be next weekend, meanwhile Ive given up on attempts to modify the existing clutch/brake/accelerator peddle arrangement and am going for a new peddle box to be sourced for fitting then. Ive only got the workshop available for the coming Saturday so will have to ensure anything else needed will be completed on the day and then the car will come back home for the rest of the work. Whilst theres still a lot of fiddly bits to do Im confident I will at least be able to drive her onto the trailer!
R
Ignorance breeds Fear. Fear breeds Hatred. Hatred breeds Ignorance. Break the chain.
Yay at last Ralphy, been waiting for progress on this one for a while, keep it coming !
Cheers
Simon
Ralph Waldo Emerson: We ask for long life, but 'tis deep life, or noble moments that signify. Let the measure of time be spiritual, not mechanical.
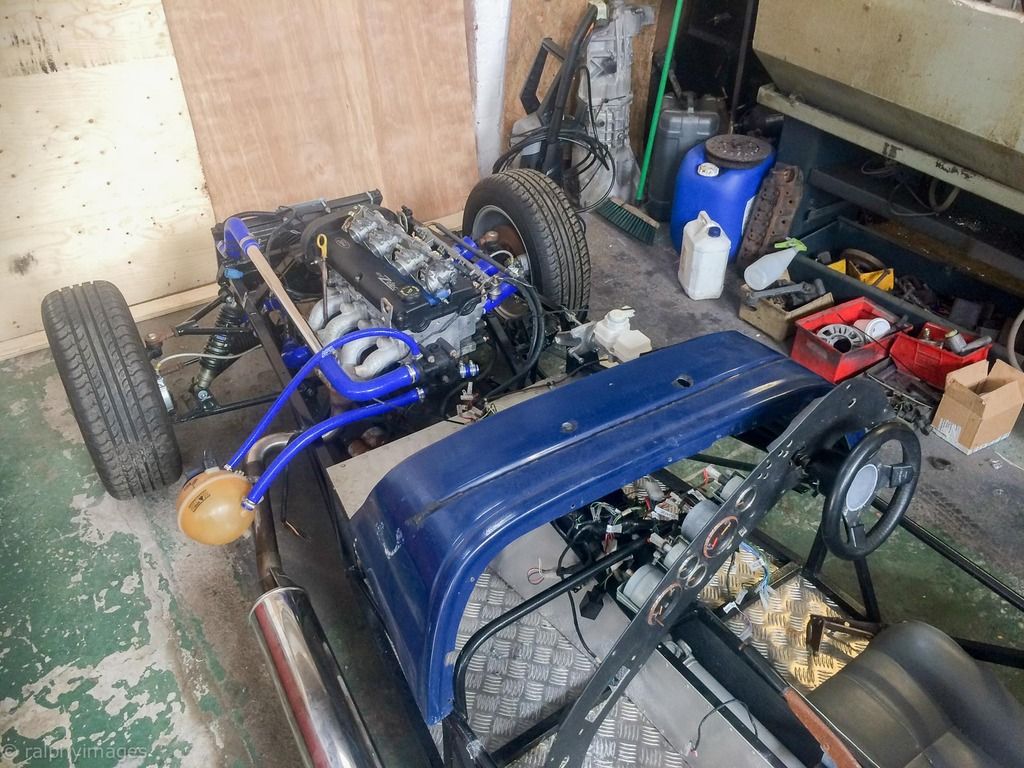
Great to see this sort of pics again!
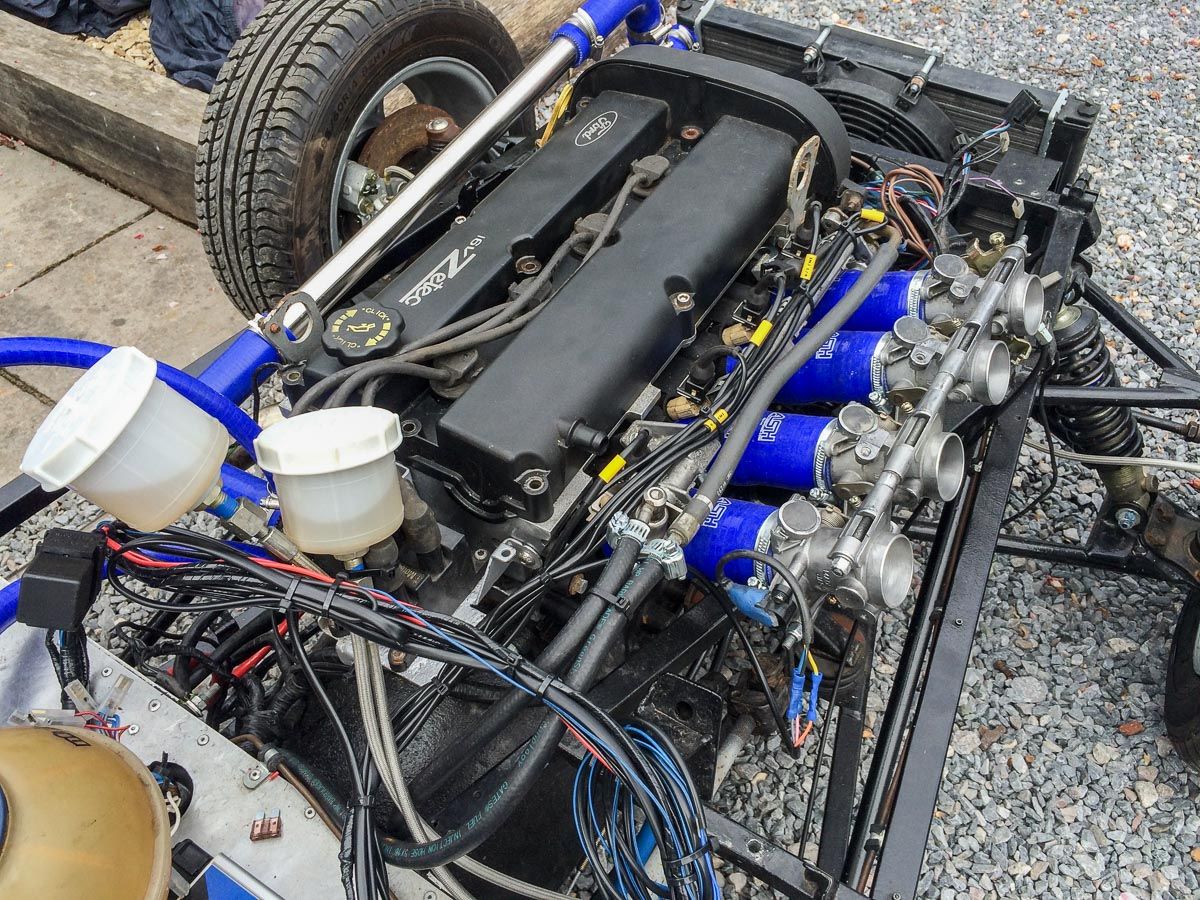
I love this 'fan-to-radiator' solution! And for the dip stick tube? Nowadays, I paint the upper part of that tube white: makes inserting the stick a lot easier when it's dark.
Finally: I see that the back of the dash has glue residues. If you're not going to glue it back on something else, I would like to suggest that you paint the back of the dash white! The light coloured background makes fiddling under the dash with the dash light bulbs soo much easier in years to come!
Menno
Thanks for the tips, I’ll do them.Originally Posted by thieuster

The dashboard is destined to be replaced: it’s shoddily-made, I don’t like the positions of the dials or switchgear and it’s been cut for a radio - I’ve no wish to listen to anything other than my own-made ‘music’. ;-)
R
Ignorance breeds Fear. Fear breeds Hatred. Hatred breeds Ignorance. Break the chain.
Great! What about a racy digital dash like the ones from Stack! I'm sure your telemetric gifted mate can help you set this up! (I have a new Daily Driver with a digital display and I rather like it!)
Menno
Awesome thread....keep em coming! Great work!
Great to see progress Ralph, please tell me you are keeping this after so much effort!
F.T.F.A.
I have just read the complete thread.
My doff my cap to you sir.
I'm sure you'll enjoy the approaching summer.
Westfield June update.
How do you make God laugh? Tell him your plans
Well, we just couldnt get the engine to start at the workshop, time ran out and so the car was pushed onto the trailer and brought home.
Once back however, other non-Westy stuff had to be done first - and then I ended up travelling abroad before I got the chance to do any further work.Finally arrived back home last week and the Westy was my top priority.
After much head scratching I found the cause of the failure to start: Id lashed up some temporary connections to get the ignition circuit live (the rest of the wiring needs attention) and one of the relays had an internal fault. Replaced that, added some fuel to the tank (what little that was in there had evaporated in my absence), made good the coolant system, charged the battery, hot-wired the ignition, fuel pump & ECU and IT FIRED UP!

Tick-over was rough and the engine kept dying, but Id been warned that was likely as the ECU only had a basic map loaded. After a couple of minutes I gave it some blips and thereafter it settled down to 900 rpm. As the engine warmed up some adjustment became apparent: hoses needed tightening up as did some mounts nevertheless my grin remained fixed and it sounded good. Shut her down, left to cool and then more checking.
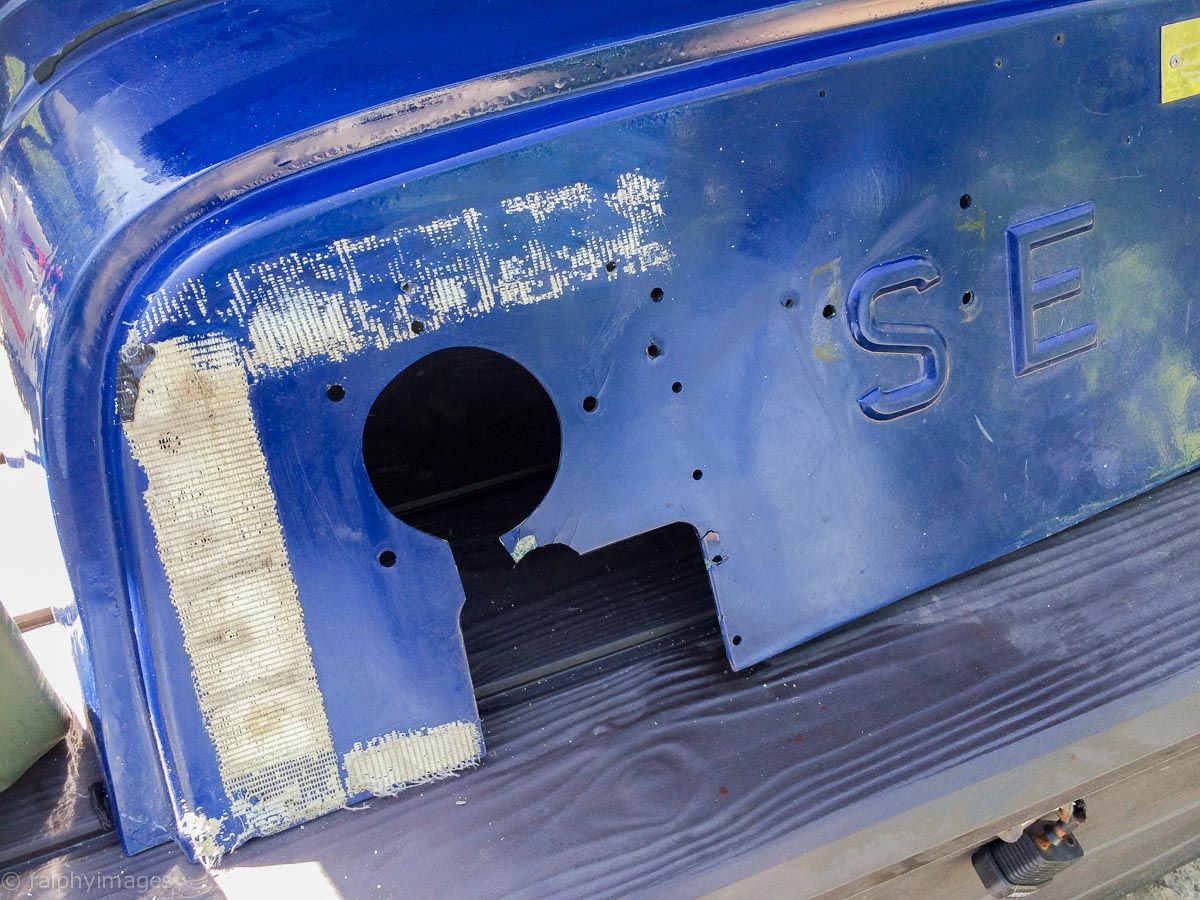
Next on the to-do list was getting the air intake sorted out, but first I had to make some decisions about the original bodywork.
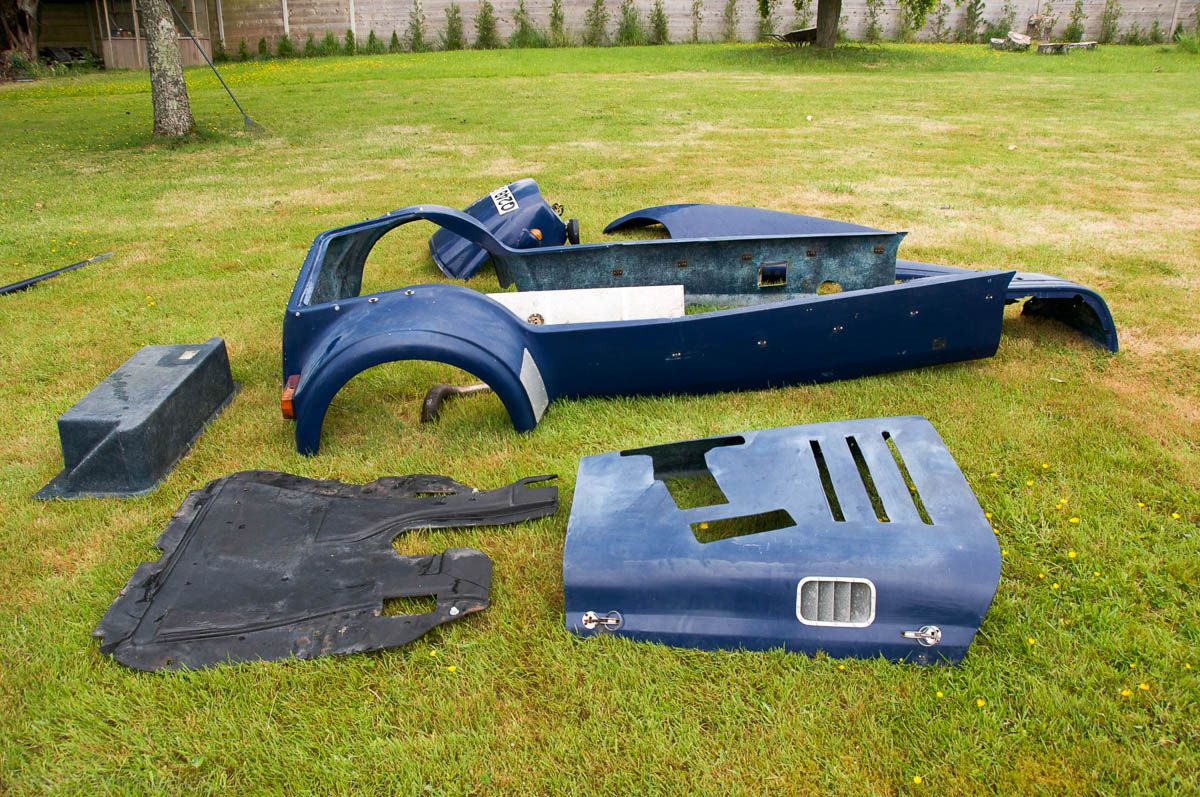
My original plan had been to source some second-hand panels but that had proven to be quite a challenge as Id only managed to get a reasonable nose cone (in bright red) but had drawn a blank with the remaining items: scuttle, bonnet and the tub' - (the one-piece main part of the body which is both sides of the car and the rear including the wheel arches).
In short, the 2nd hand ones Id found over the last year were in no better condition to mine so no point in buying them, and whilst Westfield can supply new bodywork, the cost is prohibitive.
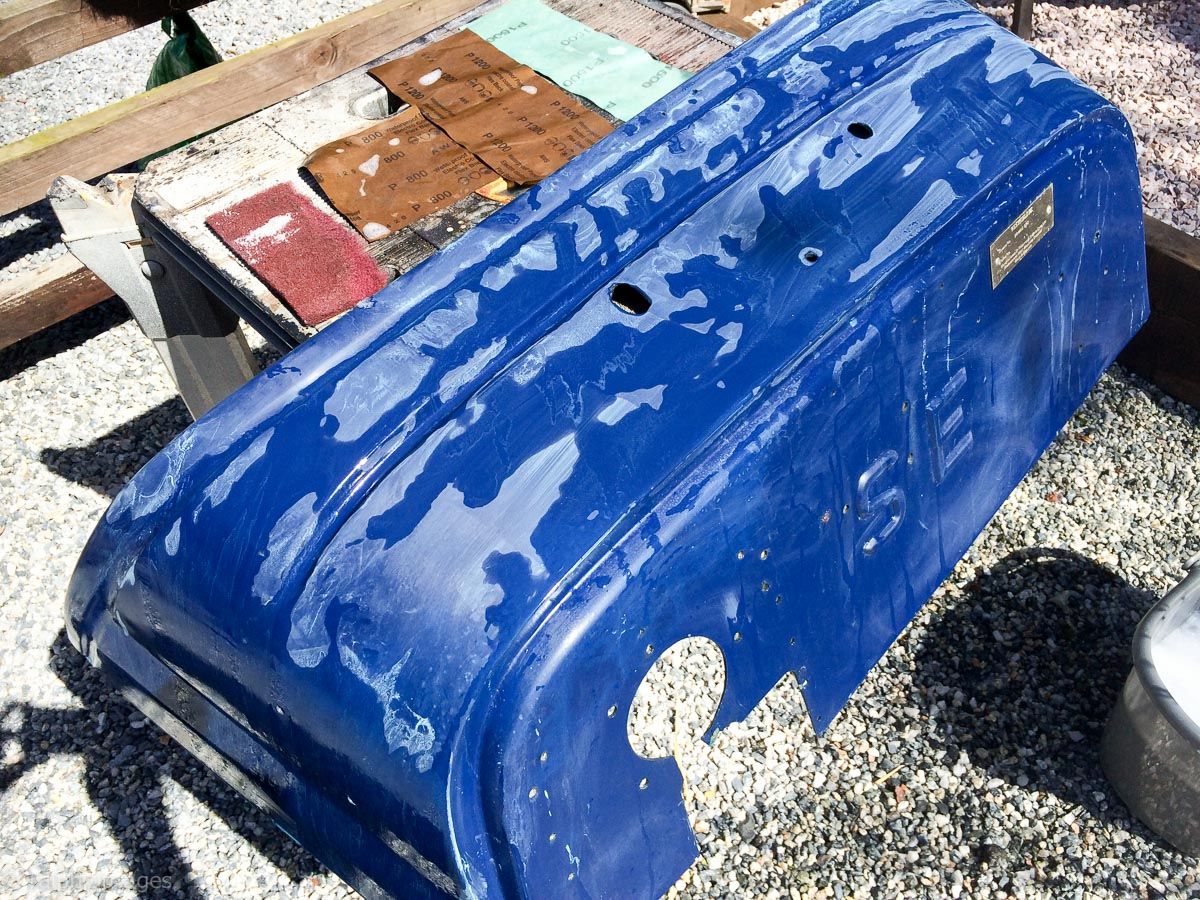
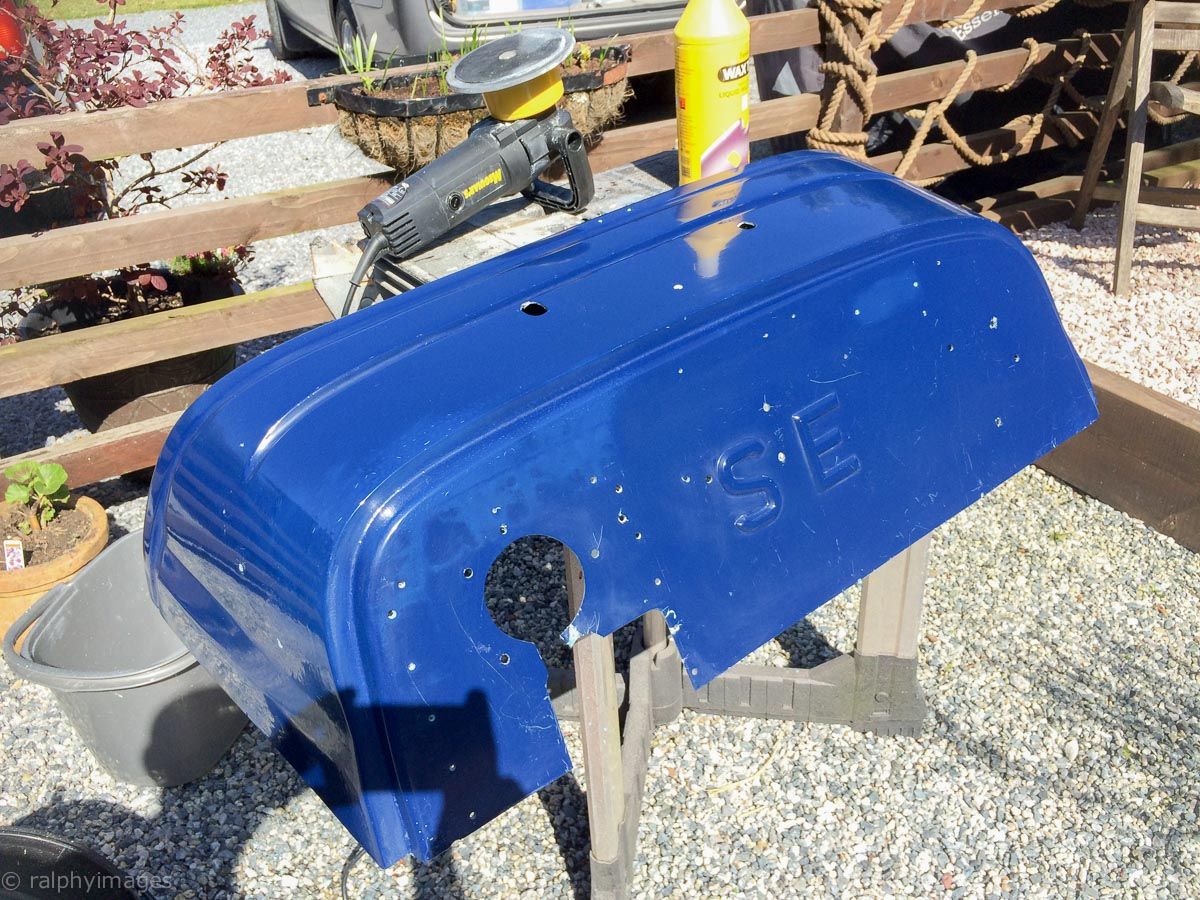
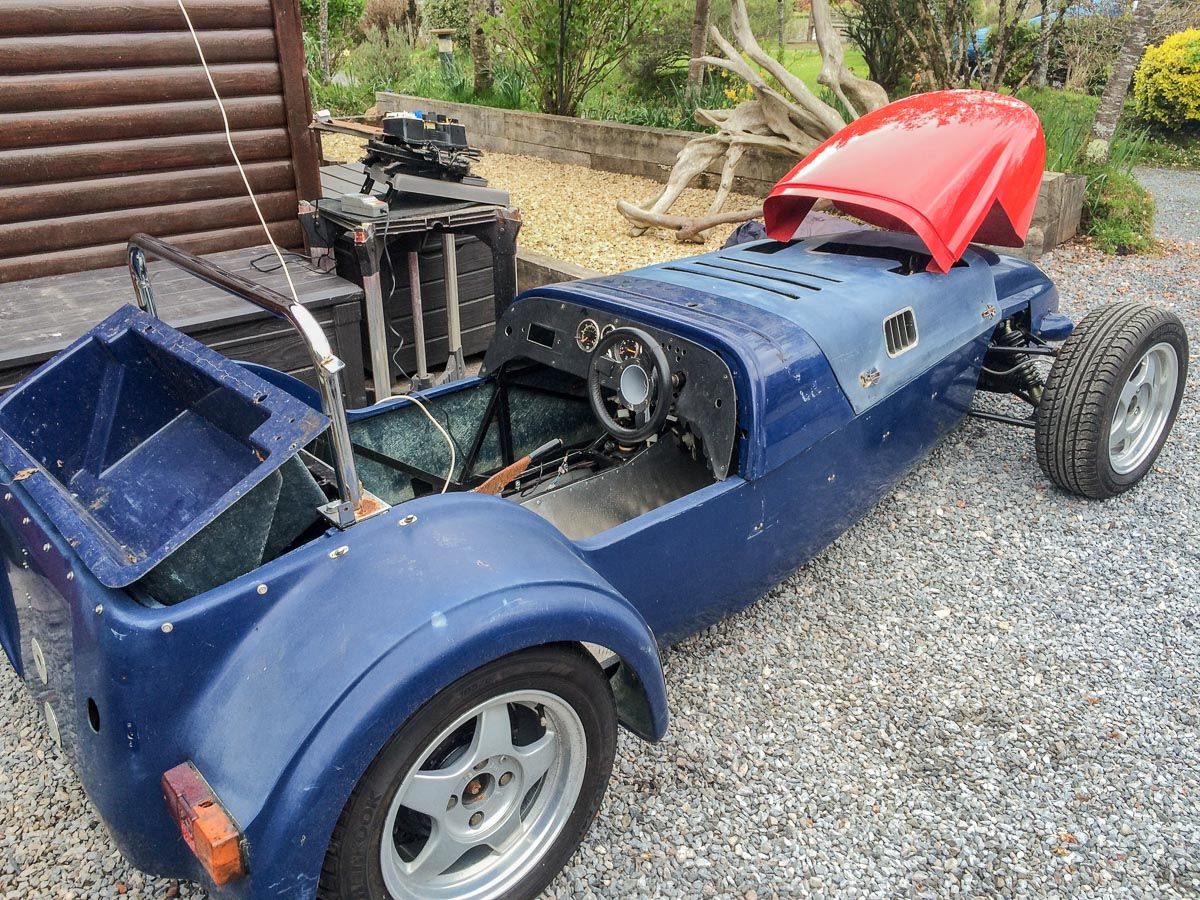
So I finally decided to have a go at refurbing what I already had
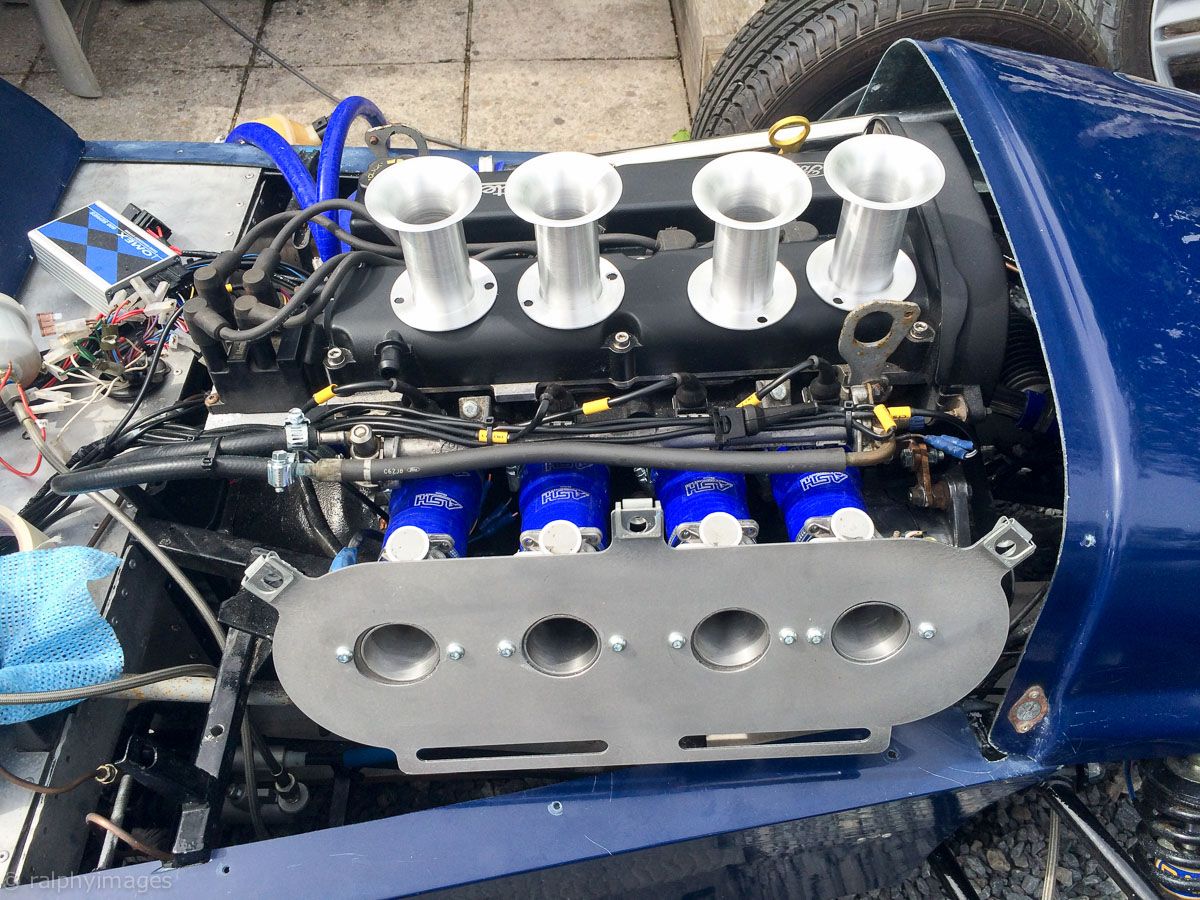
The end results were good enough to use to be able to get the car back on the road and whilst the bonnet remained questionable from a legal POV ;-) it would at least allow me to use it as a template for the new set-up. So it was back to the to-do list and fitting the air intakes.
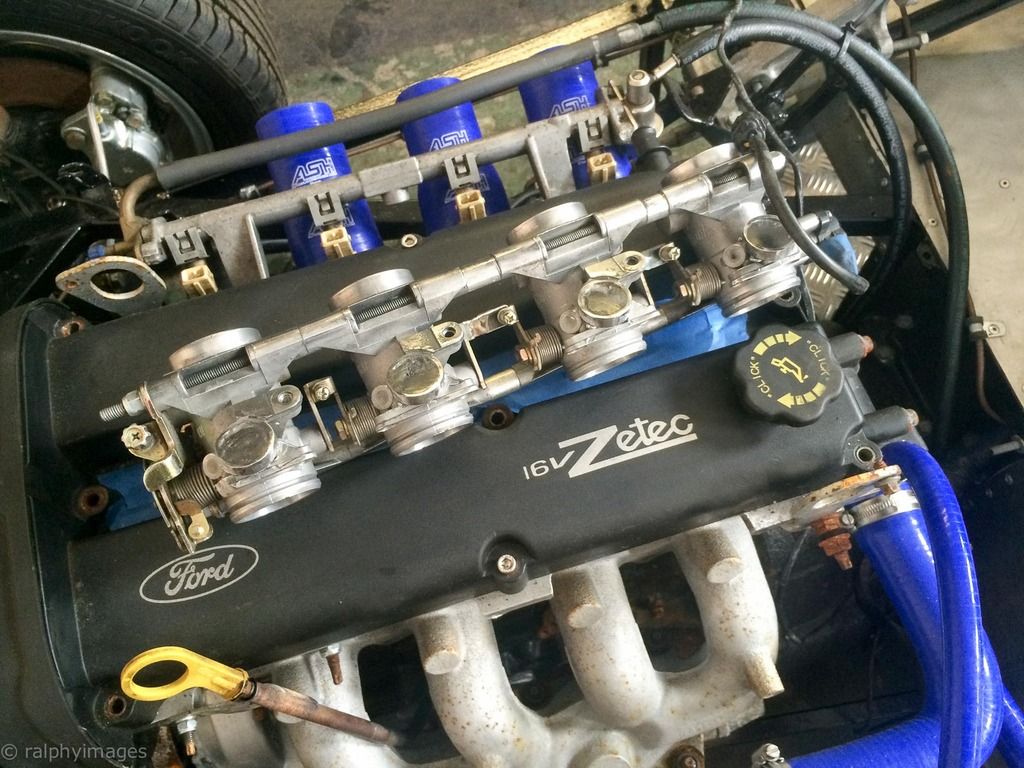
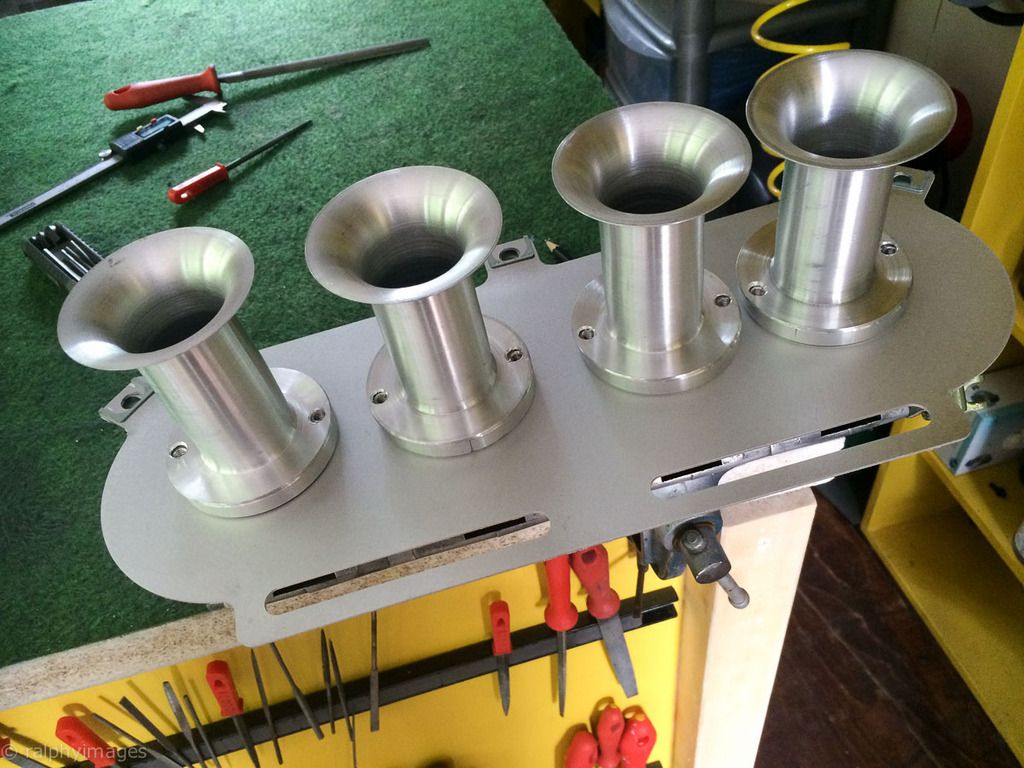
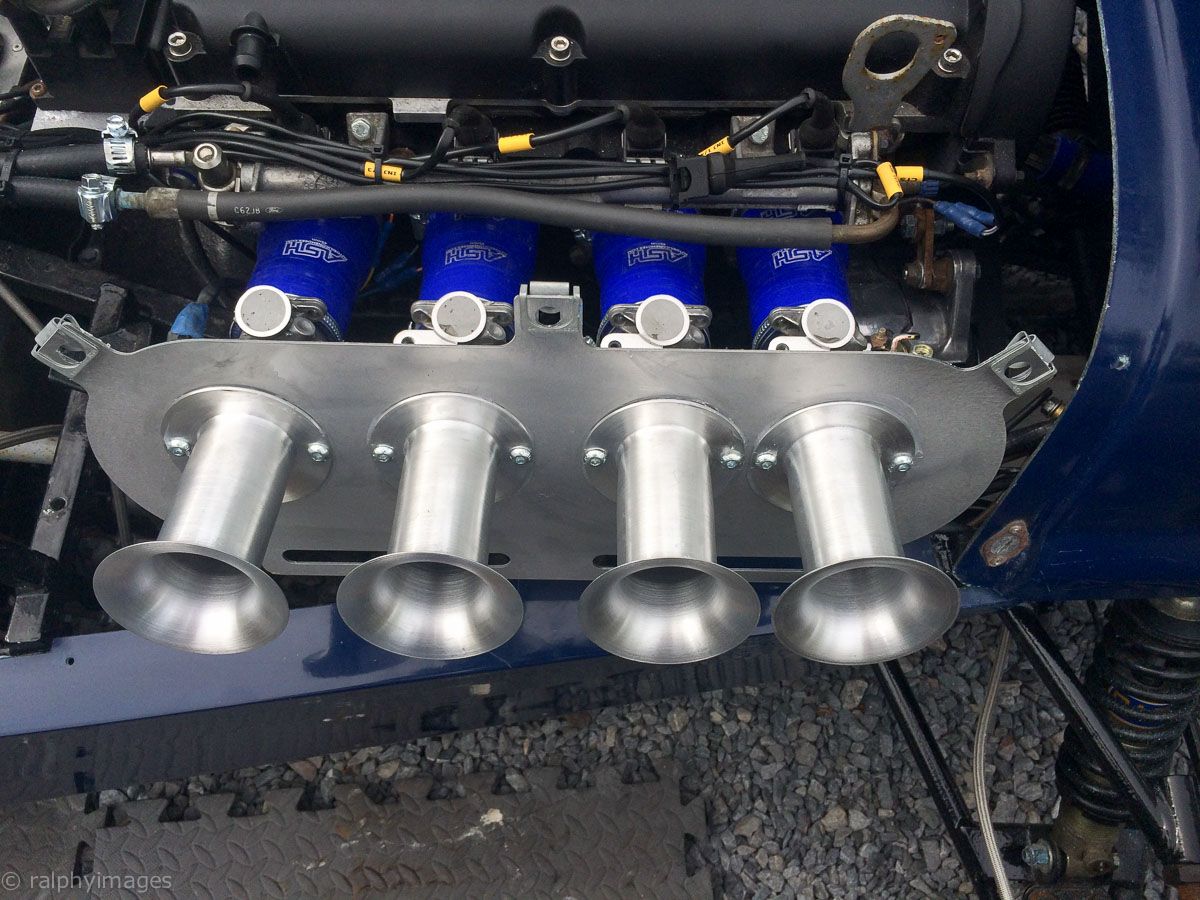
Because the throttle-bodies are not evenly spaced I elected to construct my own mounting plate.
Once the whole air-intake was in place I was able to start hacking the bonnet around:
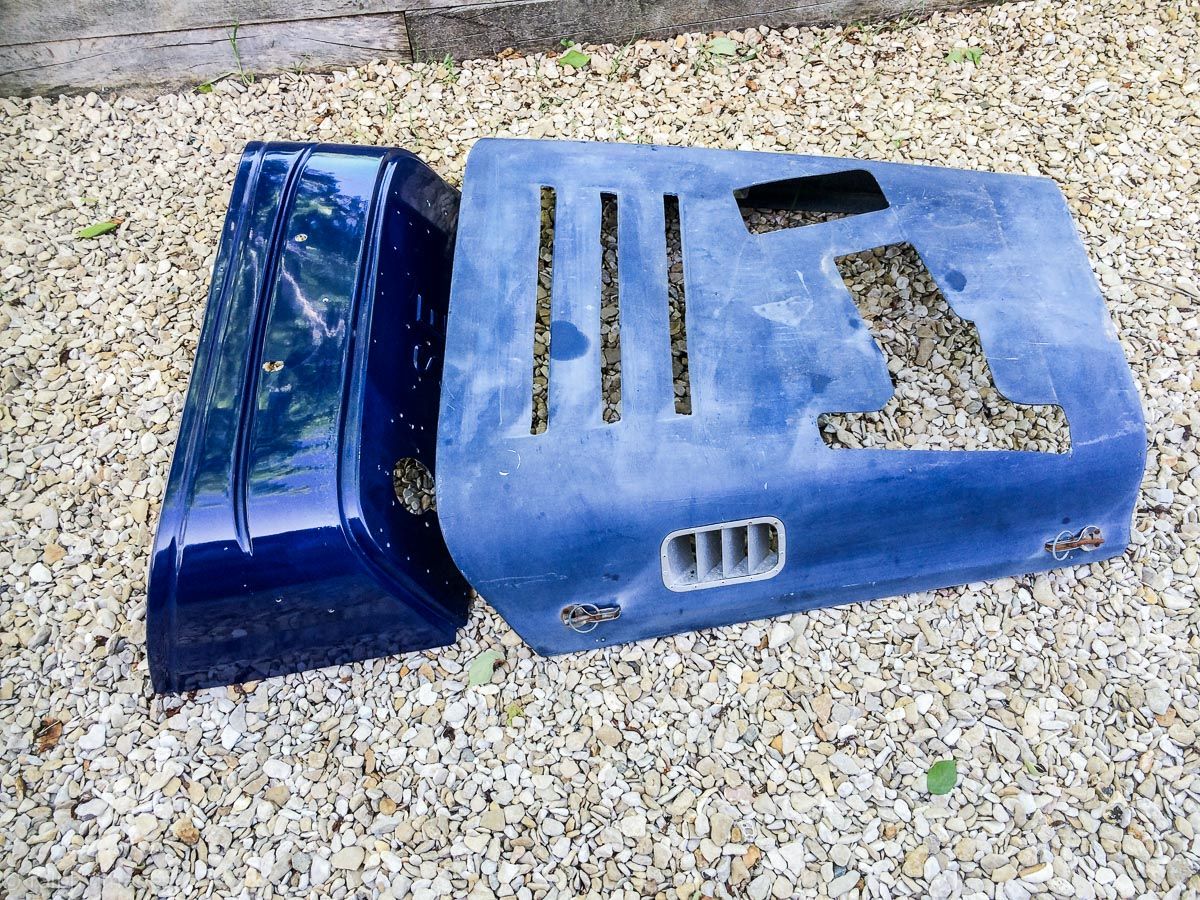
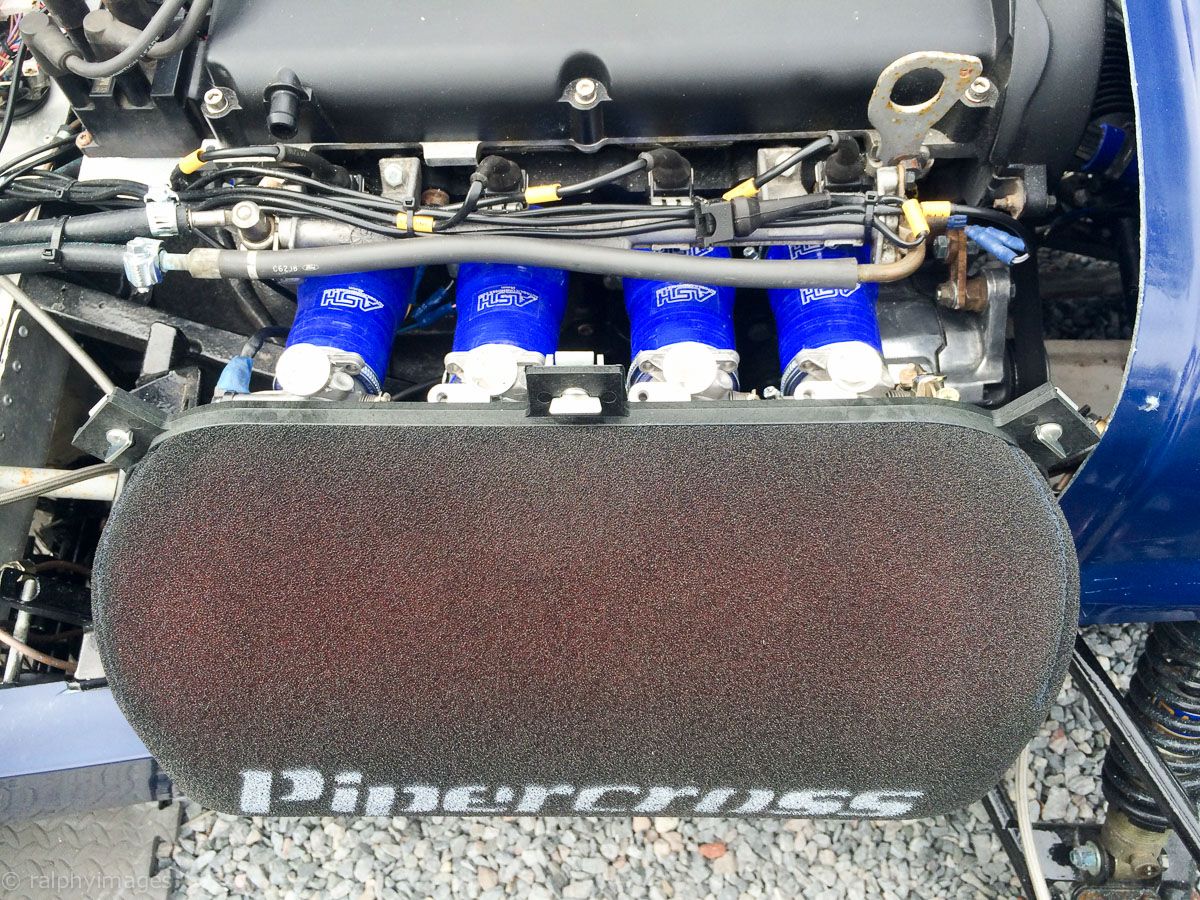
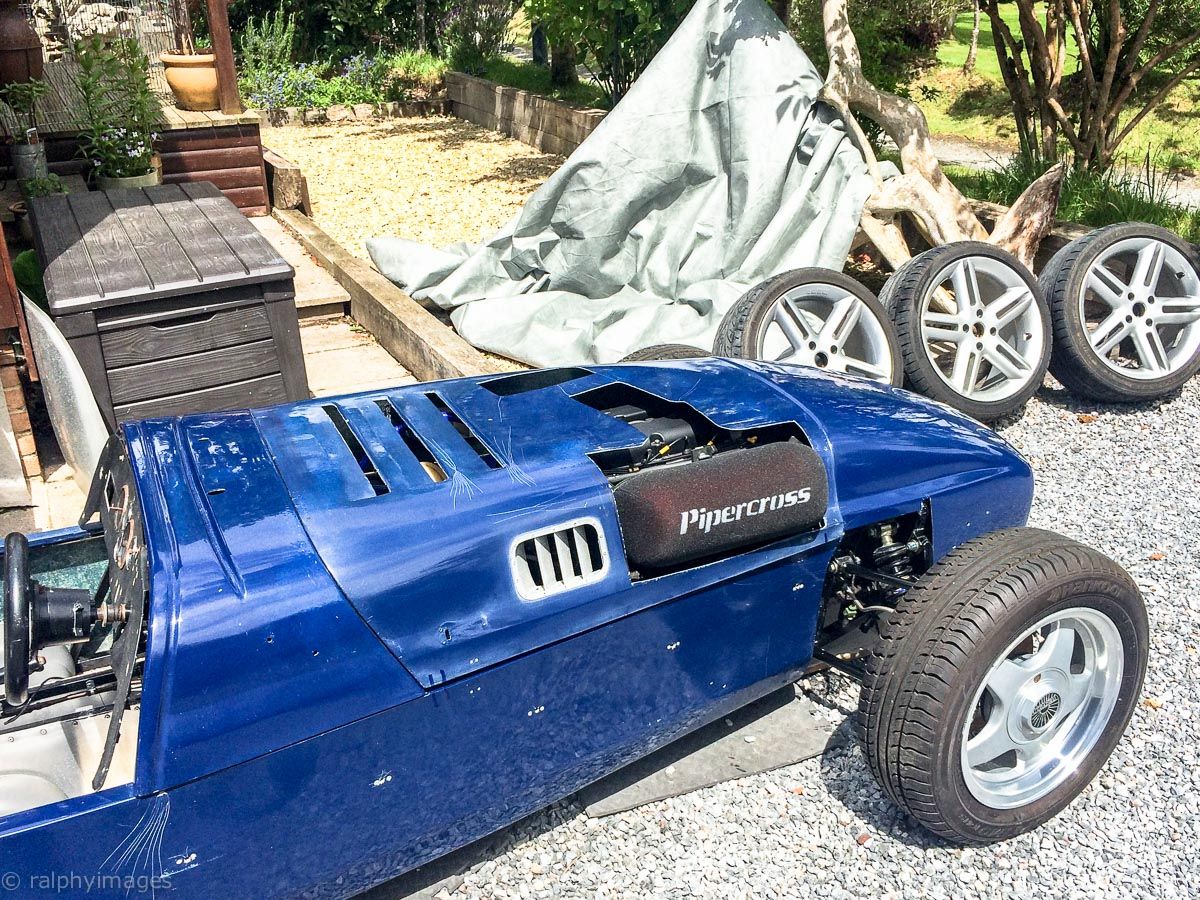
To accommodate the new set-up and this is how it looks as of today:
Ill make up a plate to finish off the bodywork immediately around the air filter, meanwhile Im just contemplating what to do with the rest of the existing holes in the bonnet
R
Ignorance breeds Fear. Fear breeds Hatred. Hatred breeds Ignorance. Break the chain.
Great to see some progress Ralph!
Very nice Ralphy! A word if I may: make sure that all the holes in the mounting plate a equally sized. Different sizes can cause different air-swirls for each cylinder. I am sure that the ECU can deal with that, but just to make sure... try to make the exactly the same. And, in a perfect world, try to smooth the edges towards the engine. Sort of mini-trumpets. The straight edges also cause swirls.
Then, at a later stage, make sure that the mudguard on the RH front wheel is properly installed. Despite the fact that a Pipercross filter is a wise choice, there's always a possibility that a stone gets through the filter, into the engine. And when it rains, the filter needs to be protected from water as well. Drops sucked in by the trumpets cause rough running (ask the Porsche guys with the triple Weber carbs under the slots of the bonnet!) I would try to install some sort of mesh guard on the front side of the Pipercross filter.
Menno
Top work, excited you got it going!
My goal for the RD350 is to get the engine going this summer. Lots to do but achievable I think.
Ralph, did you check out the cost of the bonnet alone from Westfield? I didn't think they cost that much?
I did, £400+ shipping (c. £50) and a minimum 4 weeks lead time, but that could be a lot longer being Westfield as their parts supply is in some disarray at the moment.
But in addition Im quite enjoying learning about working with fibreglass: quite different compared to metal bodywork/paint.
R
Ignorance breeds Fear. Fear breeds Hatred. Hatred breeds Ignorance. Break the chain.
As always, thanks for your input, Menno.
The filter assembly will be coming off again in the near future and whilst I’m confident I got the holes sealed up to be equal (there was a bit of a cock-up with the first cut on the l.h. intake) I never thought about smoothing off the edges of the plate. I’ll bear in mind the mesh advice too, one thing I was wondering about was fitting a heat shield below the filter/TB assembly to reduce down the effect of uprising heat from the engine. Would you say that’s worthwhile?
R
Last edited by ralphy; 1st June 2015 at 19:51.
Ignorance breeds Fear. Fear breeds Hatred. Hatred breeds Ignorance. Break the chain.
Ouch! Prices have gone up a lot in the last 15 years!
Been away for a while Ralph - WOW, looking pretty good sir
When you look long into an abyss, the abyss looks long into you.........
Yes, I would install one! Sounds like a safe 'investment'
Menno
love this stuff ,miss mine a quick pic .Days before kids eh!
Just read this from the start. Fantastic work and more updates please!

Great thread
Loving this, keep the updates coming :)
Cracking work as always ralphy!
I love those pics of parts in the kitchen.
Reminds me of when my Dad was restoring his old Triumph Mayflower and he used to work on the engine in the sink and on the kitchen table.
My Mum would go mad and banish him to the garage!
I had one of these many many moons ago, race rep...wheelie machine...loved it.
Great work on the westy mate! Really enjoying reading this.....
Keep up the good work and keep the updates coming buddy!
Any updates on this Ralphy?
Oooh yes the weathers been nice have you been working on this little beauty?
Hmmm. The short answer is no, I havent.The slightly longer answer is Id got it to the stage of firing up and even moving under her own power, but then other stuff got in the way and eventually she got put on-hold for the summer.
Im planning to restart work in November (Im abroad for the next month) and with a plan to have it running by spring-time next year. Id not only seriously under-estimated just how much time it would take, Id also over-estimated just how much time I would have available...
When Ive got some further progress to show Ill post an update.
R
Ignorance breeds Fear. Fear breeds Hatred. Hatred breeds Ignorance. Break the chain.
Any progress Ralphy?
Erm, yes: finally!
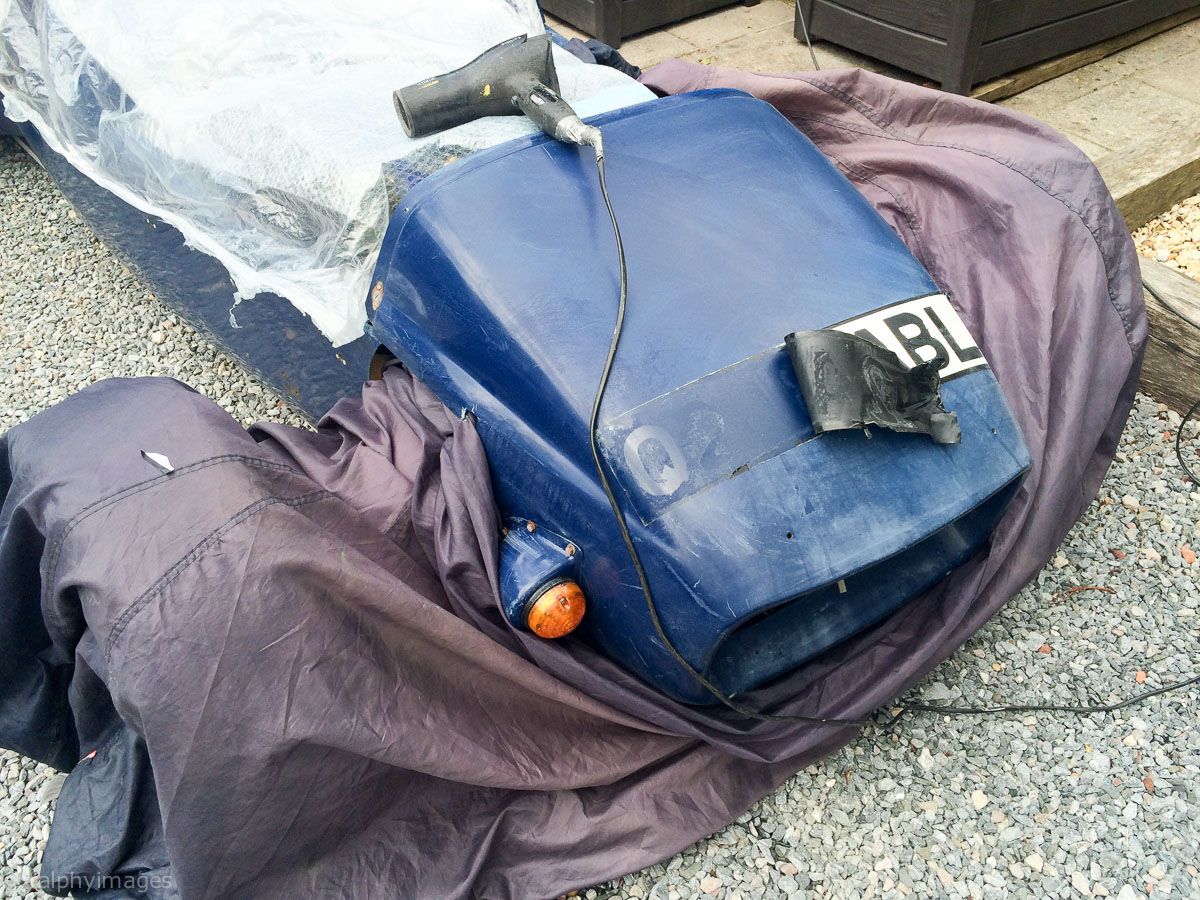
Today I pulled the covers off her, the first time since last June that I'd done so. She's been left due to other priorities taking up my time, but I've just booked some time on a ramp at a friends garage next week so I though I'd better get her ready to be trailered there.
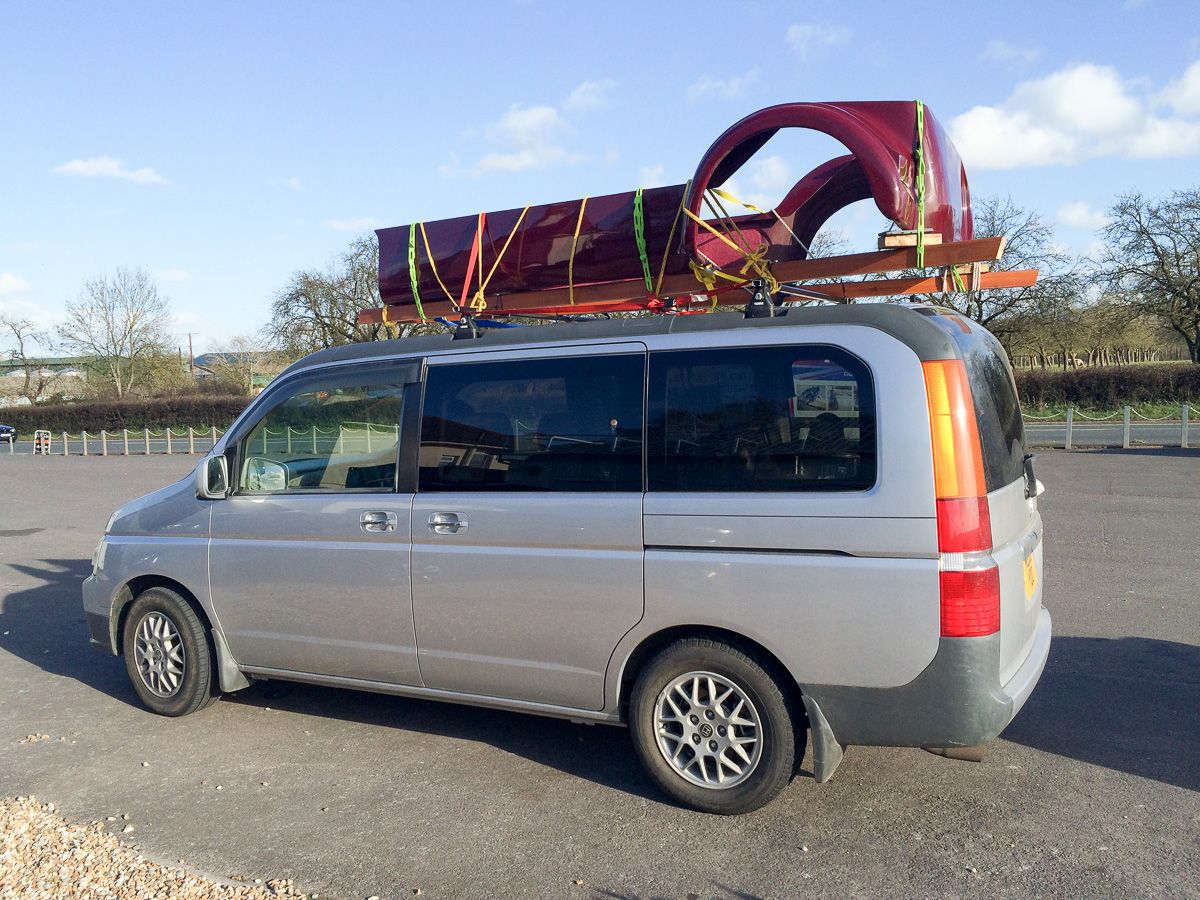
The only thing that has been done in the interim is I sourced a body tub from Birmingham so drove up there to collect it.
It was blowing a gale on the way up and as I had to carry it on the roof of my van I ended up using anything I could get en route to lash it down tighter...
It survived the return journey intact, so the only major body part I still need now is a bonnet.
Back to today, I drained out whatever was in the petrol tank and poured some fresh petrol in, checked the oil & water levels then hot-wired the ignition: and she started first time! Ran as rough as a badger's, but I'm not surprised given the lay off and dampness.
So finally, work has recommenced. ;-)
R
Ignorance breeds Fear. Fear breeds Hatred. Hatred breeds Ignorance. Break the chain.
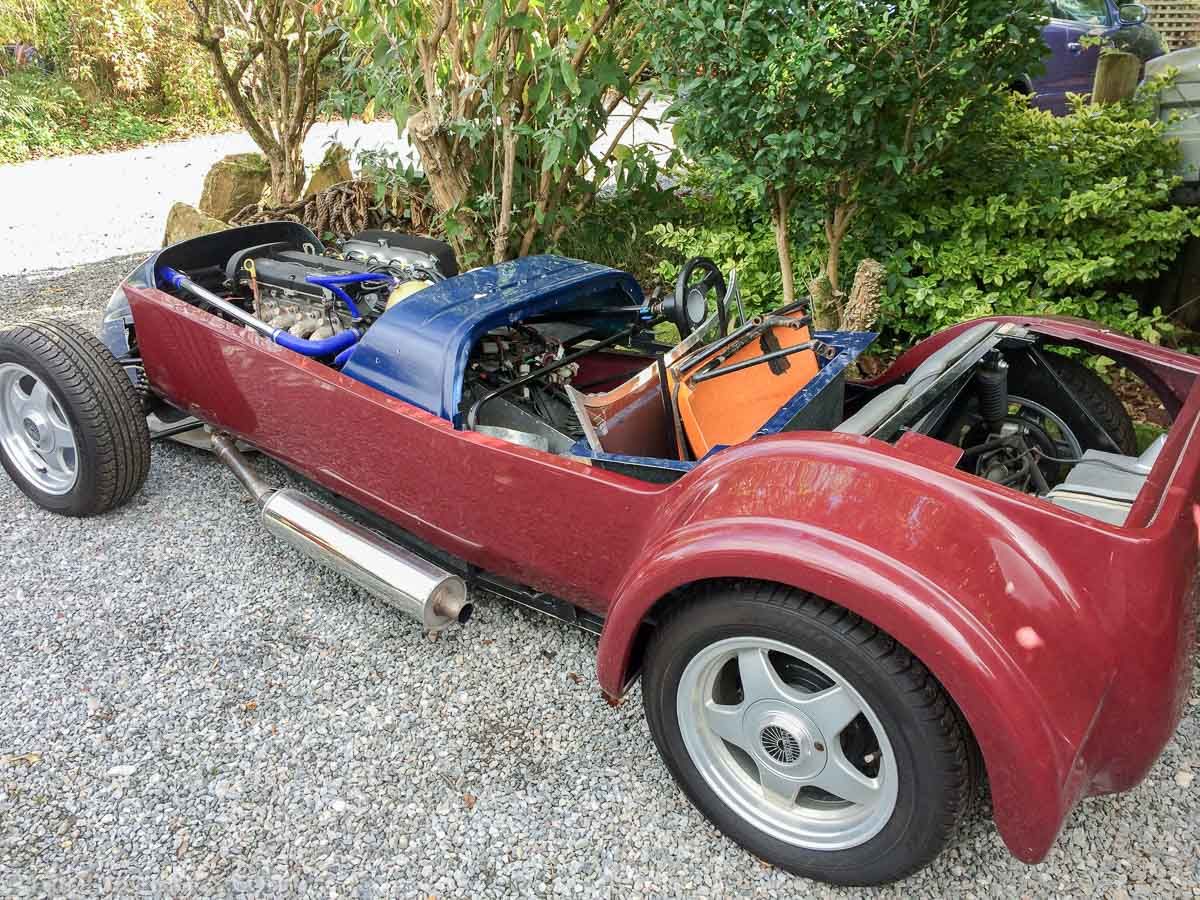
Nice to see this underway again Ralph. Any more thoughts re the final body colour?
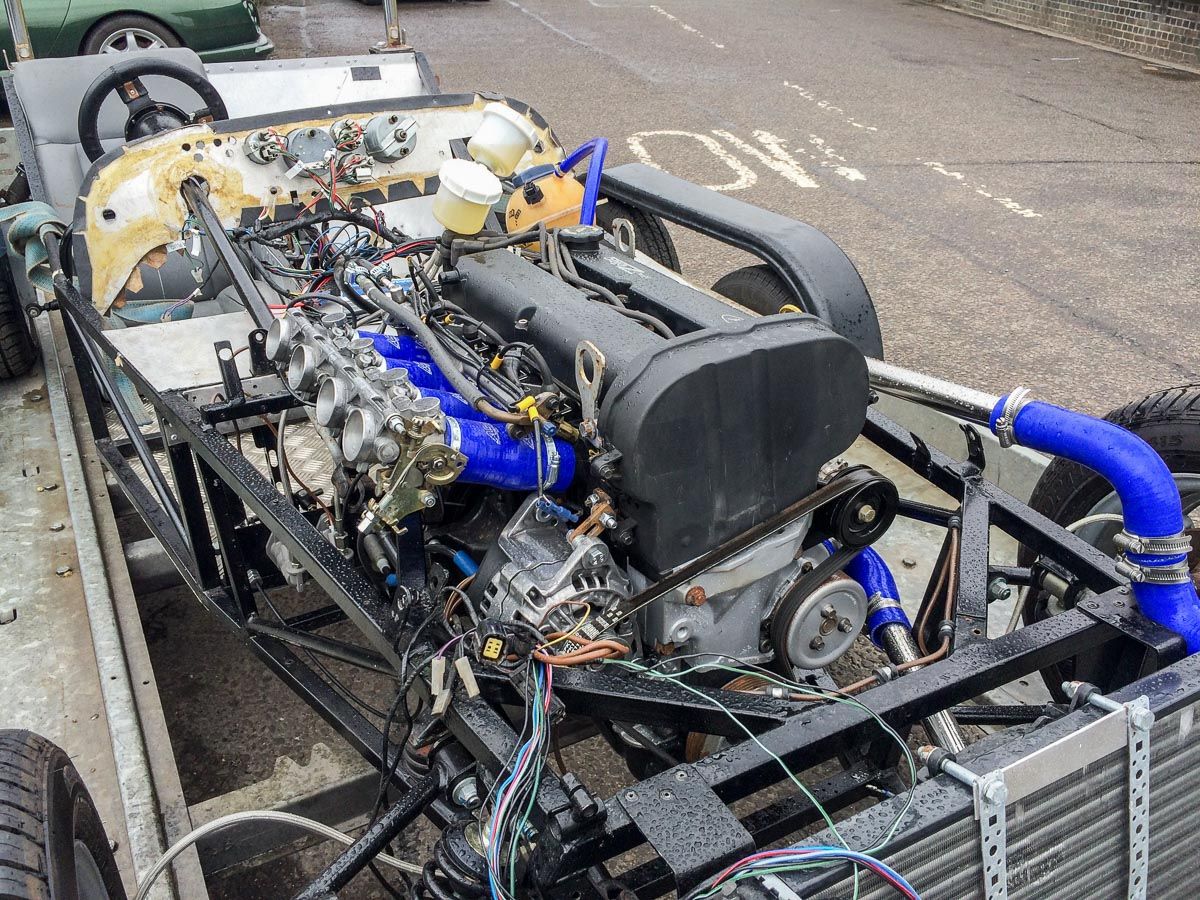
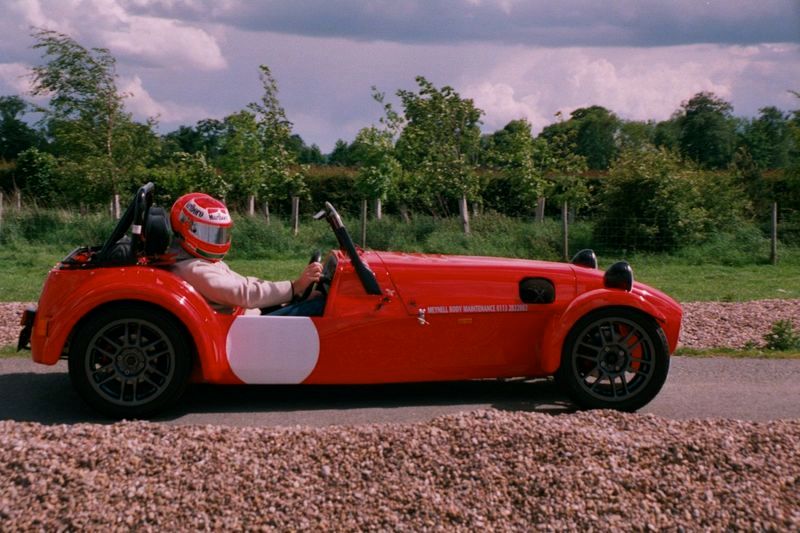
I haven't, Bob. All I do know is that I want something bright, as these cars are low and need good visibility. At the moment it's a right miss-mash of colours; burgundy, blue, orange and bright red (nosecone, not in pic):
R
Ignorance breeds Fear. Fear breeds Hatred. Hatred breeds Ignorance. Break the chain.
Excellent news, looking forward to more updates :)
Ha! Nice to see that you've picked up the spanners again.
I agree with you on the colour choice. I once suggested the Polar Blue colour from Volvo. I still think that it's a good choice. However, I've seen another beautiful colour as well: Porsche's Lava Red (Spotted a GT3RS with that colour last Sunday - visible from miles away).
I am not good with Photoshop. But what about a few pics of the car: profile, 3/4 front. 3/4 rear and post them here. I am sure that a fellow forumite can help you with Photoshop! (btw, black of anthracite coloured wheels look great I think)
Menno
The Polar Blue did rather appeal, but perhaps not quite bright enough for my current musing.
Regarding the Porsche colour, would it have been Lava Orange that you saw?
Certainly bright enough!
I've given my bodywork guy an open brief on what colour he'd choose so am interested to see what he comes up with, my final decision will be made once I've got the rest of the car ready to fit the bodywork on: plenty more things to think about before then!
R
Ignorance breeds Fear. Fear breeds Hatred. Hatred breeds Ignorance. Break the chain.
Yes, that's the colour! Although the picture doesn't do that colour justice, I think! It is very bright, cheerful and (when applied properly) very deep as if it's a 3D layer on top of the body. Try to see one of these cars with this colour IRL!
Menno
I seem to recall a sort of burnt orange as a possibility earlier in the thread that looked nice.

Seeing the Chimaera for sale post and remembering Ralph had one reminded me of this topic, any updates Ralphy?
just read the whole thread Ralphy, thank you for documenting this, although not in any way capable of this kind of work myself, reading through work logs like this does inspire me,
I look forward to the updates and finish
Short answer, no. Longer answer, I've just checked my diary and have spent a total of 10 days at home since the end of July last year...
I've got two more overseas trips booked which'll take me to the end of this June, thereafter I'm planning to be at home for a while and the Westy is top* of the 'round tuit' list. I've bought a few parts for it recently and with those and the electrics done (I'm planning on making up a new loom) it should be ready for an MOT.
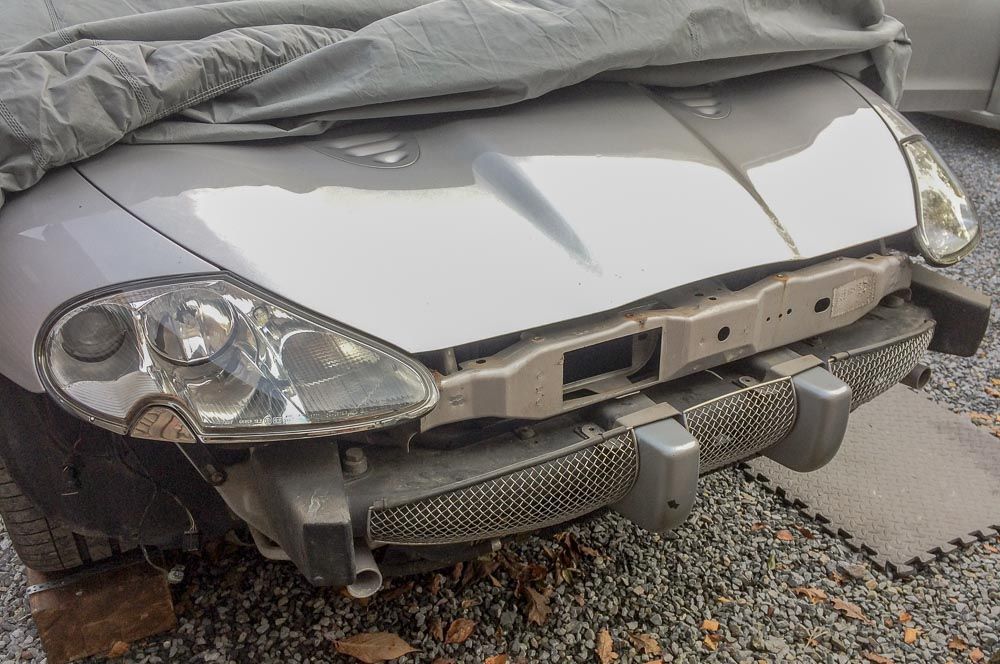
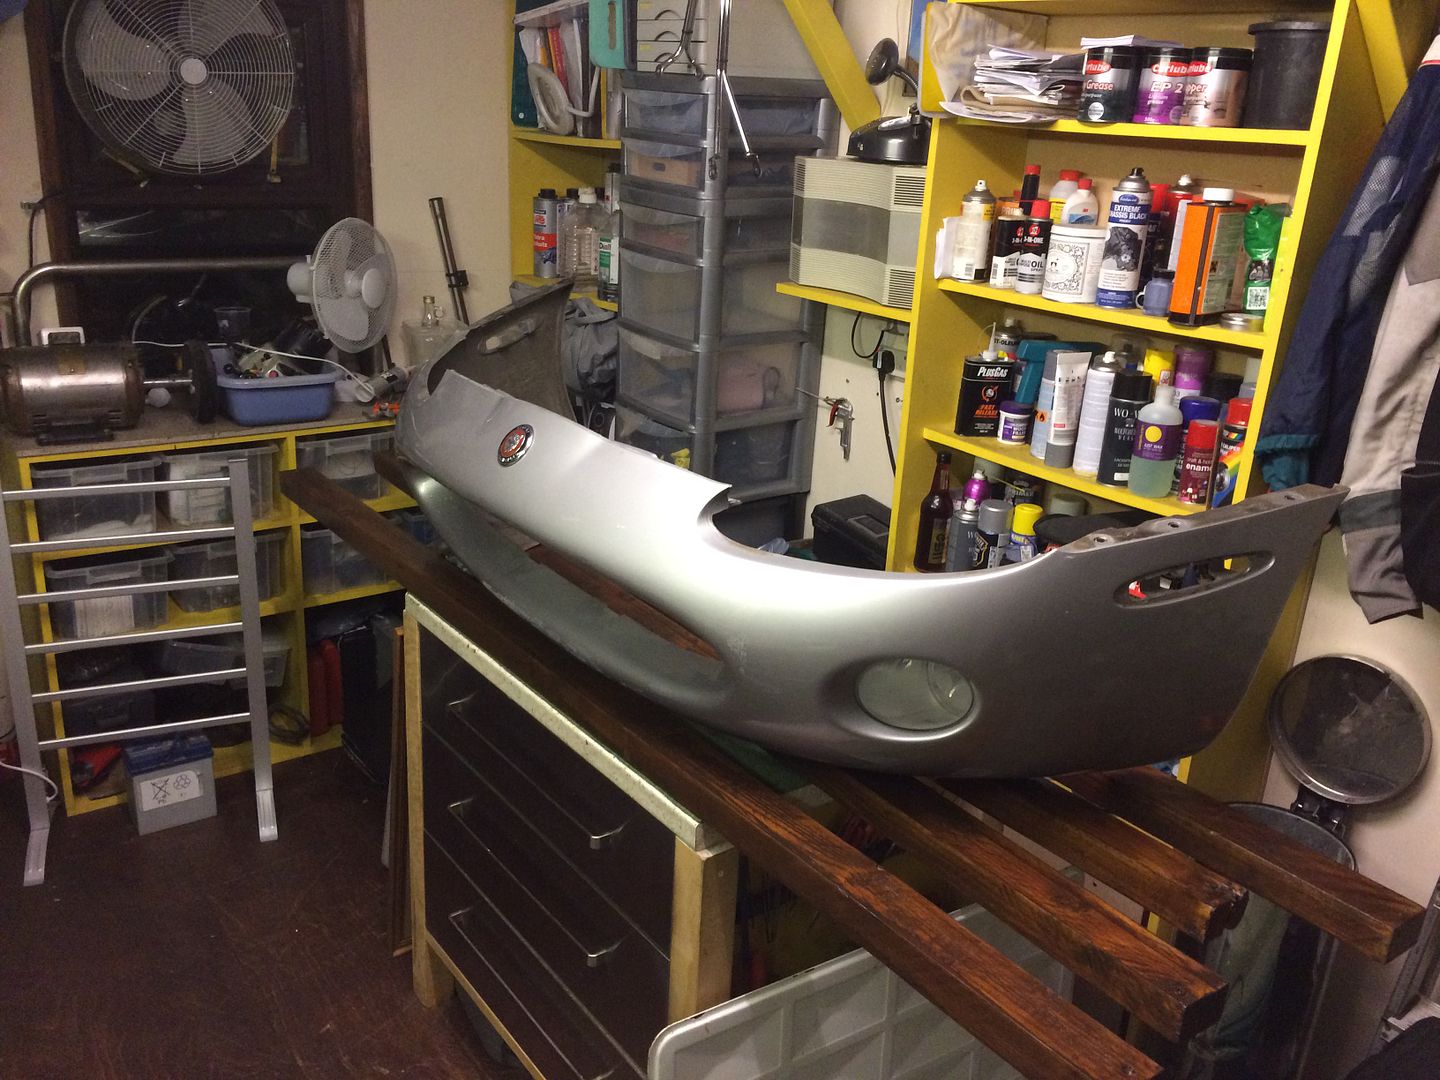
*Actually there's one other job that needs to come first: I've had the nosecone off the XKR for some modifications (plus a respray) and that's now ready to be refitted, which I've scheduled to do between the trips:
(That TVR on SC looks well-sorted and a good buy, btw).
R
Ignorance breeds Fear. Fear breeds Hatred. Hatred breeds Ignorance. Break the chain.
Thanks, busy times!
Cheers..
Jase
Finally, I've managed to set aside some time to get on with this and have been on it for the last two days solid.
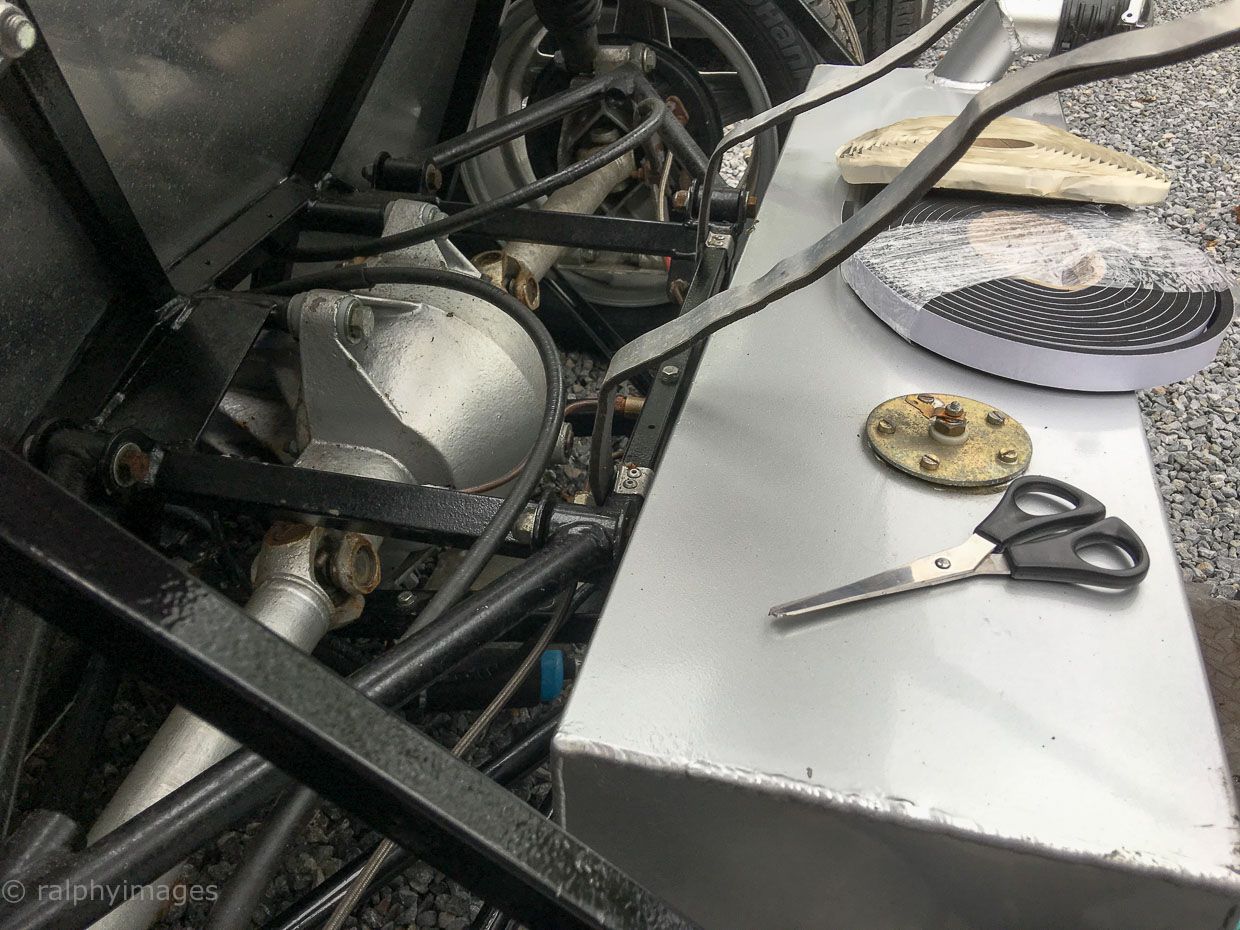
The plan is to start at the rear and work my way to the front, so yesterday it was fuel tank day. More than that was planned, but as always there was more involved than I'd anticipated...
Tank out was easy enough as it was only sitting there unsecured in situ.
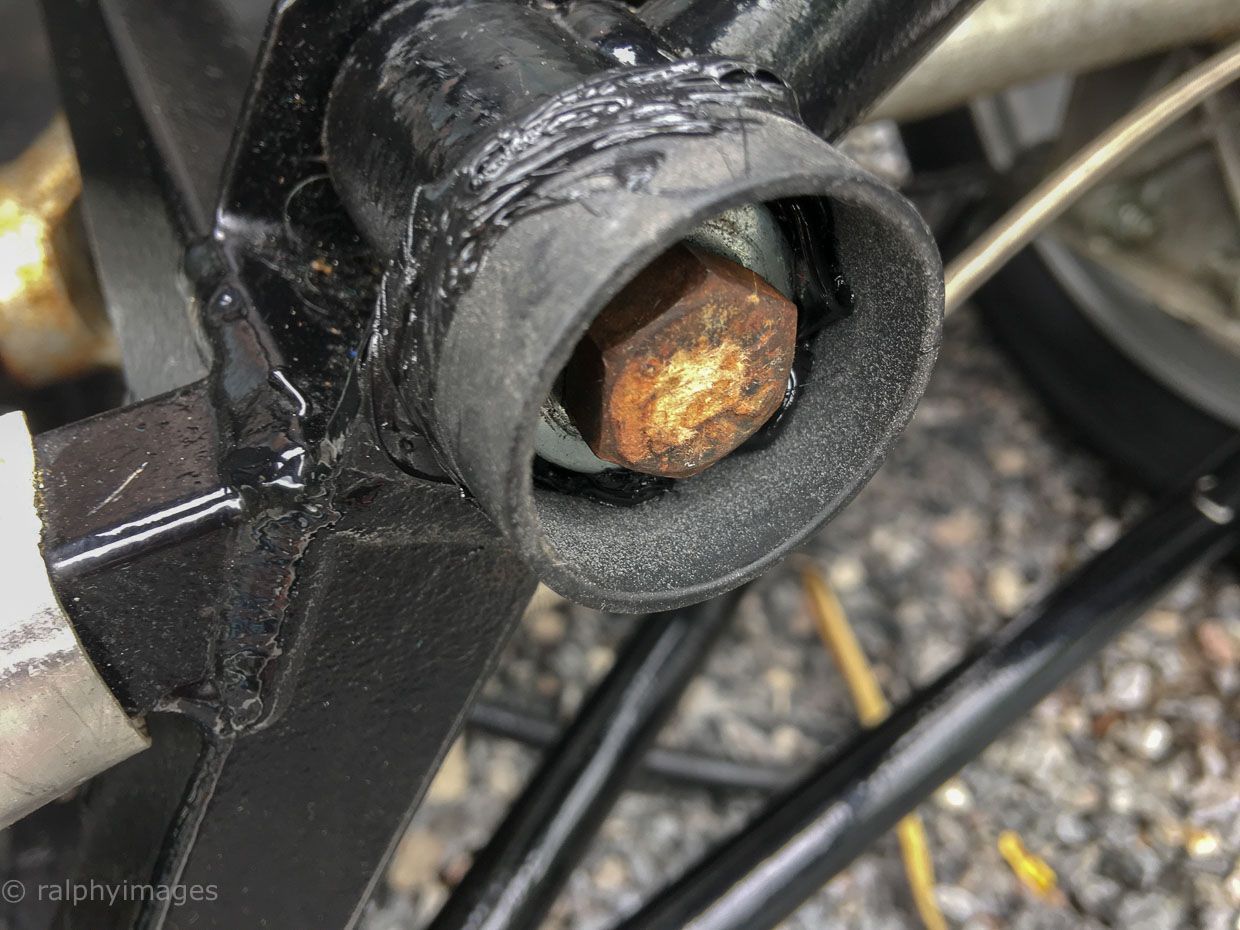
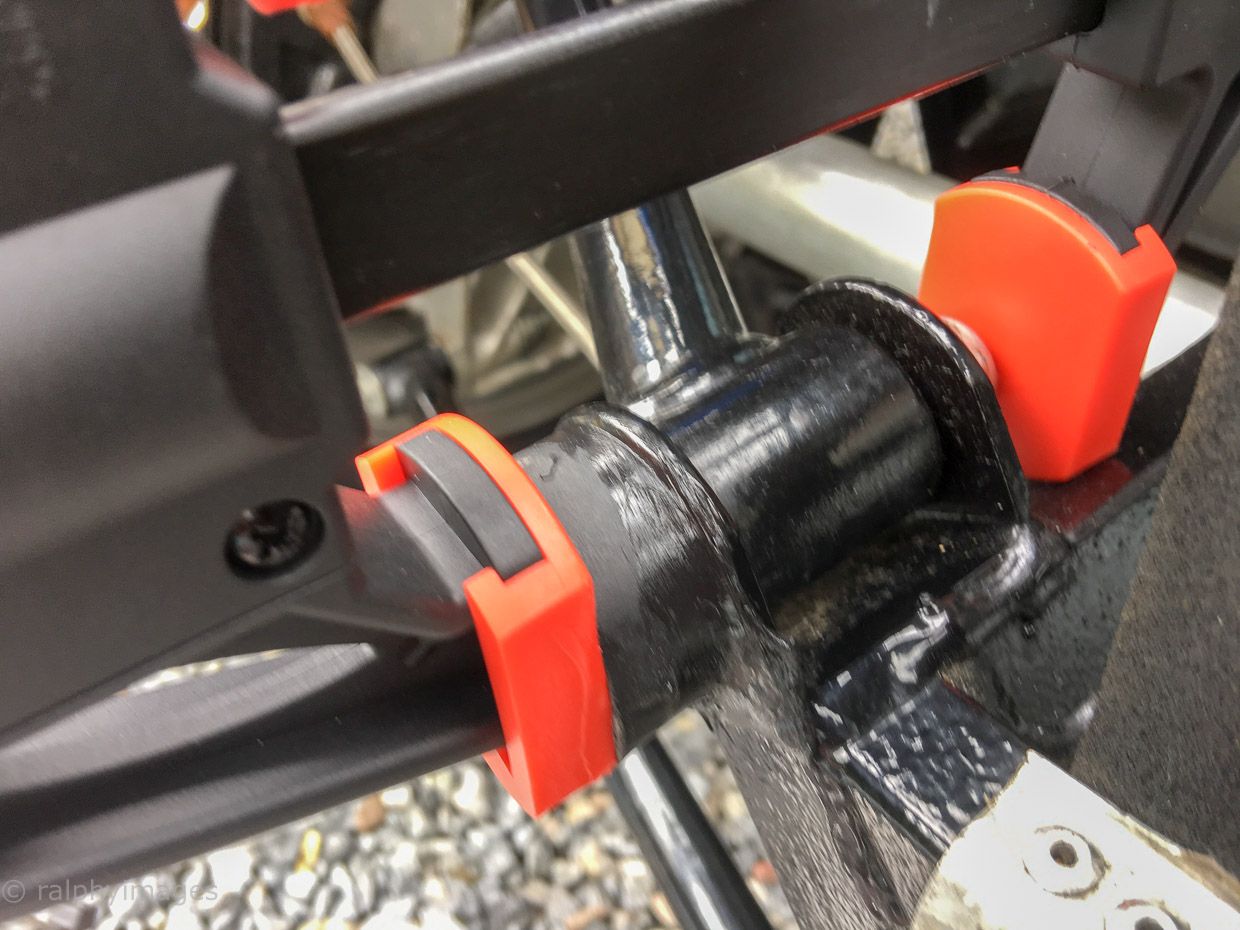
But I had been unhappy with the way it had been mounted: up against the two bolts of the lower wishbone arms.
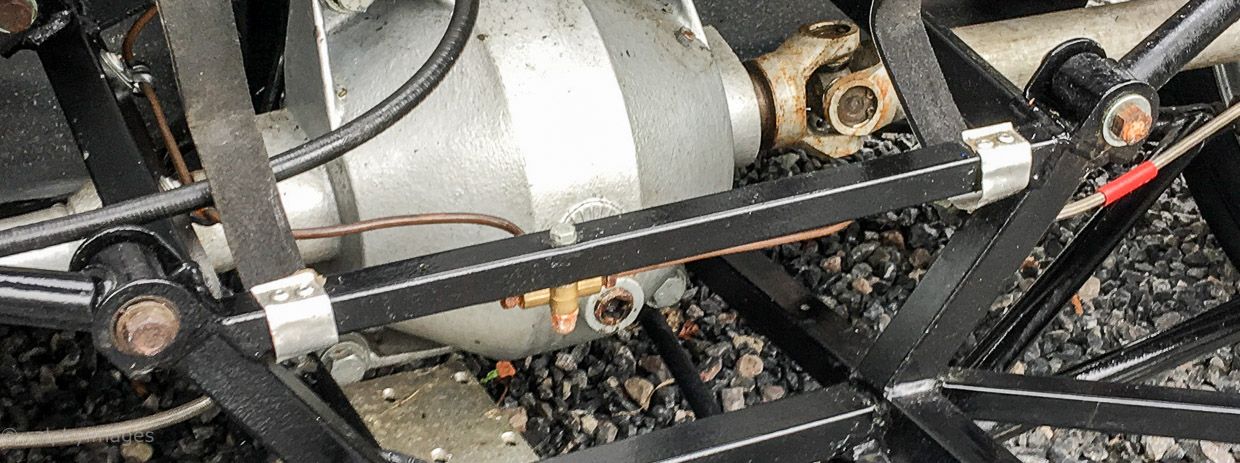
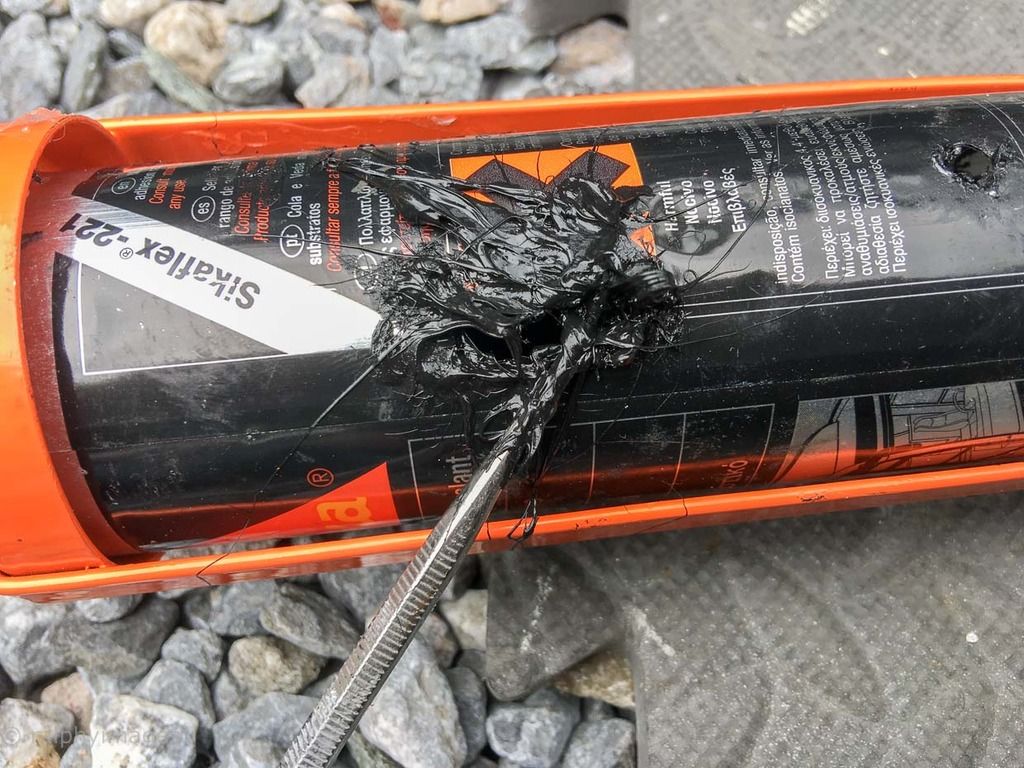
So I wanted to space it off them and to do so a used a piece of plastic tube, cut to size and then mounted over the bolt heads. When I came to fix them in place I found my Sikaflex cartridge had gummed up at the nozzle and no amount of coaxing out the set adhesive would work, so I cut into the tube further and further down until I found some fresh...
Stuck and clamped in place (it looks a poor application but it was smoothed out after the first hour of curing)
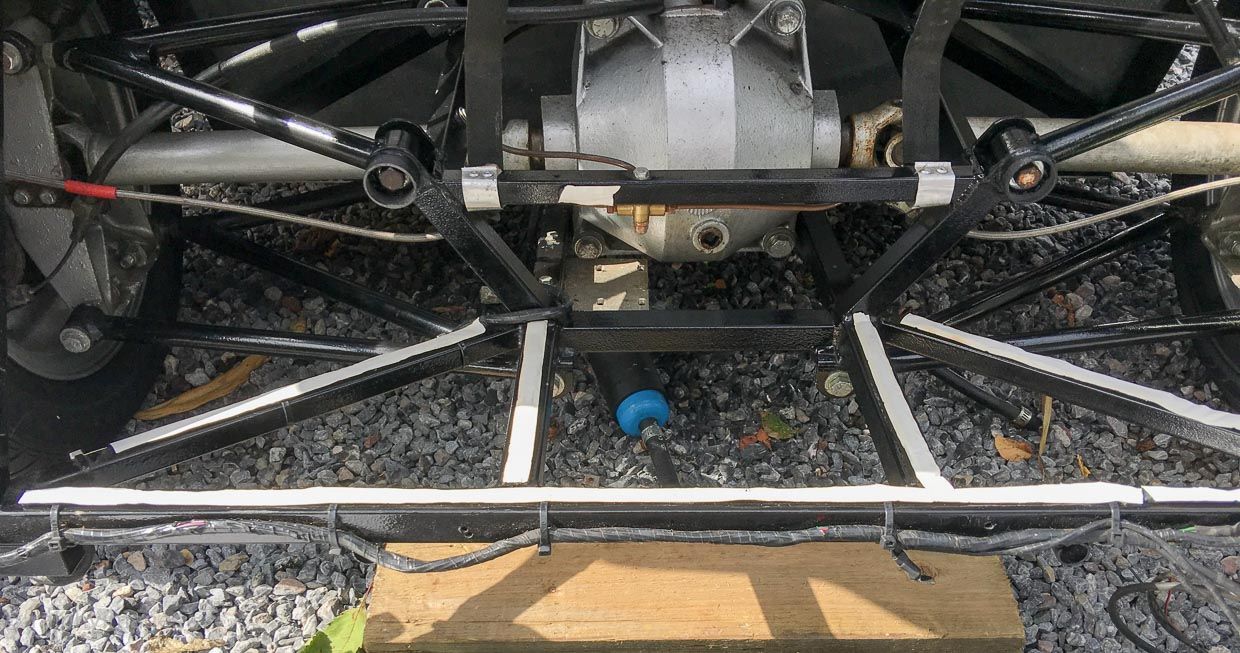
Then soft-seam tape applied to all the supporting chassis arms
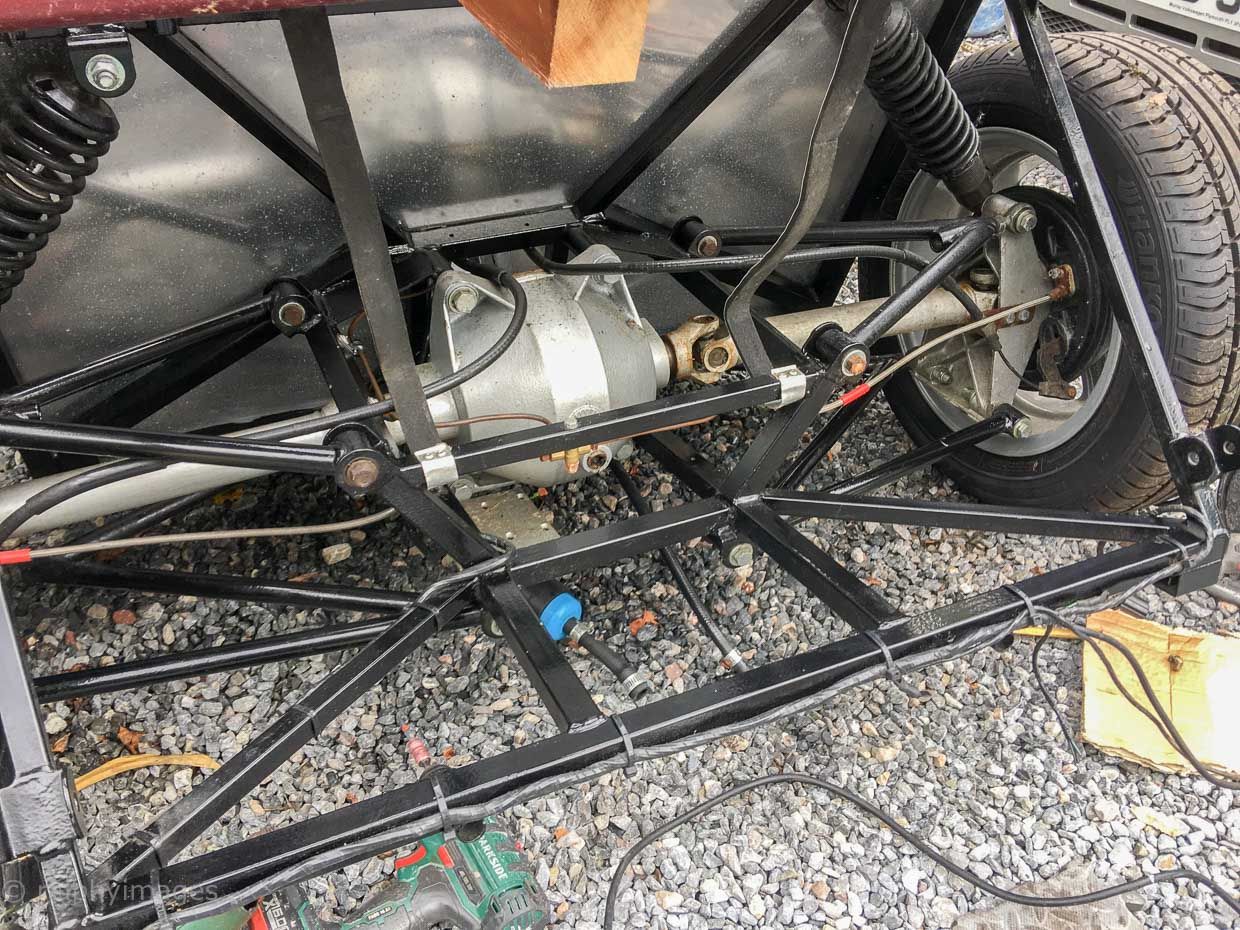
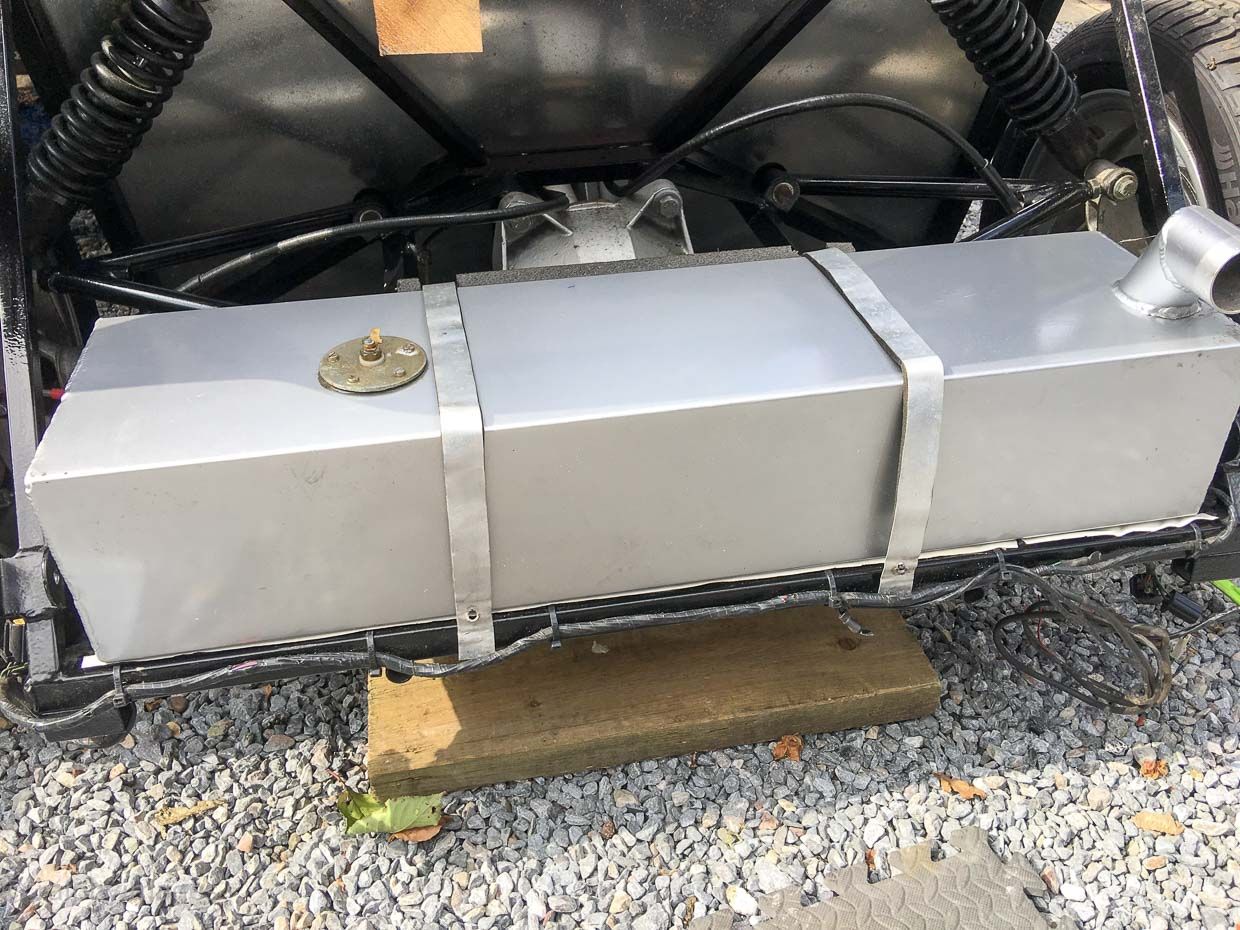
Tank cleaned out of the remains of old fuel and a visual inspection inside (minimal crude really given the time it's spent sat since last touched) and back into position, out of sight is some high-density foam to set the tank slightly off the new spacers
Left to do is cut out a new hole in the bodywork to fit the petrol cap, but that's going to be done at a later stage as the bodywork hasn't been fitted to the chassis but stored elsewhere and it's gone out of shape a bit, so I'll secure it to the body soon and then let it re-form first.
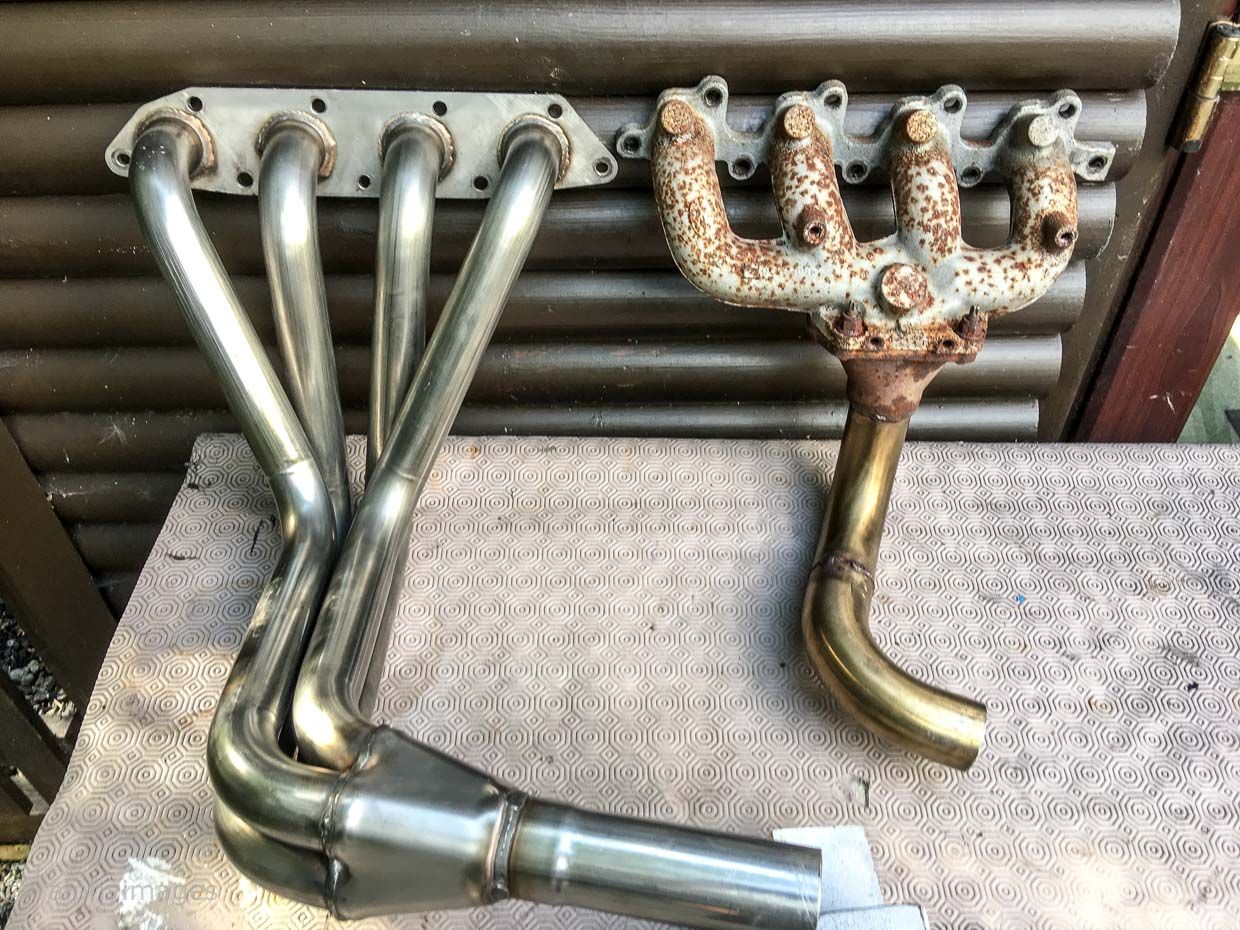
Today was change the manifold day. I'd pickup an unused Westfield manifold to replace the standard Zetec one (well, you would wouldn't you):
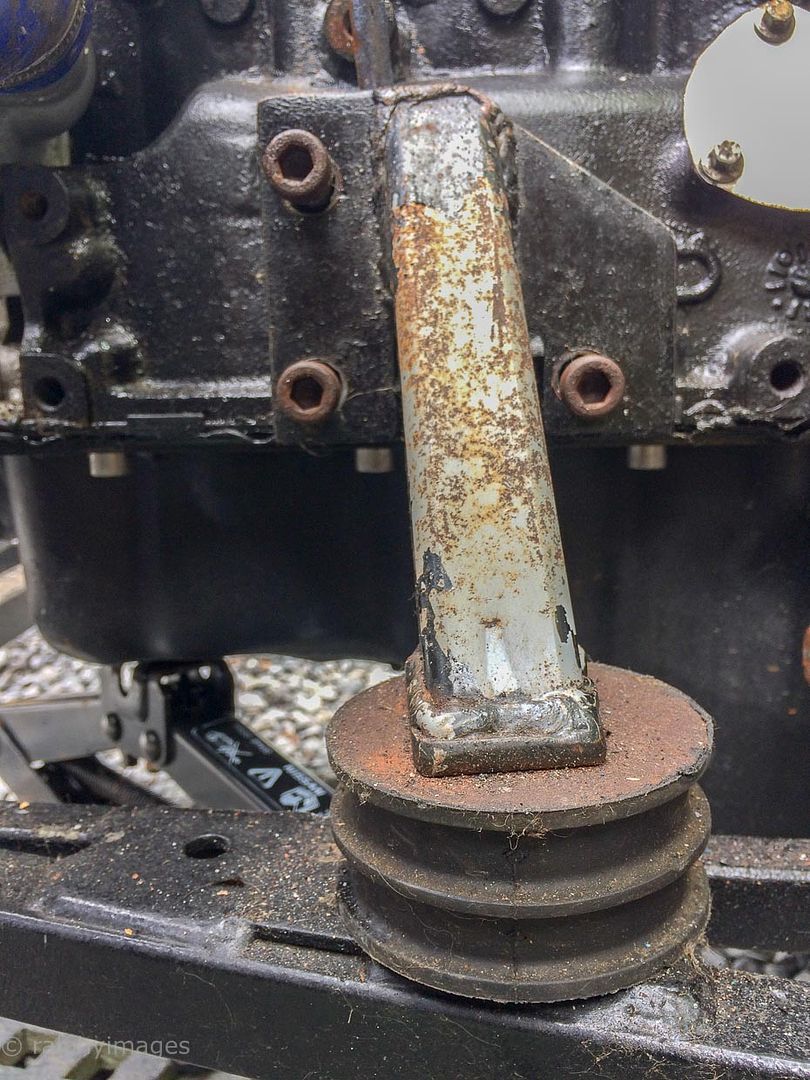
and it should have been a straightforward swop. Well, it wasn't: my car is a standard model and the new manifold was made to fit a wide-body model, so not only did it foul my chassis it also interfered with the engine mount. The chassis issue is relatively easy to sort: the four pipes were just touching the chassis rail so a reposition of the engine to sit a few mm higher would sort that. However, the engine mount needed more work...
Jack up engine from underneath to support it and then slacken off both mounts to allow the new height to be determined.
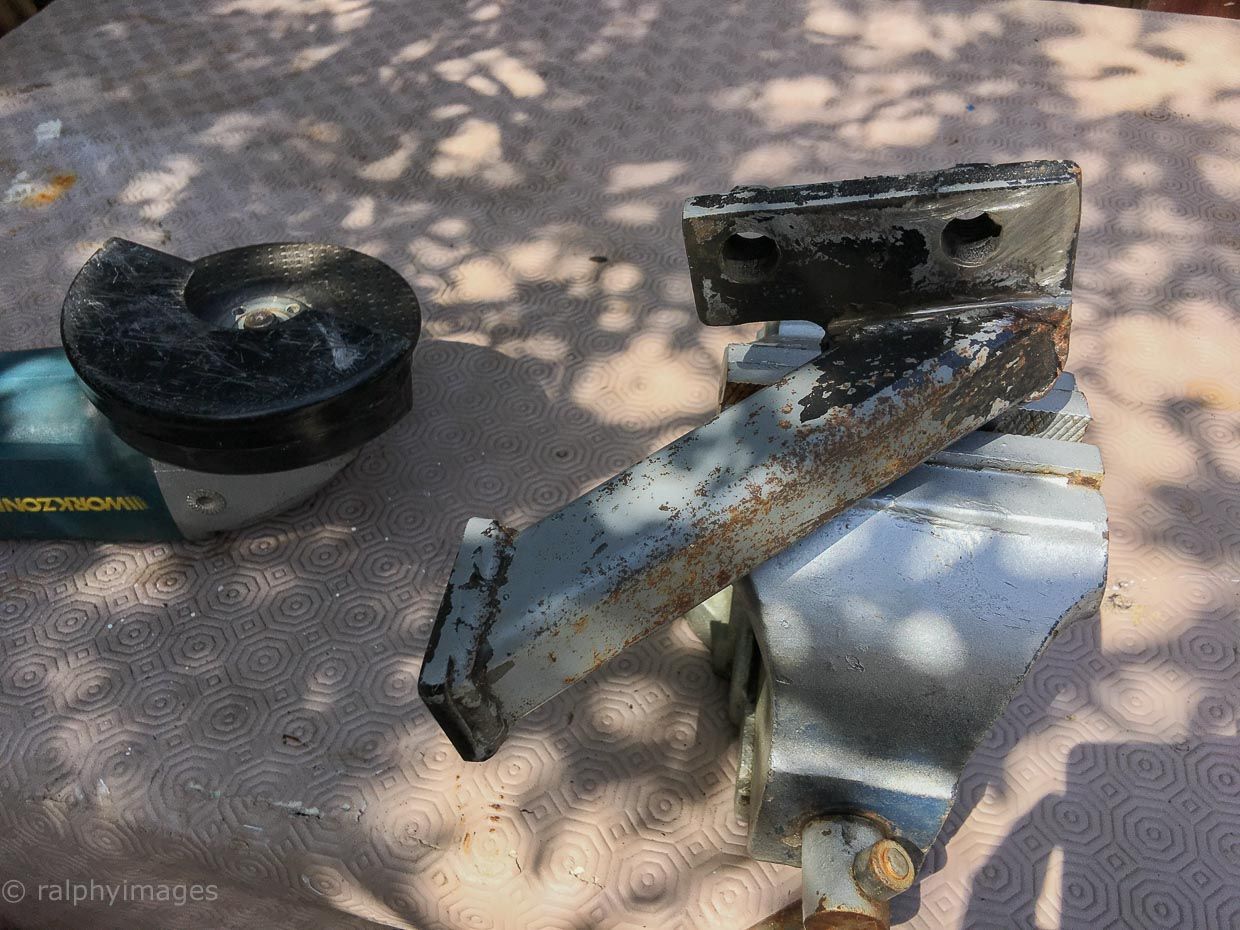
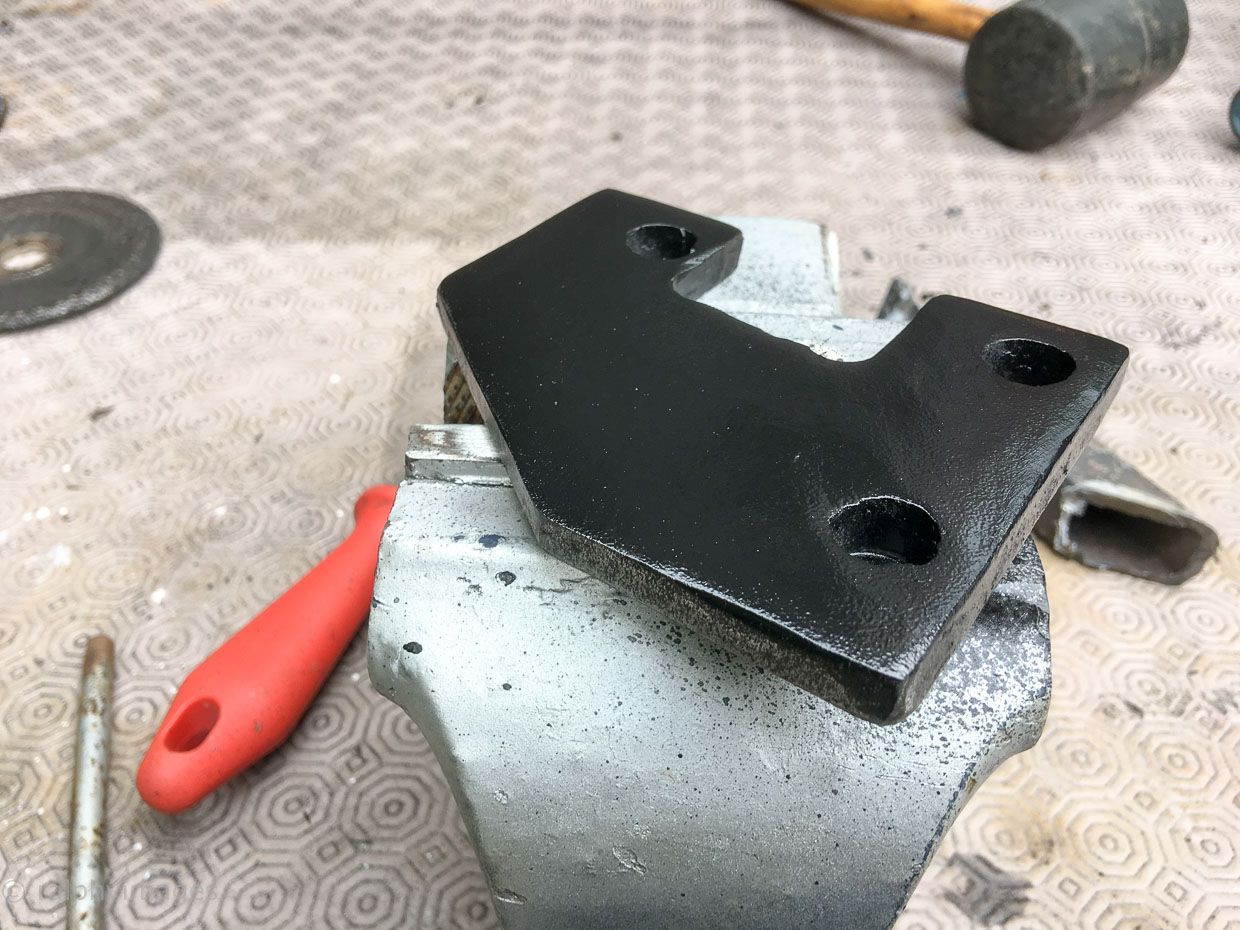
Remove the problem mount
The only solution I could think of was to break apart the complete mount and reposition it clear of the manifold.
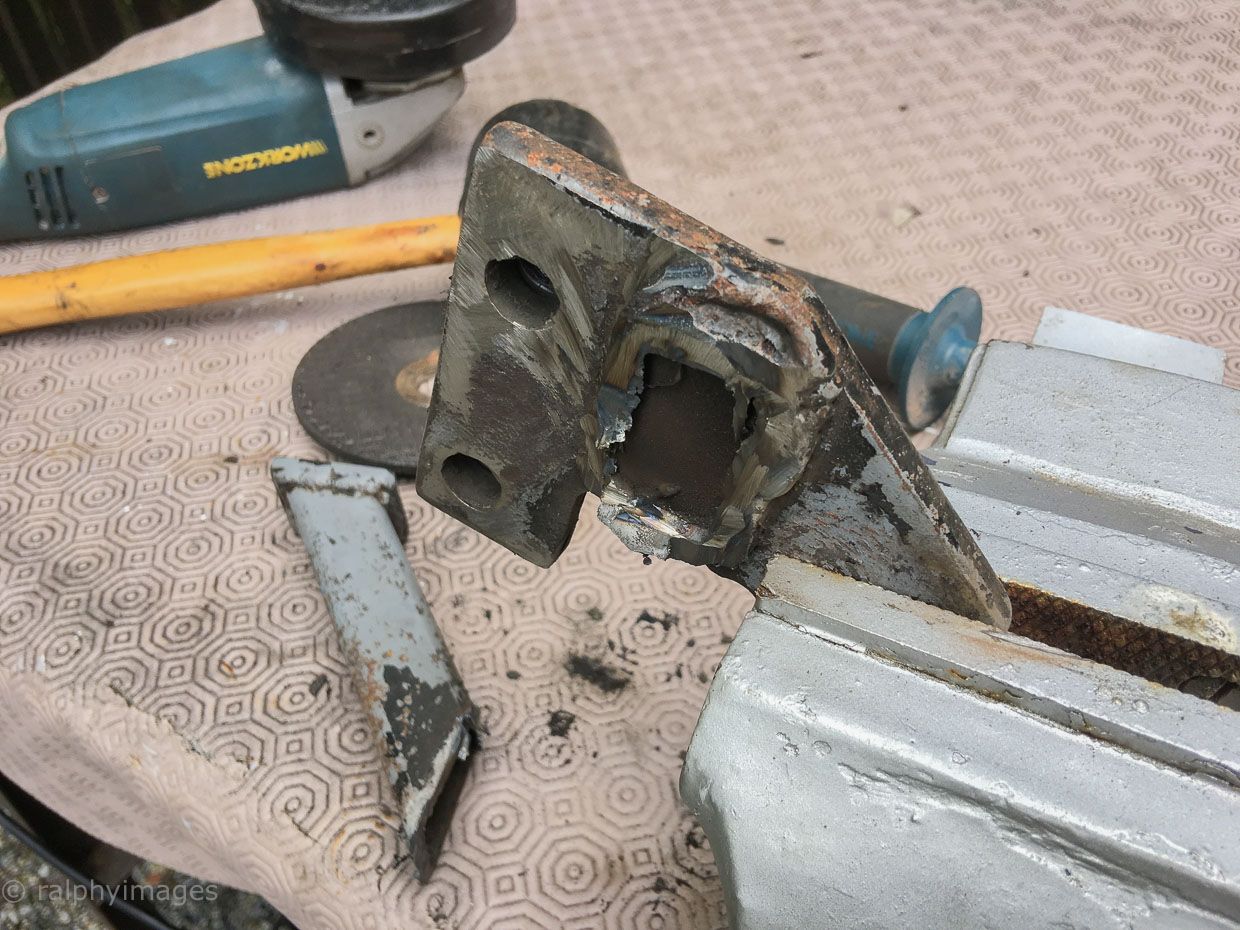
Cut the arm off the plate
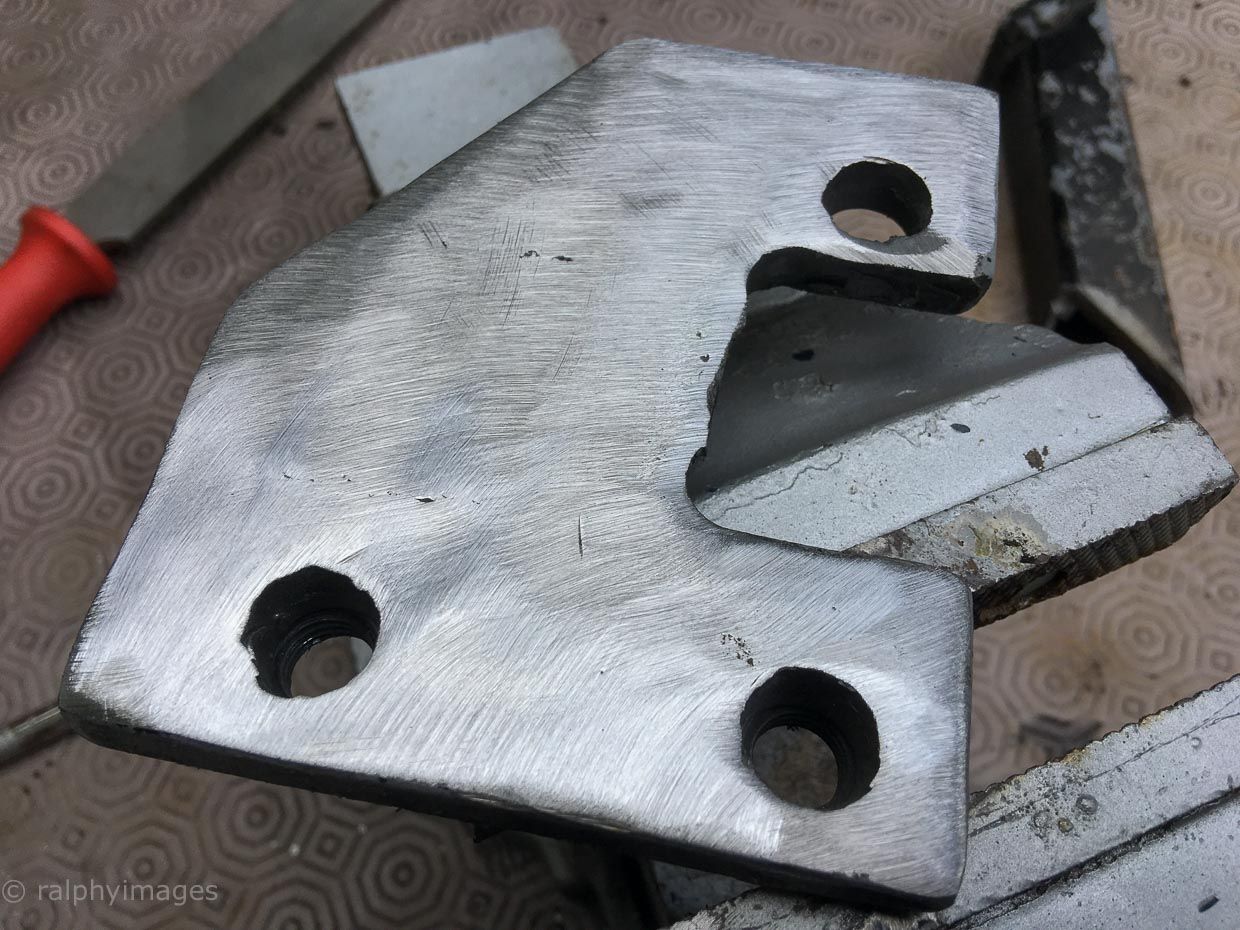
Clear off the face of the mounting plate
You can see it was a home-made on in the first place
A lick of primer (to facilitate marking it up with a scribe, once I'm happy with that I'll score the marks deeper and remove the paint)
Now the fiddly bit begins, mount the bracket on the engine, fit the manifold back on, make sure everything doesn't foul, mark up the plate, remove manifold & plate and then I'll have to modify the arm of the mount to sit correctly for the welding. And annoyingly, that'll have to be given to someone to do - I wouldn't trust my own attempt!
Tomorrow (weather permitting) the plan (ha) is to get started on sorting out the wiring and get some instruments fitted.
R
Ignorance breeds Fear. Fear breeds Hatred. Hatred breeds Ignorance. Break the chain.
Going to be amazing when it's finished
I had a wide body fitted with a redtop C20xe with bike carbs, that's blew the cob webs away in the morning
Can't wait to see yours finished
Sent from my iPad using Tapatalk HD
Wow- this is nice!!!
Sent from my iPhone using TZ-UK mobile app
Meticulous work - looking good
Good to see some progress Ralph!
Edit. PS, forgot, did you decide on the colour?
Last edited by magirus; 11th August 2017 at 08:04.
 Posting Permissions