

 Reply With Quote
Looks great Paul. You have a talent for this.


Assuming the best way to learn is to try, I've decided to attempt an homage to a watch that doesn't quite exist – largely because it can be done using parts I won't sob over if they get ruined. And maybe I'll get some experience along the way. Or break everything and give up, we'll see.
A few caveats. First, total practice ahead of this so far: removing and resetting hands a few times on an old broken Seiko just to get my hand in. Second, I may be covering well-trodden ground with these ramblings, apologies if so. And third, this may not be the fastest-updating thread given its dependency on a newbie and an inadequately stocked parts bin to draw from.
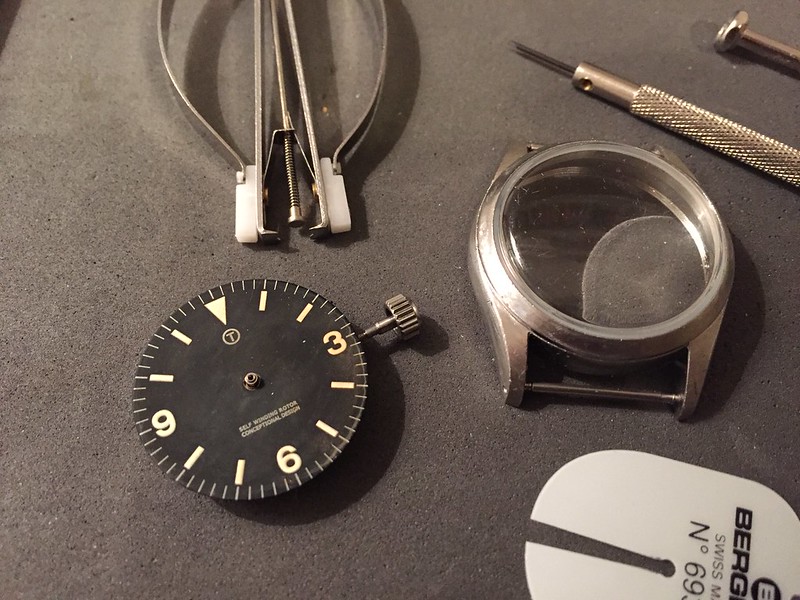
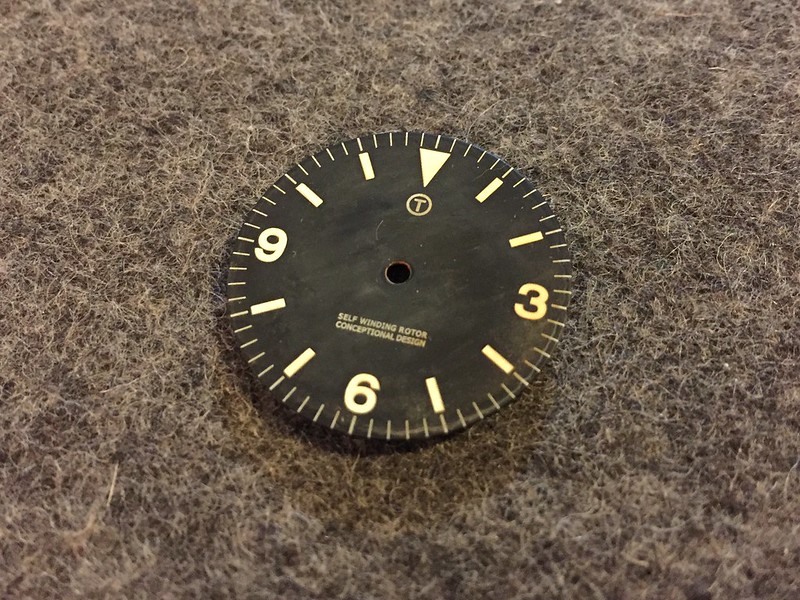
Anyway, after the Seiko I next pulled apart a Tiger Concept 1016. This is for a build I'll get to once I know a bit more about what I'm doing, but the dial and hands are now spare. Here they all are unsuspectingly awaiting removal from the DG2813 movement (and note the white lume and dial markers):
It occurred to me that the circled 'T' on the dial (inconveniently hidden in the photo above) is a little reminiscent of the Milsub 'T', but decided the 'TIGER' branding was getting in the way a bit. So I took a teeny dab of cutting polish and a duster to it – masking the T with some tape – and rubbed out the words. This worked brilliantly but left a little shiny patch on the otherwise matt black finish that needed covering up. More on that later.
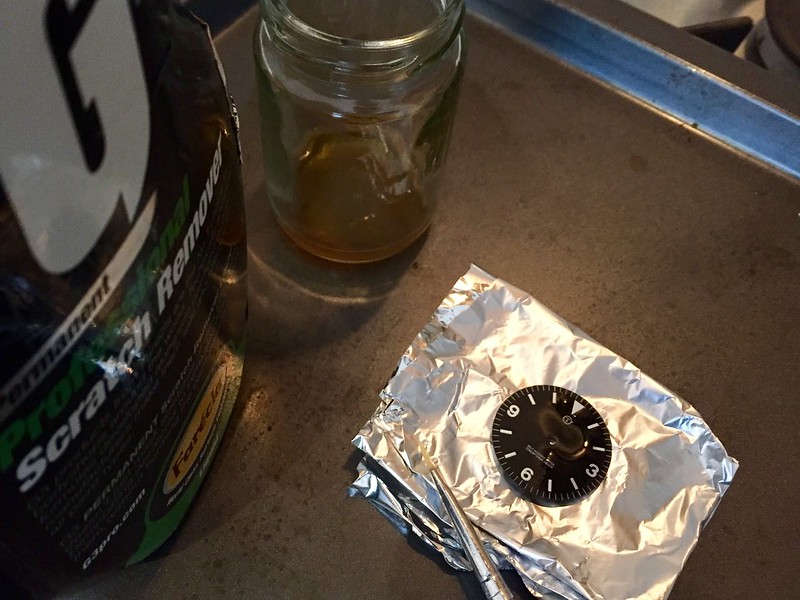
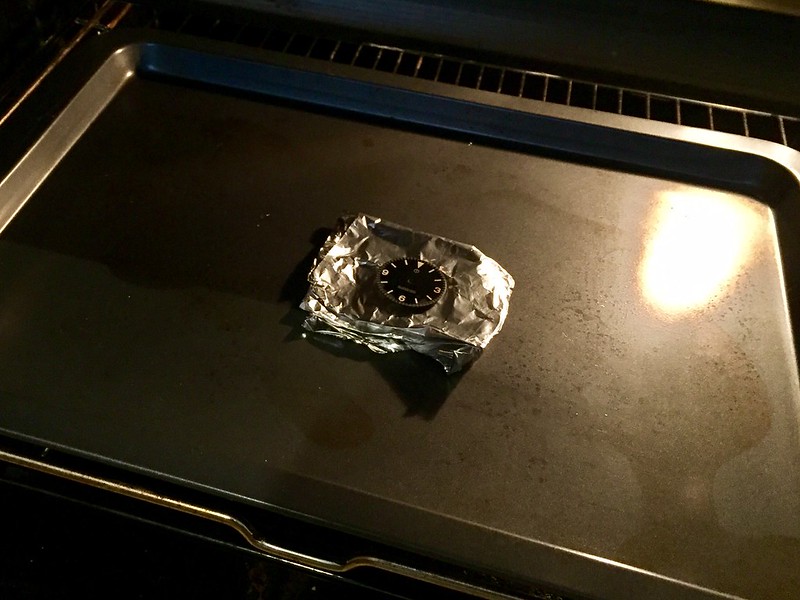
I then preheated the oven to 100 degrees and mixed up a small pot of 'brown' – in this case a cocktail inspired by various forum posts read in recent days: three drops of iodine and a few healthy squeezes on a teabag otherwise spent after its cuppa duty. A folded up piece of foil held the dial level while I painted the solution on:
I kept going until the whole surface was coated with a bubble-like film of fluid (I did the whole dial rather than just the lumes in the hope it'd deal with my that shiny patch) and then slid the tray into the oven... not without fear, I might add:
Checking every ten seconds like a child waiting for cupcakes to rise, I left the dial in only for long enough to dry the fluid. Then gave it another coat and repeated. And one more. After that it (a) made the lumes look creamy enough, (b) covered up the shininess and (c) gave the dial face a lightly sunbleached texture (there are a few spots of dirt in the mix in the following shot):
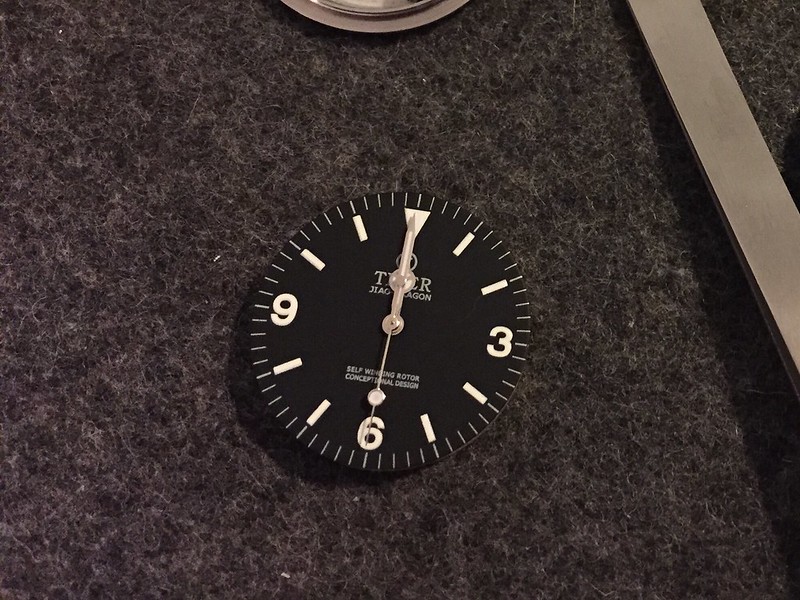
Pretty pleased with that. Also, to my point earlier about 'homage to a watch that doesn't exist' it has the beginnings of vaguely military Explorer look (ok, maybe it doesn't, but it's kinda cool anyway). Next, the hands got the gentlest scrub with a small file to take away the gloss before a coat of the brown – and these I left out to dry naturally. They may have turned out a bit too orange tbh, but the unbaked solution will wipe off so I'll lighten them off at some point, the hour and second hands especially:
Now we pause to find a case. And that's why I have a WTB post for an old or unloved Tiger 1016 or Alpha Explorer that I can (with a clear conscience) beat up a little – and maybe fit a low-dome acrylic crystal to. Or maybe find a 6538 Sub, whatever turns up. In any event, I'll update once I've found a something to bolt it all into.
Last edited by paulrgn; 17th January 2017 at 00:06.
Looks great Paul. You have a talent for this.
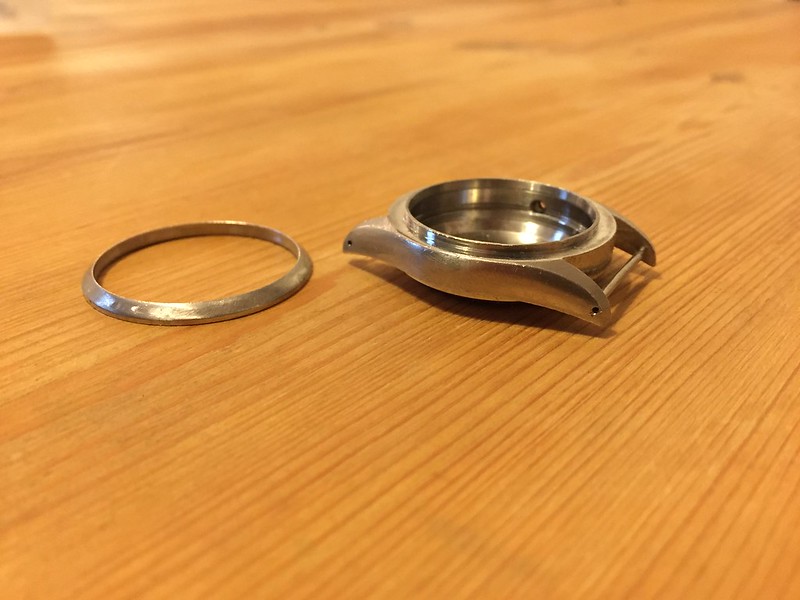
Bit more work on this today. Picked up a cheap Explorer-style case on eBay the other week for about £30. First job was to pop the flat mineral crystal to measure up for a (deliberately) cheap domed acrylic replacement. You'll see this in a bit.
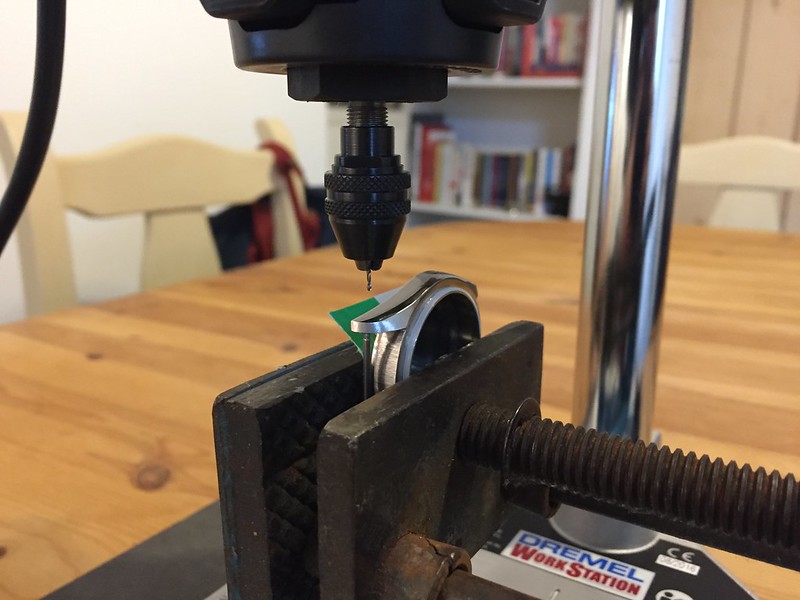
Next, stripped case gets clamped in a vice and lined up by eye with a drill bit hanging from my Dremel. This was an experiment in whether I could add the missing holes you'd usually find on a 'proper' case – not, I hasten to add, to necessary succeed in drilling through to meet the spring bar holes on the other side, just for the effect:
This was a terrifying job. I managed the full set of four 'pilot' holes with a 0.8mm bit and decided that was far enough. I wasn't building a fake here, just a 'nod' – and from wrist distance the little holes did a job (if not the job). Without the accuracy benefit of a lathe I collected a few extra marks on the case but these were easily covered up with a little light reshaping:
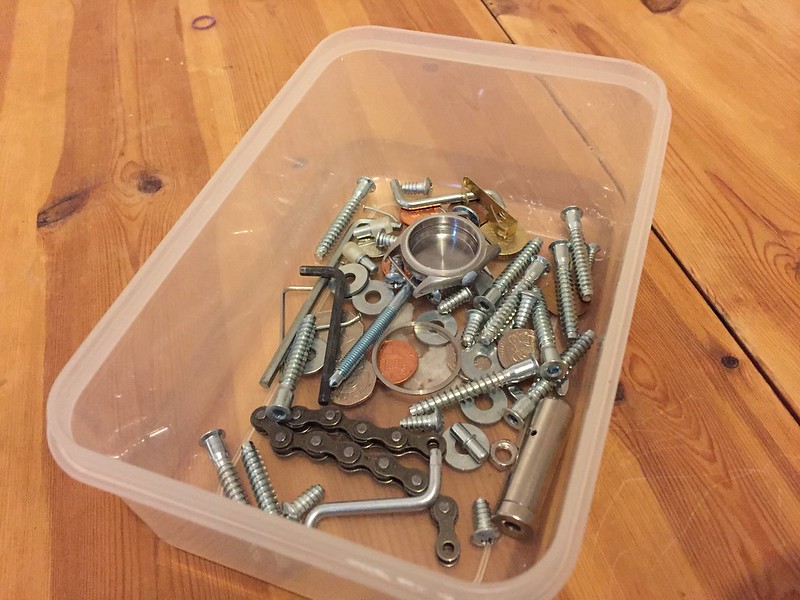
Before I polished out the resulting 'mess', the case needed some age. I filled a plastic lunch box with an assortment of screws, allen keys, coins and an old left-over bit of chain from a vintage bicycle build before placing the case and bezel in the mix and affixing the box lid:
Note I stole an idea from somewhere on the internet to stick a little Blu-Tack over the crown tube to protect the threads before shaking the hell out of the contents, resulting in about 20 years-worth of heavy use in 90 seconds. An odd feeling, that – even though it was a cheap case I still felt a pang of discomfort doing it. Anyway, a light going over with some fine-grit paper and wire wool and we were getting somewhere:
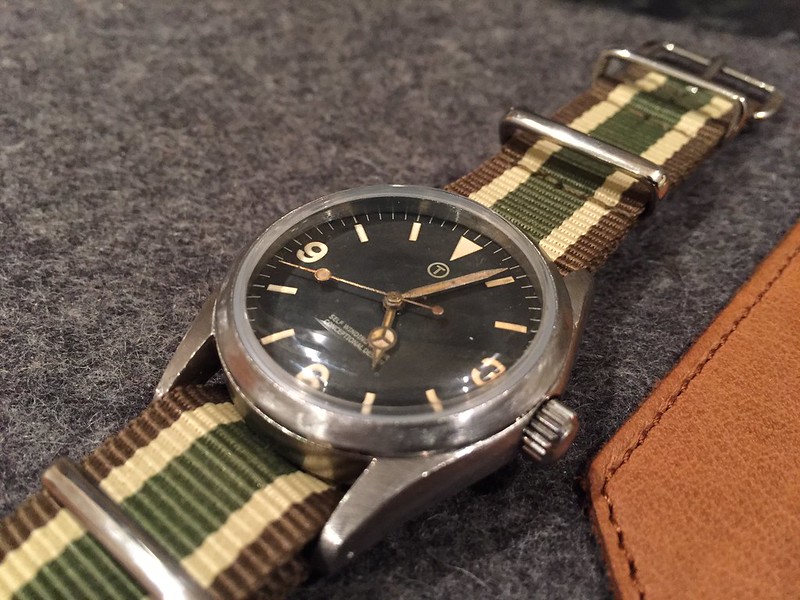
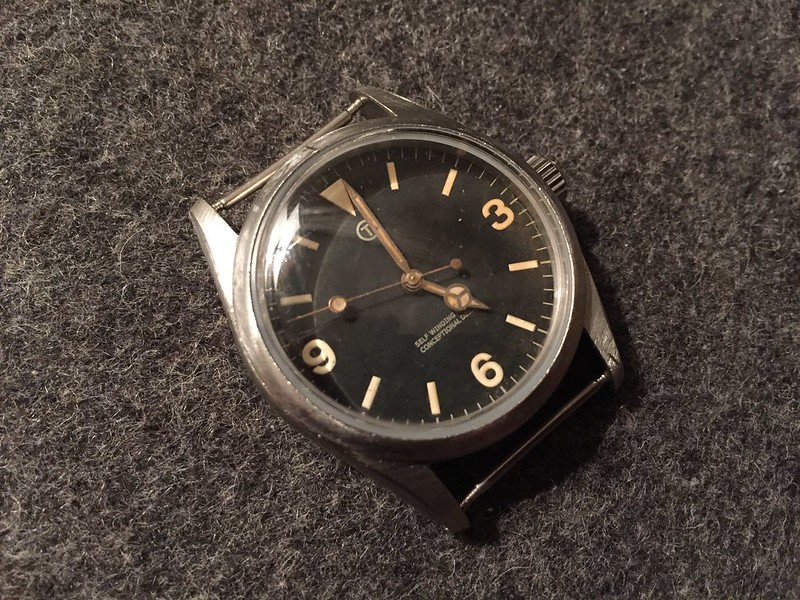
Now to retrieve the dial and hands I'd pre-prepared with tea and destruction. These I assembled onto a DG2813 movement going spare after being removed in favour of an ETA in another upcoming build. You can also see the aforementioned acrylic crystal now in pace too:
After a quick wipe over the DG was slotted into its new home, along with stem and crown (which too had seen a little beating up with sandpaper). The end result got final touches from a drop of Brasso and a suitably military-themed stripy NATO. Not a bad outcome:
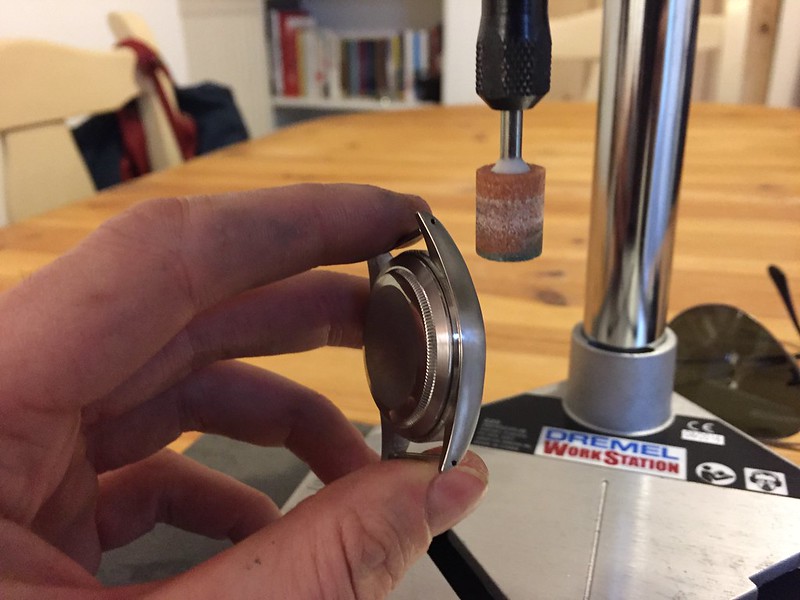
Some things learned: bezel removal is super-easy with only a decent Stanley blade and some care. Drilling lug holes is a mugs game: first and last time I'll do that. Probably. And practicing watch modding a 'patina build' is a great way to make ham-fisted mistakes and get away with it. I now definitely have requisite confidence to move on to Seiko mods and dabble in dials and hands on ETAs. Just without the oven and box of nails...
Last edited by paulrgn; 12th February 2017 at 10:02.
And one more pic, head only:

I think that looks excellent. Very well done and thanks for the interesting read.
Interesting read and a great result. Well done.
 Posting Permissions