Reply With Quote
I don't think it was designed for forced induction. Just typical German engineering from the time before the bean counters ruled.
Dave


Good stuff! I have enjoyed following this thread
2 things: getting the cases/componenblast cleaned? and I was surprised to see a single link camchain as opposed to a (stronger) duplex which would have spread the load over those cam sprocket teeth...thought Porsche used those.

I don't think it was designed for forced induction. Just typical German engineering from the time before the bean counters ruled.
Dave
Cams don't actually take much force to turn. Think about a belt - a simplex chain is plenty strong enough.
The chain in the middle also helps with the torque along the length of the cam.
I'll be cleaning the cases by hand, but this isn't a restoration out concourse build - I actually want my daily driver back!
Dave
Very interesting thread, I shall keep an eye on it.
I wish I had the ability to tackle something like this!
Unfortunately mine has extended to opening my wallet and having Mr Porsche reach in and extract money!
I'd love to see the internal condition of my engine, just for intrigues sake.
I've seen inside my gearbox and it was a £££ experience...!
Love this thread Dave, please keep it going. Really interesting and kudos to you for attempting such a job.
Sorry that was the 2.5 wasn't itOriginally Posted by Dave S

I see they've now crept north of £20k for fairly average examples. Prices can only go up :-)
Lots of boring cleaning now. I'll try and post some pics tomorrow, but if your interested my twitter feed has some - @solutionsbydave
Dave
(Oily, and smells of turps)

I can certainly relate to the 'oily smell' comment! Whilst doing my MG engine I got thoroughly sick of the smell of oil and white spirit. My garage is attached to the house and the smell crept through to the kitchen......wifey started to complain at this point so I thought it best not to tell her I'd been using the oven to dry parts after cleaning
Apart from an annoying problem with the exhaust manifold ( gasket not sealing) my MG's now running like a good'un. Starting an engine for the first time after rebuild is daunting, it's a huge relief when it runs properly and everything's OK.
Hang in there and don't forget to update the thread; I've no doubt it'll cost more than you planned and I'm sure it'll take longer than expected, but in the end you'll know it's been done properly and that counts for a lot.
Paul
Quote..wifey started to complain at this point so I thought it best not to tell her I'd been using the oven to dry parts after cleaning
Pal of mine cleans motorcycle carbs in the dishwasher, usually when his missus is out!
Several years ago, whilst rebuilding a TR6 engine, I needed to warm the pistons to ca 200° to get the gudgeon pins to fit. Wifey was out, so I placed them on a baking tray and put the gudgeon pins in the freezer. 30 minutes later I took them out and they looked just like a tray full of pies. Fitting the pistons to the rods was simple, the pins just slipped in nicely to give a tight fit after cooling. Oven smelled a bit but that soon disappeared.
Sometimes you have to be resourceful and think laterally........but these tricks are best carried out when the other half's not around!
Paul
Been quite bad at updating this thread. Sorry.
However tonight I got the upper balance shaft and housing back on. Hurrah.
That's 3 seals done :)
There's a photo on twitter (@solutionsbydave)
Think I need to find a better way of getting photos of my phone and hosted so forums can see them. Suggestions?
Dave
Dropbox (mobile will upload to there automatically), upload from Dropbox into an image site and link to there. One extra stage.
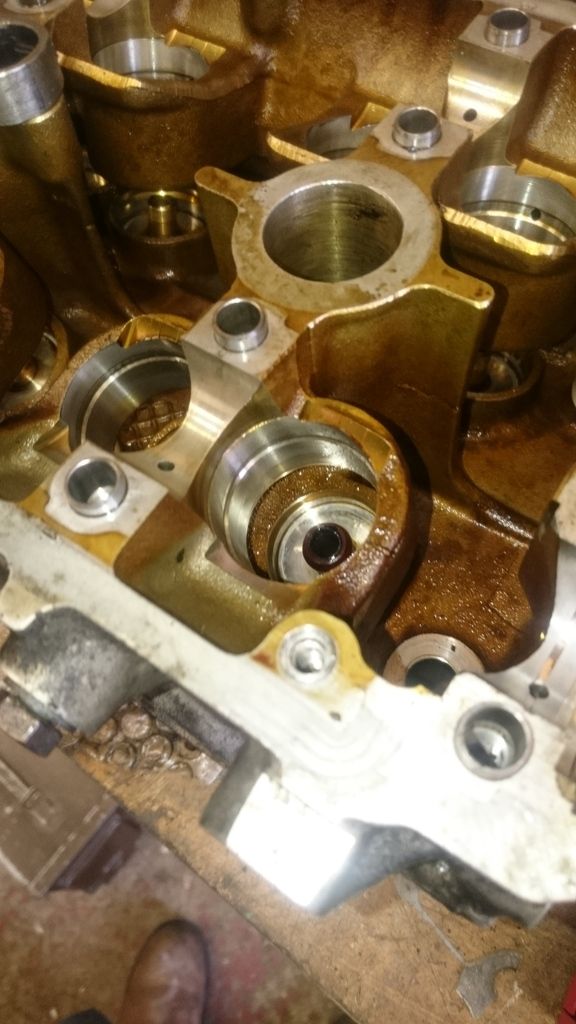
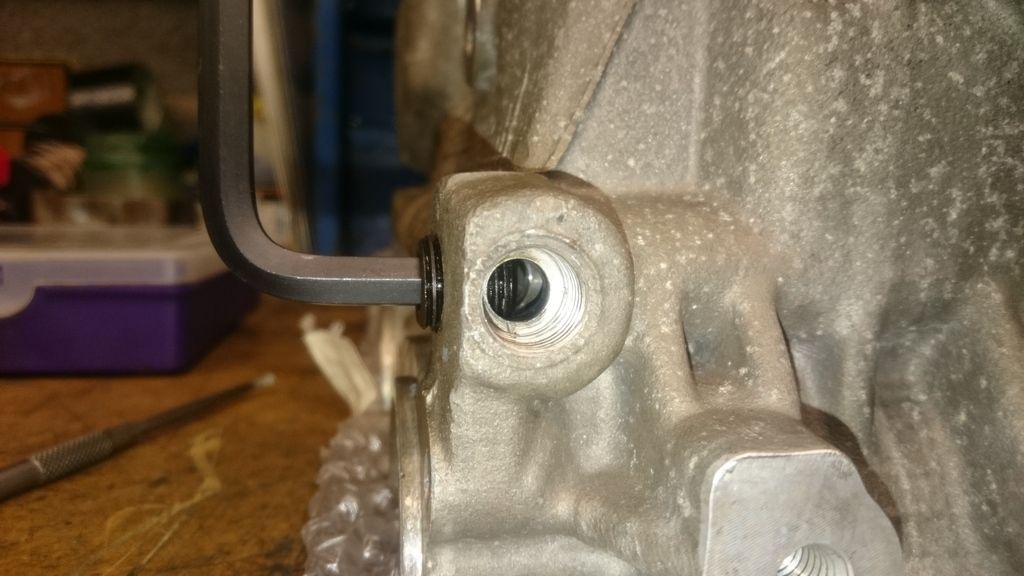
Porsche want over £600 for this casting. It holds the front bearing for the lower balance shaft, and also the PAS pump pivot which was unfortunatly damaged in removing the engine from the car.
Fortunatly the fracture makes a good key, and I found the missing piece.
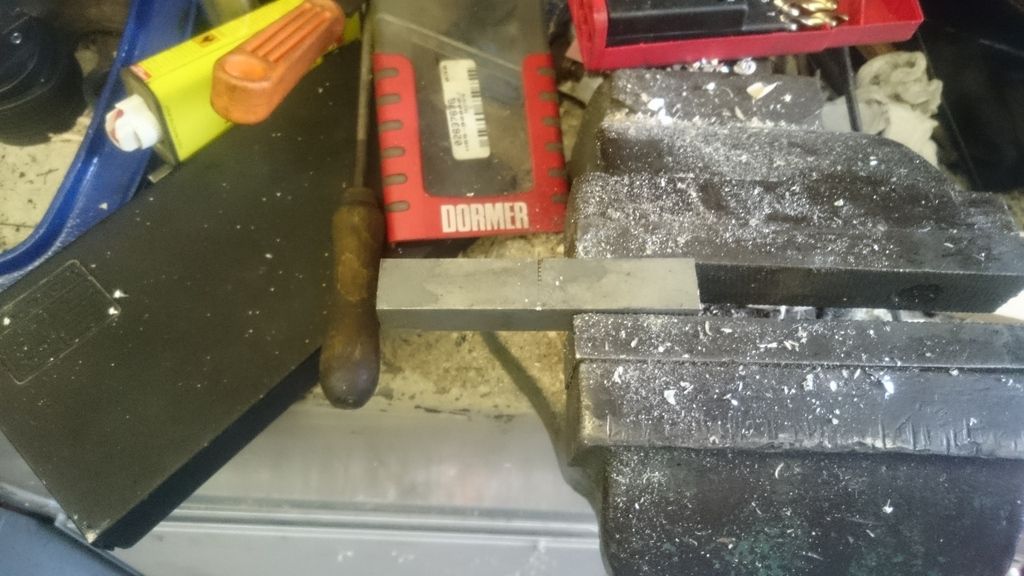
So plonk in the mill and make some holes:
Breakout a watchmaking tool - a small tap (M2)
Tap the holes
Mix up some epoxy
Glue and 2 bolts
cleaned up ok.
Once thats set Ill change the seals and refit the lower balance shaft housing.
Dave
Great thread!
I am full of admiration.
I did something similar with my 50 year old Land Rover but at least all I needed was a hammer, mole grip and some imperial spanners!
Good luck
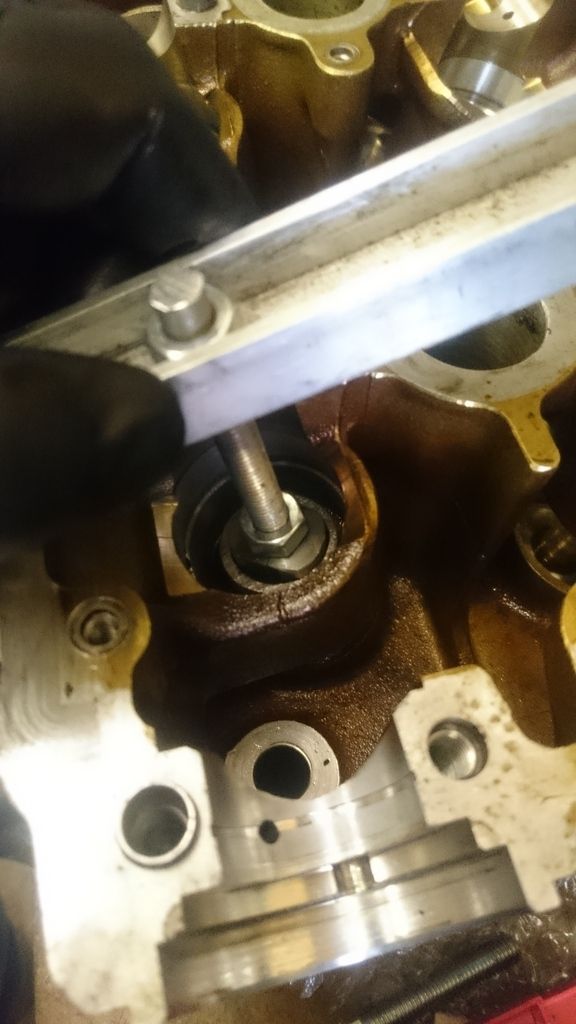
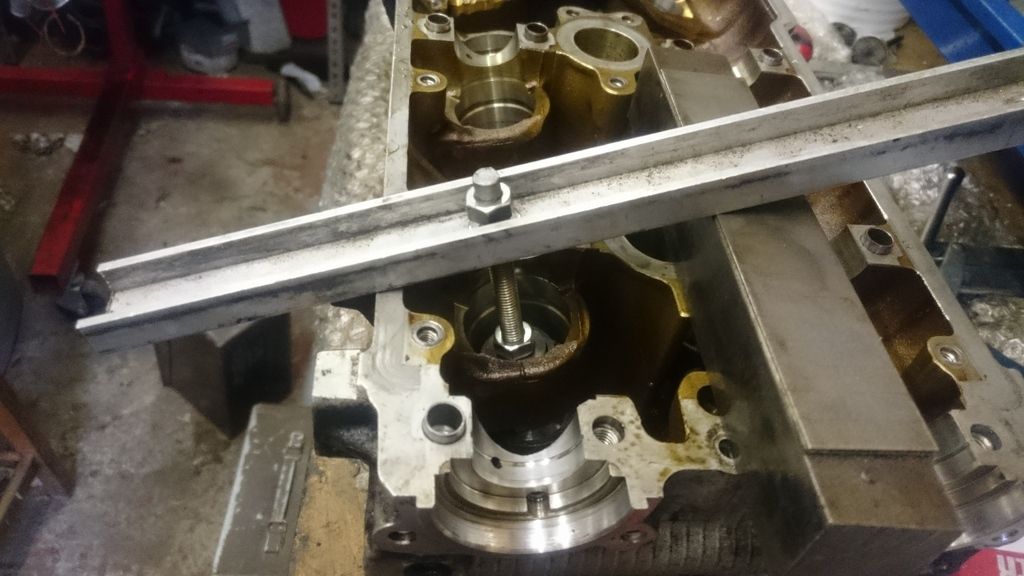
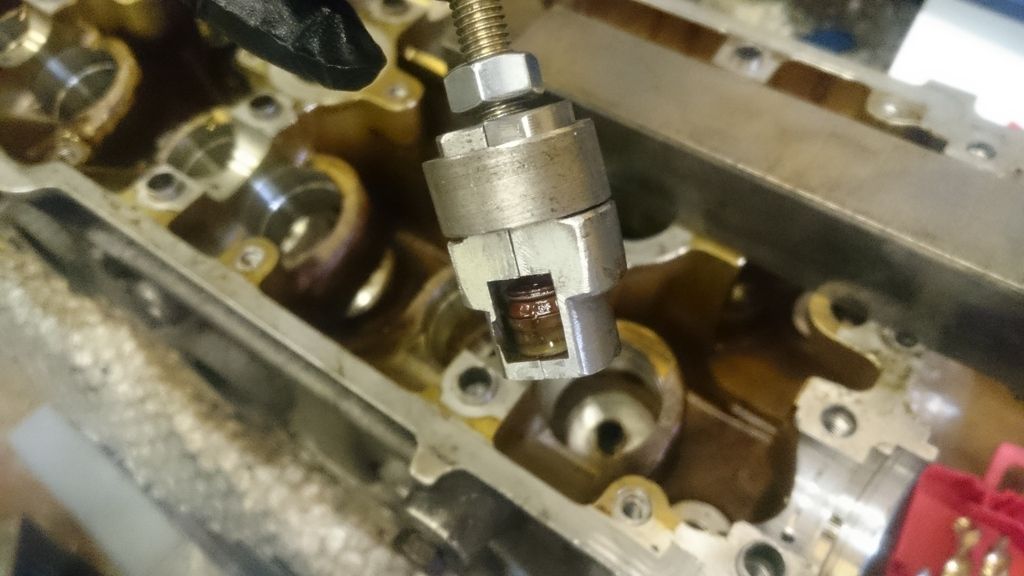
So tonight was sort out a little oil pipe and its seals.
I asked on another forum I frequent (for 968 owners), to be told that they were cheap, and a bugger to get out so to remove it with whatever force was necessary...
I had an idea that should work, so nothing ventured, nothing gained. (in this case about 2 pints gained :) )
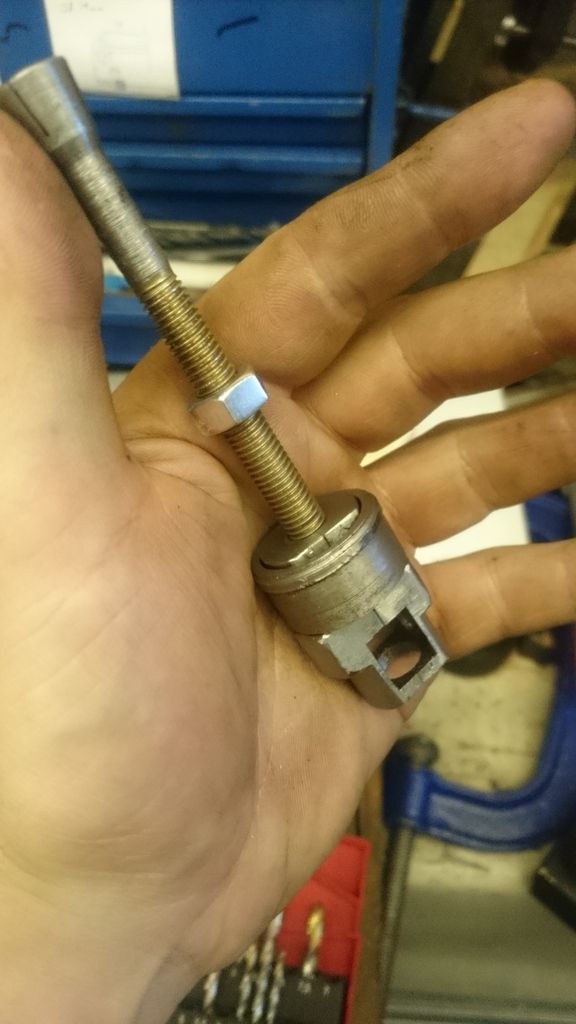
Some time ago I needed to bolt a gun cabinet to a wall. nothing fancy, but it had to be secure.
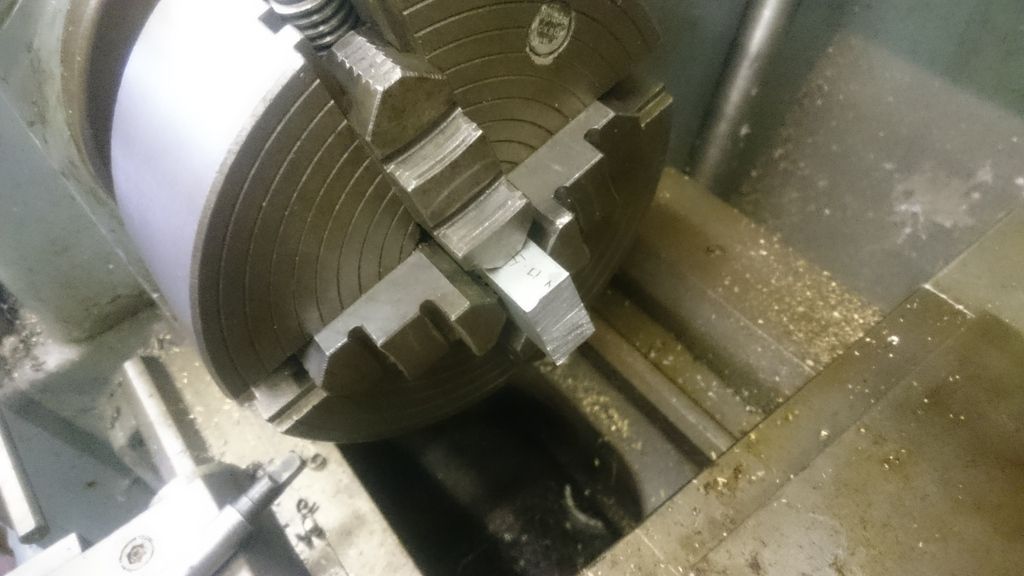
So I bought some of these expanding rawl bolts:
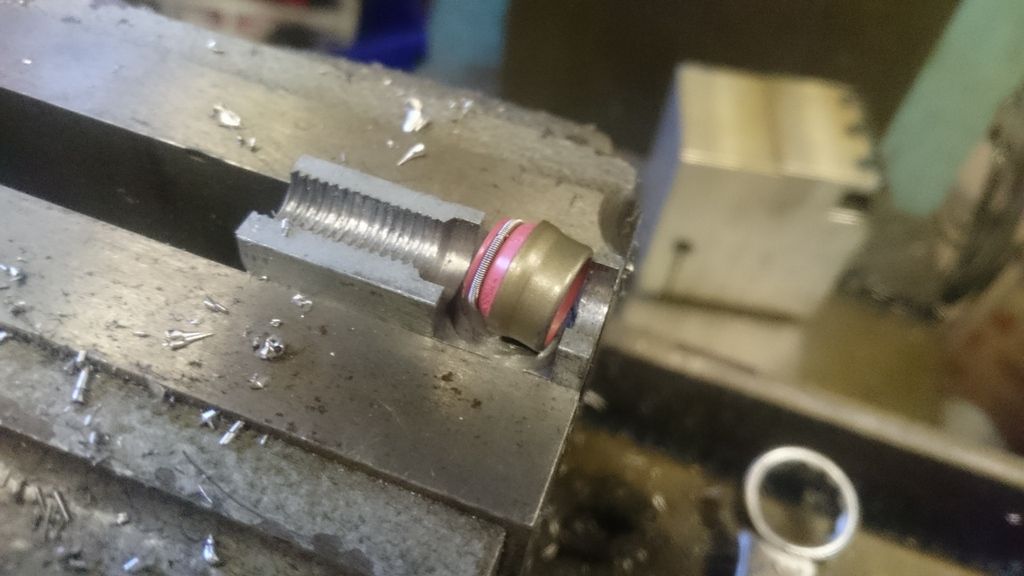
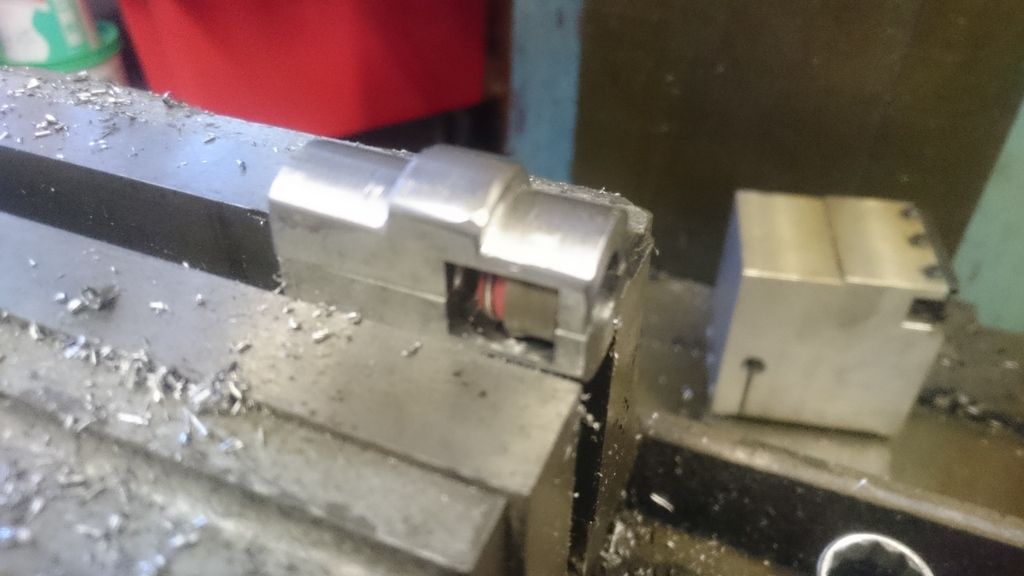
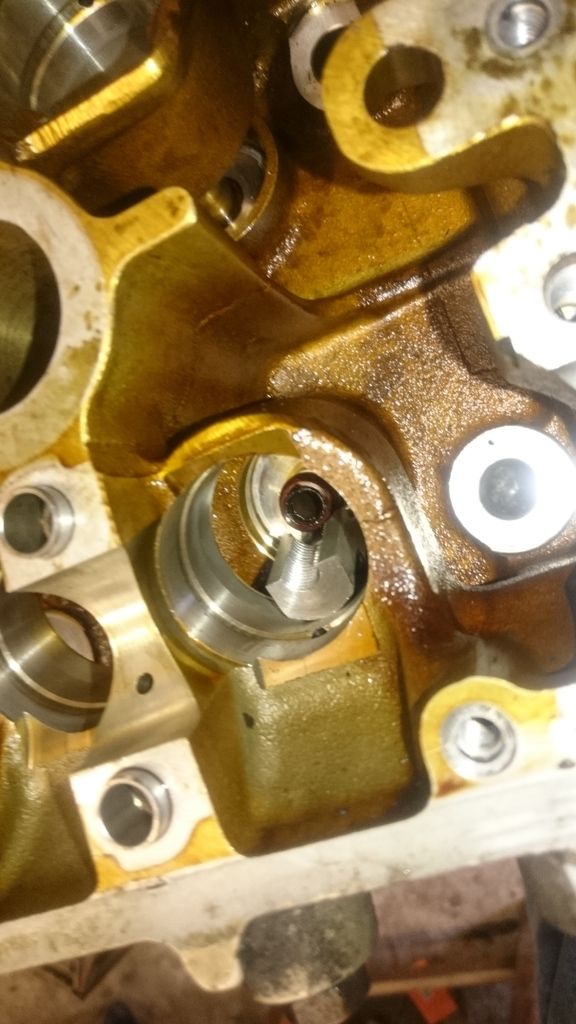
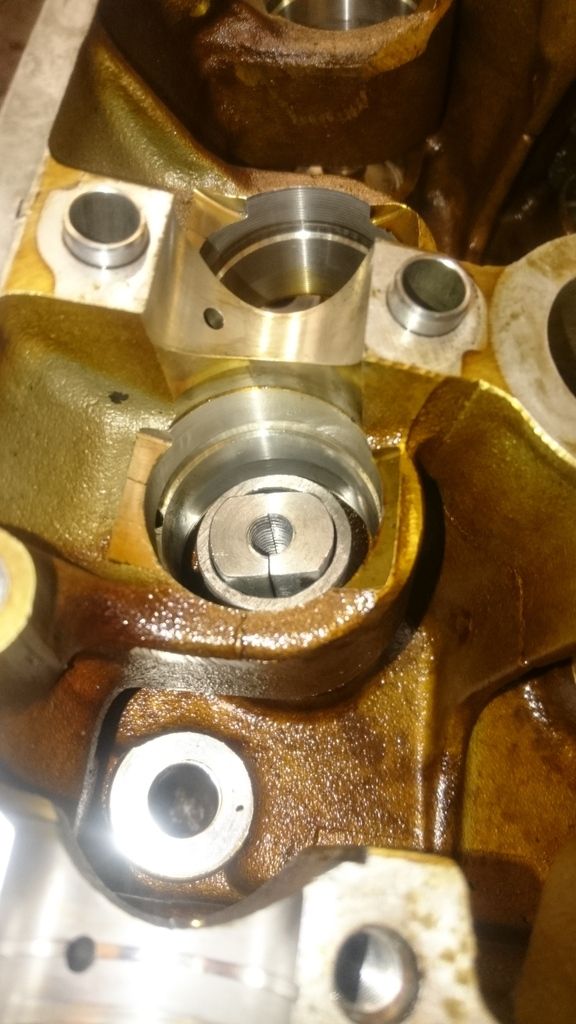
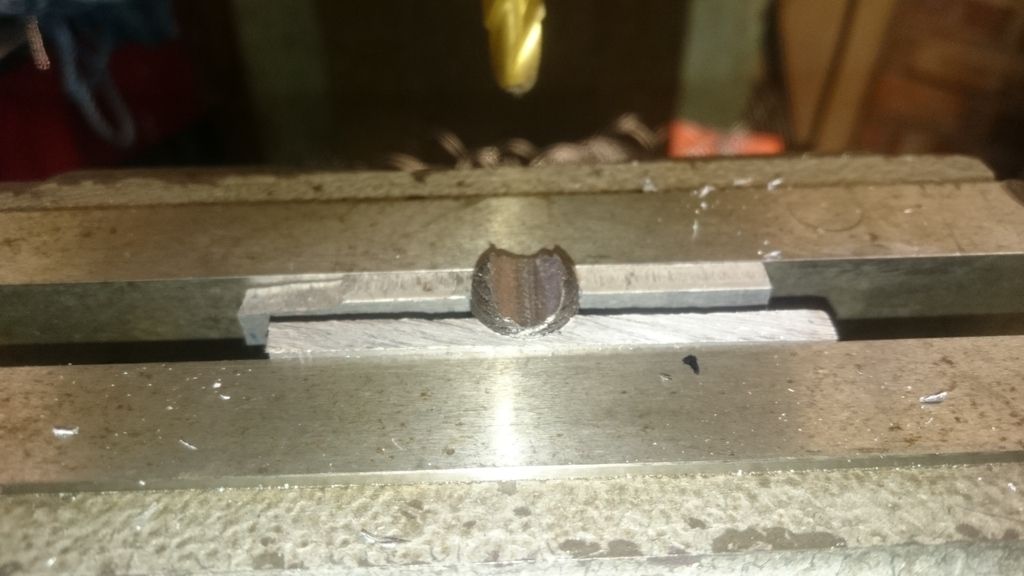
They happen to be the perfect fit into the oil pipe:
Careful not to grab the block, tighen it up so it grips the pipe.
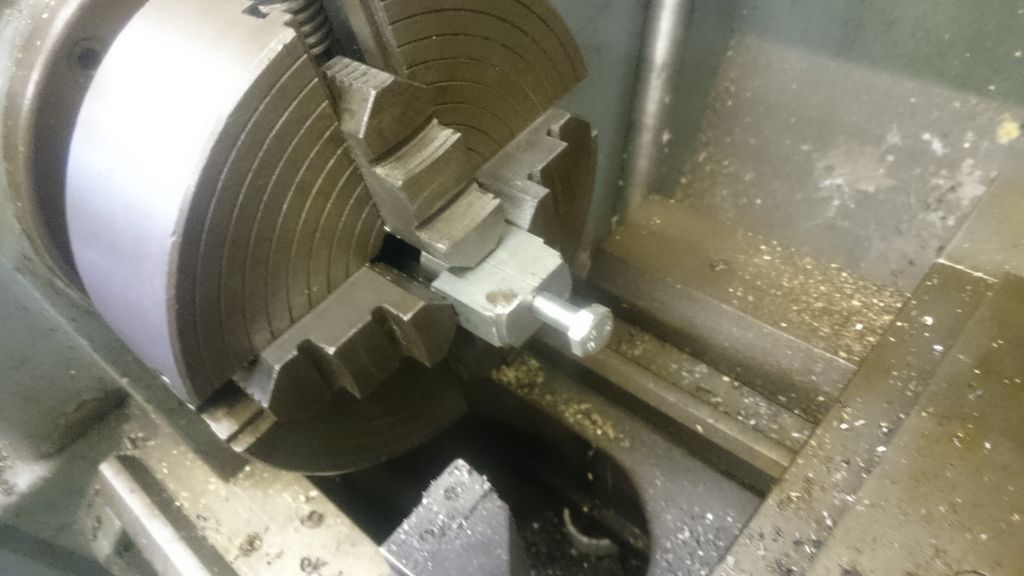
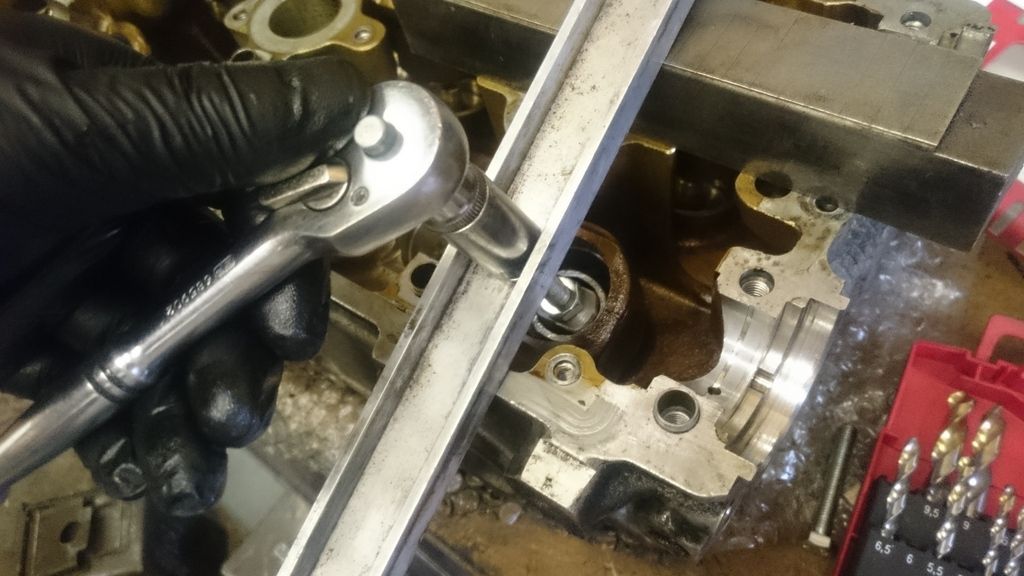
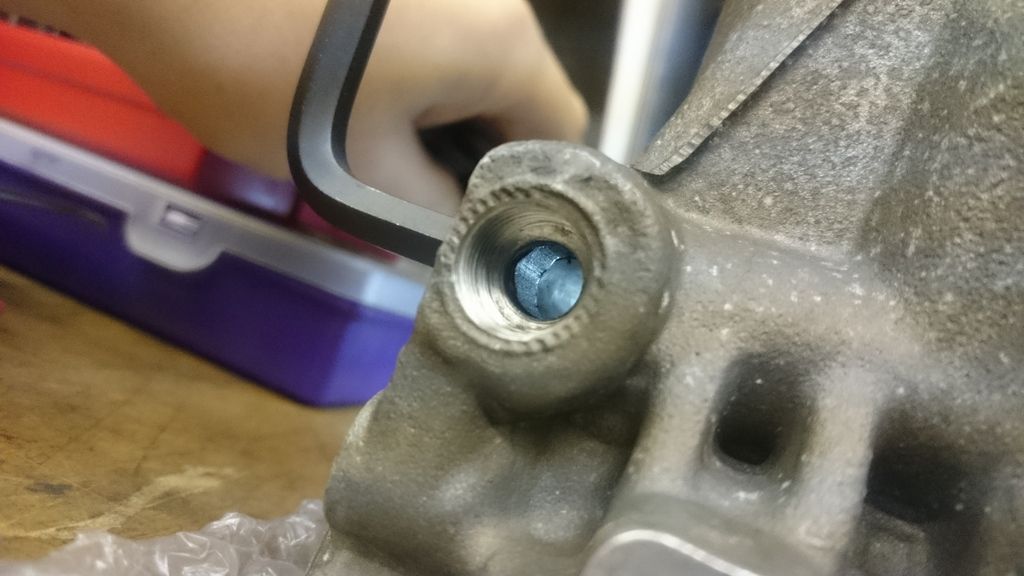
Then root about and find extra deep 32mm impact socket (I cant remember which car that needed that, but it was one of those jobs where only that will do)
Add a couple of washers and tada:
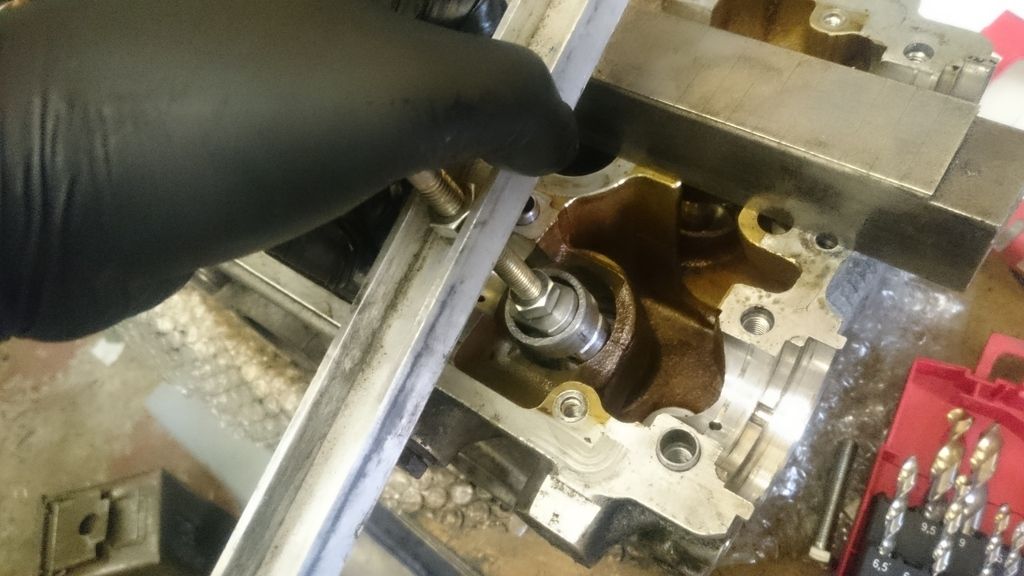
Oil pipe puller. Just tighten the nut and it gently pulls the pipe:
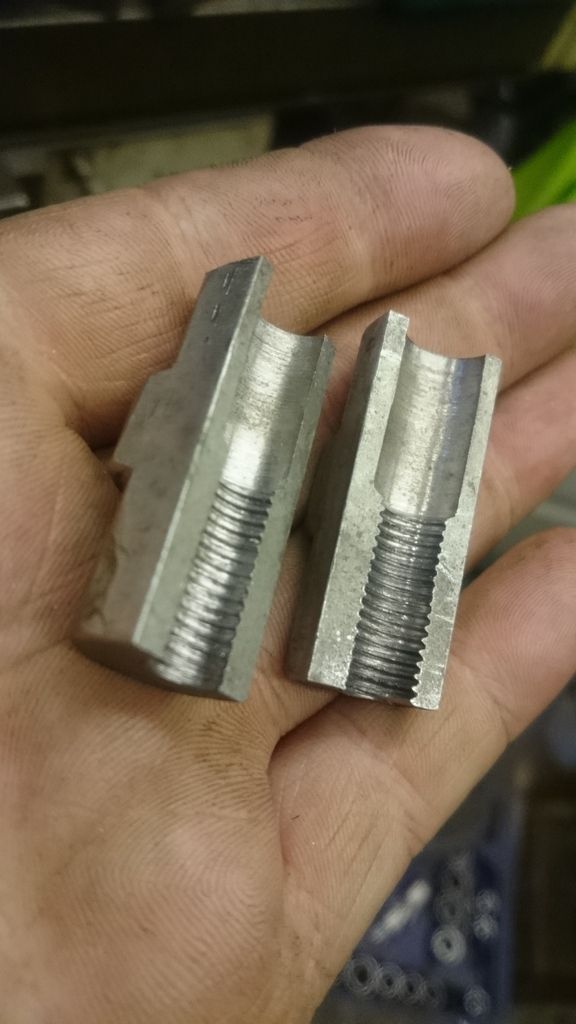
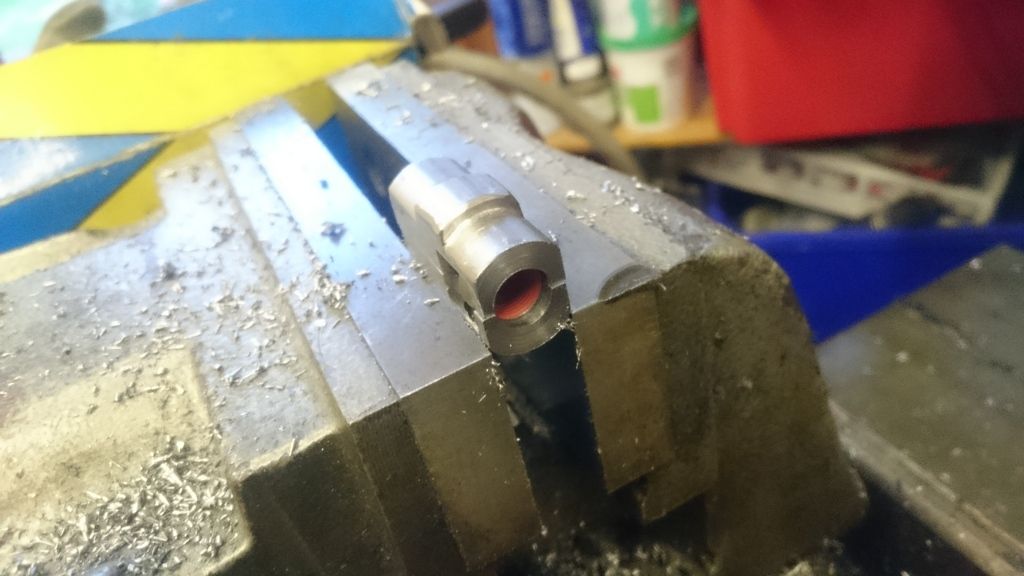
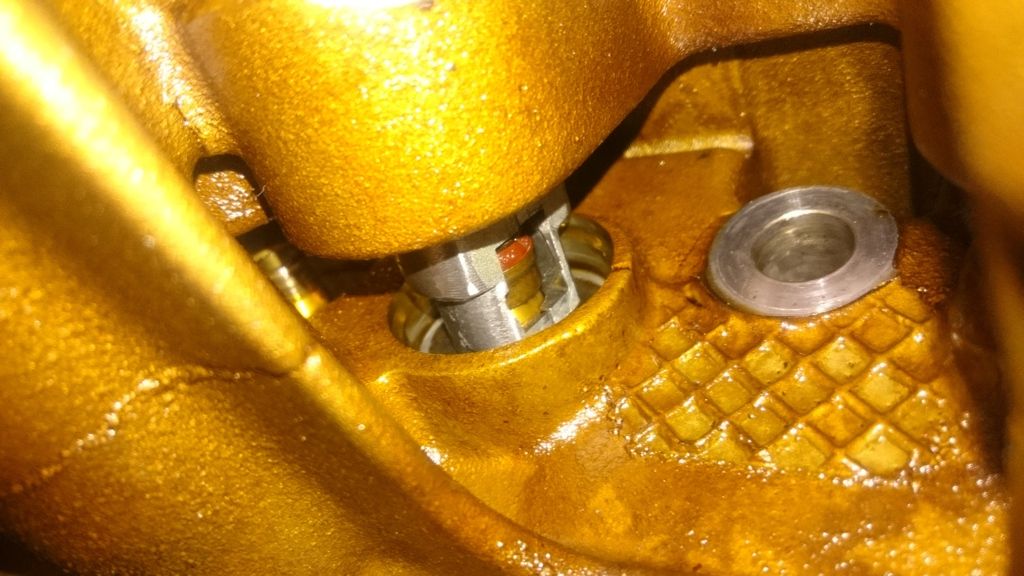
The seals were no longer rubbery, and square in section, not round o rings like they started.
I cleaned it up a bit:
And fitted the new seals:
Reassembly, as Haynes would say is the reverse of removal...
Dave

You're in exulted company gentlemen using an oven...
This from Pitpass.com about Sir Jack Brabham
http://www.pitpass.com/56076/Greatness
"In Spain, Jack had a valve seat fall out because the wrong material was used by a sub-contractor and the valve seats were shrinking. Ron Tauranac says, "It was at the Belgian Grand Prix when this became clear. After practice on the day before the race, we stripped down an engine and discovered the problem.
"Jack contacted John Judd at the Brabham Racing Organisation with a request to make new valve seats, he then flew his own plane back to England with two cylinder heads and collected the valve seats. To fit them, he heated the heads in his kitchen cooker so that the seats could be shrunk into place.
"At three in the morning on the day of the race the smell of baking metal woke Betty Brabham, who was convinced that her house was on fire."
Like Lewis, Jack was a triple World Champion. Unlike any other World Champion, Jack had stripped down his engine, discovered a problem and had set about rectifying it in under 24 hours. Only a genius would have realised that his own kitchen cooker could do the job. Even in 1968 every other team would have sent out for help."
Geran, Missed this question. Yes it was. and it ran fine <eek>
Ive mostly got through my big box of seals, only to find that some of them are not included. A couple of these are for the Oil pressure relief valve.
For an engine block seals kit that's a bit of an omission IMO.
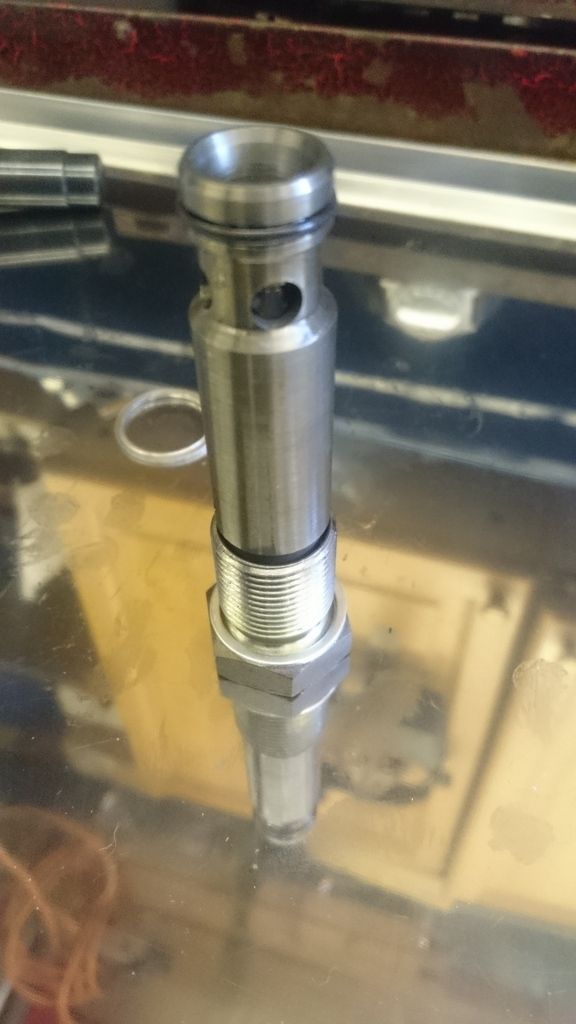
Anyway OPRV housing is back on.
There is a special tool:
the gasket goes on:
And then the housing is bolted down with the tool in place:
you have to be able to unscrew the tool by hand - this ensures the OPRV is aligned and wont stick. A sticking OPRV can cause the oil filer seal to blow out, and spray hot oil on the exhaust manifold.
I really don't want that!
Next up rebuild the OPRV and bolt on some more stuff...
Dave
For those of you idly following along I've made some progress. The block is all back together, and I've started on the head. I've not uploaded photos to update this thread, but there are pics, and a semi live update over on twitter ( @solutionsbydave ).
Made a puller for the valve stem oil seals tonight. Couldn't see any way to get them off without a special tool, so after a dose of thinking I dug out some scrapbinium and made busy with the tools.
Some photos on twitter, I'll try and put them up on photobucket and do a proper update this week.
Making the tool took about 2 hours. Removing 8 inlet valve stem seals took 15 mins, and no damage to anything. I expect the exhaust ones will take about the same :)
Getting there slowly
Dave
Please do upload the photos when you get a chance, Dave.
I'm fascinated by this thread, and your abilities. I can only dream lol
Loving your turn of phrase, Dave.
'Idly following' describes me perfectly; a 'dose of thinking' should be applied more often; and it took just a couple of miliseconds to figure out 'scrapbinium' but it's the perfect word.
Keep it up!
Just seen this - brilliant thread.
Reminds me of youthful days rebuilding engines, albeit simpler.
Re the kitchen stuff, I remember putting a new ring gear in the oven to expand it before fitting to the flywheel.
Cheers,
Neil.
Long over due photo update for you all. Enjoy.
Last bit on the block was to rebuild and install the Oil pressure relief valve:
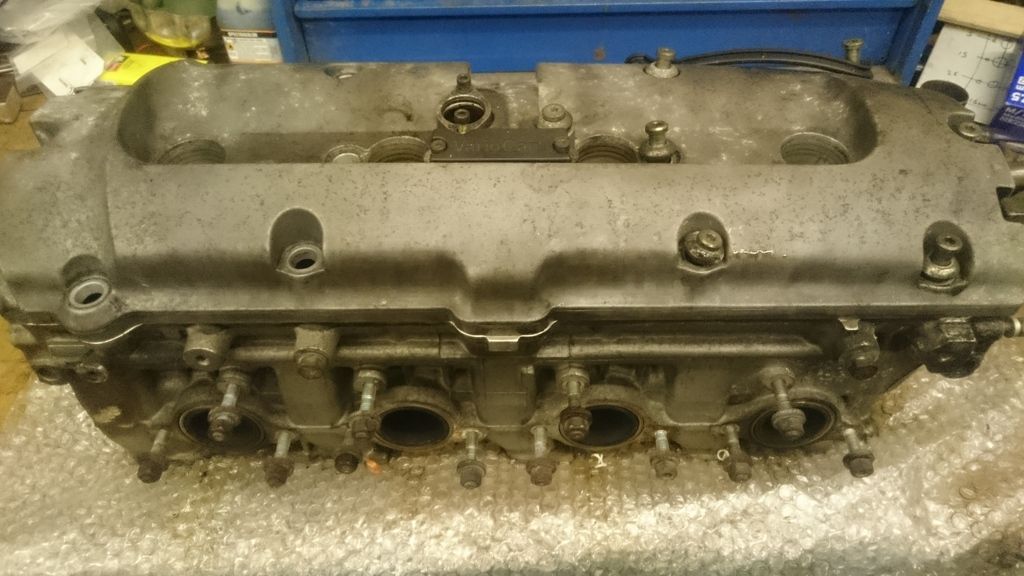
Then onto the Head.
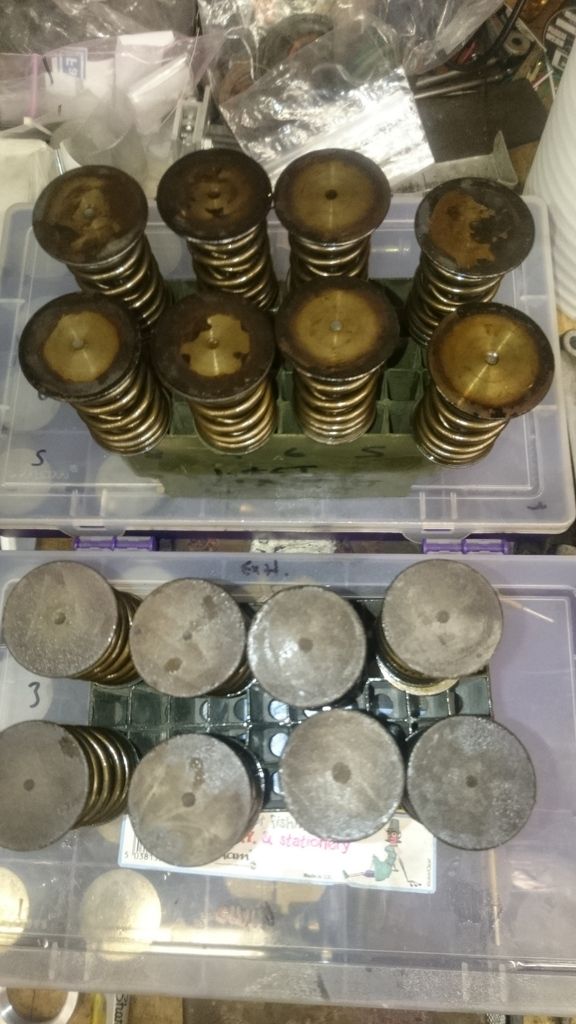
It was still very oily, so I set it to drain over a tray:
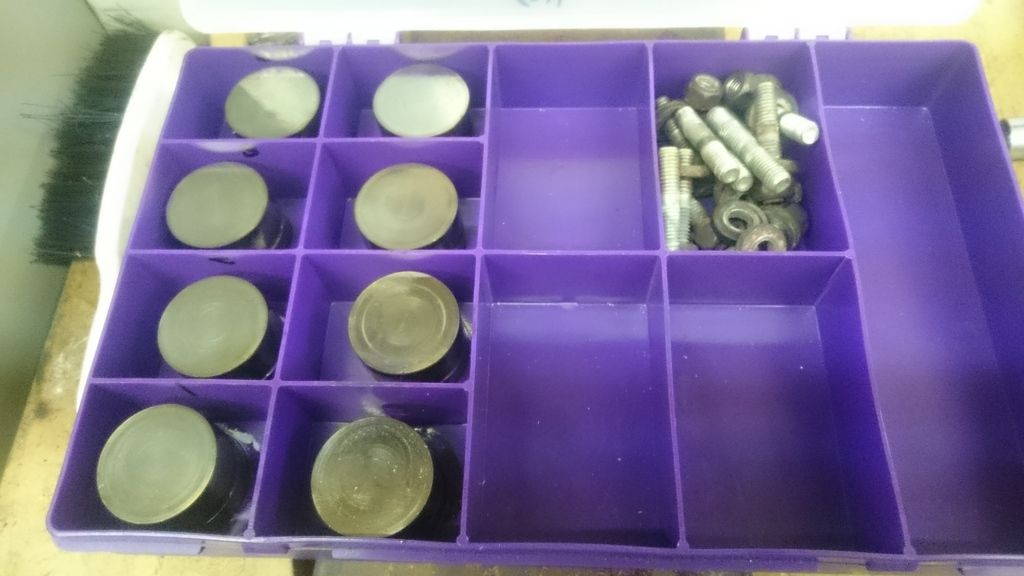
I pulled the hydraulic tappets. I have some of these boxes to store watch parts in, ideal for keeping things in order.
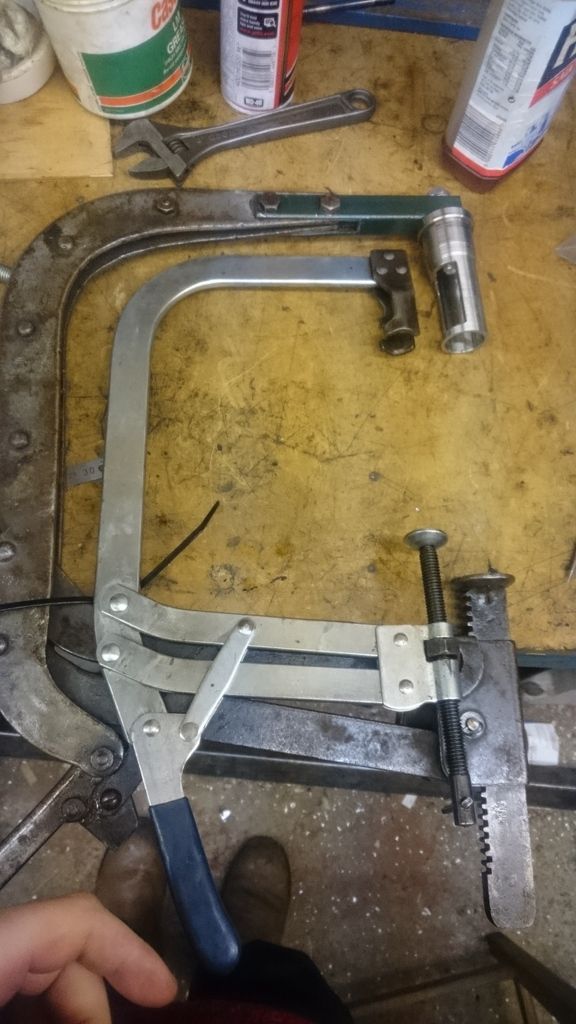
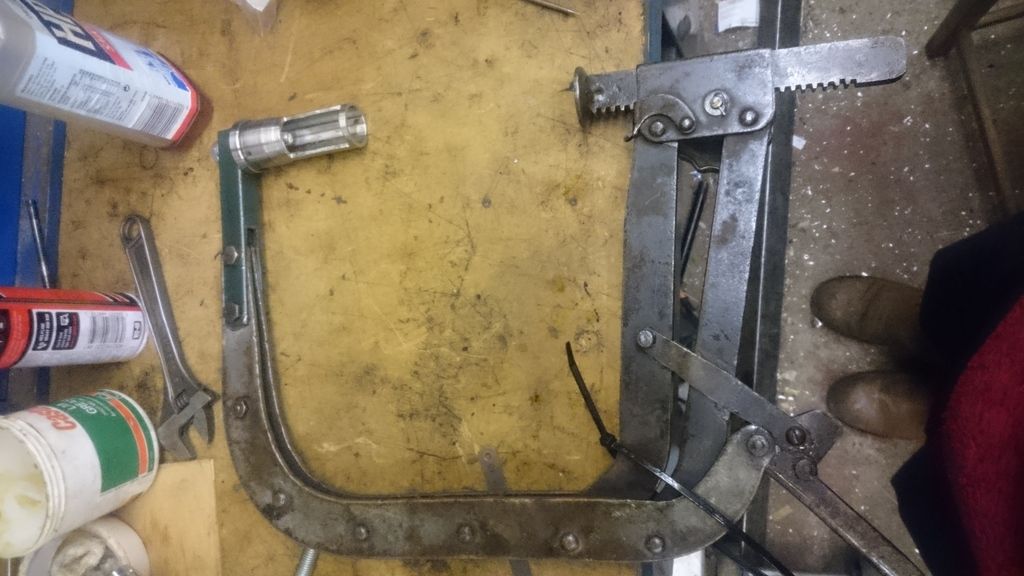
To remove the valves I need a valve spring compressor. I have one, but its only suitable for Mini engines.
I looked at the price of a suitable OHC one and decided that it would be *much* cheaper to make one.
My mini one is made from a G clamp after all...
So first make a tube of the correct size and length:
This fits perfectly where the tappets were:
Then out with the G clamps :)
Result:
All 16 valves, springs etc out, and stored in correct order.
I have to make a better one to allow access to put the valve collets back in for reassembly.
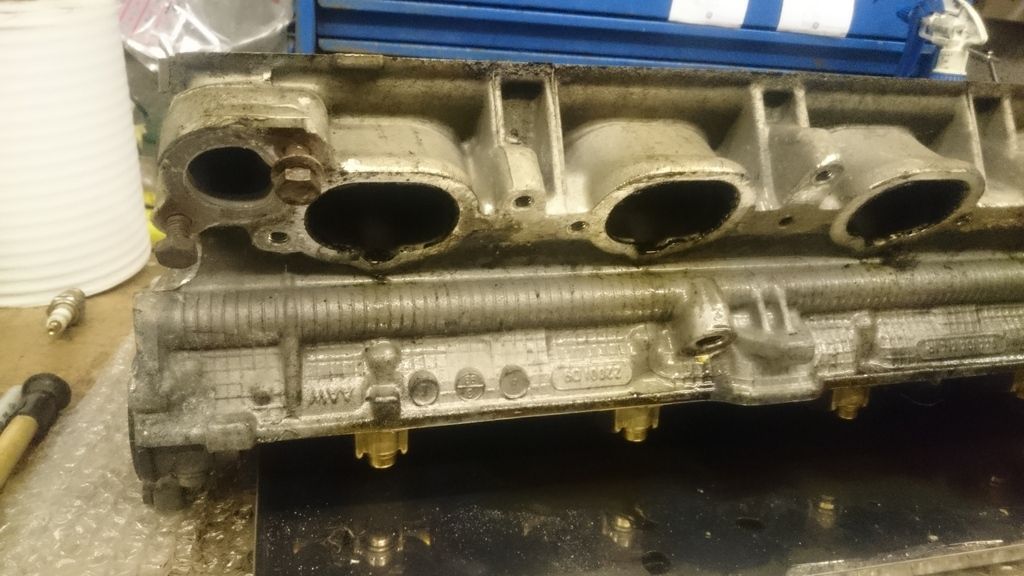
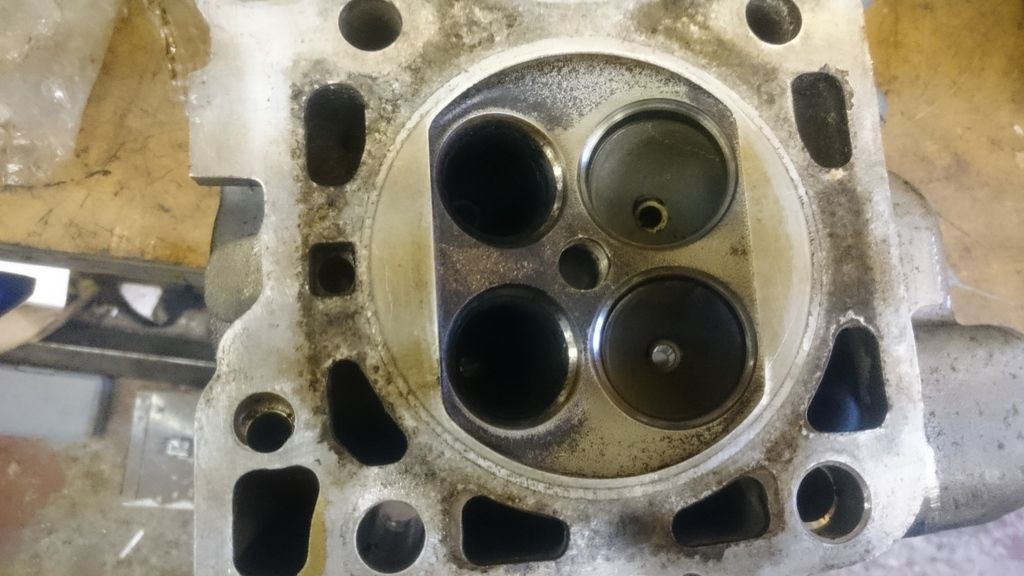
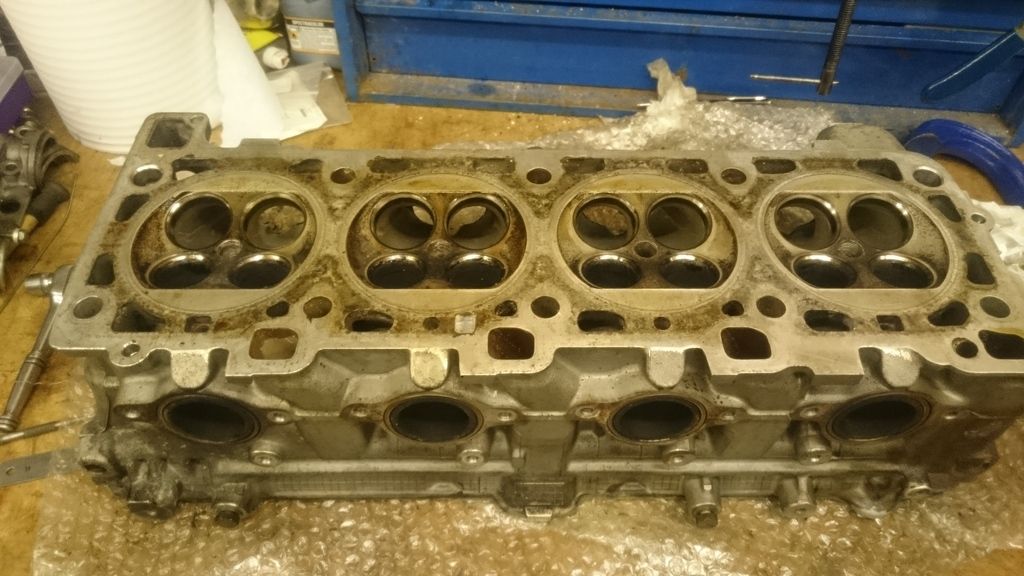
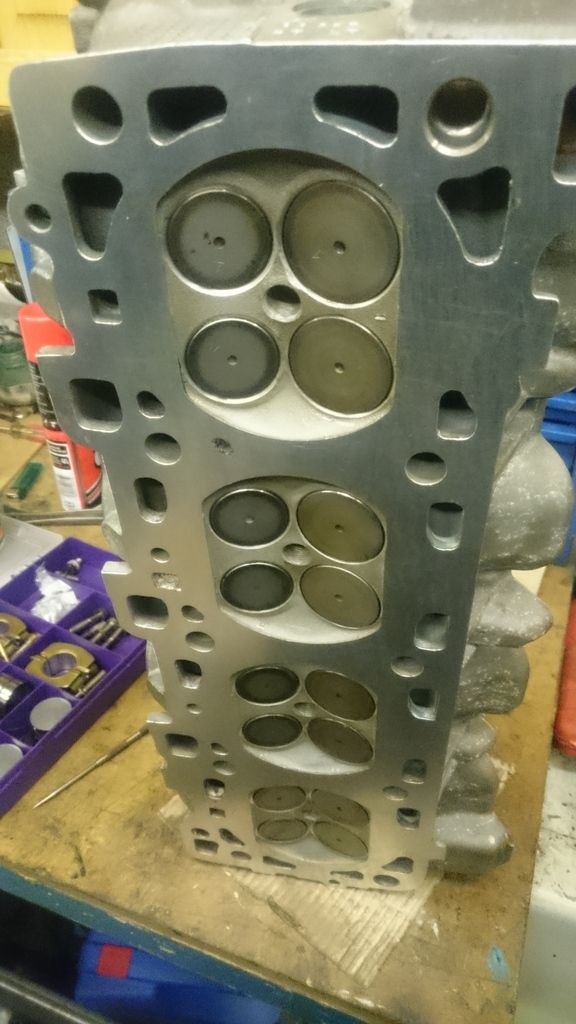
The now more stripped head:
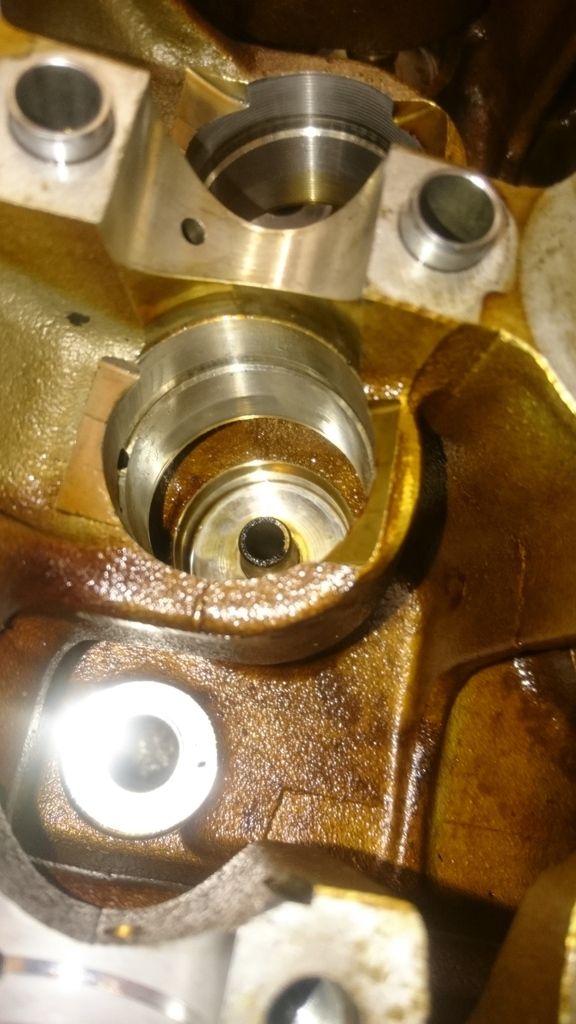
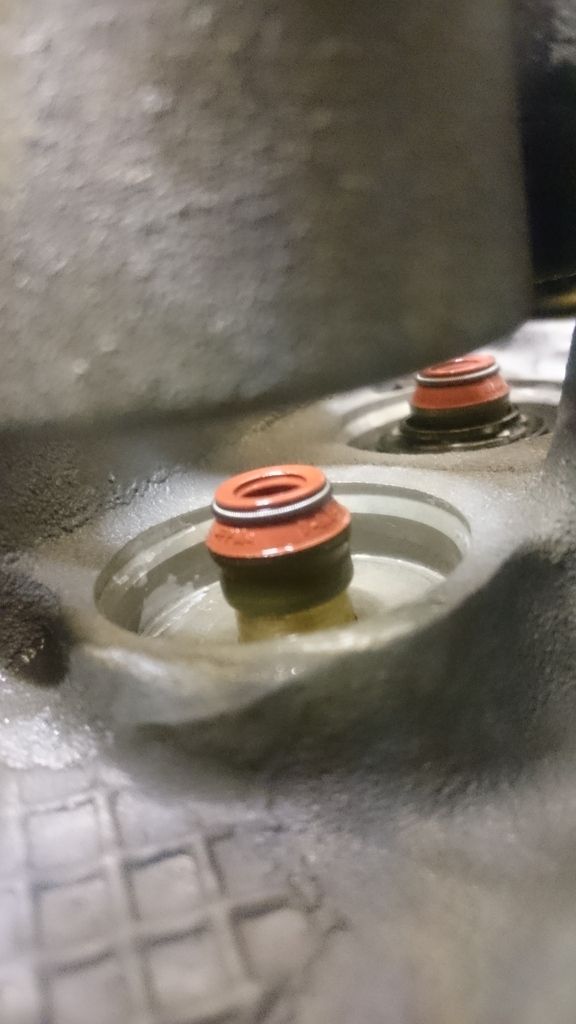
The next challenge is the Valve stem oil seals. there are 16 of these as well, and they are down a long deep hole.
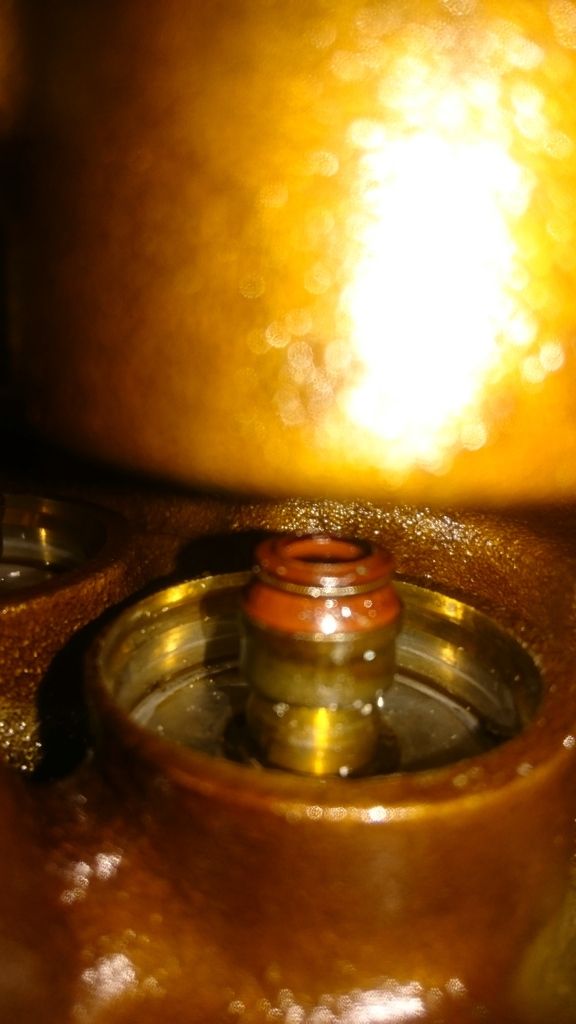
Poking a phone down allows a photo in situ:
You can see the lack of access:
The seals are of course chuffing tight on the valve guides - they have to stop the oil leaking after all...
Not going to just fall off. I suspect that there is a Porsche special tool for this.
As I mentioned I gave it a dose of thinking and set to work making a 'Dave Special' tool.
Normally I would have tried to bodge something, but with 16 to do and the risk of damaging the hydraulic tappet 'bearing' seat I thought it was worth it.
As it turns out I think that making the tool + removing the seals has taken less time than trying to bodge it.
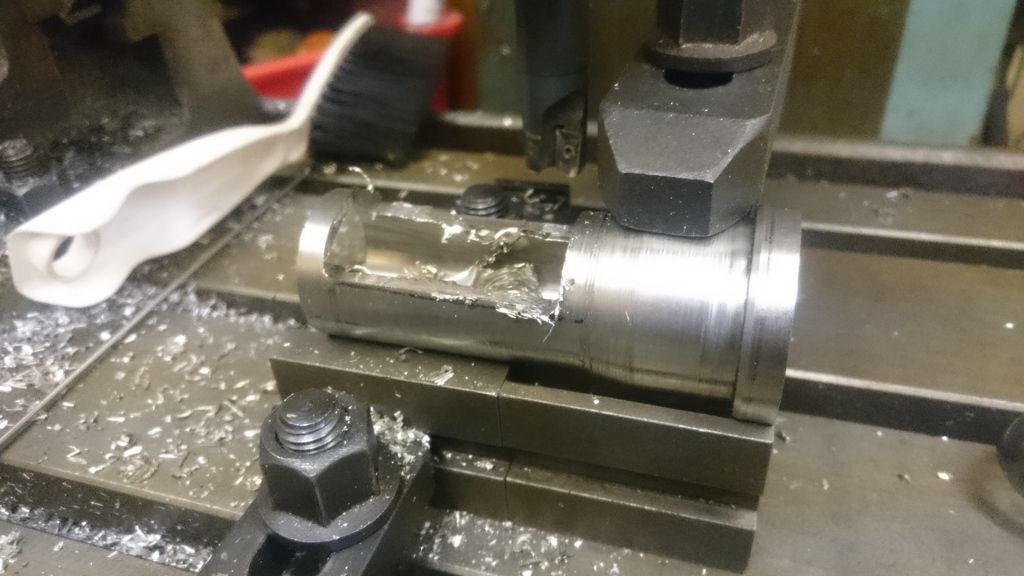
A nice chunk of Scrapbinium.
This particular piece came from a line printer - it held the hardened plattern that the dot matrix heads printed against.
I lopped it in half and bunged it into the big lathe:
Bit of a clean up, then drill a hole in one end. Reverse and tap M8 in the 2 halves:
When it came out of the lathe it looked like this:
The drilled hole is the size of the valve guide (that took some measuring...) so that it will sit below the seal.
Next over to the mill and cut out bit above the claws to allow the seal somewhere to go:
Do both halves and we are getting there:
A good job I have the new seals to help with the sizing :)
Make a collar from some gas pipe to hold the 2 halves assembled and add a long bit of M8 thread.
TaDa new tool :)
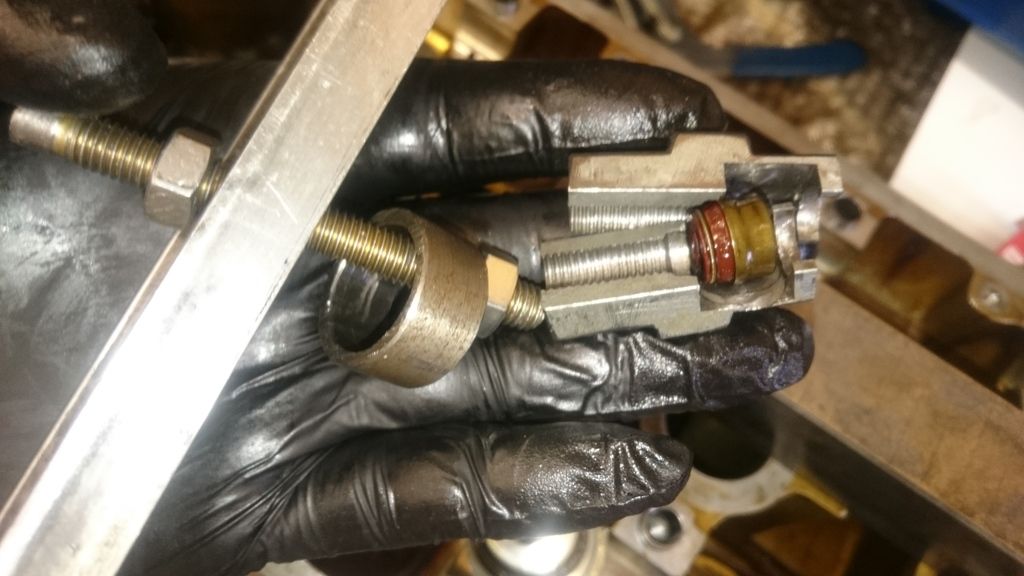
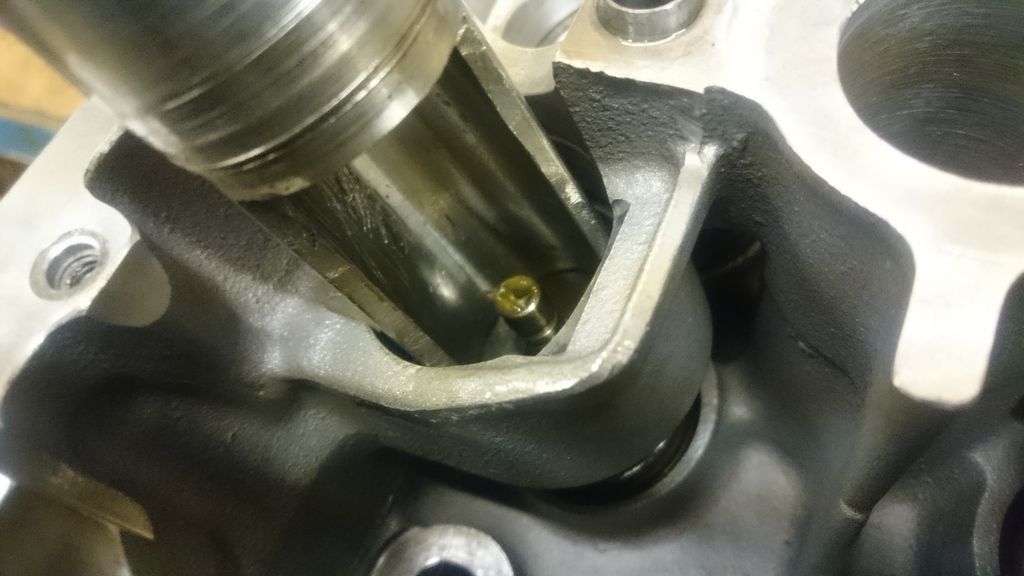
In use the 2 halves are carefully placed either side of the valve guide:
Then the collar is slipped over to hold them together.
Thread in the long bar, which goes through channel section to give it something to pull against:
To pull straight off the guide requires the puller to operate at an angle.
The channel is alloy, so it wont damage the head, the large block it a piece of cold rolled steel that sits on the flats over the spark plug holes:
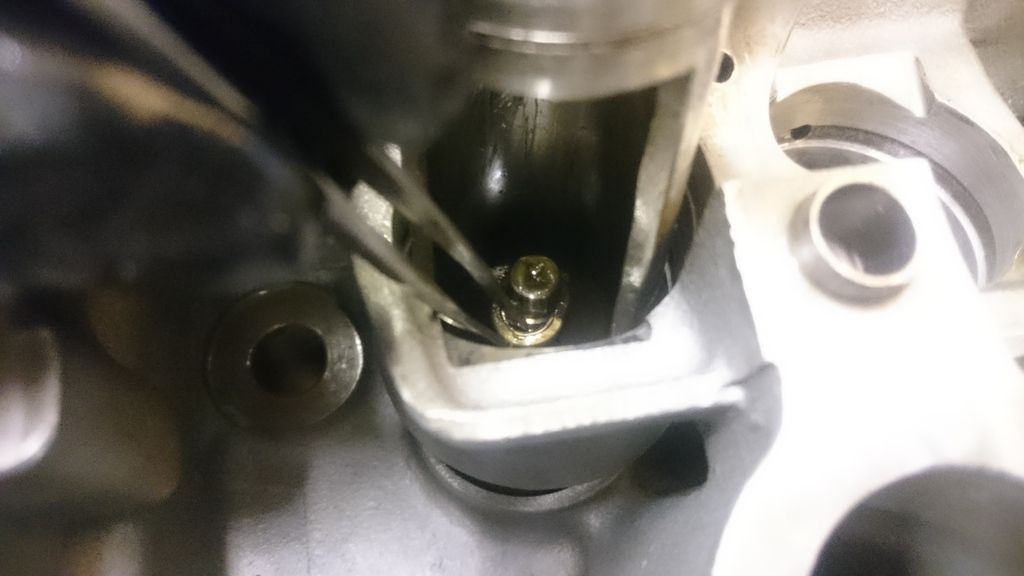
Tighten the nut:
And out comes a seal:
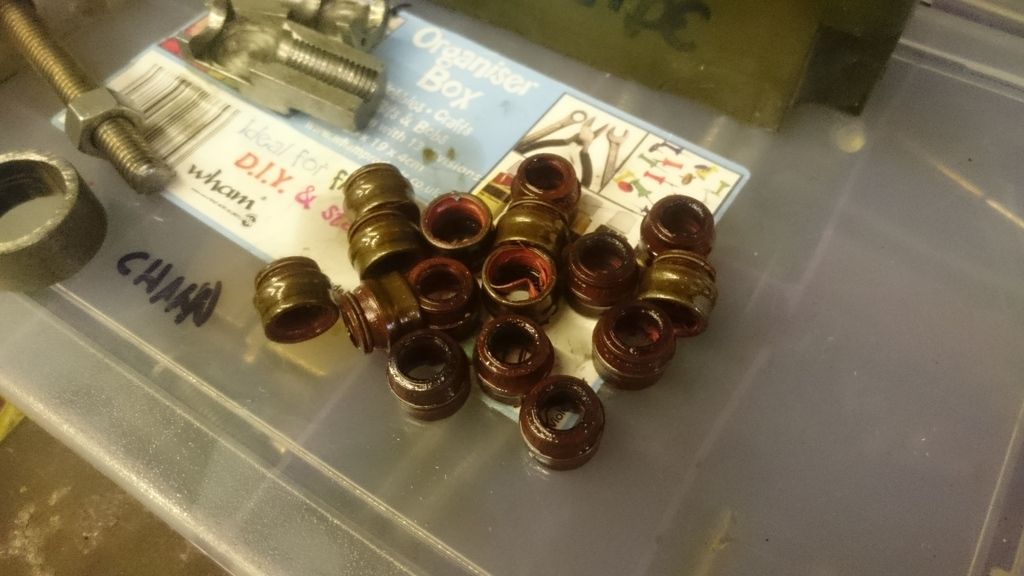
one down:
The puller easily disassembles to remove the old seal, and get ready for the next one:
All 16 seals out simply, in about 3 hours elapsed time over 2 evenings.
no damage, no stress about slipping tools or marks. jobs a good un as they say :)
Dave
Cracking thread Dave!
When you look long into an abyss, the abyss looks long into you.........
That is a brilliantly ingenious solution to the problem. Awesome stuff. :-)
Are you going to skim the head?
Cheers,
Neil.
Not planning on it. It is still flat, so there is no need.
Dave
^^this. Wonder what the original Porsche tool looks like. Must be pretty similar.
I think that this beyond briljant.
When you team up with Stephan Hawking you two should be able to solve the problem of warp speed!
Menno
Agreed. I love coming back to read this thread, partly for the engine rebuild, but more so for the ingenious and clever ways Dave is solving the problems encountered.
It takes the age old problem of needing more tools to a different level, doesn't it, when you need to spend most of the time making your own tools...
Good show.
I always used to get Alfa heads skimmed as they were prone to warping.
Cheers,
Neil.
I do seem to spend a lot of time making tools to do jobs I didn't even know I needed a tool to do...
But then again when I need a 50p part and all the shops are shut I can spend several hours using many £worth of tools to make one :)
Dave
Its been a while, but in that time I took the head up to Guy Croft in Lincoln to get the Guides and seats renewed.
Its had a very light cleanup skim - mostly to remove the grunge.
Going to pick it up at the weekend, and then onwards with the build :)
Might even get my car back on the road for Xmas (that's doomed it hasn't it...)
Dave
Its been a while since the last update, but I've not been very good at uploading pictures. Its very simple to tweet as I go, but I have to sit down and upload / write this.
I sent my head off to Guy Croft to get the valve seats, guides and valves refurbished.
It came back all nice and ready to build.
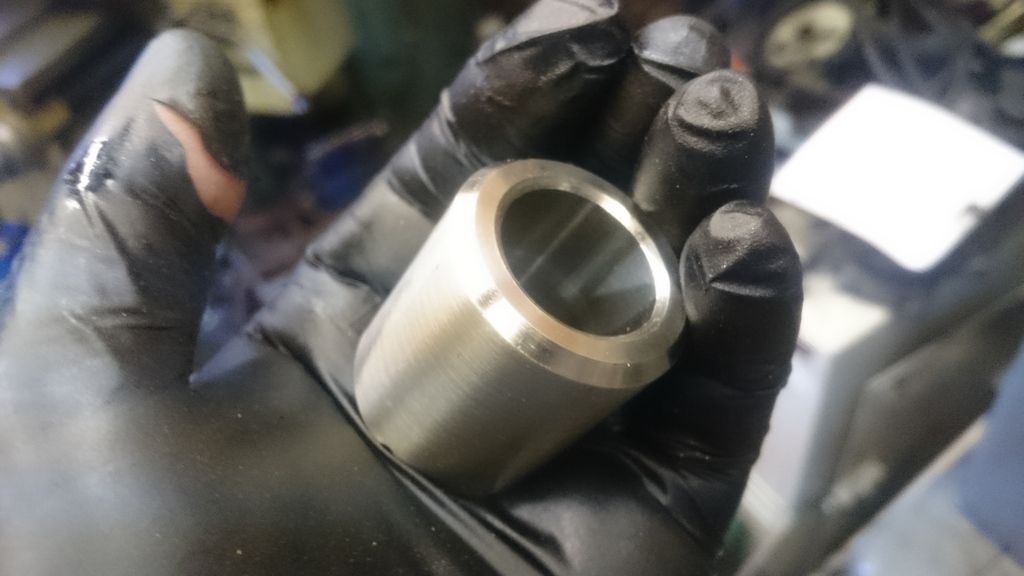
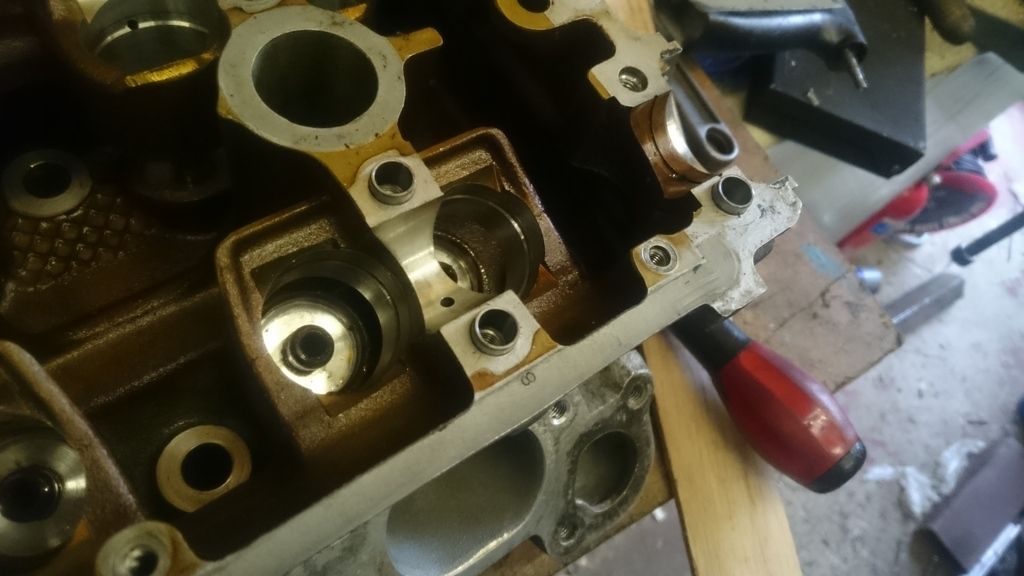
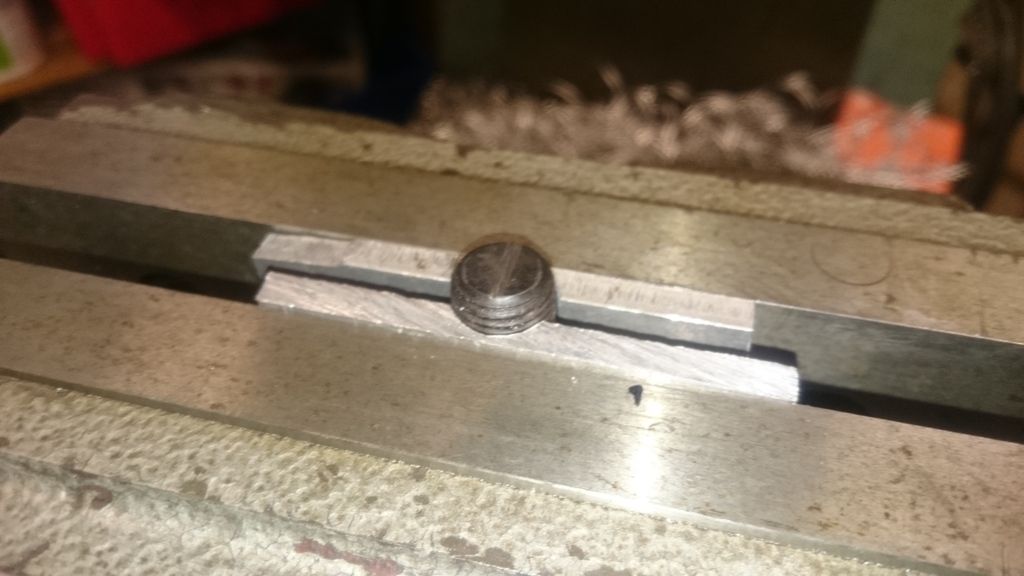
Following a thorough clean out it needed new oilway bungs. The original ones are a pressed in bit of tin.
Threaded plugs are a bit better - you can remove and refit them if required.
Guy left me these to fit, as I have the required tooling, and my time is cheaper.
Can you spot the problem?
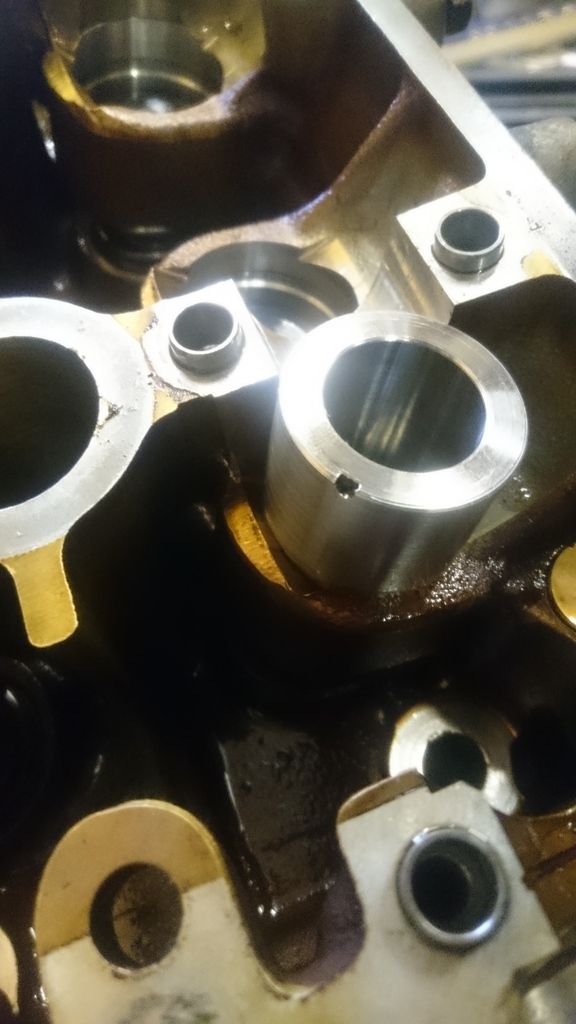
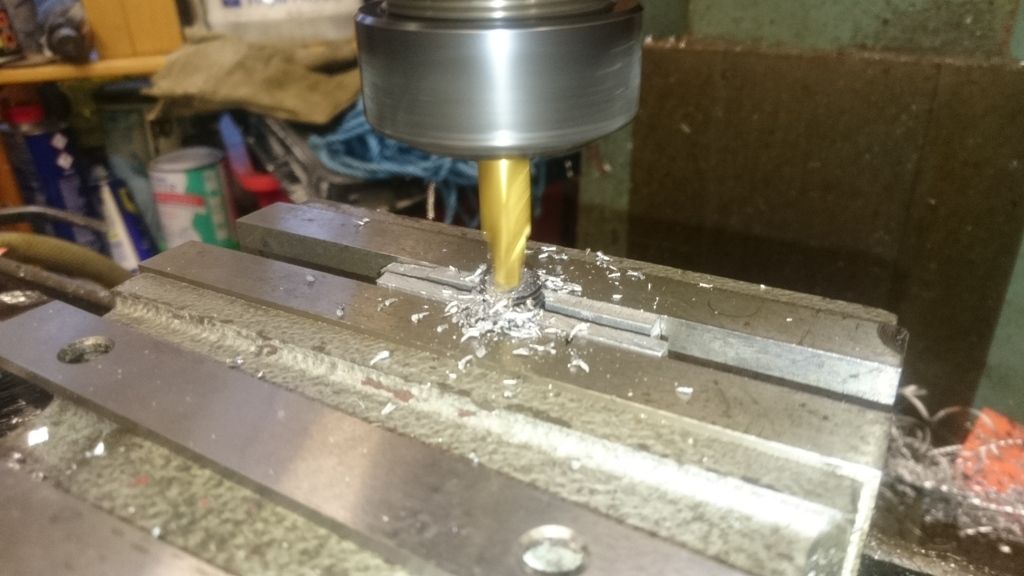
Yes, the thread blocks the drilling, so they need clocking in and then machining to clear the bore.
marked up and ready in the mill
Out with an 8mm ball end mill, and have at it:
No longer blocking the flow
There are 6 of these to do, but its just a rinse and repeat process :)
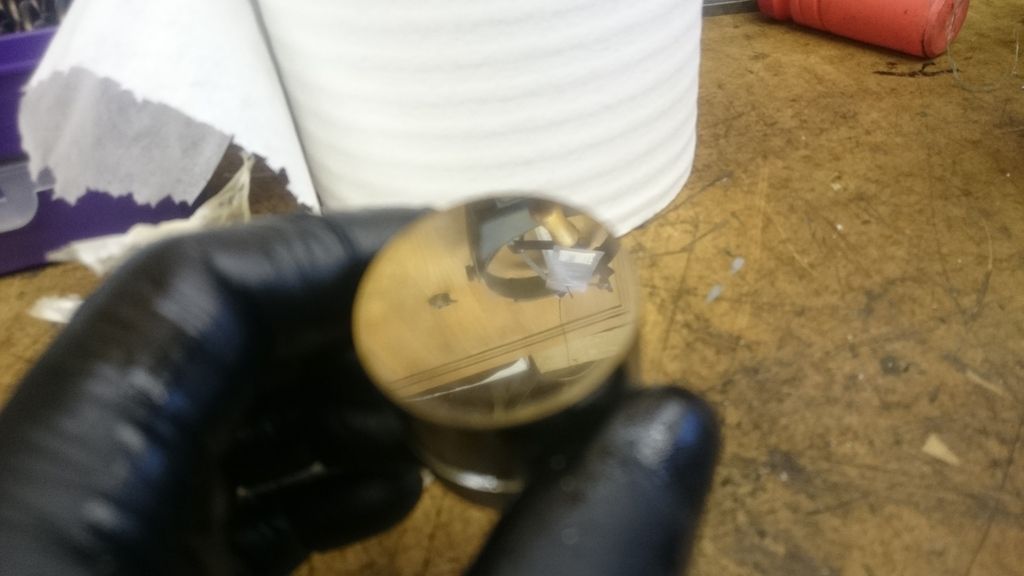
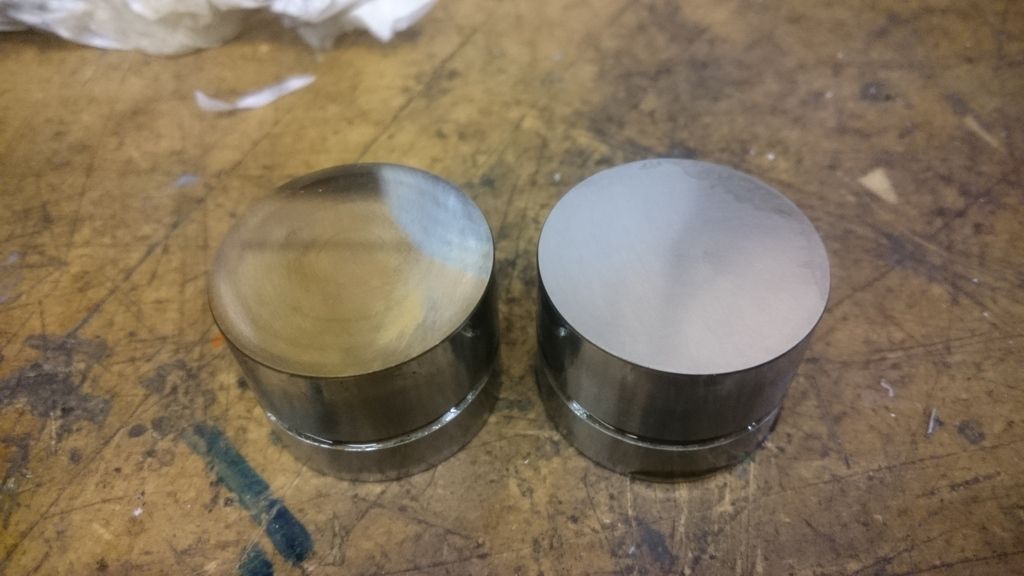
Next up the Cam Followers. These are bedded into the previous cam. Nice and shiney, and fortunately in good condition.
Since I'm fitting new cams these need to be knocked back to allow them to bed in again.
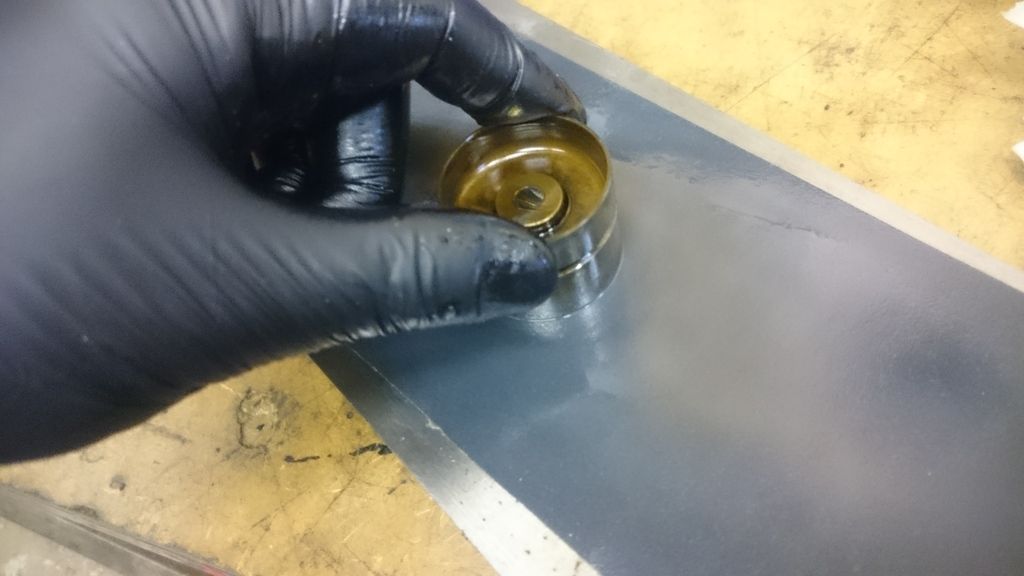
Its quite a simple process - use a light oil and some 600 grit on a flat surface just enough to make a nice even frosted surface
Side by side:
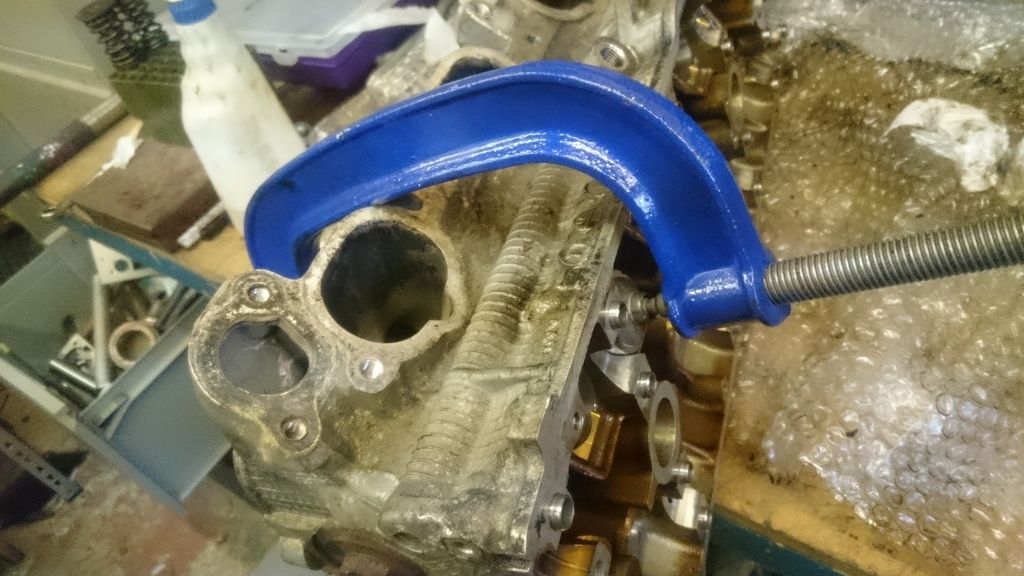
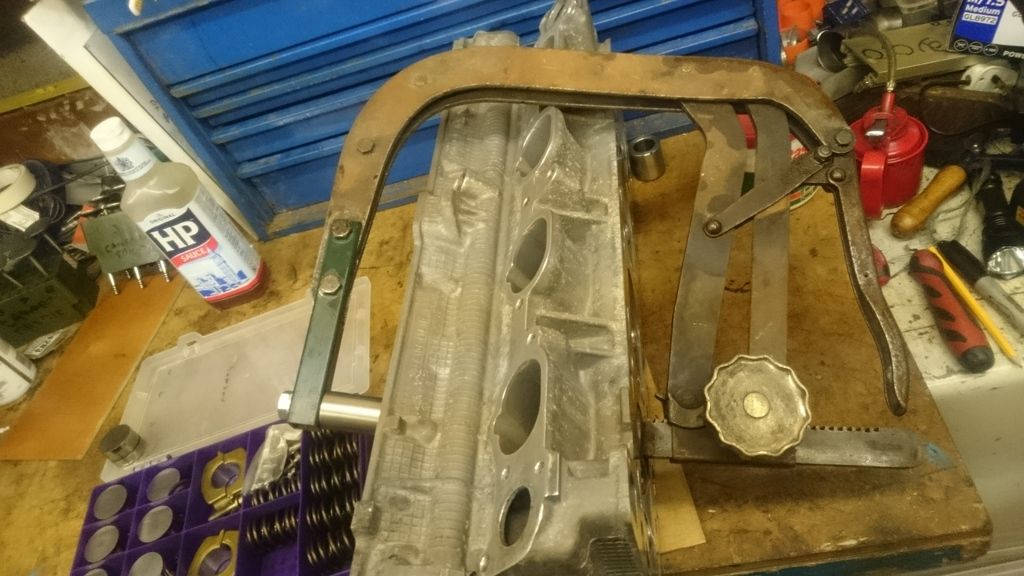
To put the valve springs back in I needed a valve spring compressor.
I borrowed one, but it wasnt quite big enough.
so I aquired an old one from a Bus garage. It needed a little adapting, but its big enough. :)
That first try however was no good - the tube was not big enough to allow me to get the collets down it to secure the valve.
So find some bigger tube, and remove half of it:
Much better.
I actually managed to half assemble the valves before I remembered these:
so Ive had a lot of practice now (11 valves twice + the other 5 valves)
Even with the bigger tube its to tight to get a pair of pliers to hold the collet and get it in place.
Hurrah for watchmaking skills:
No those are not my best tweezers, they are the dedicated garage pair for odd jobs like this.
Both collets in place
And all 16 valves done:
Feels like I'm getting there, until I look at the pile of stuff still to do...
Dave
I am repeating myself, but I will say it again - over and over if needed: BRILLIANT (no shouting, just so excited to see this!). I think you've raised the bar when it comes to engine (home) rebuilds. Keep these pics coming, Dave!
Menno
Indeed brilliant. Next time a time lapse movie please. I can look at jobs like this for days!
Totally, total respect, AMAZING. You are one clever fella': lovin' this thread.
Remember losing the woodruff key on the steering arm of my Morris minor. Very bad.... took much to obtain another ( pre-internet days, if anyone can remember that long ago!)
Just awesome - I wish I had half your skill and determination! I'd love to be more hands on with my vehicles
It's just a matter of time...
Enjoying reading this - and looking at the pictures. Great workshop facilities you have!
Brings back a far off time when I used to work on engines in my tuning business.
*drifts away into melancholia*
Cheers,
Neil.
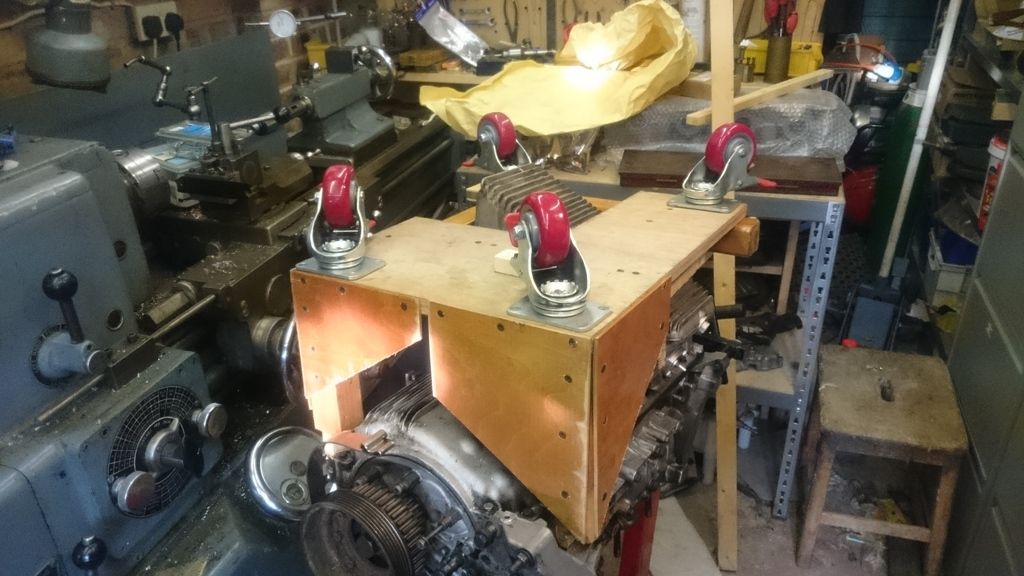
Its been a while, but I was stuck on how to get the bloody thing back out of the garage once it was fully built.
Given I managed to damage it on the way in I didn't want the same to happen, and it somewhat affected my motivation to finish.
Fortunately a good dose of thinking about has solved it.
I bought some heavy duty castors a while back to mount bits of machinery on.
As they were on sale I bought 4 extras, without a real purpose, mostly because they would 'come in handy'
I think they now have:
Now I've got over that - full steam ahead (well once it warms up a little ;) )
Dave
Great to see progress, I look forward to a link to an audio recording of some engine noise!
F.T.F.A.
Wow - that's some project. Time well spent though I'm sure!
Slow going on this, but I got the camshafts in tonight.
Might get it finished in under 2 years....
Dave
Can I assume it will not be ready for the Purely Porsche event at Beaulieu on 4th June - 2017
this is great stuff BTW.
Whoever does not know how to hit the nail on the head should be asked not to hit it at all.
Friedrich Nietzsche
Was your cylinder head man anything to do with The Cylinder Head Shop that used to be in Wimbledon (or was it Wandsworth, it was a while ago) then moved to Lincolnshire?
Not likely to make Beaulieu...
I know Guy Croft used to be in Rochester. Not sure where else he might have been. He specialises in fiat twin cams
Dave
Did some more today, sorting out the top end ready to finally time it in.
Got new cam and balance shaft belts to fit.
No photos til I sort the photobucket shenanigans.
Sorry the previous posts are stuffed. :(
Dave
Still going on this. I've not found a good phtobucket replacement yet, but there are pics on twitter (@solutionsbydave)
Fixed the magnesium (?) can pulley cover - one of the pillars that the bolts go through had 'exploded'. I think it is corrosion that caused it.
Given a new one is £400 or so I decided that an evening to fix it was quite good value :)
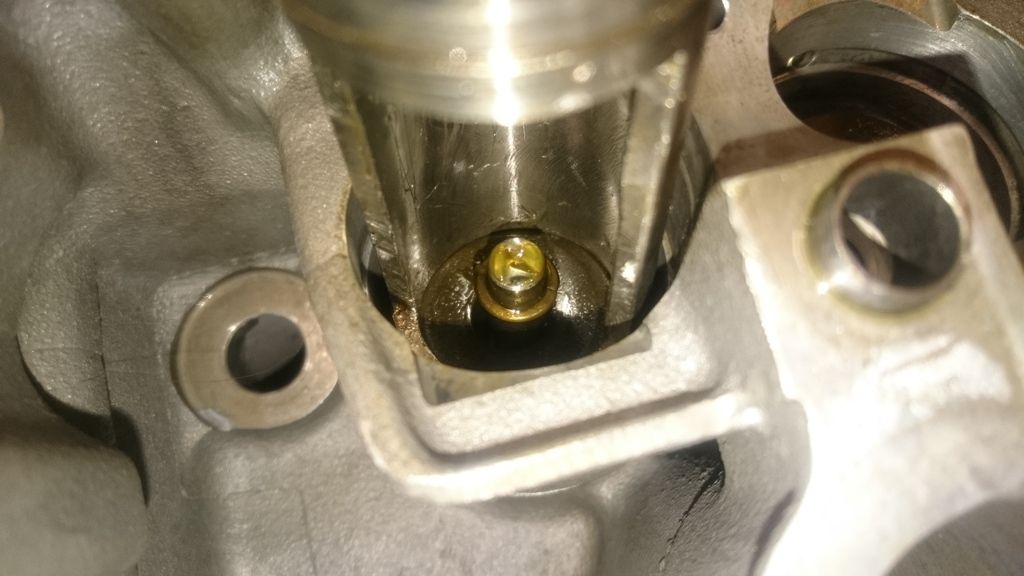
Tonight I made an airline to varocam adaptor - 19tpi thread to flat plate with holes in it really.
Then, of course, I dropped one of the oil line to variocam banjo washers into the head :(
I cant see it anywhere... I really don't want to take all the gubbins off again, but it might come to that.
Cant have a rogue washer floating about, who knows what damage it could do...
building a nice selection of the special bits n bobs for the next poor sucker who attempts this anyway.
Dave
 Posting Permissions