Reply With Quote
What are you using to clean the engine up, you always seem to get better results than me! (Probably because I'm too impatient to move on...)


I remember that story as well!Your photos and Menno's post about the engine put me in mind of the 1980's BMW Formula 1 turbo engines. The engine guys used to trawl scrapyards, buying up engines from cars which had done very high mileages. They would then throw away everything except the block, which would be stored outside in all weathers for at least 12 months, after which they were cleaned up and the bores sleeved (the regs dictated 1500cc capacity).
The theory was that using high-mileage engines and then "weathering" the cast iron blocks would stress-relieve them. These engines, when using qualifying boost, would turn out anything up to 1200bhp from 1500cc.
But... after a year outside, BMW engineers rebuilt the engines and... used them asap, without giving rust a chance to resurface again. In my example, a rebuilt engine is put aside for a long(er) period thus making it vulrenable for rust etc.
Menno


What are you using to clean the engine up, you always seem to get better results than me! (Probably because I'm too impatient to move on...)
a great bit of kit, my other half bought a red one, has a quick release mechanism from a silversmiths in Birmingham. Cost £24 on fleabay and an hour of elbow grease to clean it up.Originally Posted by ralphy


Understood.
I remember putting a straight six 4.2 Jag engine into a Consul back in the day.
That was heavy!
Cheers,
Neil.
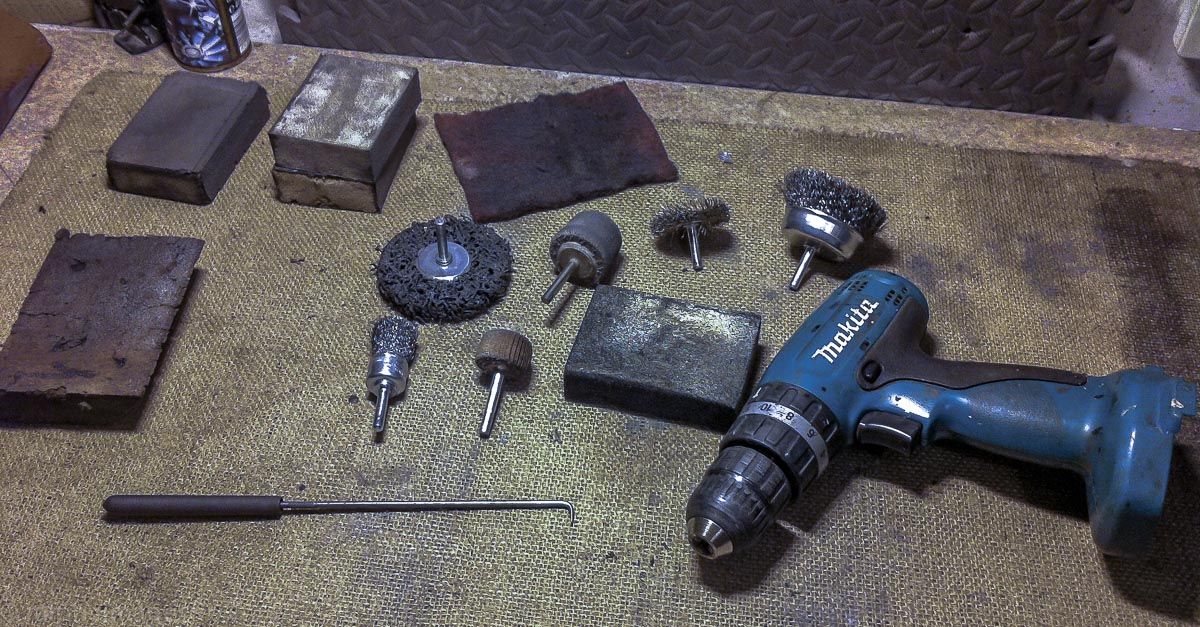
In terms of surface prep, these (wire brushes, abrasive flap wheels, 3M pads, Scotchbrite, scrapers):
Added to the above is white spirit, degreaser and sheets of wet & dry.
But you actually hit on the key thing in your comment and thats patience. Best results rely on thorough preparation and that takes time - lots of it. By nature Im not a patient person, but Ive learnt the hard way that I need to either do the job properly - or do it twice. ;-)
R
Ignorance breeds Fear. Fear breeds Hatred. Hatred breeds Ignorance. Break the chain.
brake fluid is also quite good at paint stripping.
pity I don't have use of a FV434 any more I could have that engine in situ very quick.
It's just occurred to me; if you go for the Volvo blue:
then you can get your vice painted as well:

good point, but light blue is a horrible colour, car or otherwise.
it always makes me think of Man City when they where rubbish,

http://www.pistonheads.com/news/defa...?storyId=29158
How about this for the colour scheme? Quite Similar to the polestar blue I think?
Also close to the Gulf livery colours?
Last edited by josep; 6th January 2014 at 22:21.
Looks pretty similar to me, bit richer even.
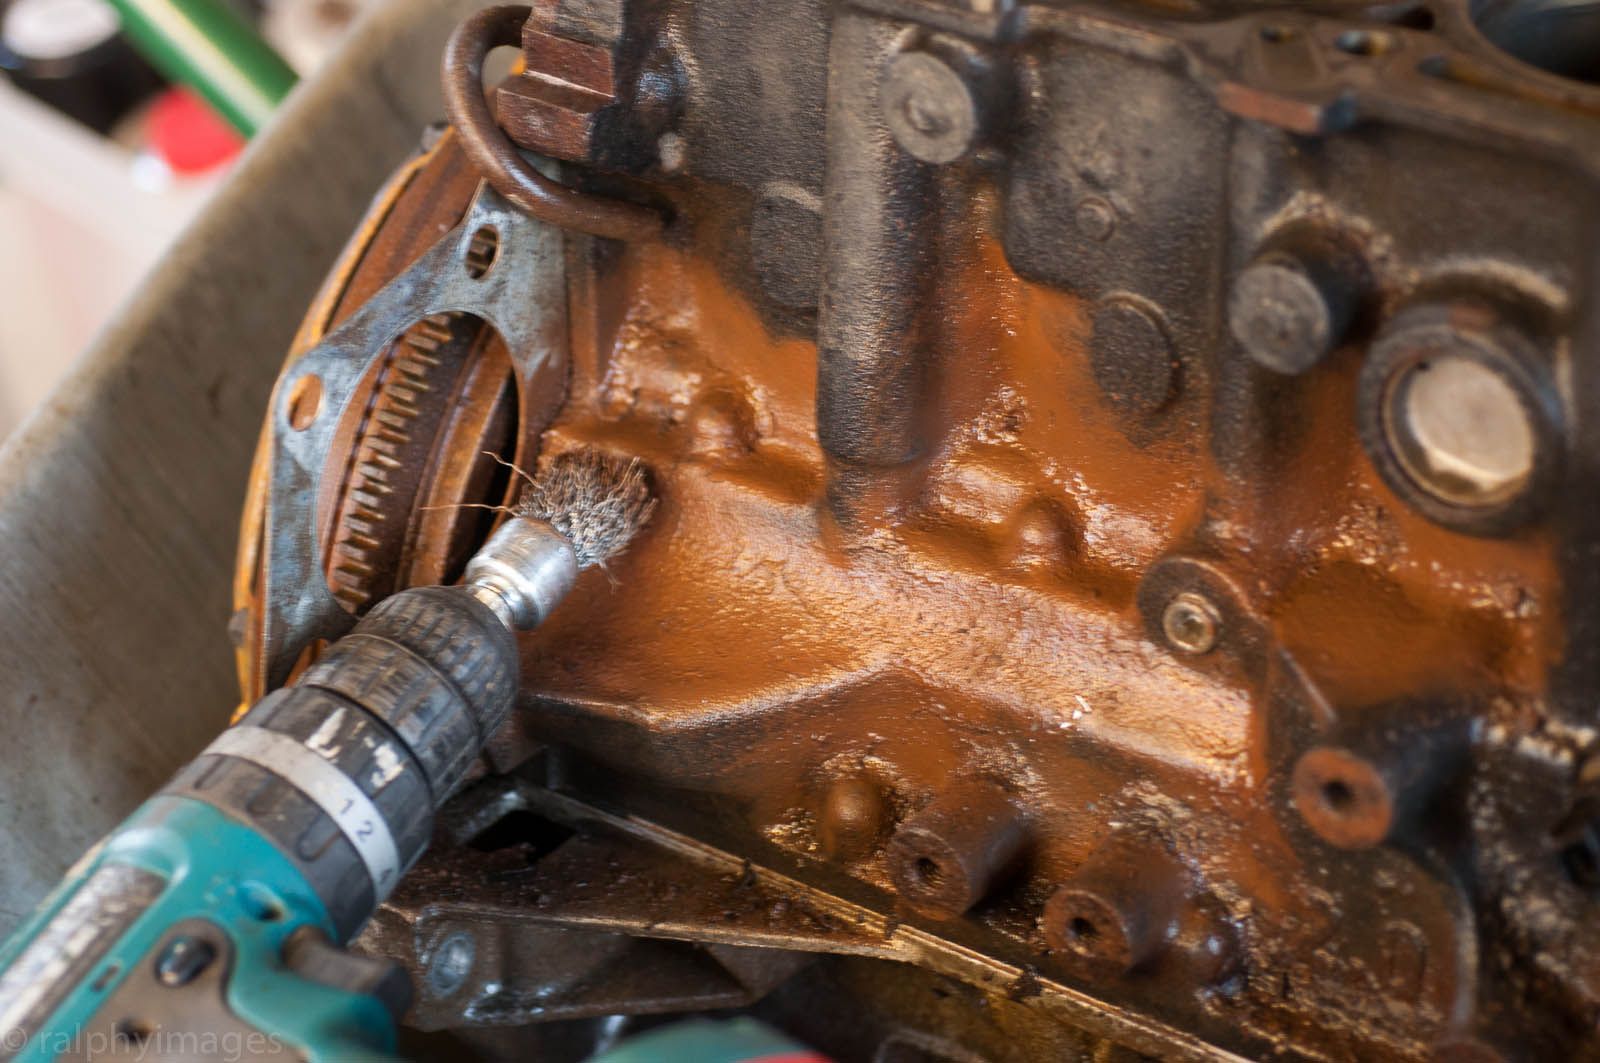
Todays tales from the wheelbarrow.
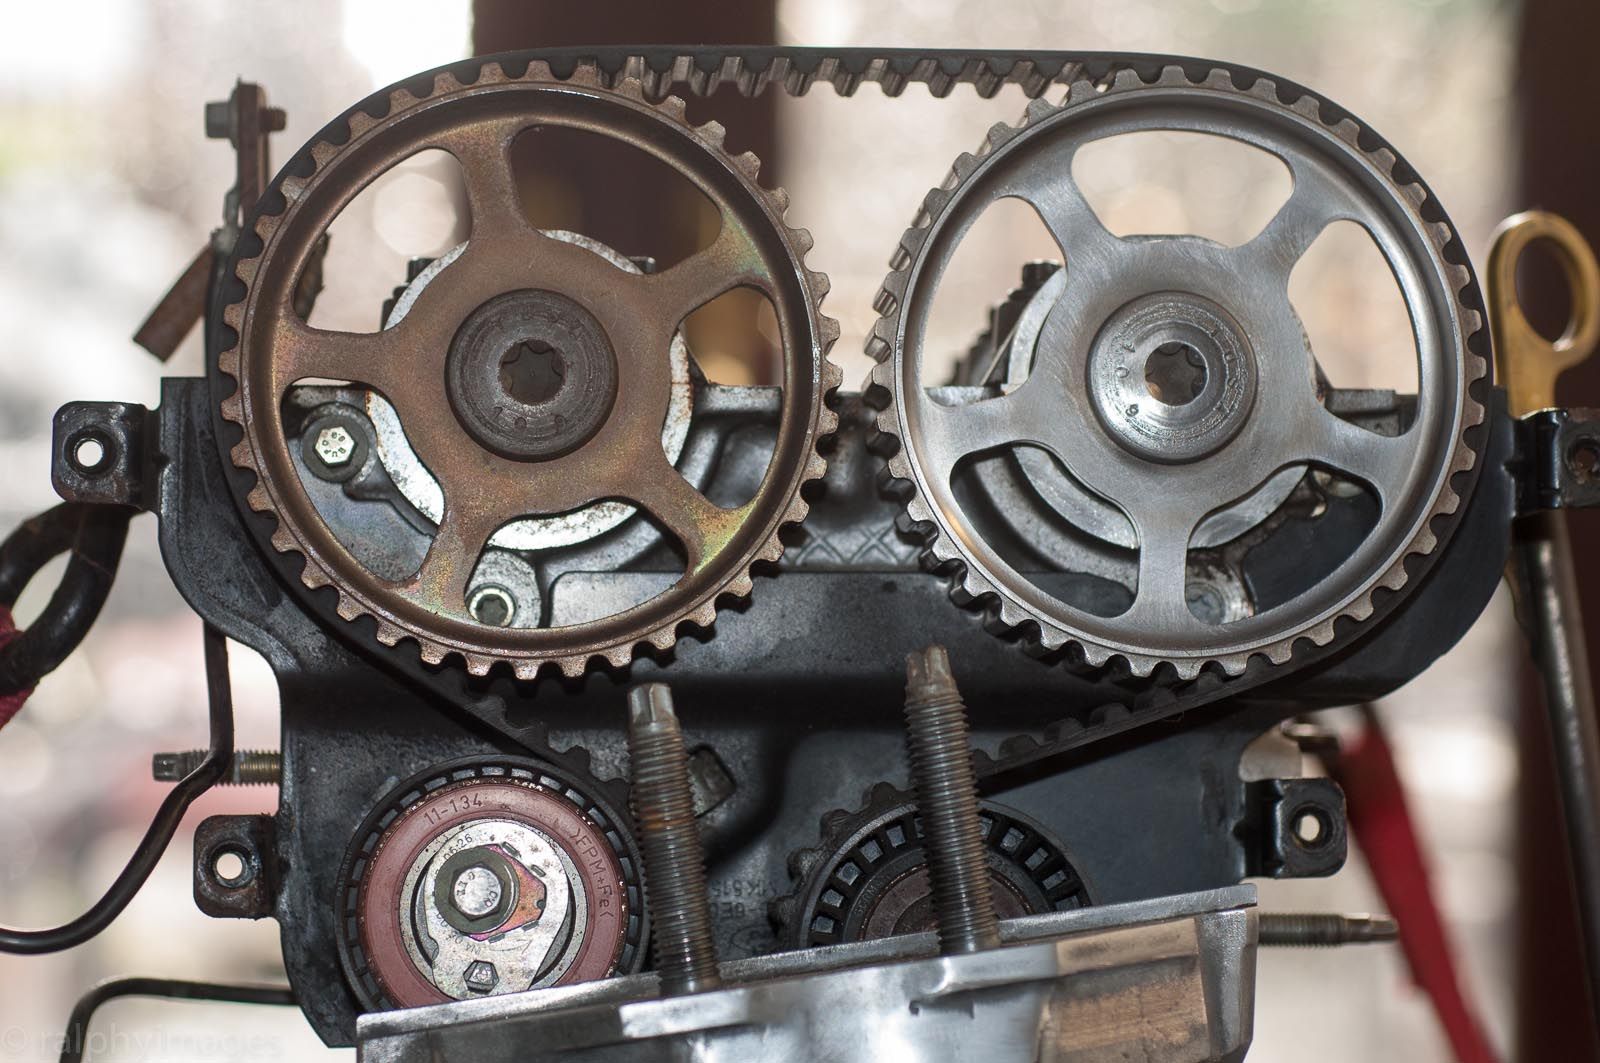
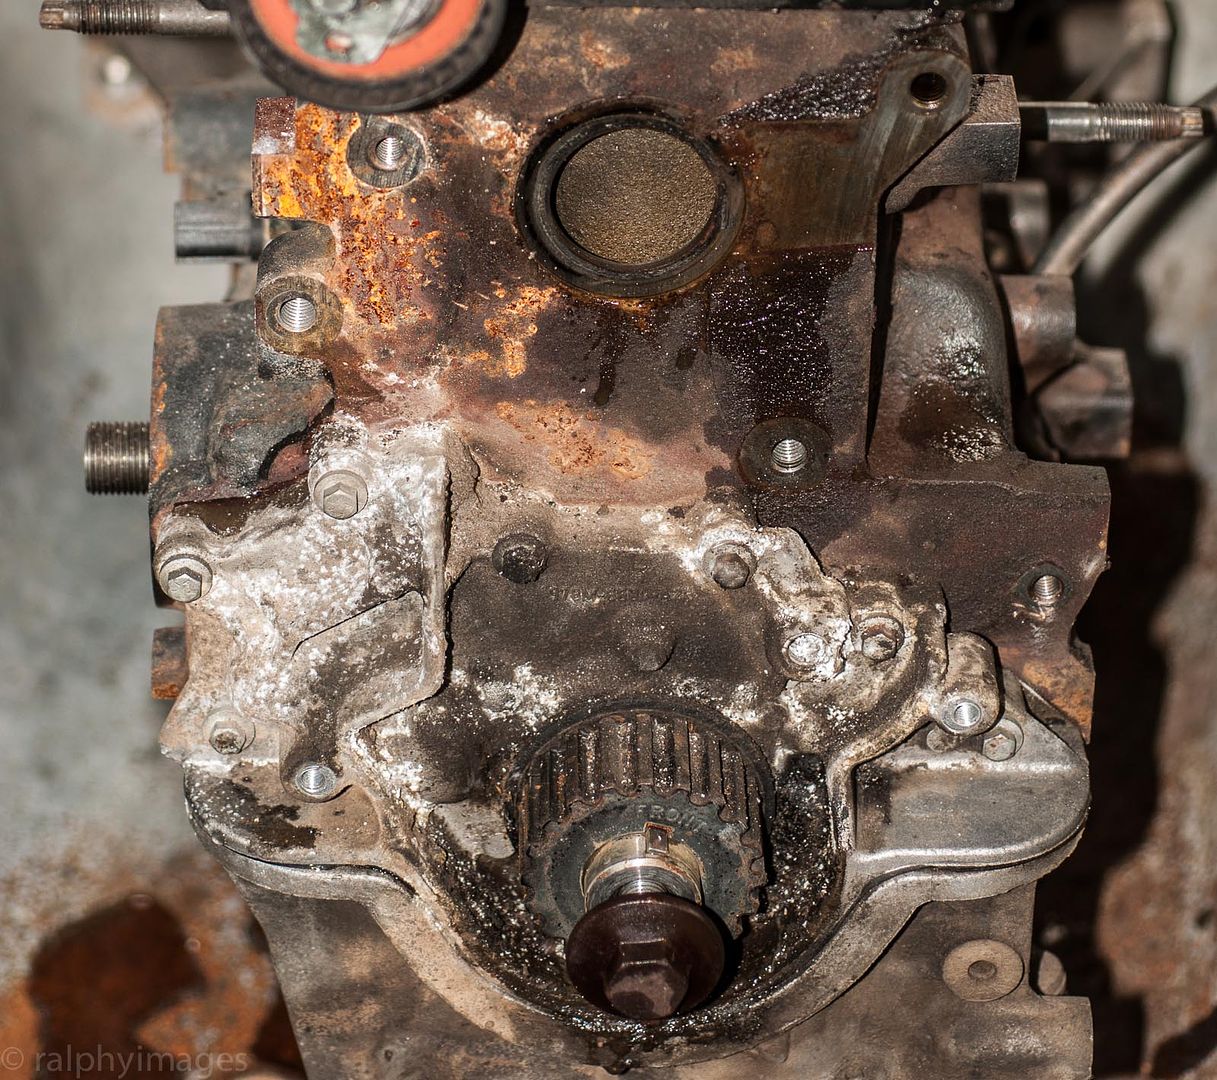
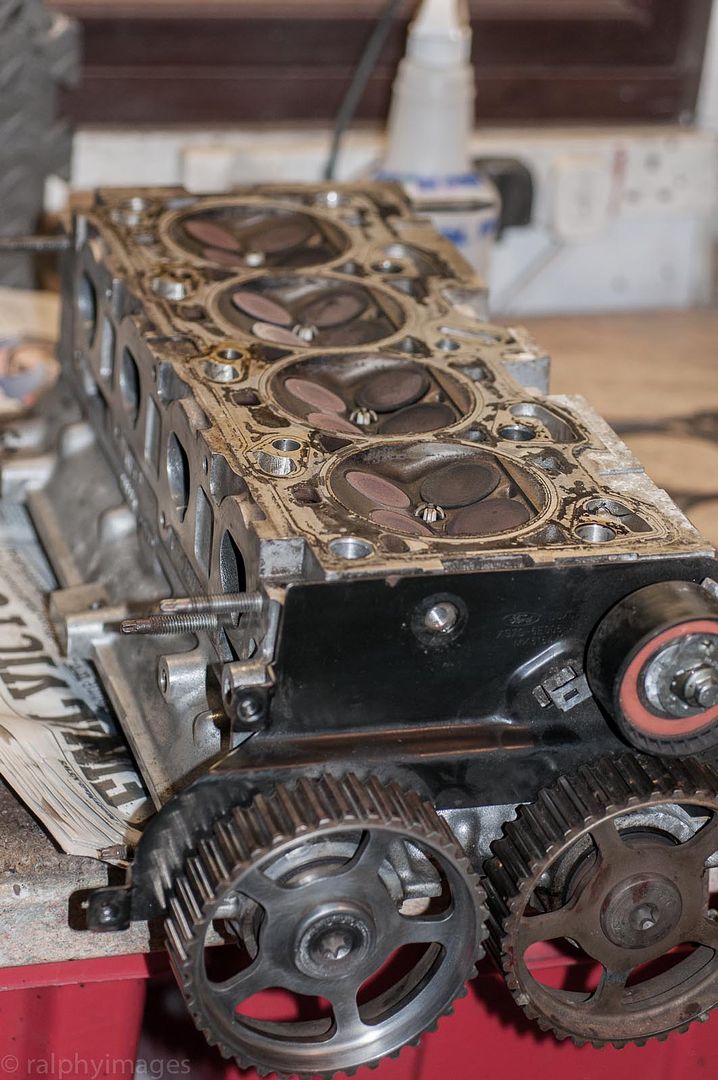
Attention turned to the front-end disassembly: cam-belt removal, covers & water pump housing.
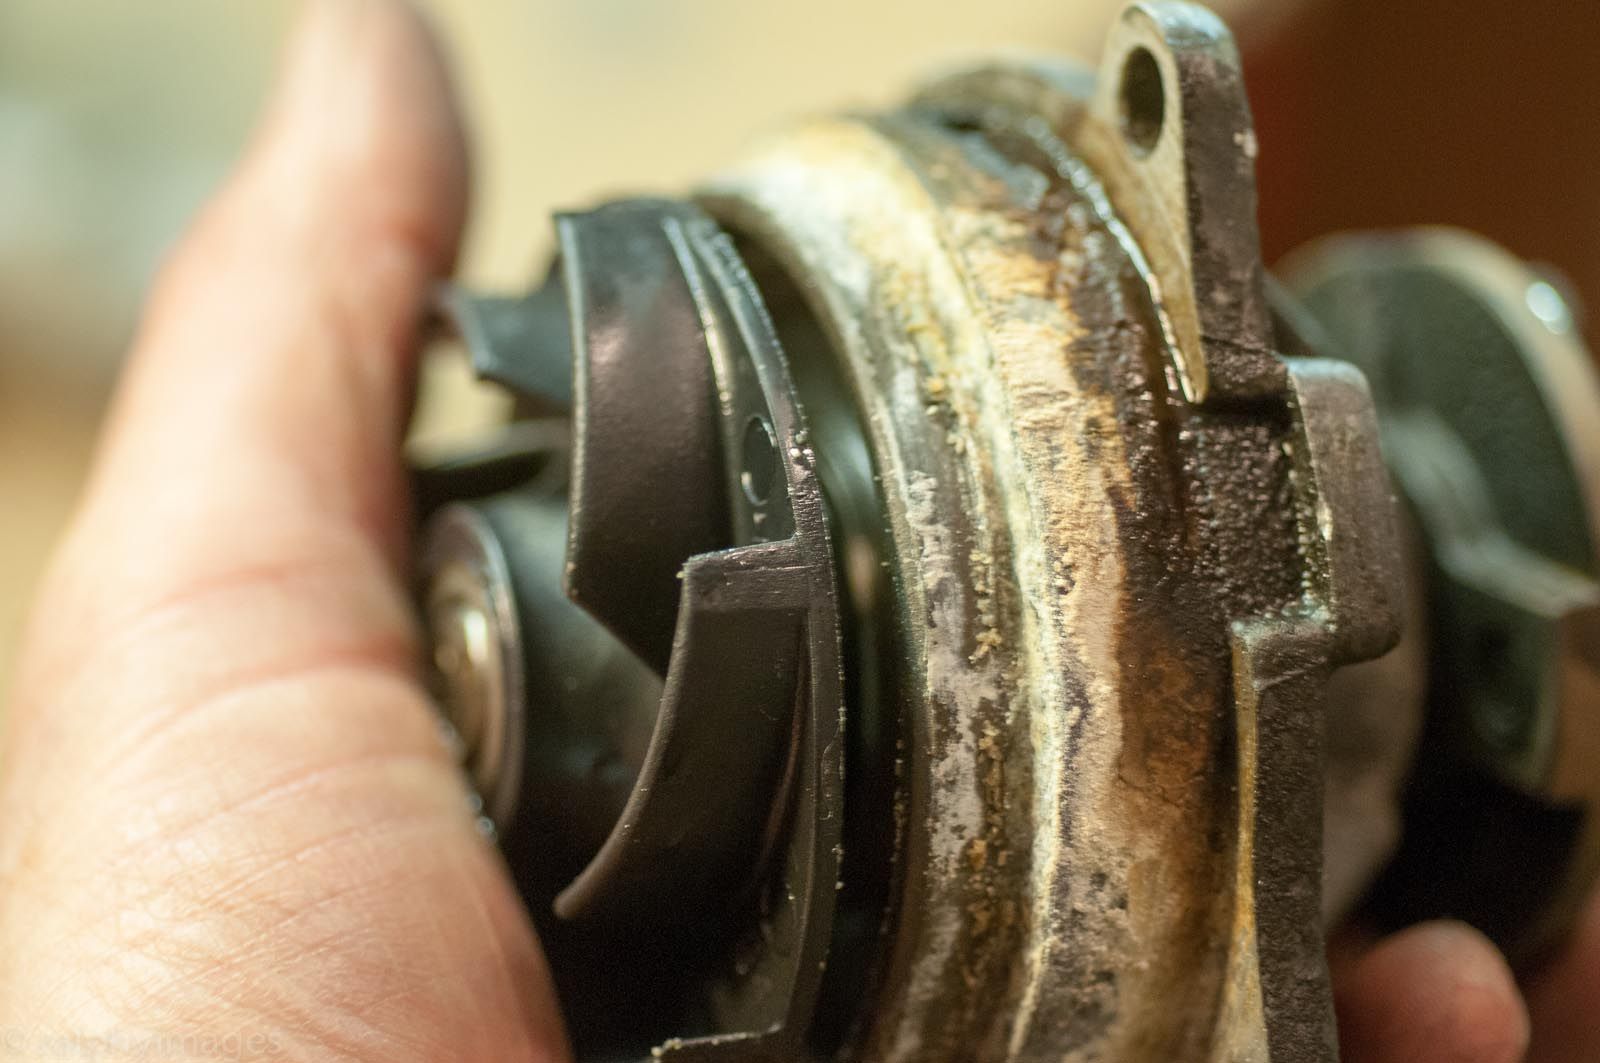
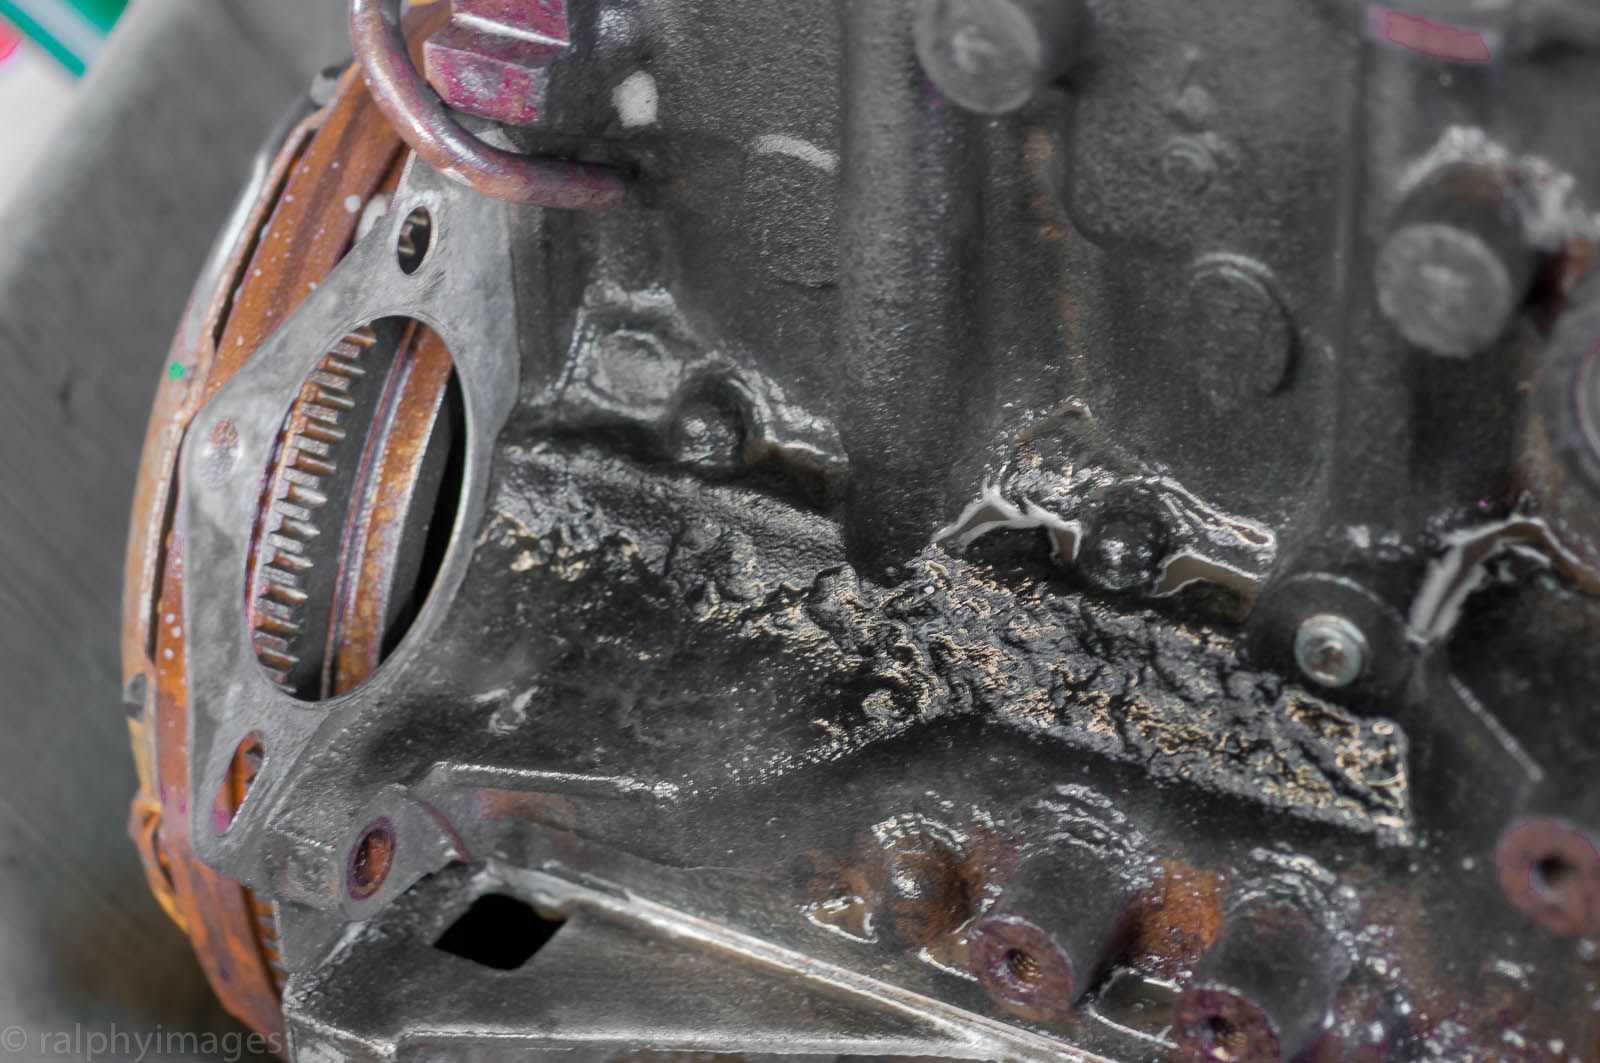
All went suspiciously well, but the removal of the covers revealed some historic coolant leakage:
Not overly concerned as all seals & gaskets will be replaced, but it didnt bode well for the water-pump impeller removal from the alloy casting
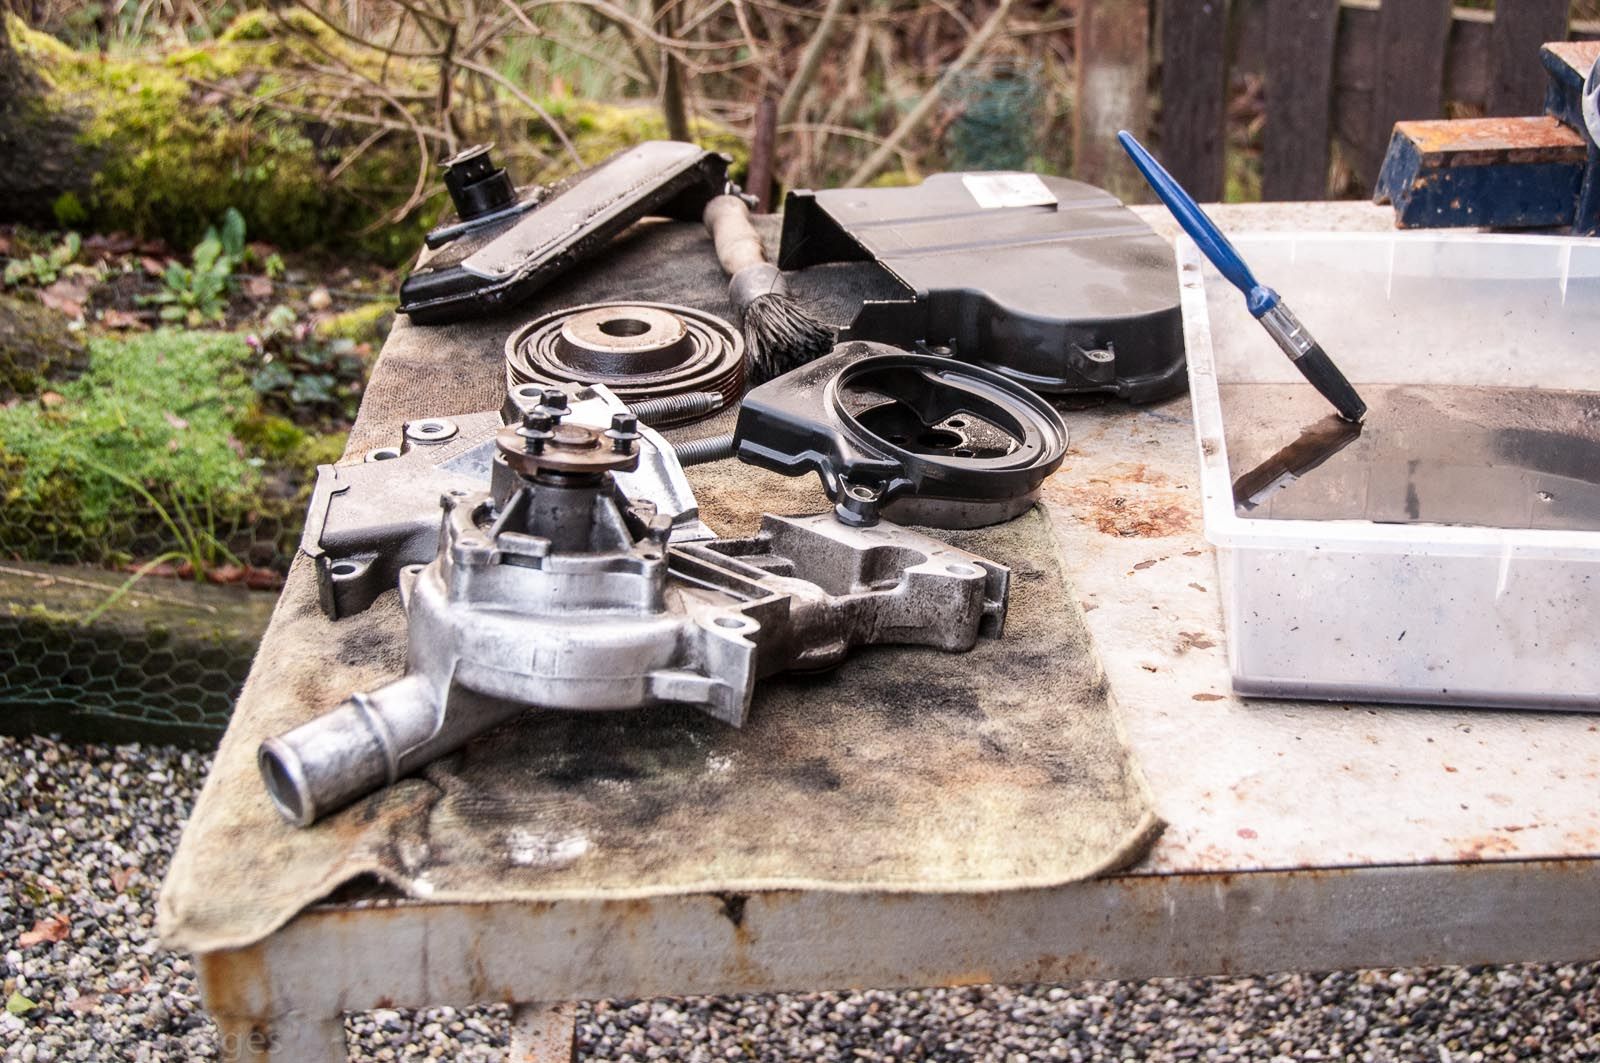
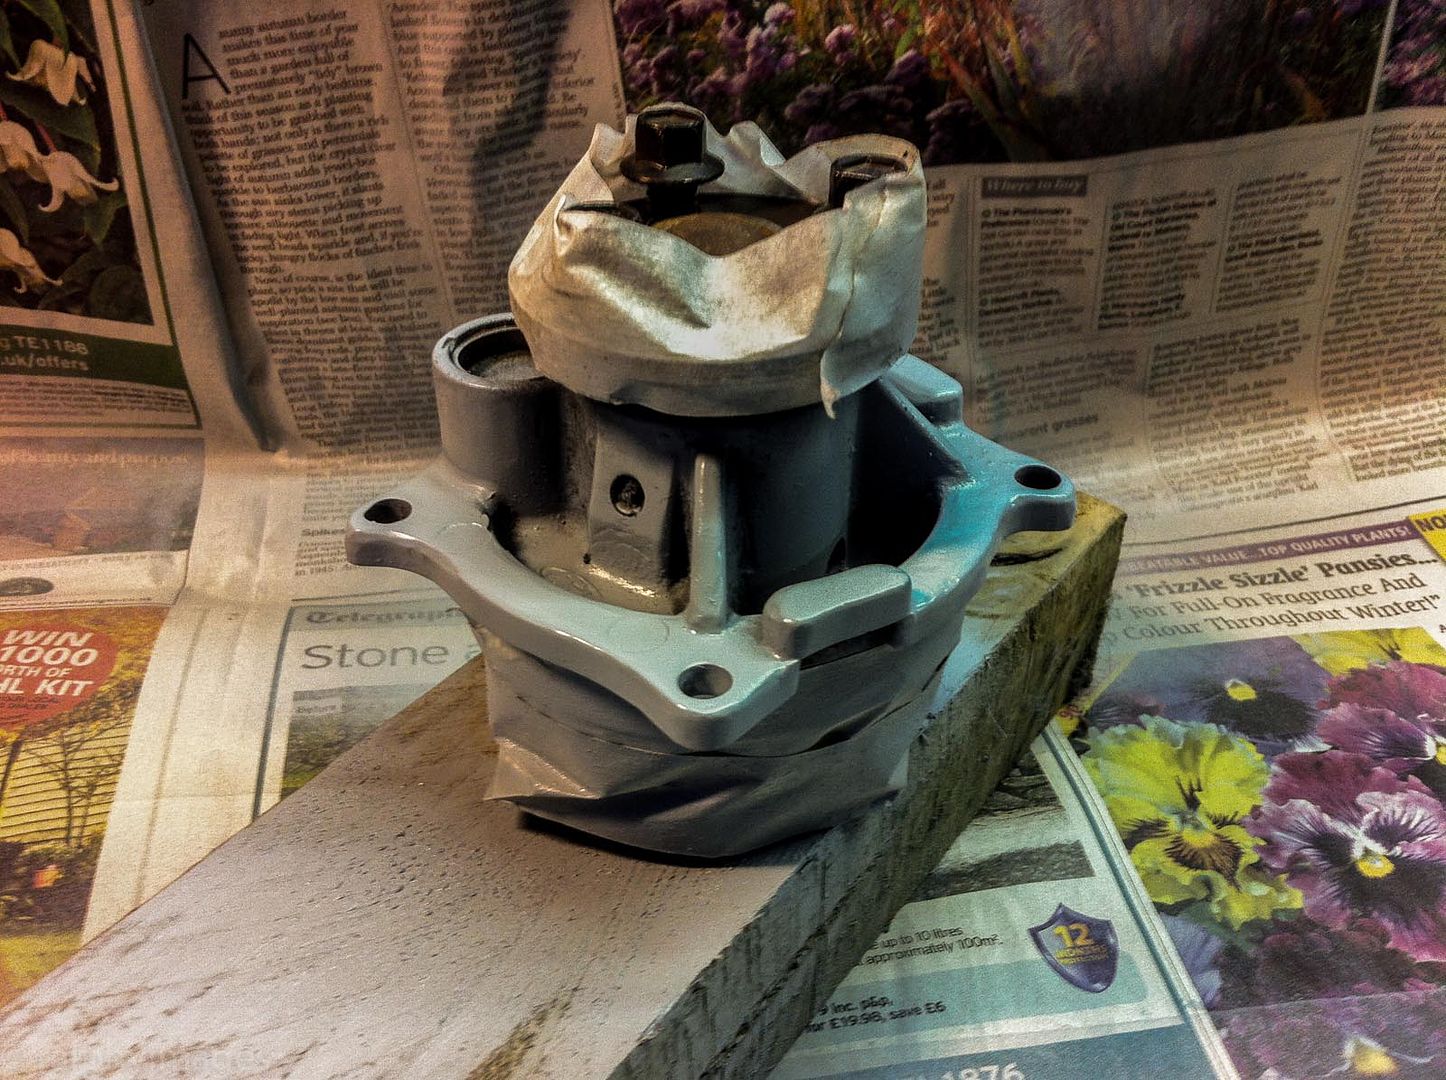
Into the dirt-box for de-cruding:
Out for a dry-off:
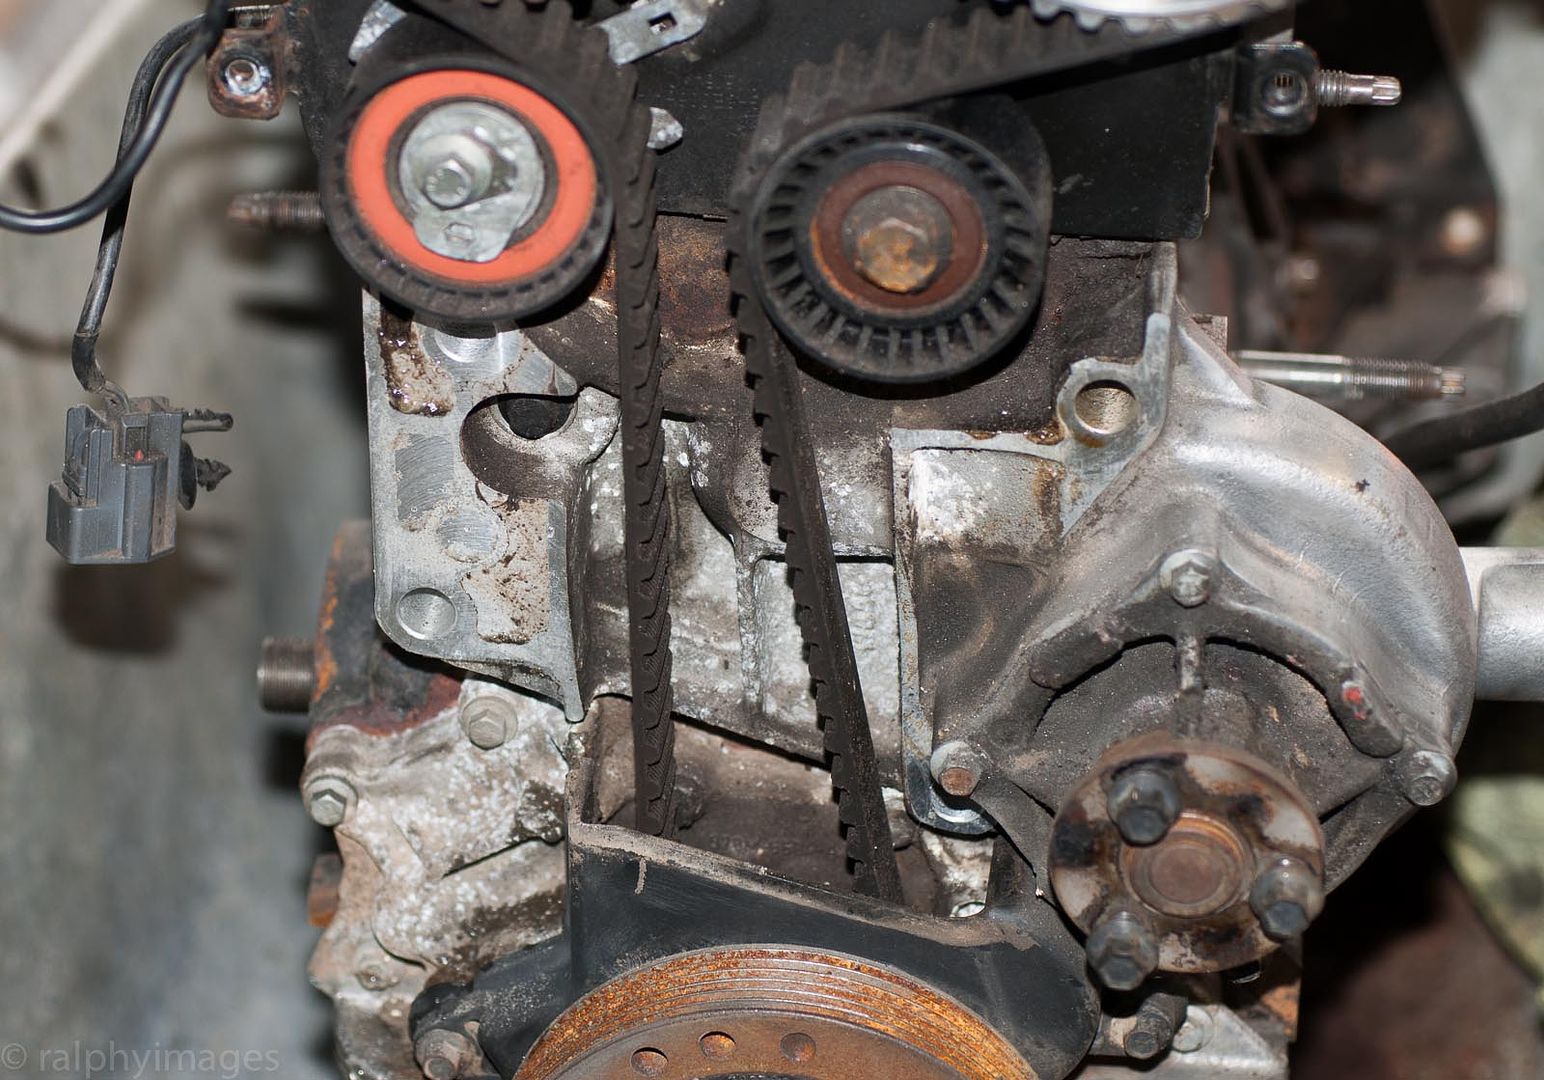
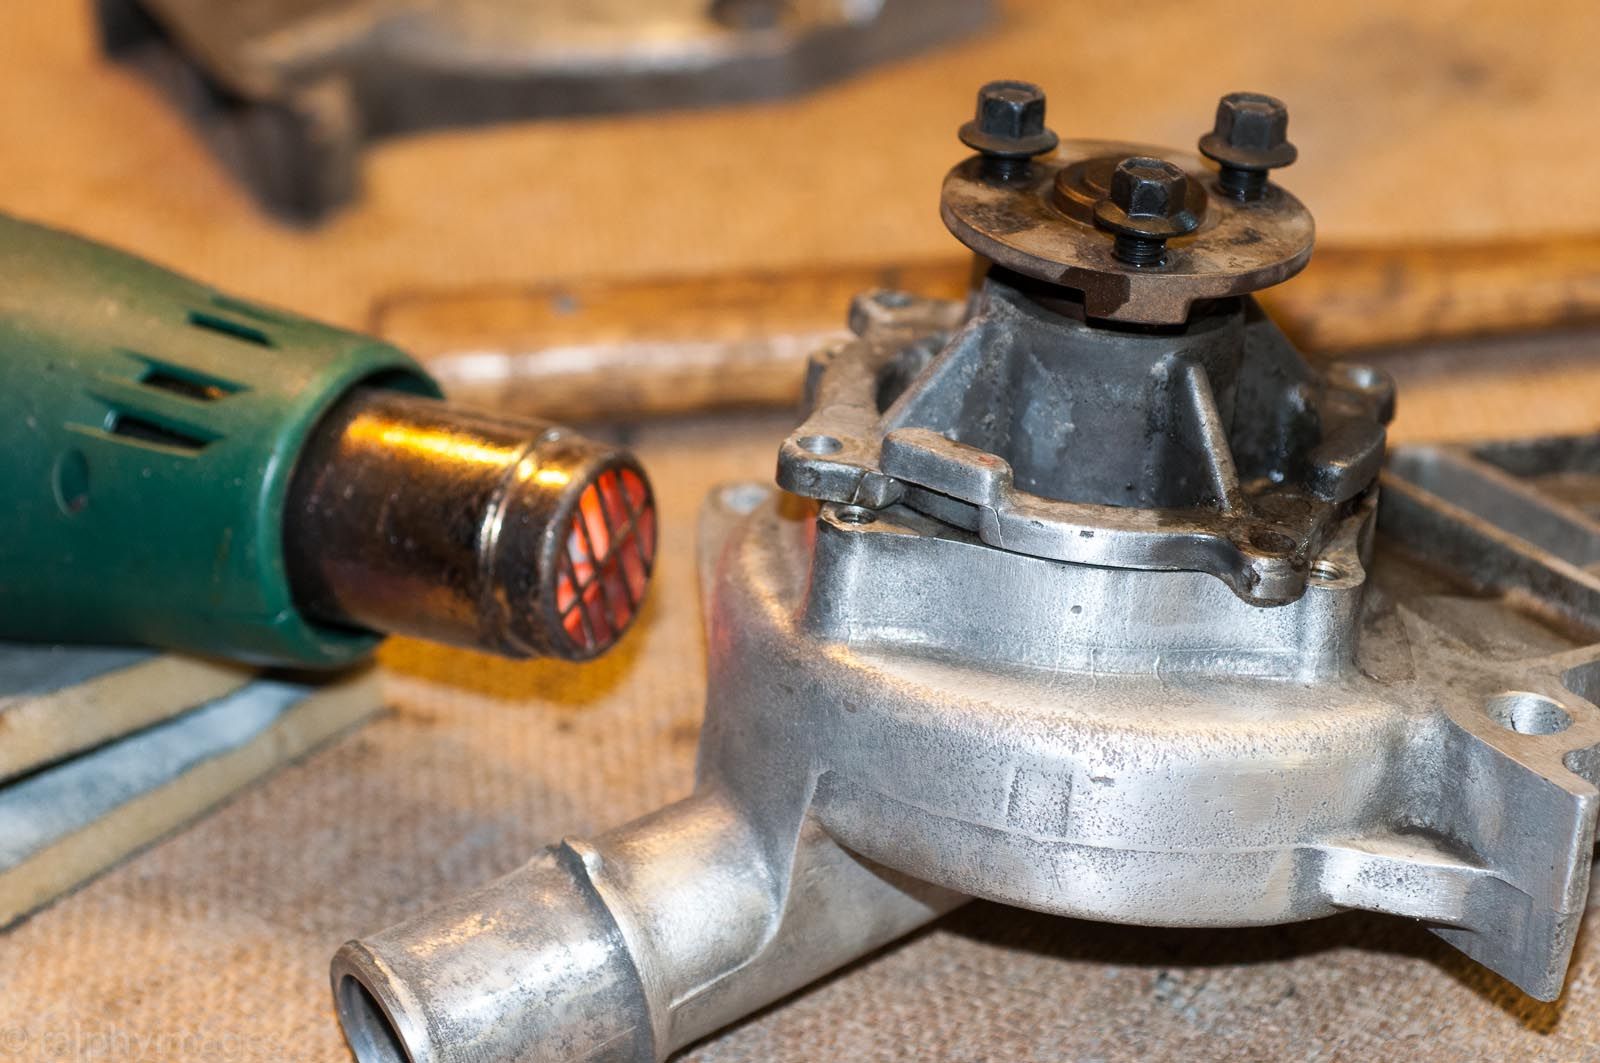
And indeed the water-pump impeller housing was as solid as a solid thing. Penetrant and some tapping didnt yield it one millimetre, so time for some heat persuasion:
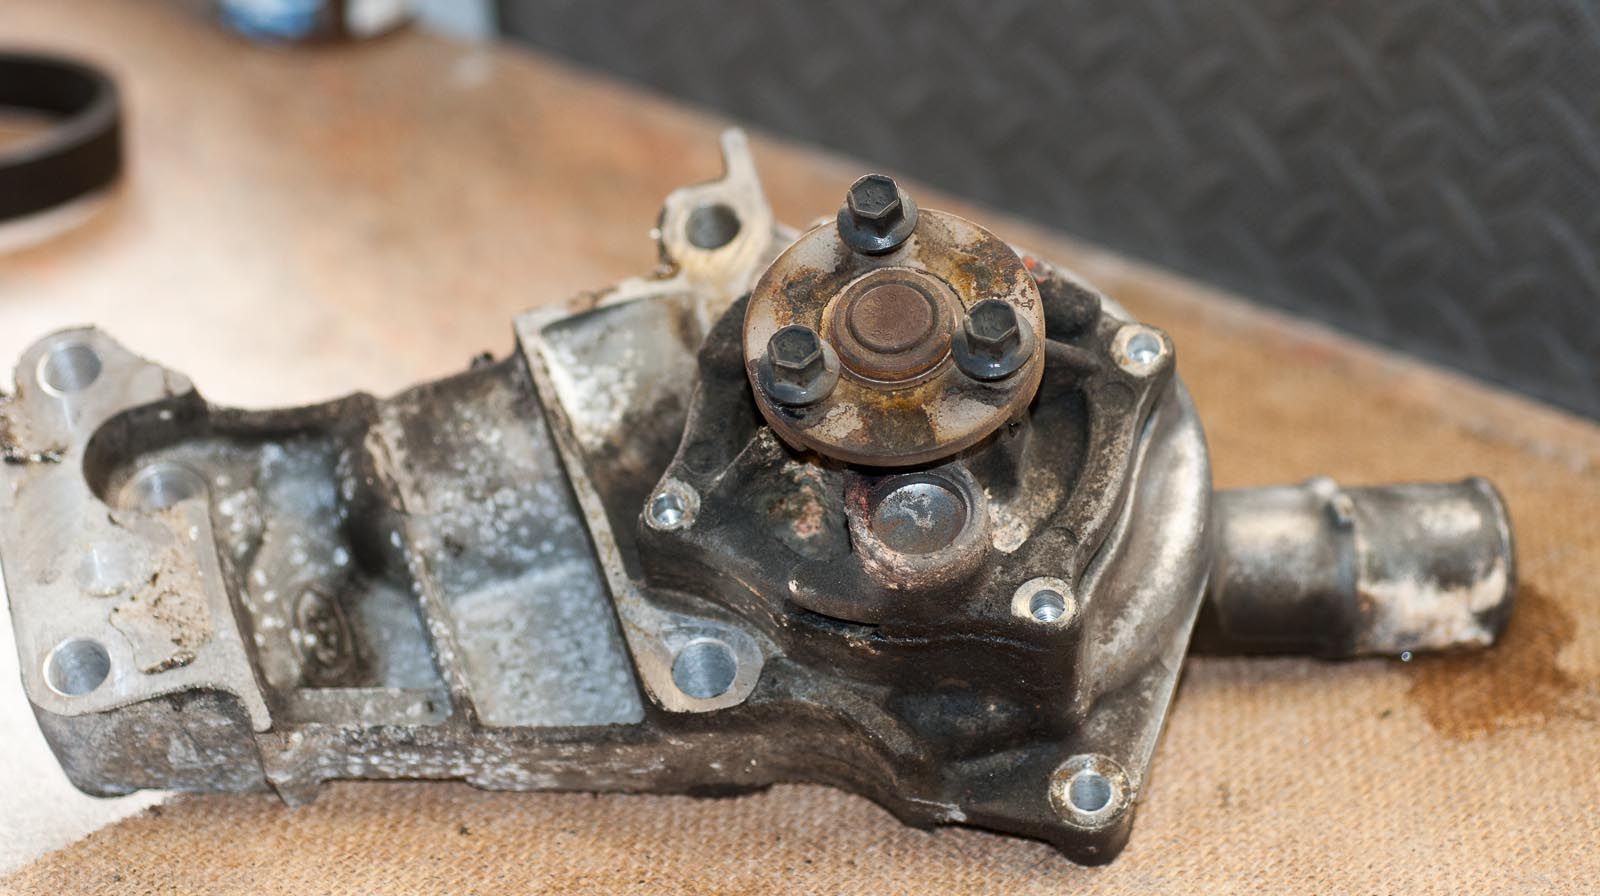
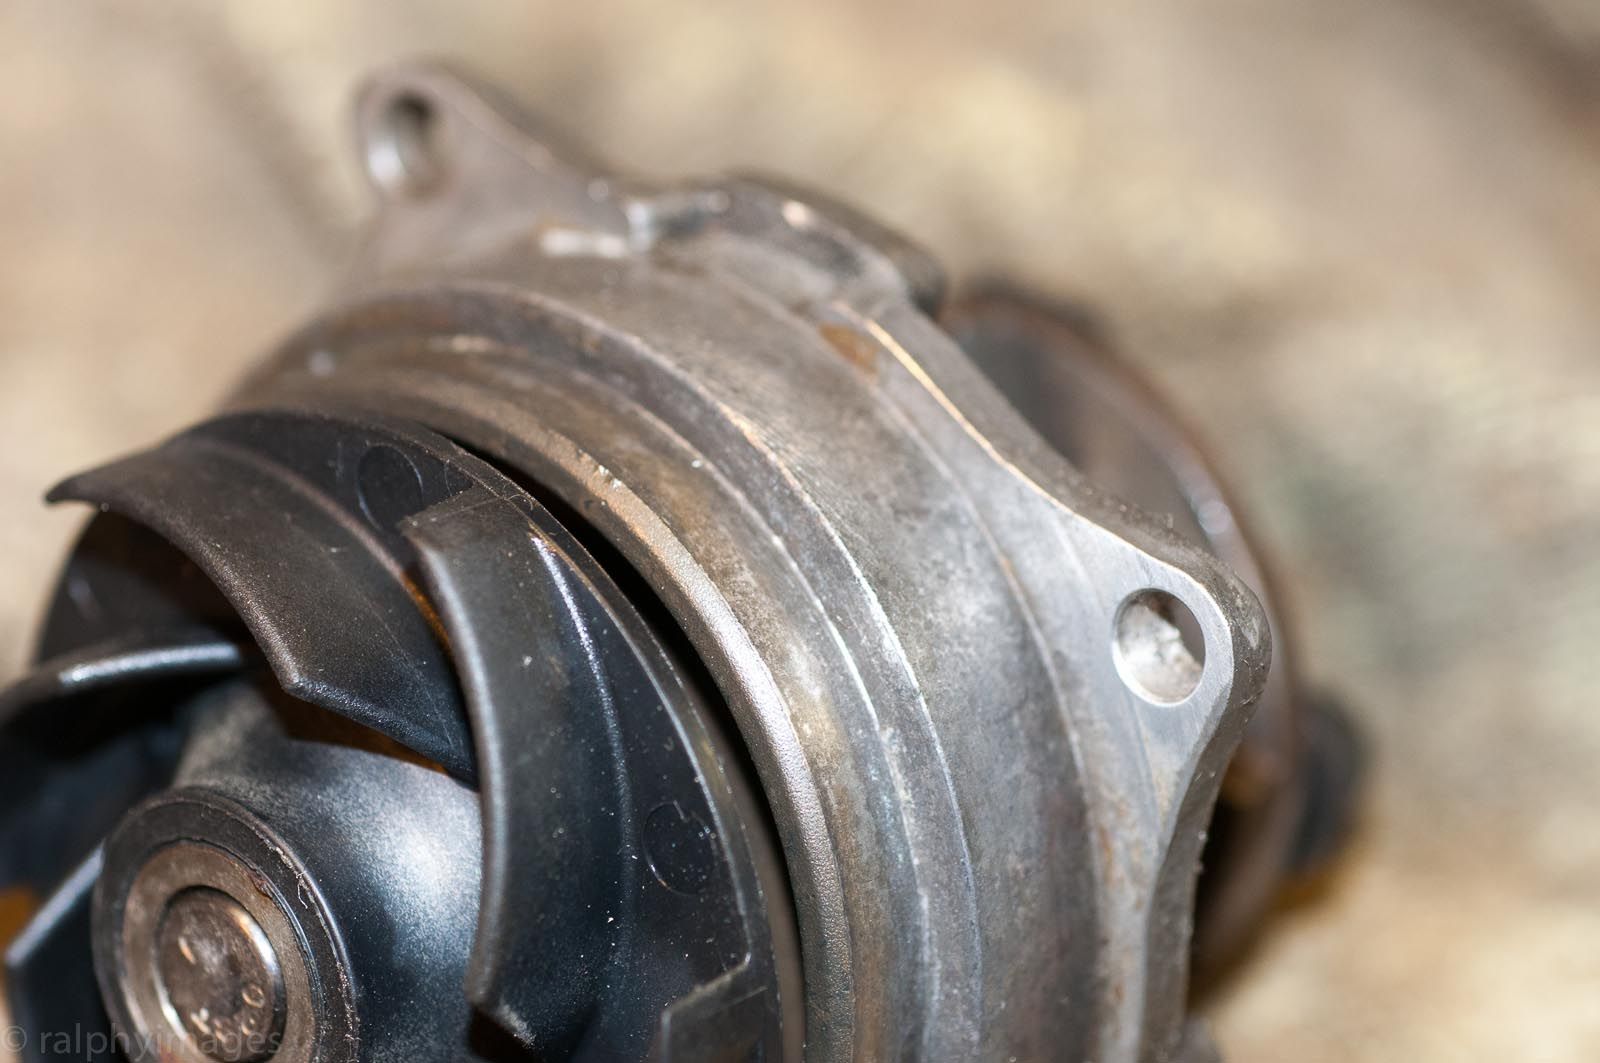
Finally, it was off - and the reason why it proved difficult:
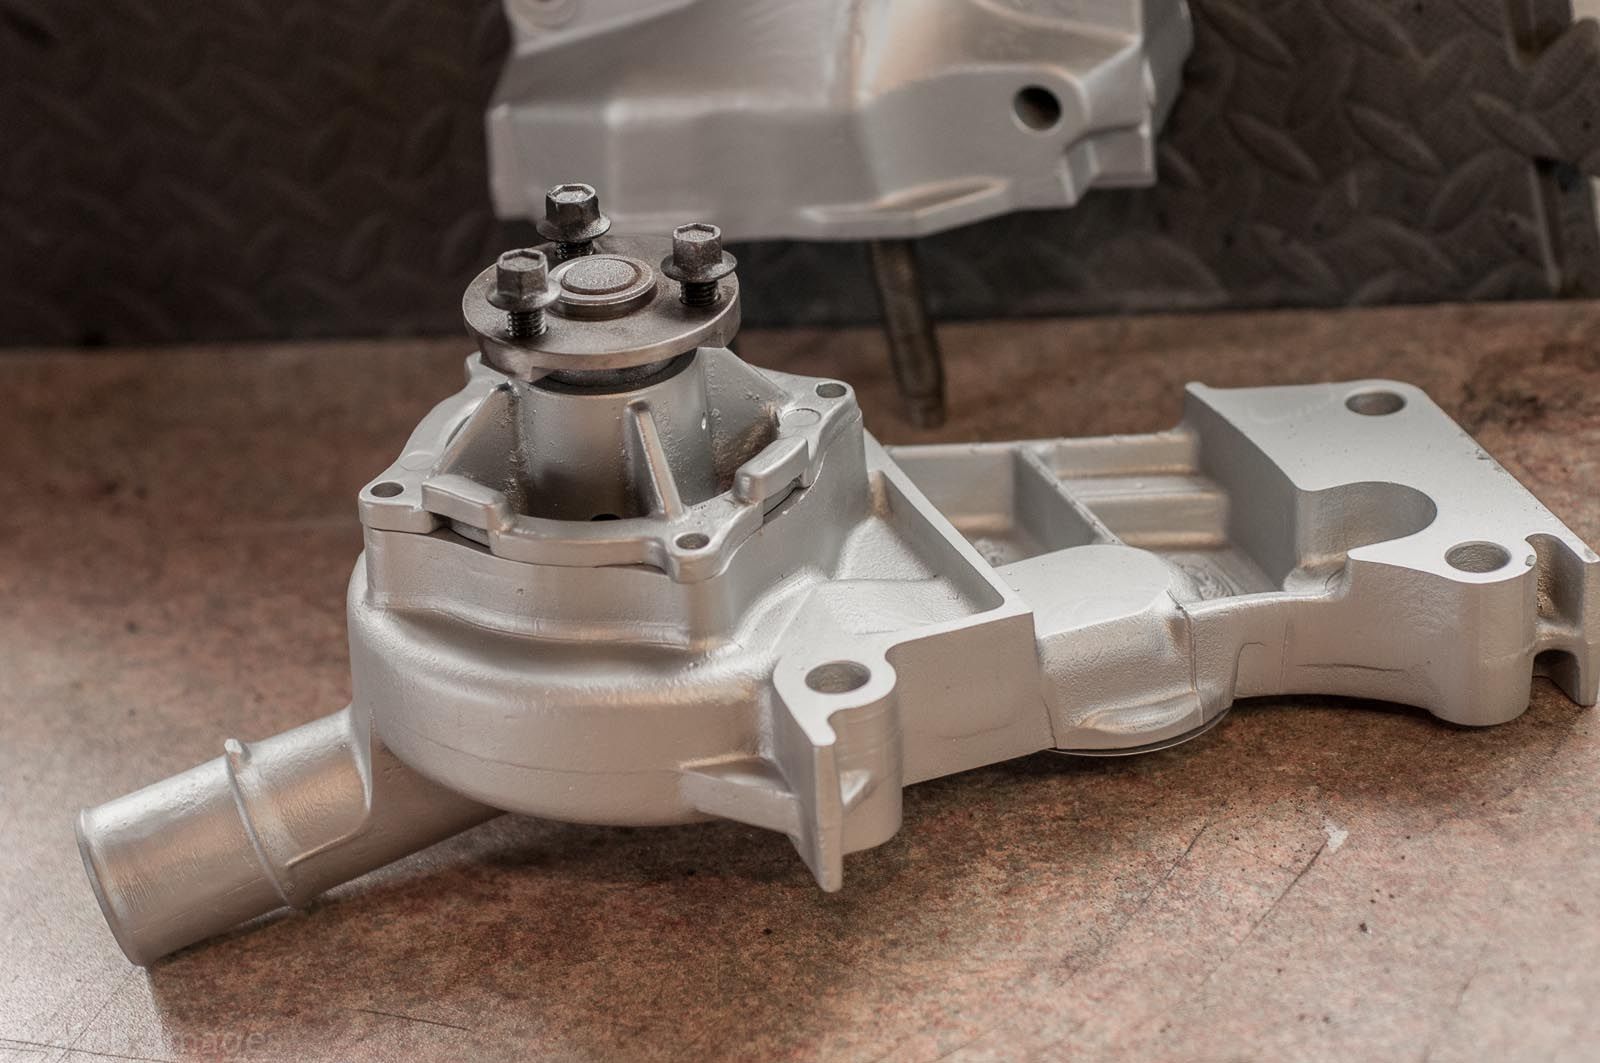
A bit of a clean-up and voila:
R
Ignorance breeds Fear. Fear breeds Hatred. Hatred breeds Ignorance. Break the chain.
Top work as ever :)
The usual purpose of leaving blocks outside to weather by specialist engine builders is to encourage Rust in the cylinder bores, The theory being that this caused pitting that held oil. Thus giving lubrication to the piston/bore without most being wiped off by the oil control ring. Some even left the oil control rings off till engine run in, Especially those with the ring right at the bottom of the skirt, Some fitt the ring but not it's under spring, thus not being quite as tight, But usually a good ball type hone used properly to give a good cross hatched pattern is sufficient Off course engines running with these set ups could be a little smoky. You should of course NEVER clean round the outside top edges of the pistons in a used engine as the carbon can help with compression and removing can cause more harm than good, The alloy parts besides being stood for a while look to me as though it has possibly had the wrong anti freeze in at some time. But keep it up it's looking good,
Last edited by fishman307; 8th January 2014 at 00:41.
Interesting story, but more than a little weird to my ears. I used to build race engines for a living and worked with many professional engine builders over the years and we used old, used and well weathered blocks primarily because they had been through many heat cycles and had done all their settling and warping by the time we got them. We could then be fairly sure that by the time we'd done our machining and built the engine that it would stay straight. You can't guarantee that with a brand new block. I never ever built an engine with rusty bores and if I'd have tried, I probably would have been sacked.
Last edited by Groundrush; 8th January 2014 at 09:57.
looks good
congratulations
Other things have got in the way of the restoration since the beginning of Jan and Im going to be abroad for most of Feb, so progress has slowed somewhat. ;-)
Nevertheless I have managed to get some stuff done, primarily in the shed as the rain has kept me away from the chassis work.
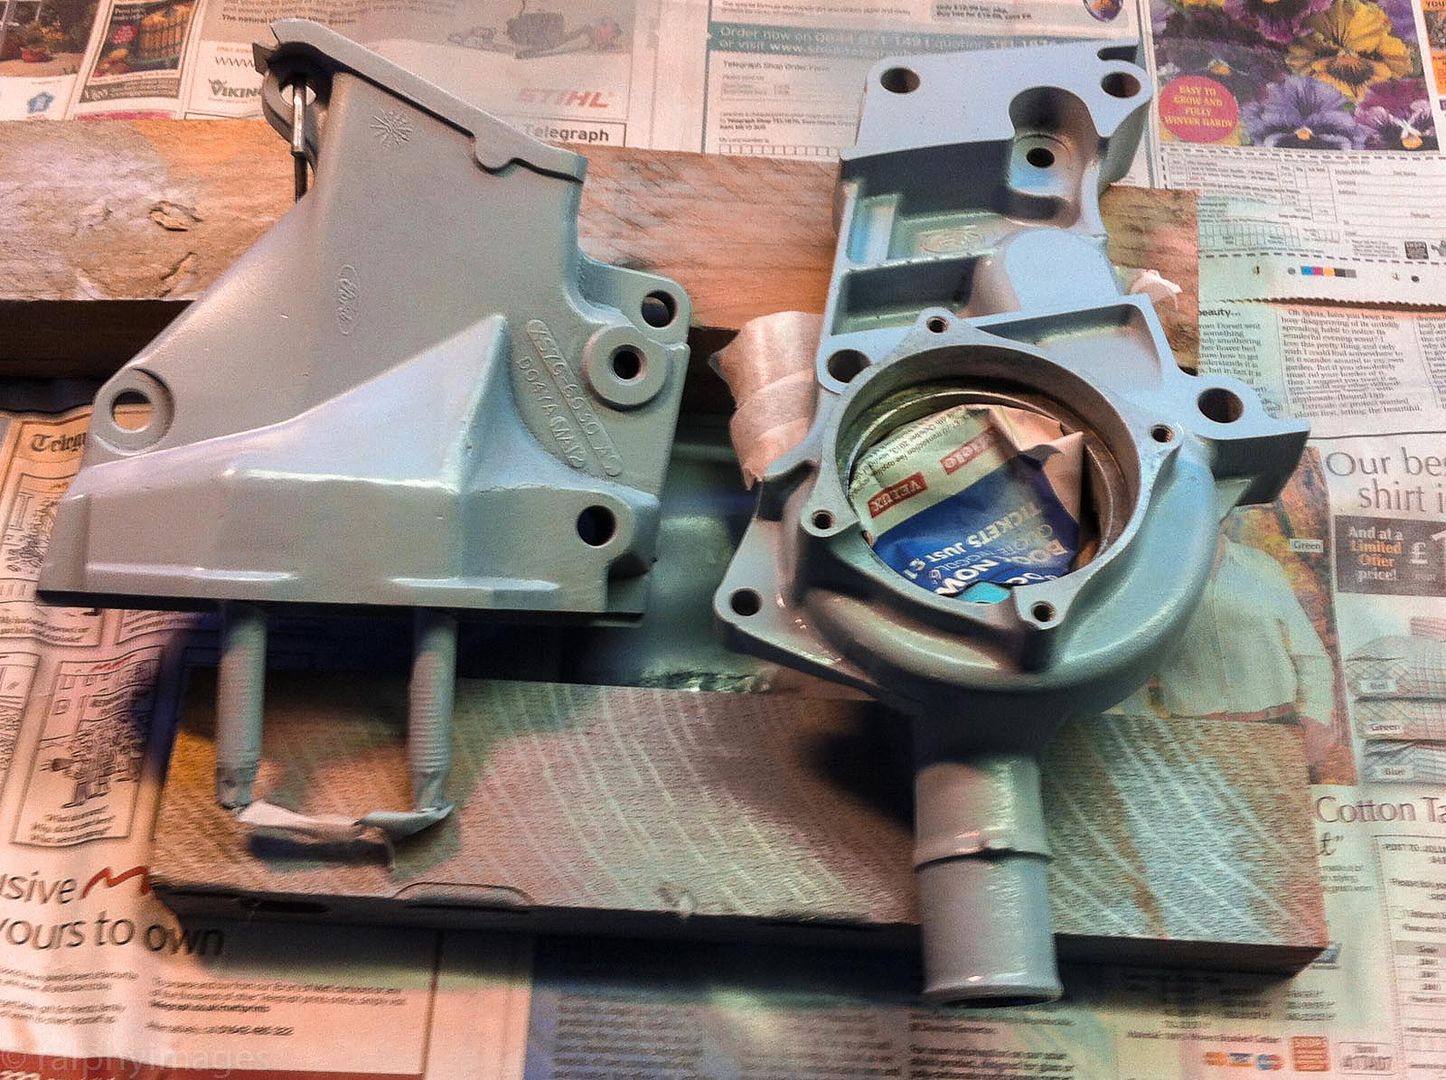
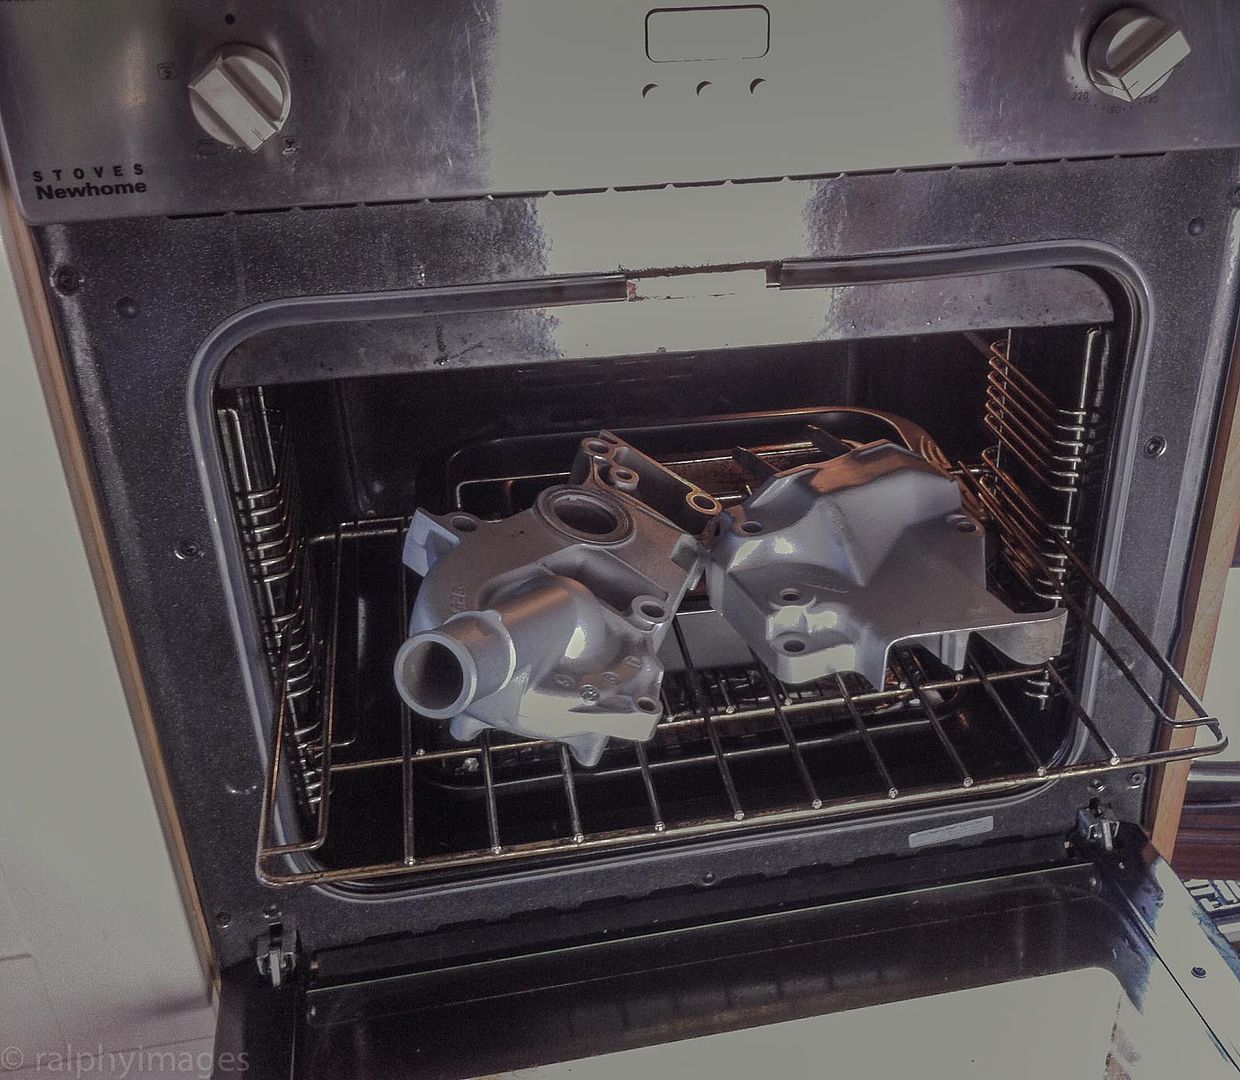
Earlier last week, the water-pump components where primed, baked, painted and reassembled:
Head removed and first view of the inside:
And clearly some work needed on it:
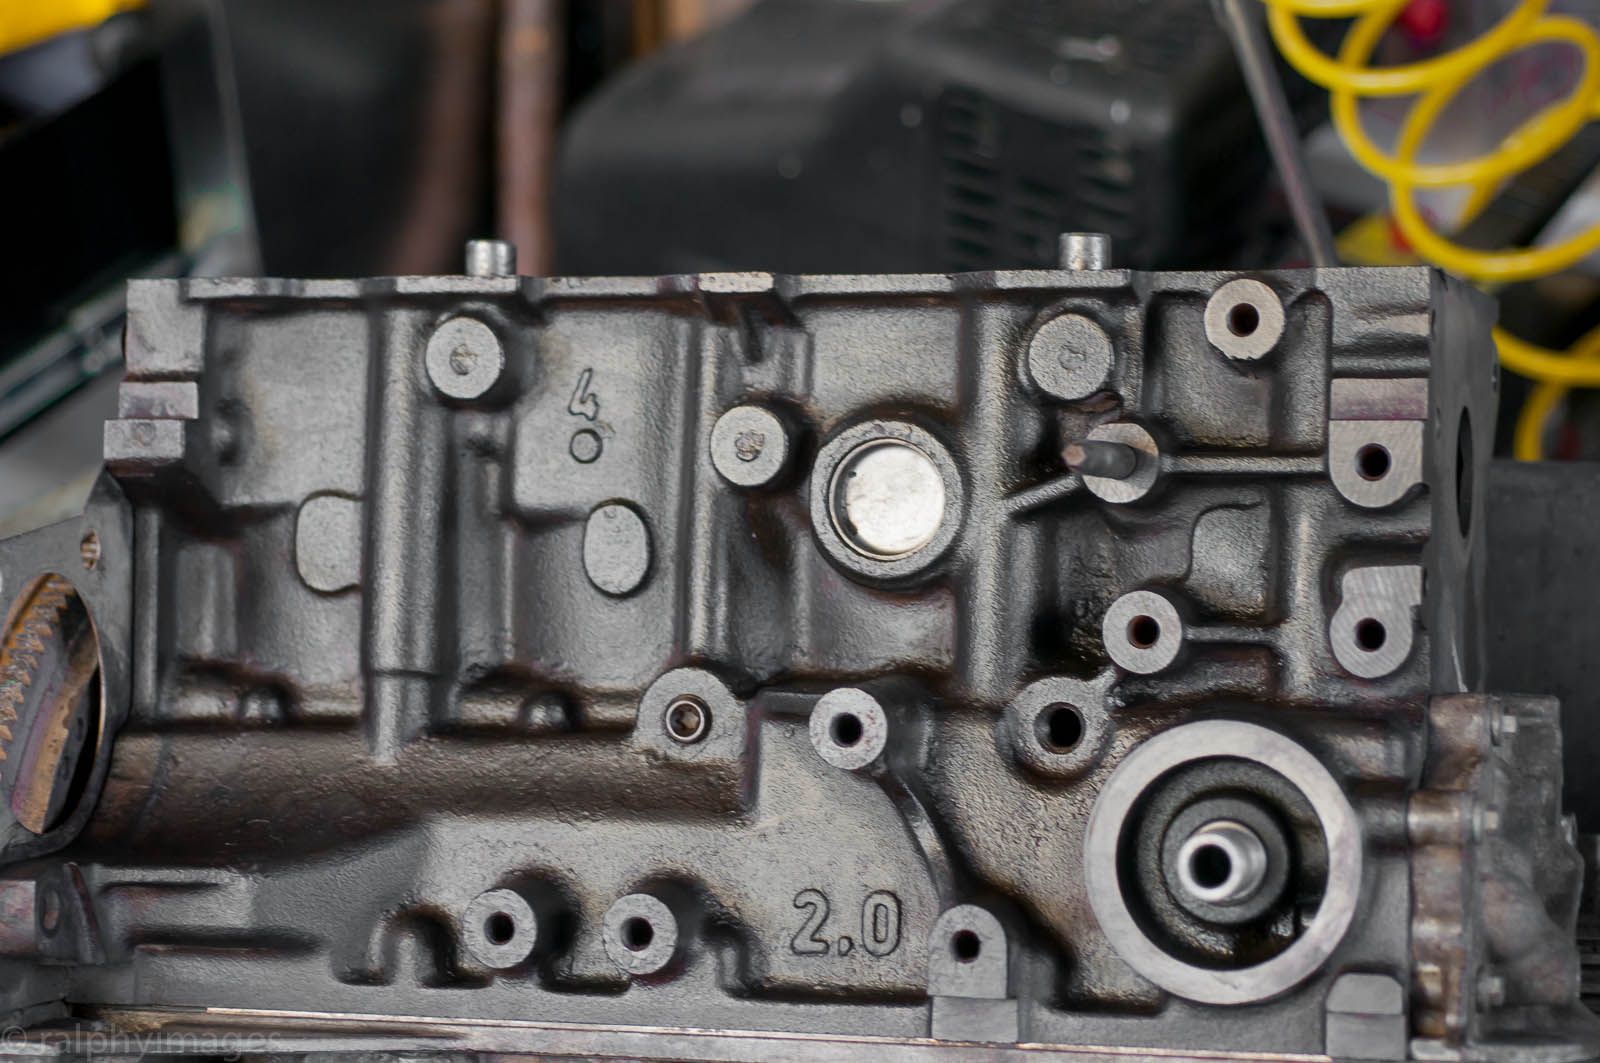
Head put aside for later and attention turned to the block. The original coating was partially disintegrated and hiding a fair amount of rust:
Lots of wire-brushing:
And then some rust-tratment followed by primer:
Gearbox re-assembled after new gaskets and bearings then given a final coat of paint:
R
Ignorance breeds Fear. Fear breeds Hatred. Hatred breeds Ignorance. Break the chain.
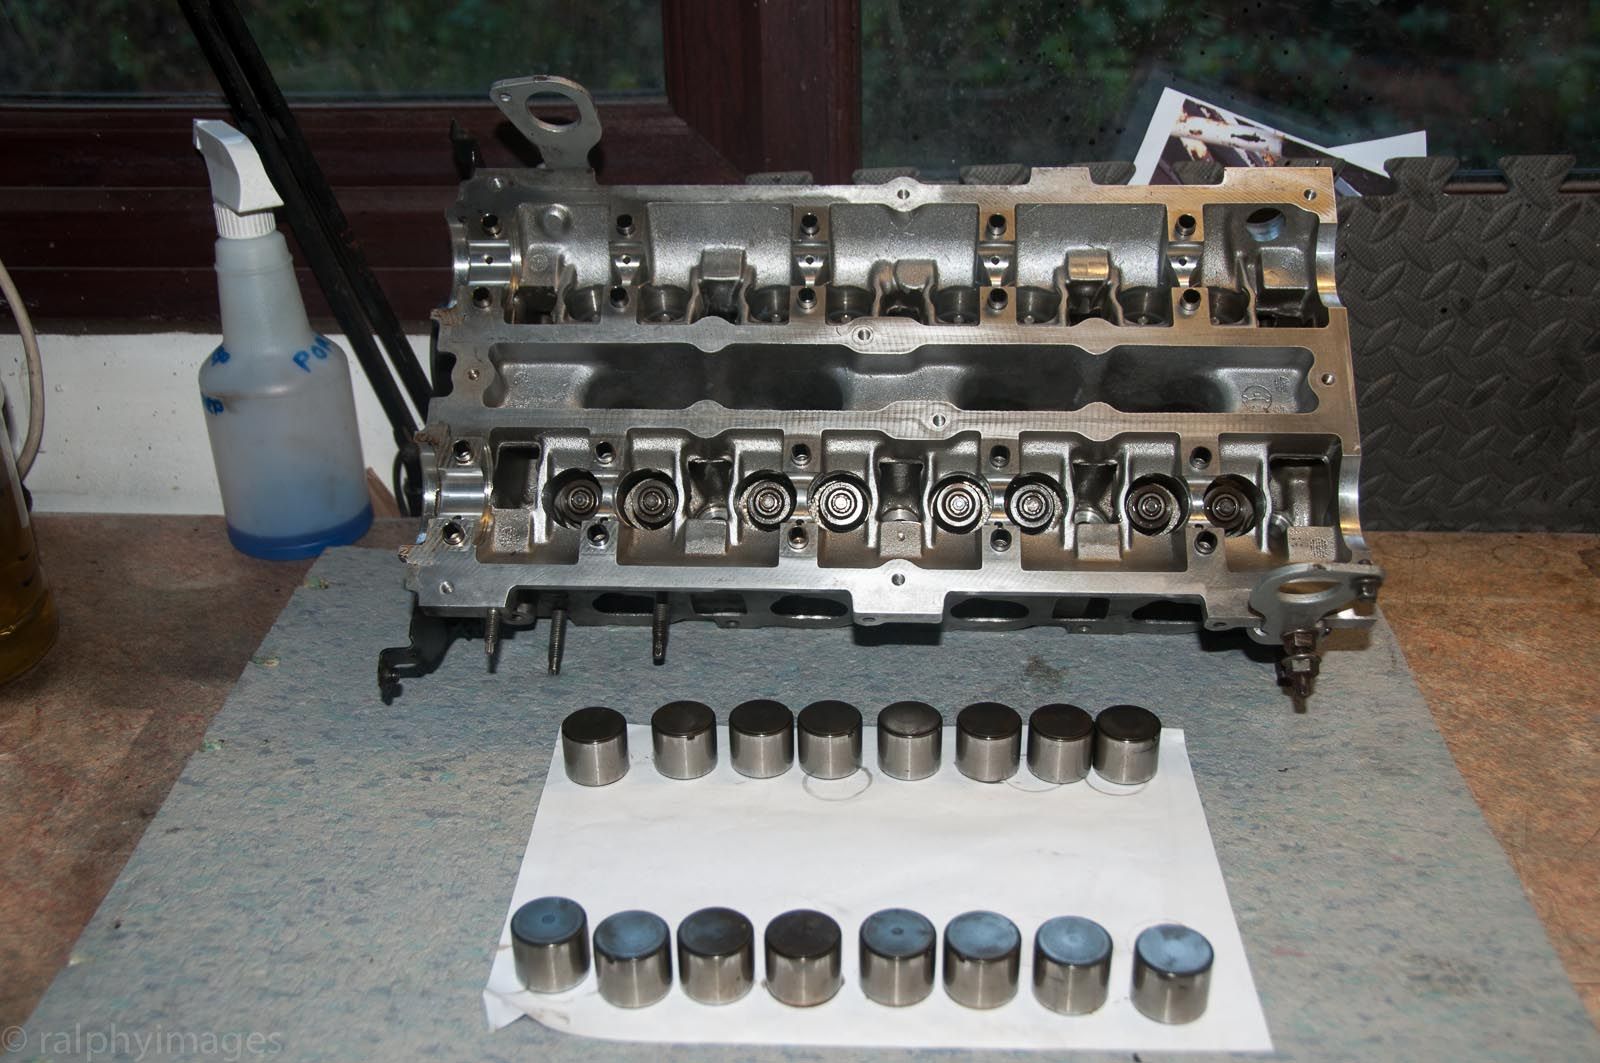
Time to tackle the head.
I planned the following:
check everything for tolerances
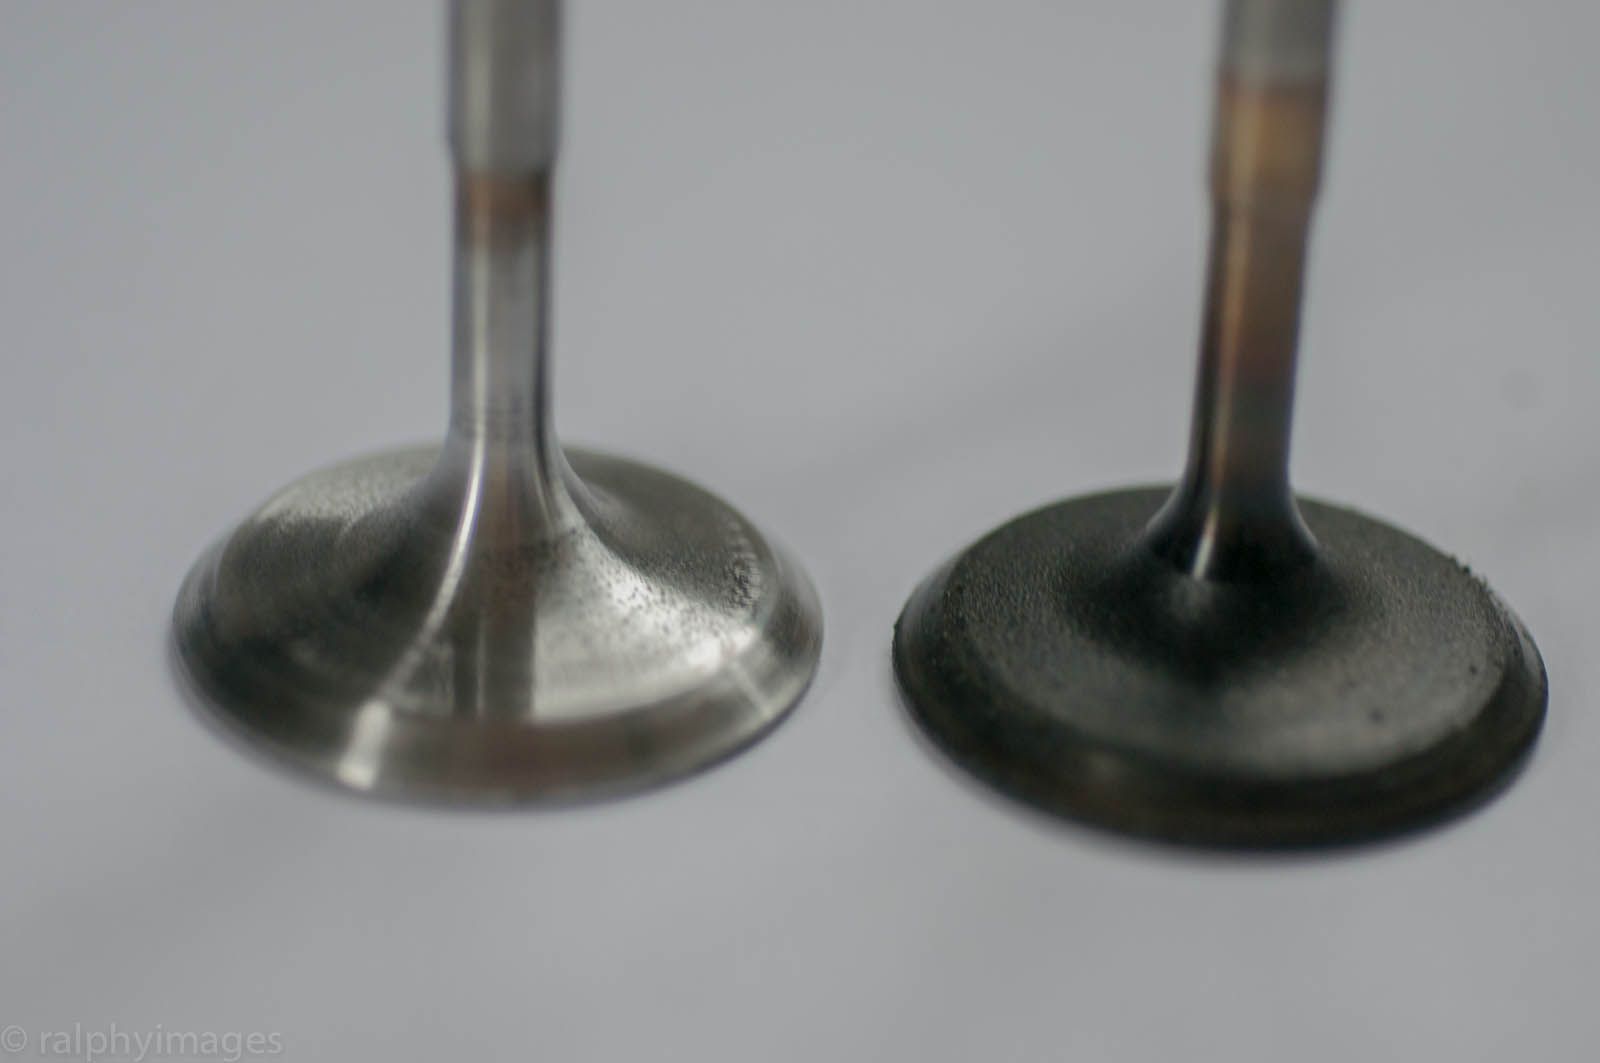
clean the valve heads
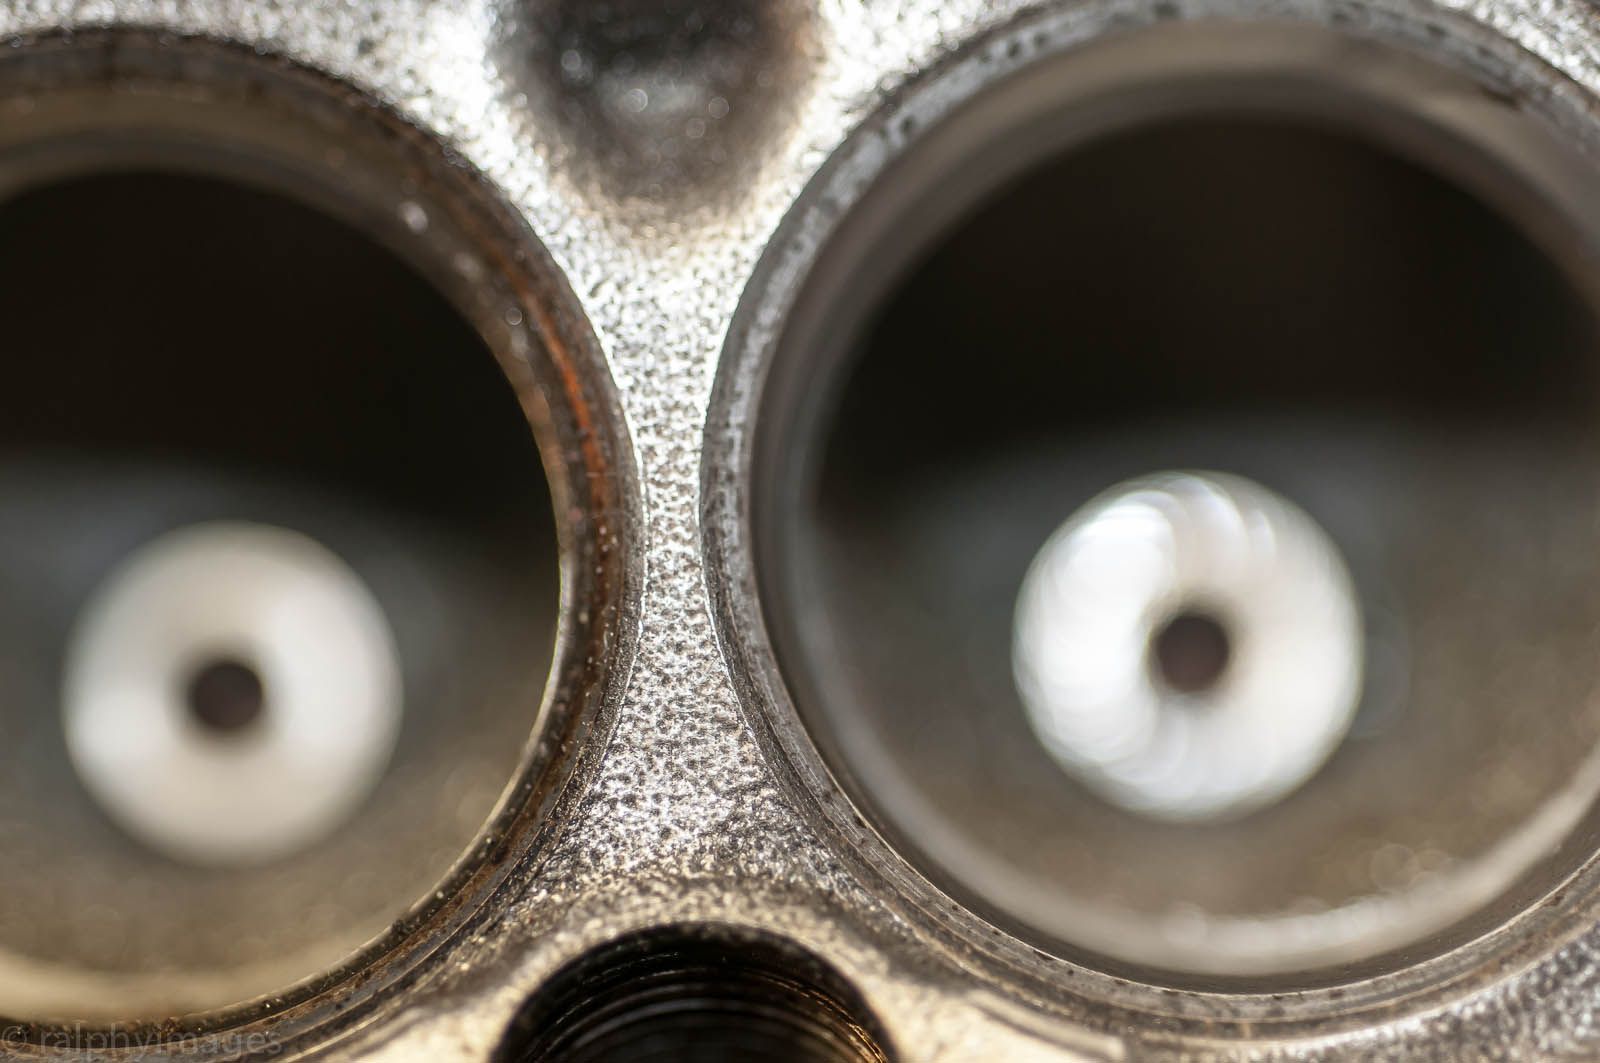
re-grind the valve seats
de-coke the chambers
smooth off the inlet/outlet ports
Camshafts out
Shims out
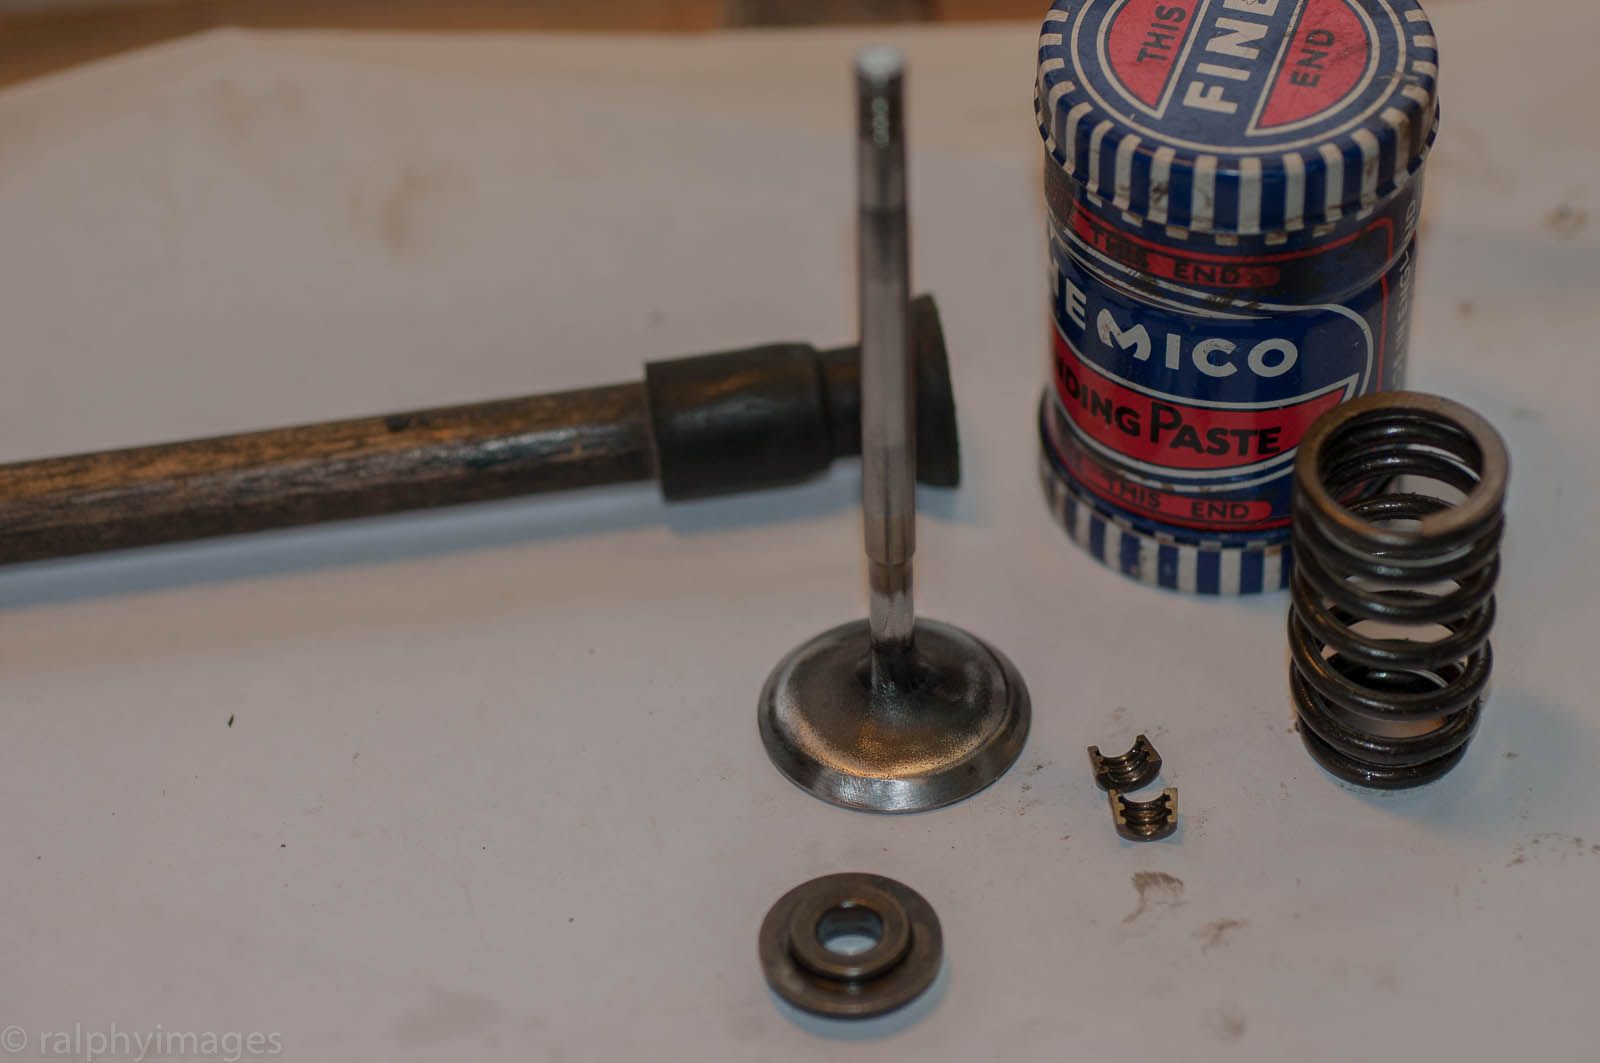
Each valve stem is held by two tiny collets, so theres 32 of them to take off and every one was a bugger to remove without dropping... They have 3 rings to them and sit in corresponding grooves on the top of the stem: heres (yet another) one disappearing down the left side of the valve:
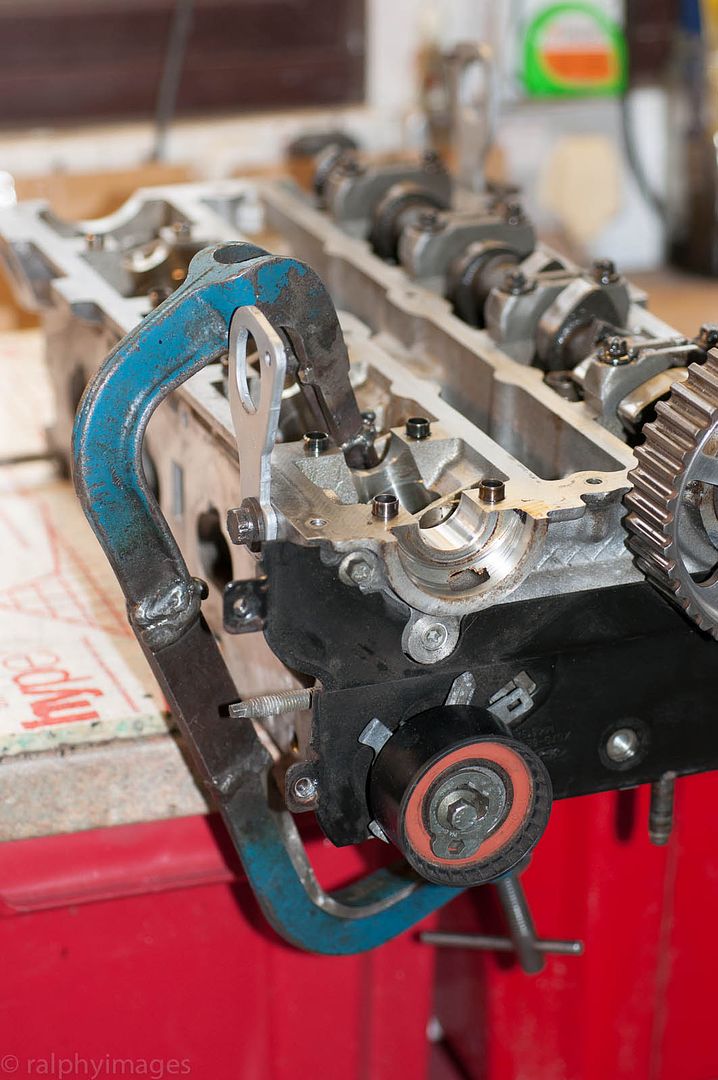
Probably it would have been an easier job with a proper valve spring compressor, but this home-made affair worked - after a fashion:
Getting to work on the grinding:
Before & after valve - except its actually an after & before order shot:
Before and during the grinding of the seats:
Then all reassembled - and after coaxing all 32 of these &%$@*$ collets back into place, Ill never moan again about Seikos collars & pins.
R
Ignorance breeds Fear. Fear breeds Hatred. Hatred breeds Ignorance. Break the chain.
New to the forum and only seen this thread - I had a pre-lit 1700 xflow Westfield a few years back - really enjoyed it - good progress with your project - looks well finished - well done
It's sounding like a broken record: I've said it over and over again and will say it again: great job, man! Off course I can not post without making a suggestion (...): I prefer to paint the outside of my engines in the correct & original color, but... I use a non gloss paint! When something's leaking, a shiny trace will reveal itself on the non gloss paint, thus making it easier to find the source/leak. Perhaps something you would like to consider?
Menno
Here's a pic of my TR3A's engine:
Menno
Top work as ever Ralphy, somehow you always seem to do things just ... right :)
On the back of this thread last weekend I reviewed the work I'd done previously on my project and in fact it's not so bad, I could improve a bit by using some of the techniques I've seen here but the bits on show are pretty good as they are painted and i've done a reasonably job on them (and not least repairing missing metal quite well). Just need to sort out somewhere to get the frame repainted, that's holding me up now, because the engine is ready to be rebuilt but I want to do it in the frame.
Anyway, I won't hijack further, can't wait to see the car going back together, not far away now :)
Just found your thread whilst diverting away from watches, this is much more interesting, great to see something being brought back to life and back to full health. Well done
My least favourite job as a youngster was lapping valves in with a 'lapping tool' which was basically a wooden stick with suction cups on either end and three pots of grinding paste! I really hated that job, it was character building, I think but did ensure you got a good gas tight seal.
Have you tried a small blob of grease on the collets Ralph, we used to put a bit on each collet and use a small flat blade to pick them up and position them in place.
Anyway, nice to see it coming along, the head doesn't look bad at all condition wise :-)
Paul
Going nicely there Ralph, good to see more progress. Have you decided on the colour yet?
F.T.F.A.
Menno: all suggestions gratefully received, Ive just completed painting the block in black gloss! Having said that it could do with another coat and by chance I saw a photo of the same engine yesterday but done in blue and I rather liked it, so I may go down the matte finish route.
Simon: thanks for the comments and good luck with the repainting. Do you wants someone else to do the work or would you prefer to DIY in suitables premises?
Paul: nothings changed, it was a wooden dowel with rubber cups I used. No, I never thought of the blob of grease idea: wish I had! Mentally bookmarked though, so thanks.
Magirus: the Polestar Blue is still first choice but Ill make the decision when the rest of the works done. Just about everything under the bodywork will be either black or silver, so that leaves the panel's colour choice wide open for alternatives.
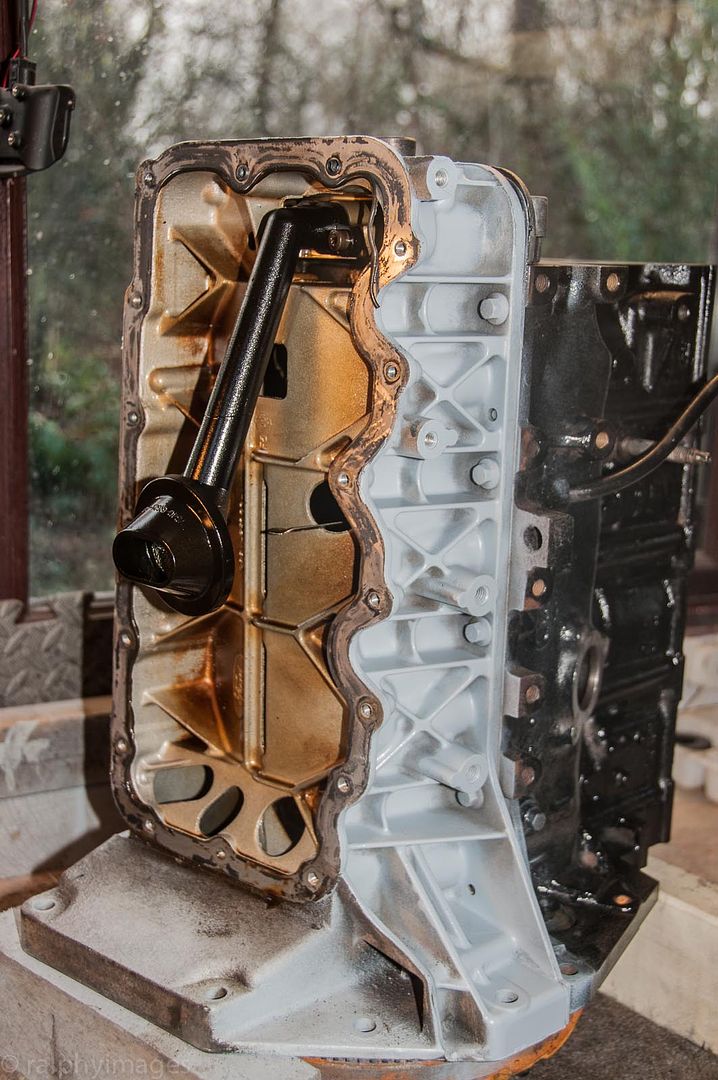
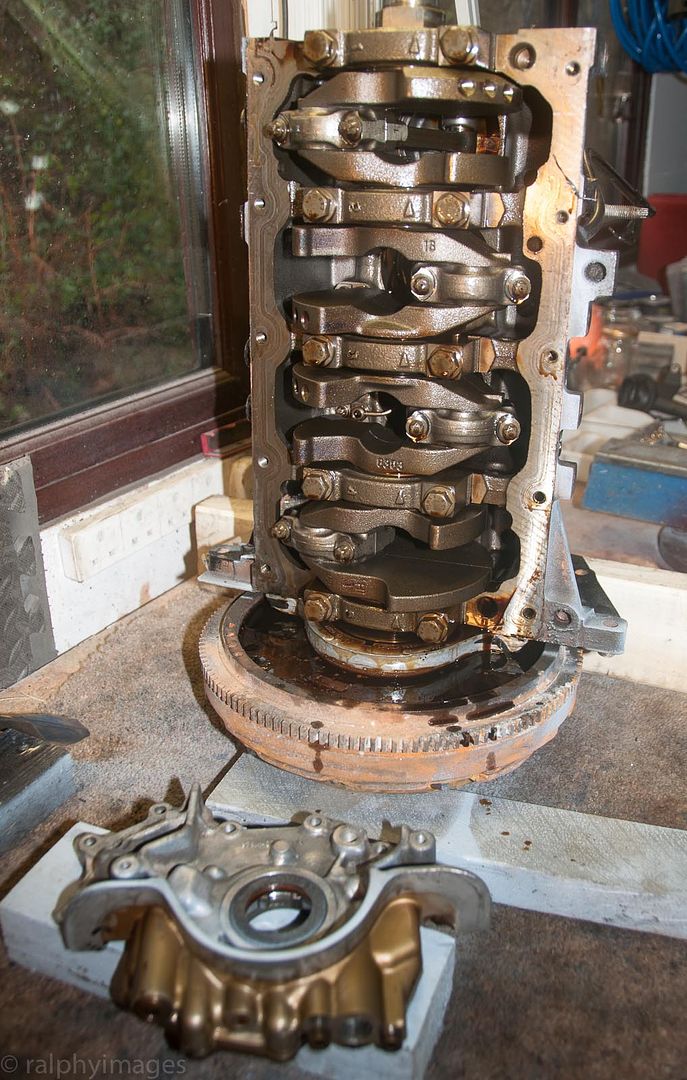
With the removal of the head the engine was now light enough (just) to lift it out of the wheel-barrow and onto the work-surface: a double bonus as I no longer need to be bent over to do any work and the reclaimed space with the wheel-barrow out of the shed was much appreciated.
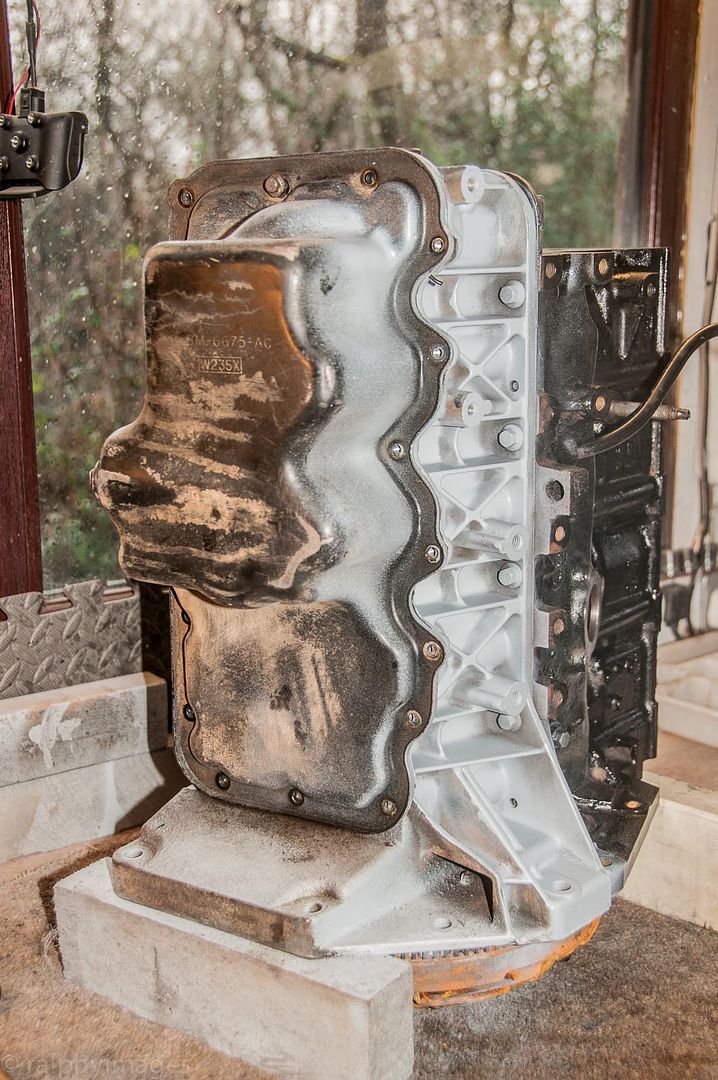
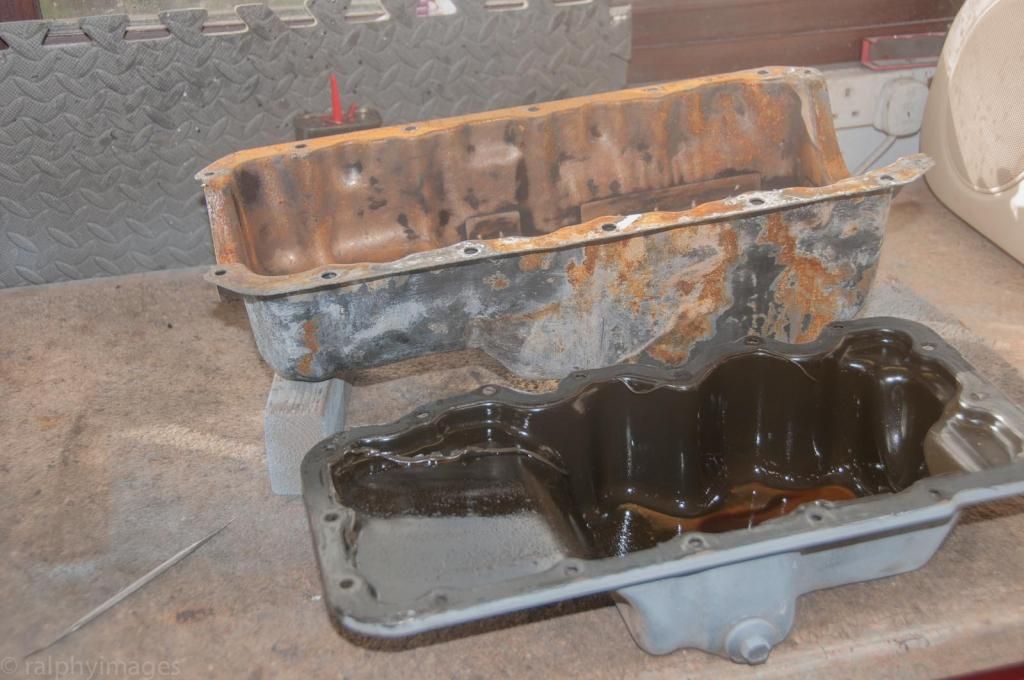
First on the agenda was sump removal. The Zetec sump/lower block makes the engine overly deep, so a popular modification is to change it: either for a bespoke sump (£££s) or an old Sierra 1.8 CVH donor. This allows you to lose the lower block in favour of just a sump. The problem with this being a popular choice though is that they command high prices second-hand and I ended up paying c. £100 for mine. :-(
Up on the bench:
Sump off:
Lower block off and oil pump removed:
They are not a straight swap by any means: some re-drilling and banging to reshape will be needed:
The next few days will be busy as the plan is to aim towards having everything as ready as possible before I go away. Then on my return the whole lot can be taken straight away to a workshop for assembling the engine, gearbox and running gear with wheels on, then back home for me to continue with the wiring and internal panelling.
Well, thats the plan, anyway. ;-)
R
Ignorance breeds Fear. Fear breeds Hatred. Hatred breeds Ignorance. Break the chain.
A 'shallower' (is that a word in English?) sump means that you will loose oil storage capacity. Looking at both sumps on your last pic, I think it's about 0.8 - 1 ltr. I'm sure that the engine will function properly with the smaller sump (after all, it's an original Ford item from another car). But, the sump also acts as an oil cooler. The larger sump allows oil to cool due to the airflow generated when you drive and due to the larger amount of oil in the sump, it will take a little longer (= lower temp) before the oil is picked up by the pump.
A long story perhaps, but I would like to advocate the use of an oil cooler with a thermostat.
Menno
Bit late now but re valve removal, Take an old 6"x 1/2 drive extension, Add an old socket (from memory) about 19mm, Place the socket over the top of the valve onto the spring cap whilst holding the extension, A good sharp smack with a hammer on top of the extension will release the collets and cap, with practice and care the collets stay in the socket and the spring caps and springs just lift off, Shame you cant put them back as quick LOL but as said grease helps, I usually buy a tin of STP, Winns type of additive and quite liberally smear on any moving surfaces , Valve stems, Cam shafts, Rocker shafts etc it gives a bit of lube till the oil gets through and it sticks/stays on better than just engine oil, Just a thought you MUST change the valve stem oil seals when re building,! Re sump make sure pick up suits sump?? Maybe stick a new oil pump in,
Last edited by fishman307; 30th January 2014 at 18:03.
+1! Forgot to mention that in my previous posting! In fact, a new oil pump is never a bad investment!Re sump make sure pick up suits sump?? Maybe stick a new oil pump in,
Menno
Dry sump kits seem to be getting cheaper since I was a lad ??? Might be worth a thought seen as how good a job you are doing.
Fantastic progress Ralphy!
Sorry to hear bout the hand, something no one needs, especially when working on stuff like this.
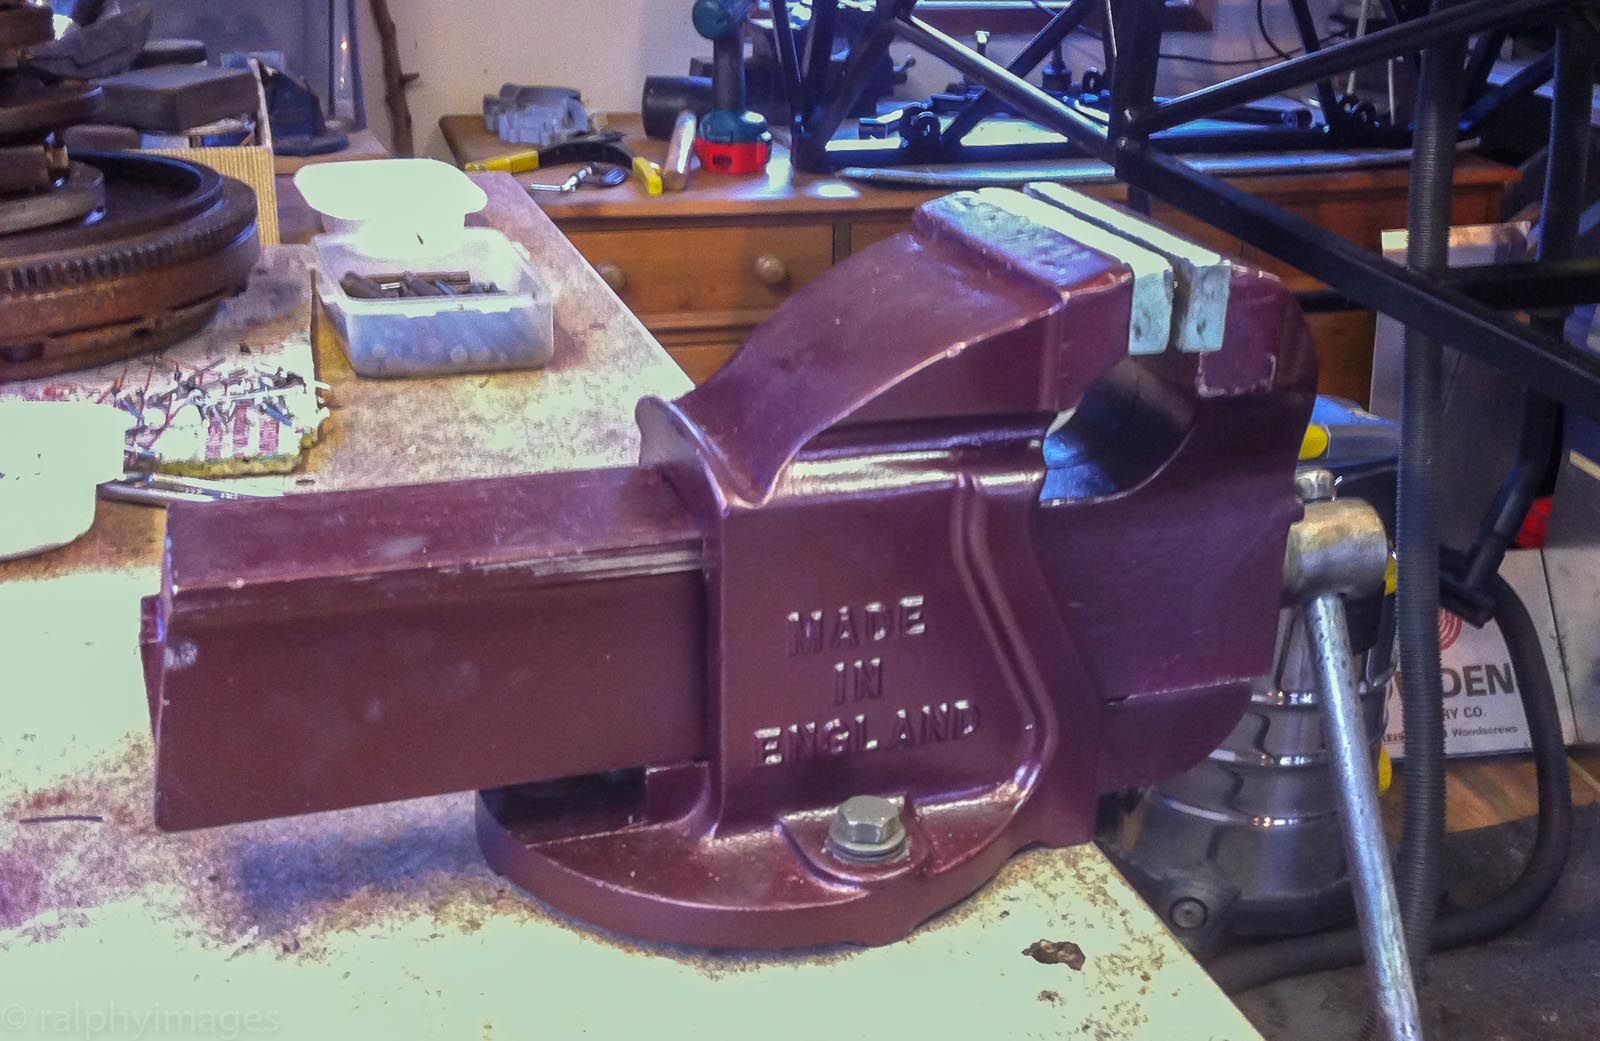
I also have a vice like this, and it is also now blue lol It came from my grandfather's garage back in the 90s and gifted to me when I was restoring a Mk3 spitfire, its one of my most treasured (and heaviest!) possessions! :)
The Wheelbarrow bench is a great new plan for those with limited space, y advice if there is a next time is to try and find a small solid parts cart, you can sit the motor on the top and get all the way round it and still move it about, plus you can store parts and tools underneath. no free tho o course... :/
Last edited by JonW; 9th February 2014 at 23:39.
Machine mart used to do a cheap engine stand (£30.00 ish ??) makes it dead easy to turn over etc, Worth the money
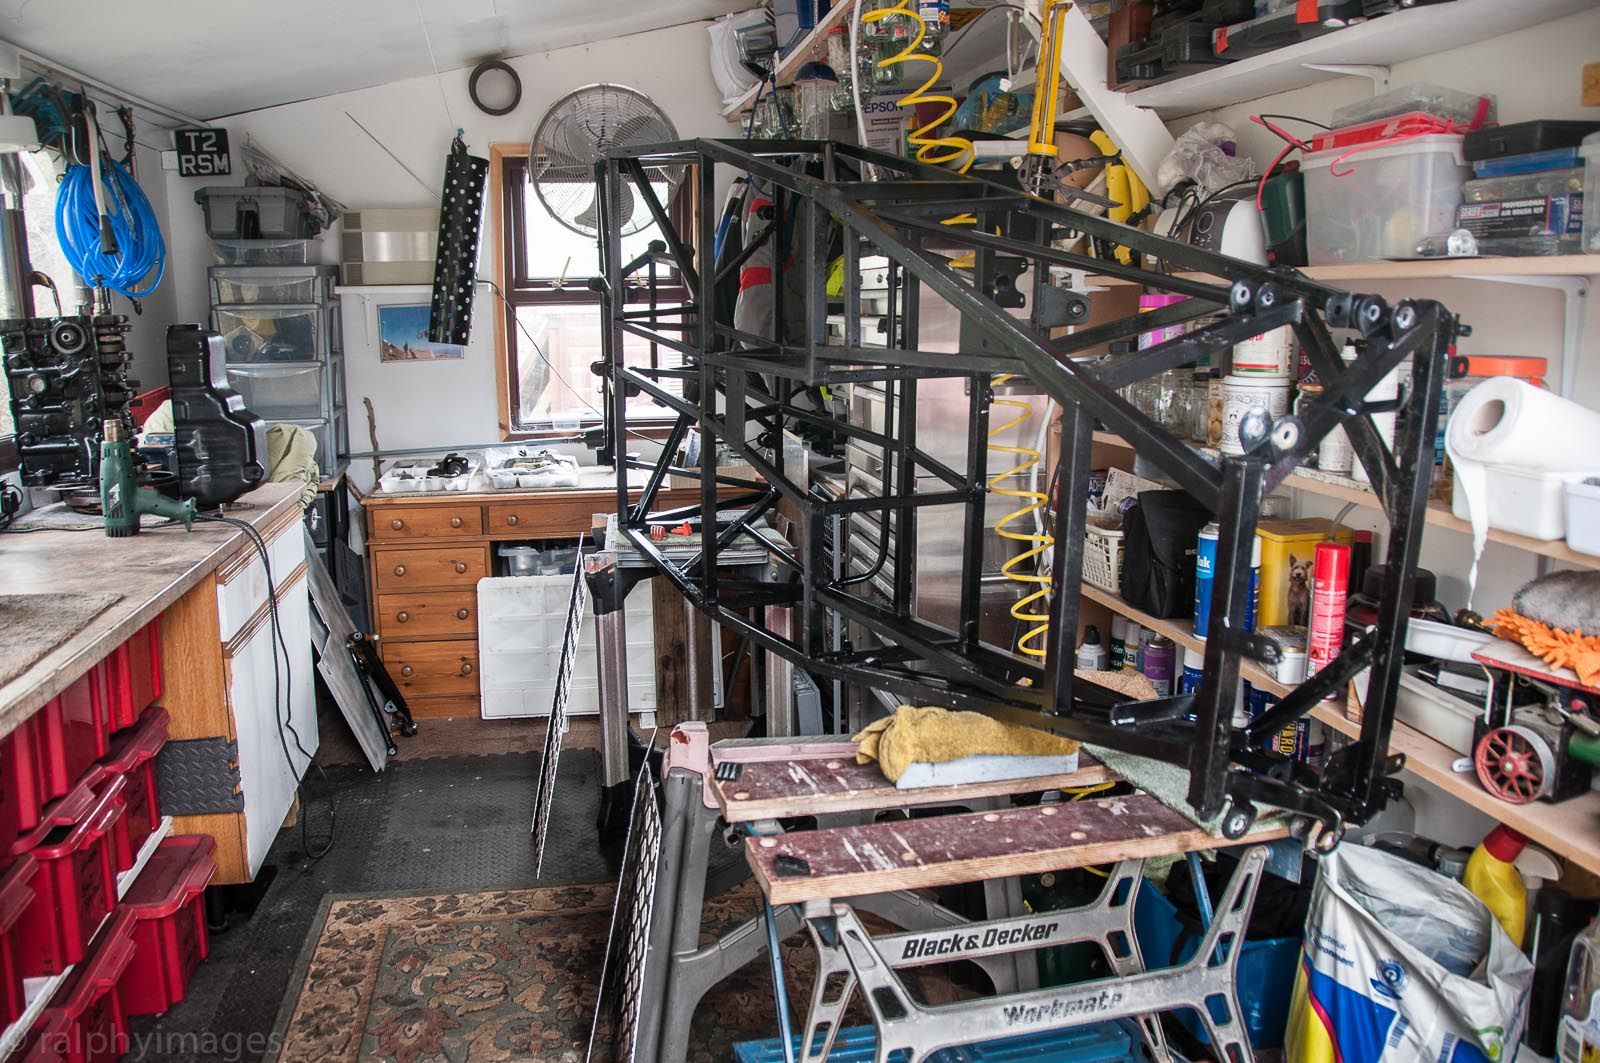
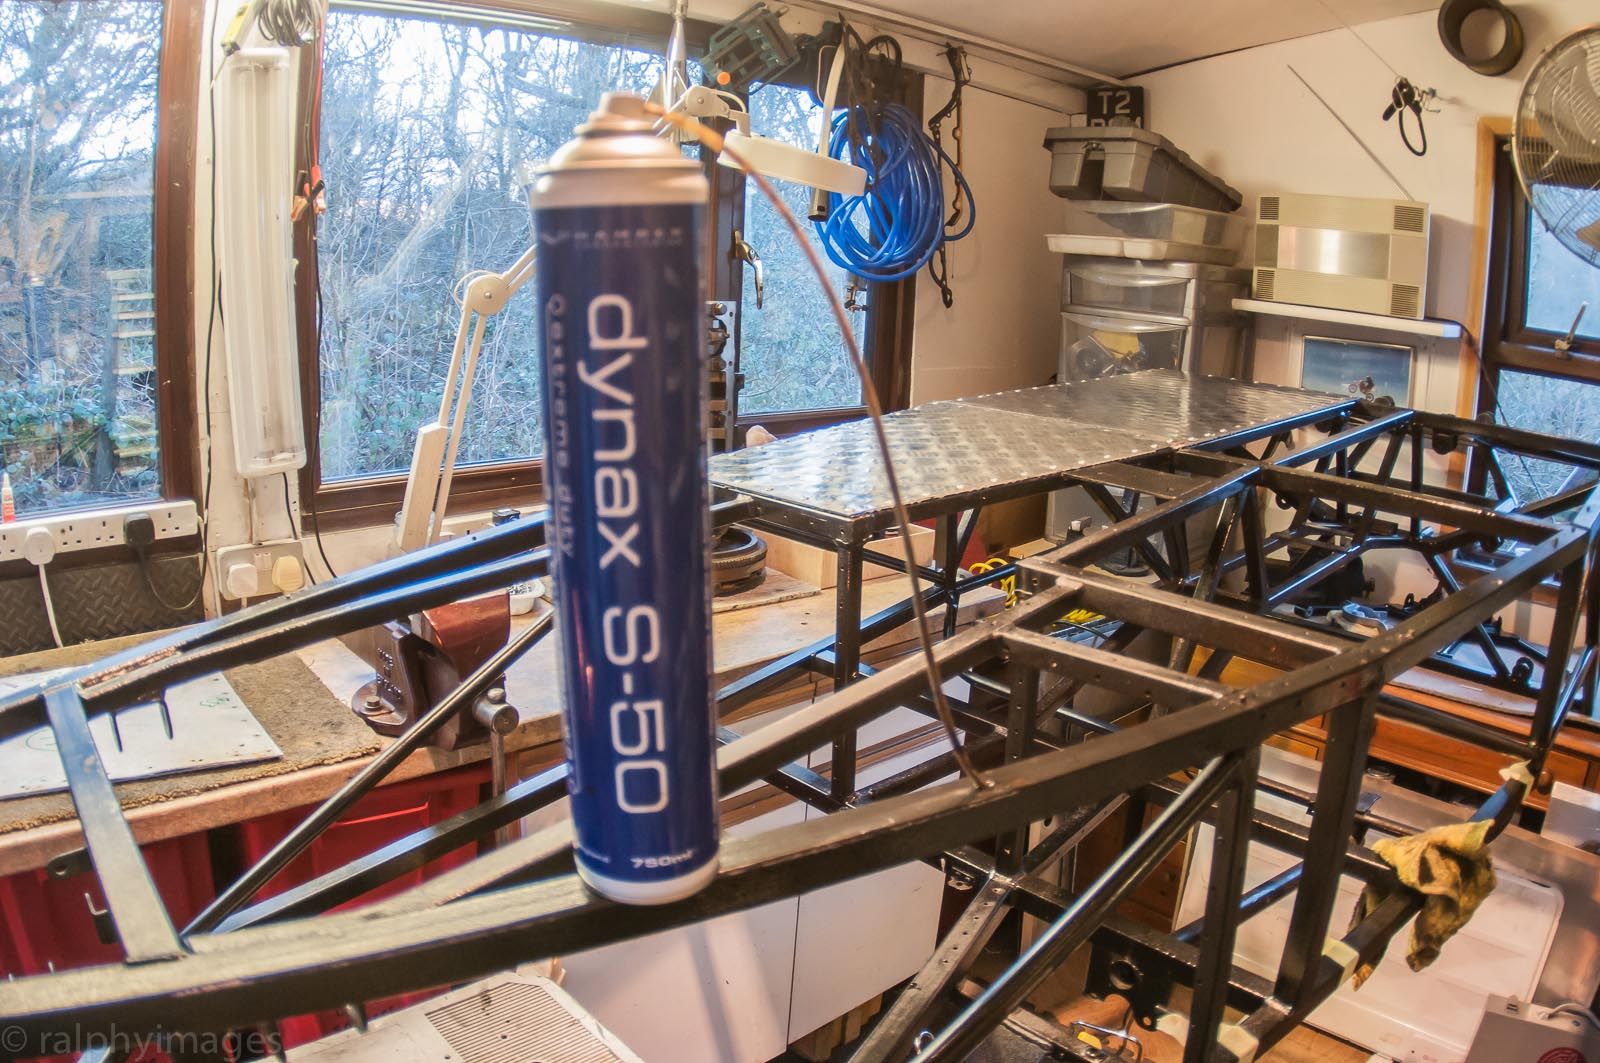
Well it’s been a while, but a combination of dealing with the consequences of local flooding and subsequent trip abroad have have delayed work in the interim.
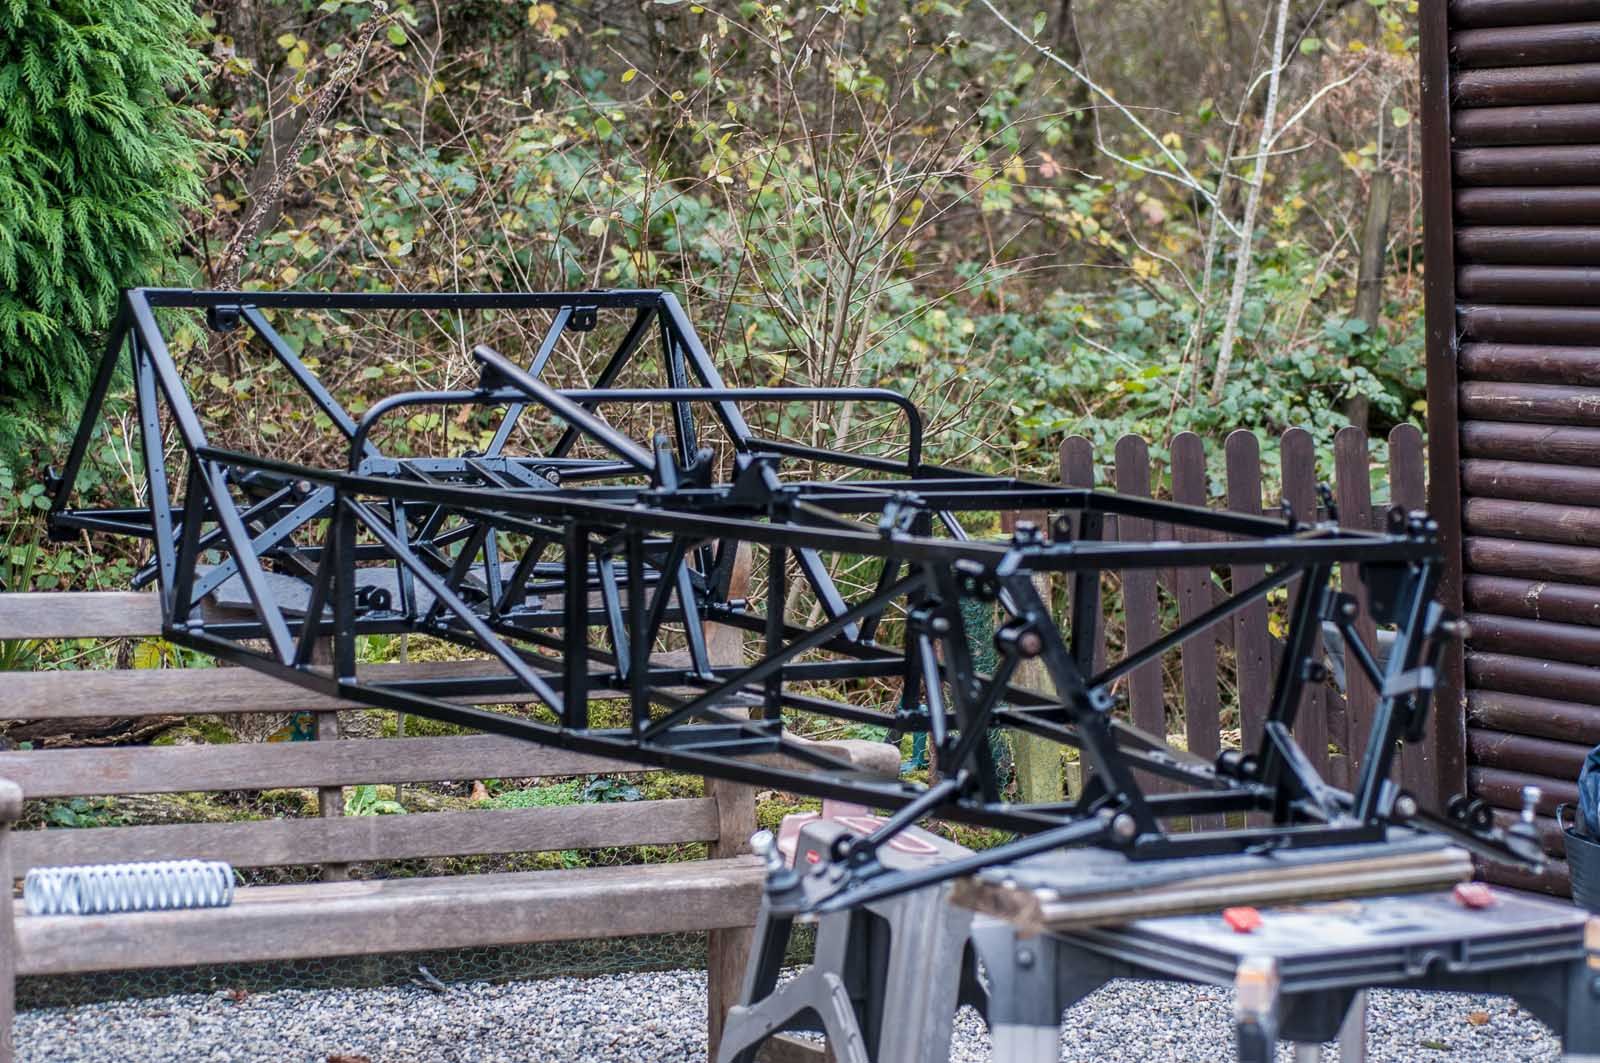
Chassis moved from garden into the shed puts me and it into the dry.
Interestingly, although the chassis had had rain ingress inside it whilst outside (the cover blew off it in the storms) when I moved it the drained water ran clear with no rust evidence, so the injected Dynax was obviously working 100%.
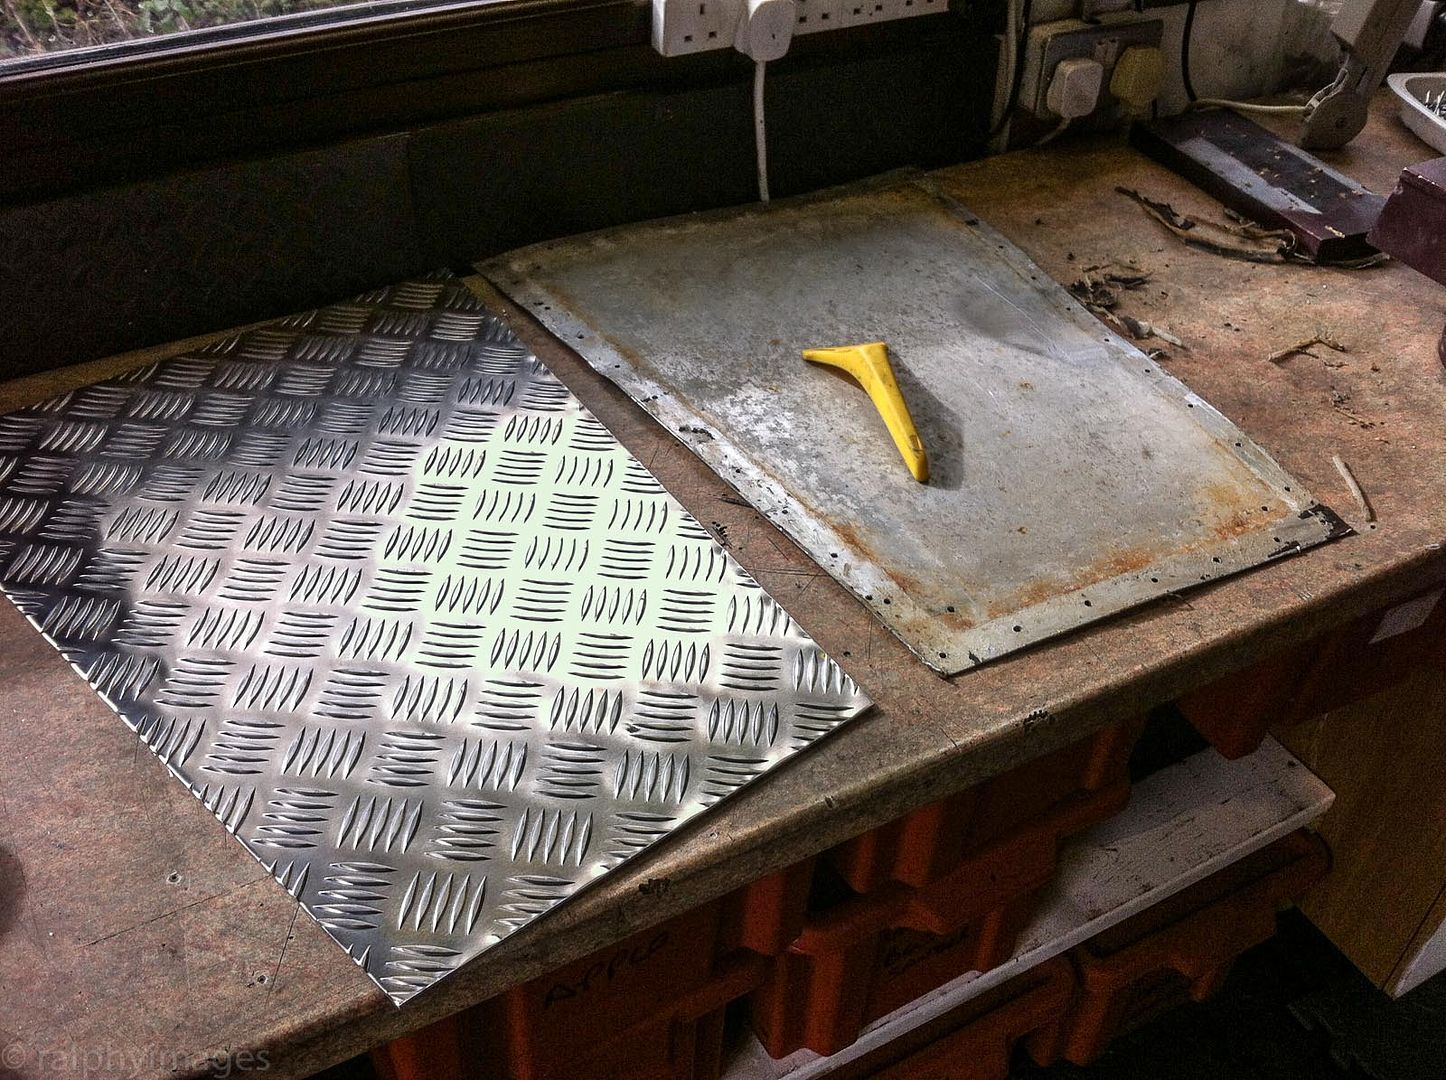
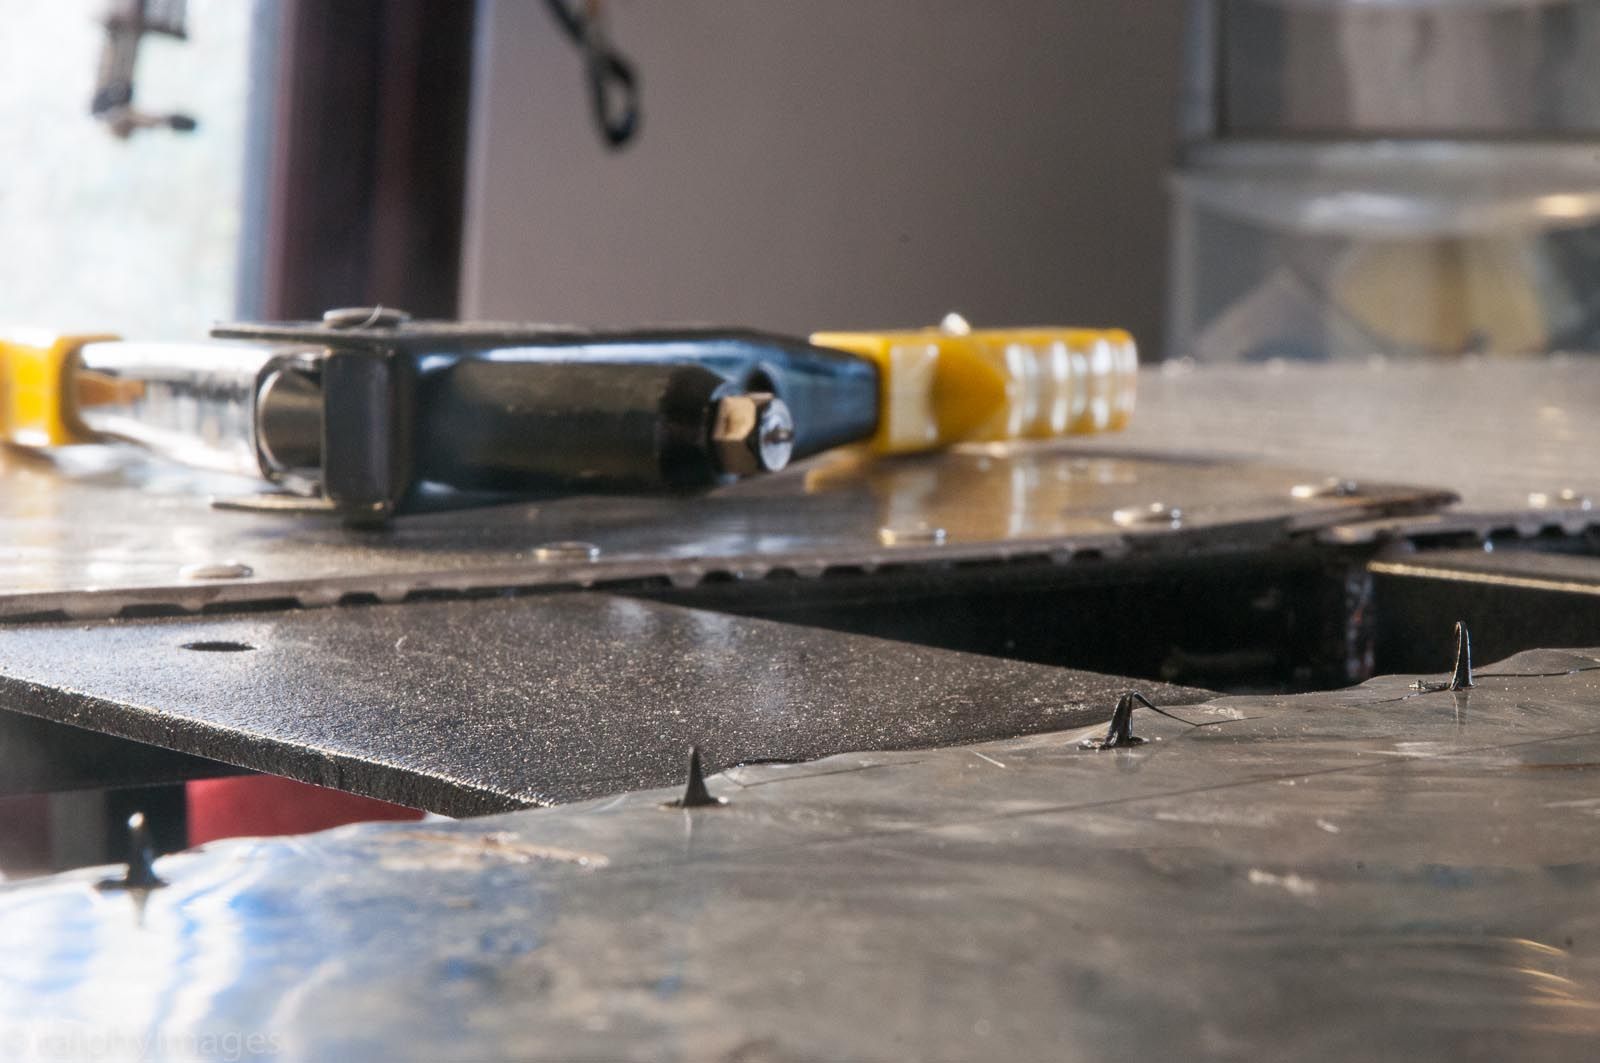
I’d ordered tread-plate aluminium for the floor and chosen to increase the thickness to 3mm. This will send the purist Westy-owners into apoplexy (as they are obsessed with weight) but I think the advantages are worth it. Panels duly collected from the suppliers and now it was time to fit them to the chassis. The original panels were attached to the chassis by a combination of silicone and rivets, so my challenge is to match the existing chassis holes to my new panels. Not an easy task and made more difficult by the fact that the rivet holes had been hand-drilled, so there was no uniformity to their spacing. My solution was to apply masking tape to the chassis rails, then ‘mark’ the existing holes onto the tape, remove it carefully, transfer the tape to the new aluminium and then mark the hole positions for the drilling. This worked quite well but is very time-consuming.
Initially I worked with the chassis on it’s side for the templating as space is tight:
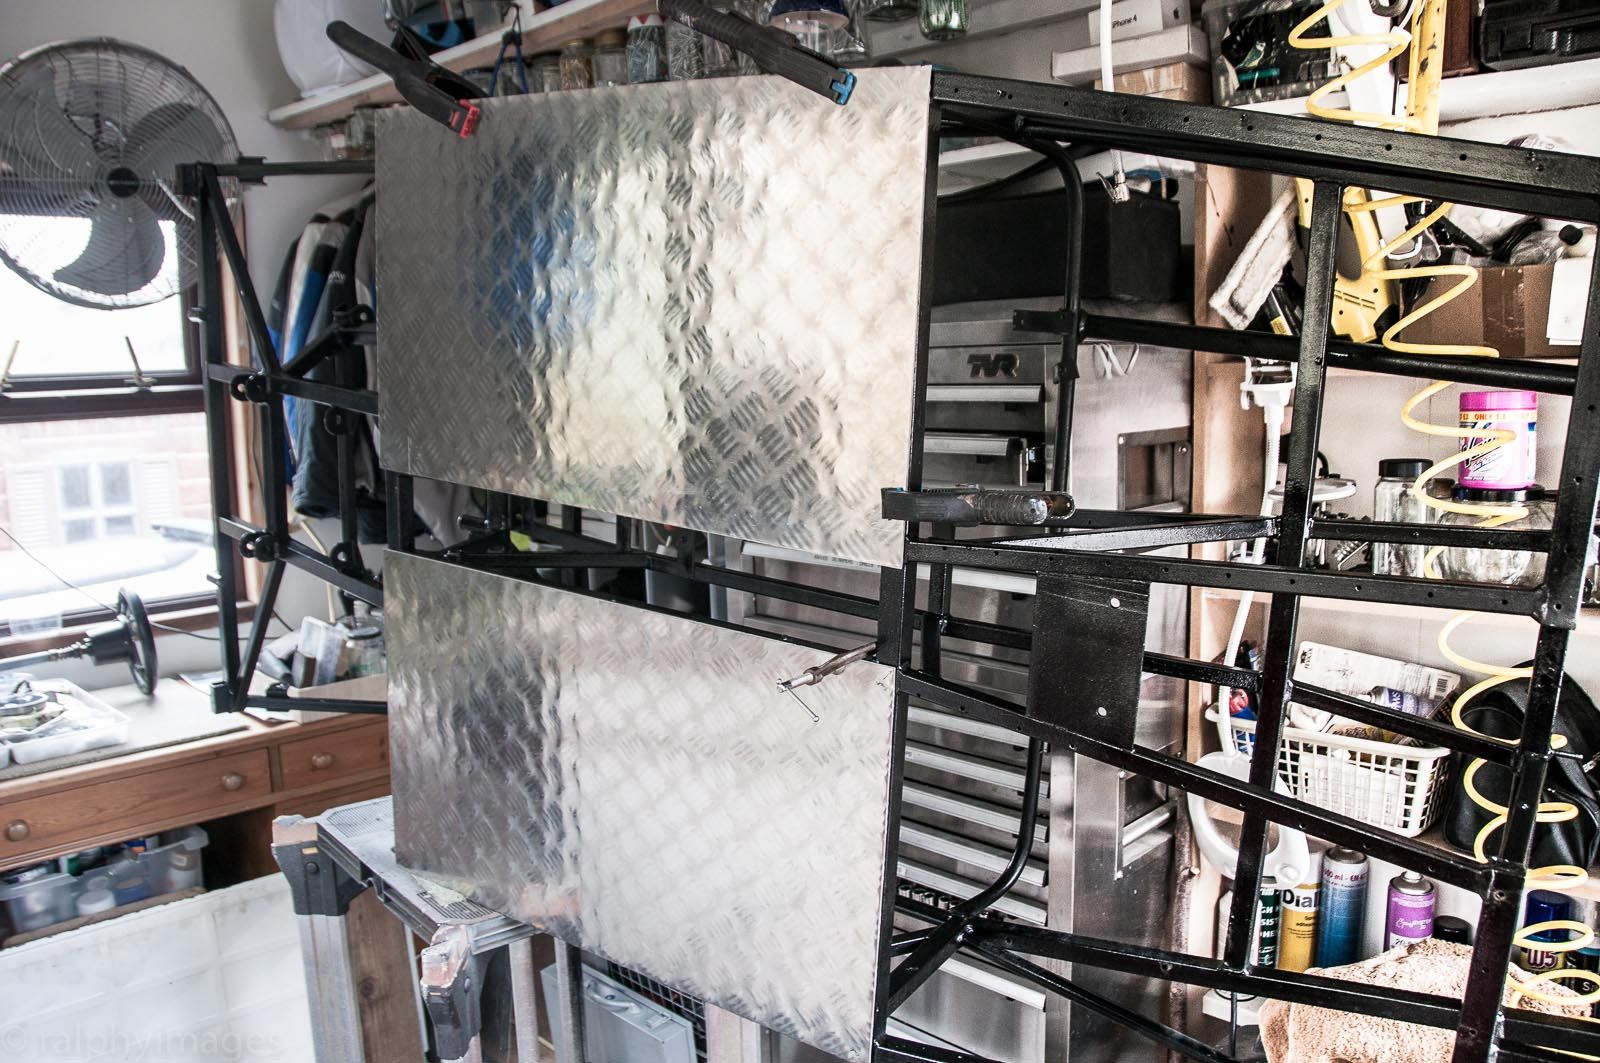
But once the holes were drilled through the panel I had to turn the chassis upside down in order to fix the rivets and also to apply the new sealant. I’ve chosen not to use silicone but instead to use Sikaflex 221, as I prefer the much greater adhesion this gives.
So, one floor panel done and three more to go!
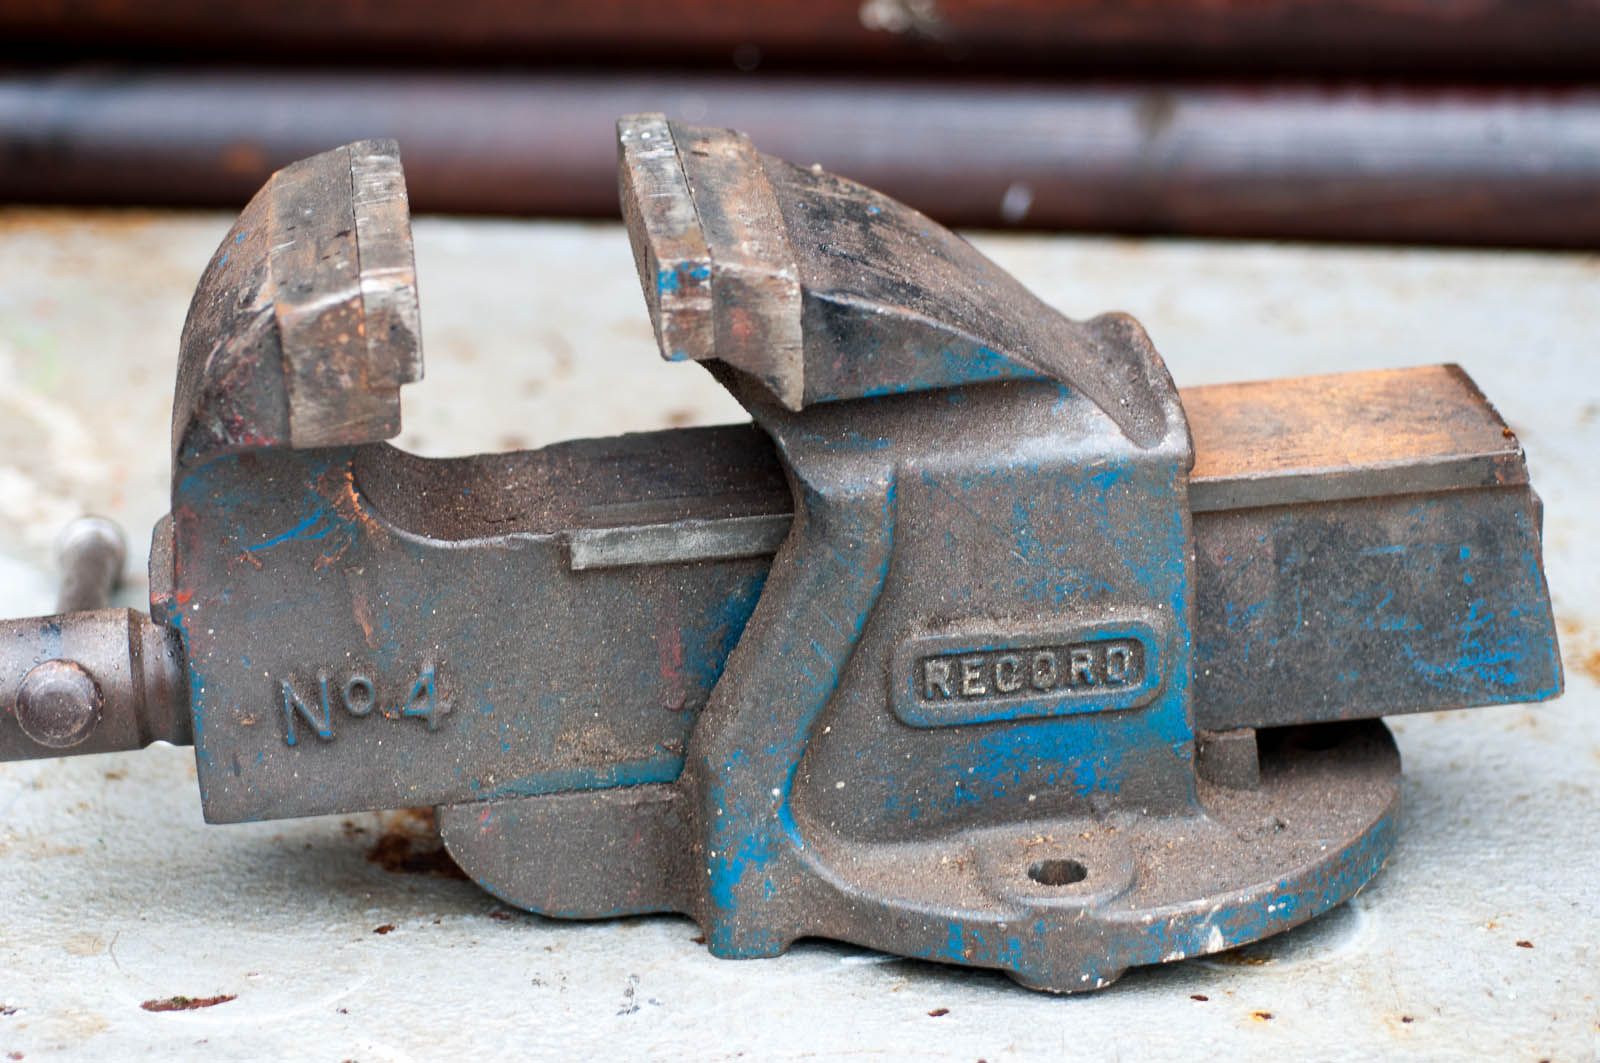
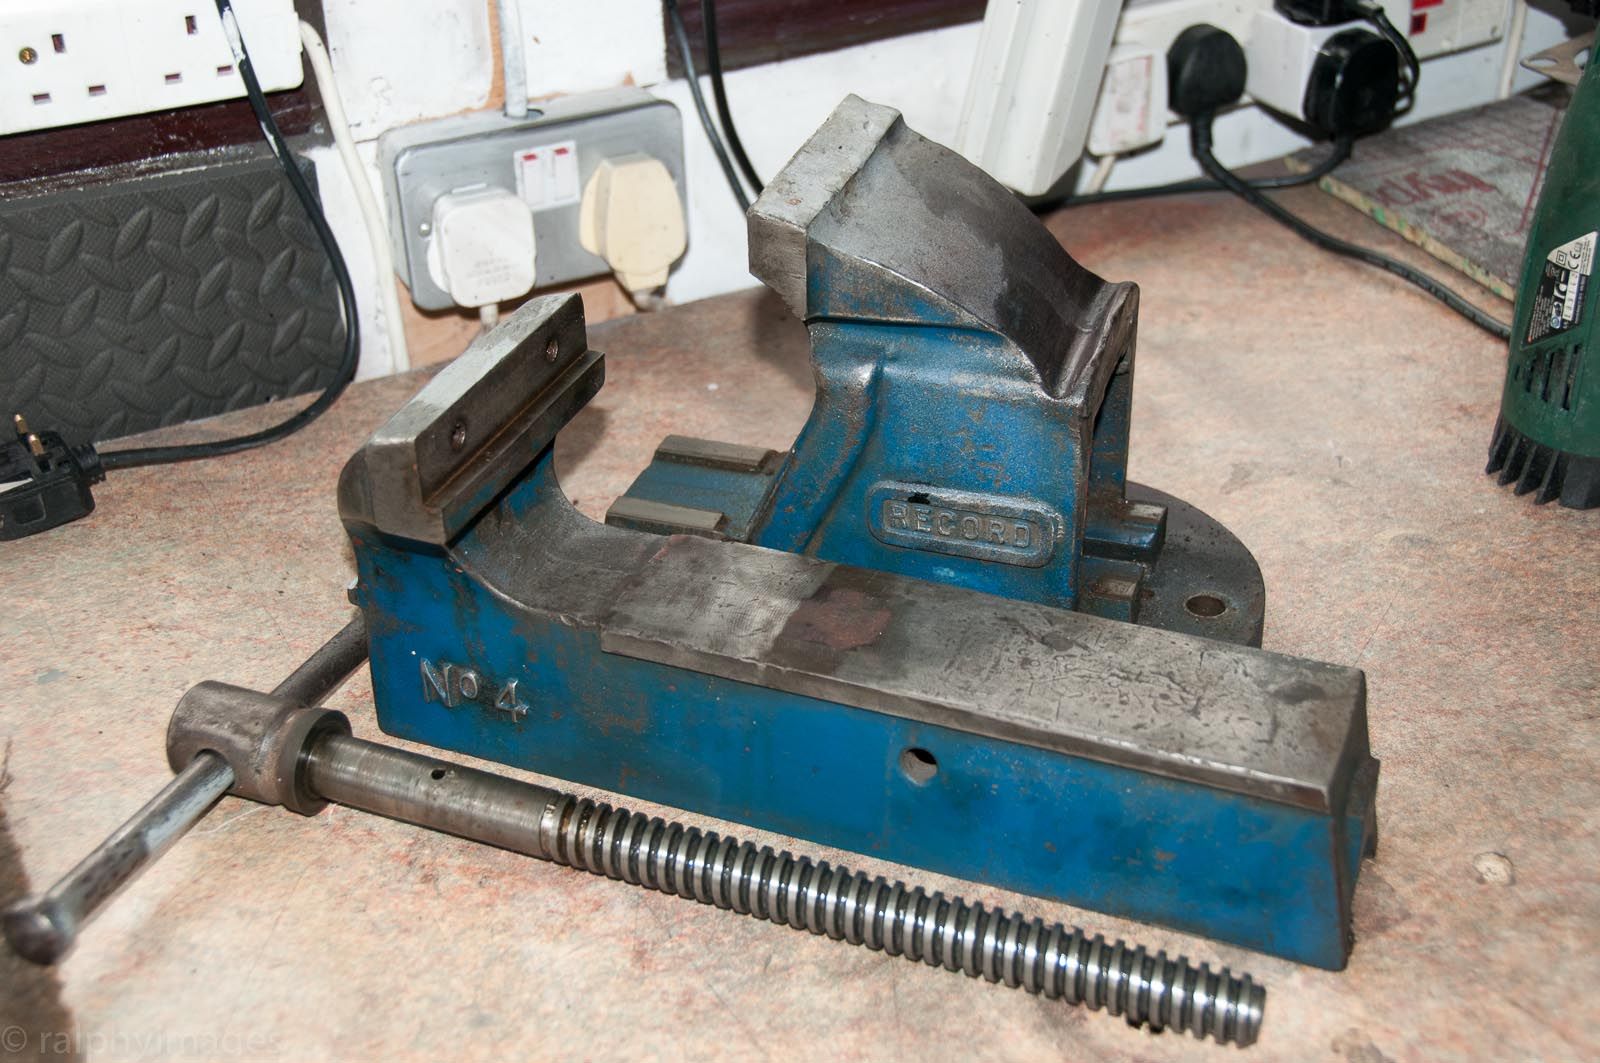
As an aside, I’ve stripped down my bench vice for an overhaul & spruce-up:
The only thing I actually need to renew on it is the jaws & jaw screws, replacements seemed rather expensive at @ £35 - but not once I’d seen the cost of a new vice!
R
Ignorance breeds Fear. Fear breeds Hatred. Hatred breeds Ignorance. Break the chain.
Again, great to see progress Ralphy!
The use of Sikaflex is a good example of 'out of the box' thinking. We car-nuts can't look beyond the shelfs of the motor factors! Sikaflex is widely used in the yacht building industry! There are more ship / yacht products we can use in our cars, often for keeping out water and moist!
Menno
I thought I recognised that vice, I didn't know they were anything special and almost feel guilty for neglecting mine!
Excellent as usual Ralphy, been looking forward to an update
Cheers
Simon
Ralph Waldo Emerson: We ask for long life, but 'tis deep life, or noble moments that signify. Let the measure of time be spiritual, not mechanical.
Good to see more progress Ralph. As an aside, I think I've had my Record for @ 25 years, great tools.
Yes, get a move on! Some of us enjoy sitting in the comfort of our own homes reading about people trying to renovate recalcitrant cars in the cold and damp.
Keep up the good work!
Although no trees were harmed during the creation of this post, a large number of electrons were greatly inconvenienced.
I thought Sikaflex was a car thing, most body shops have gallons of the stuff, It's windscreen adhesive after all. I've always used it for jobs like this, gluing and riveting aluminium panels onto a spaceframe chassis stiffens it up nicely. Getting the buggers off again is one hell of a job though.
Ha ha, this!
I'm busy trying to earn enough money to get my MGB sorted, going to get the bodywork done by someone else (I have replacement wings, doors, tailgate and repair panels) while I do all the messing around with engine etc with the help of some friends. It'll all be done 20 miles away, I'd love to have somewhere at home to do it, although I'm eyeing up the shed and wondering how much of the junk I can dump so I can get a work bench in there.
Anyway, keep up the updates, looks great.
"A man of little significance"
This thread makes me want to have a garage! Very nice job!
What an excellent thread!
Apologies if I missed this, but what's the long term plan for this? Is this a weekend/track car for you? Or are you going to finish this off, sell it then start on another project?
I'm referring to this: http://www.sika.com/en/solutions_pro...ne/Yachts.html As said, my experience with marine / yachting products is, that they're better water resistant than the automotive family members.
Menno
Awsome progress. On another note is the Steam roller for sale
Ralphy - this is brilliant, wish I had the time/money/talent/patience etc. to do this. All the best with it, please go for a Gulf colour scheme!
Are you using sealed rivets ??? A better bet for that sort of application might have been double sided tape, There are loads of variations now and it is brilliant it will help stop electrolysis gives the joint very high strength, Waterproof, VERY easy to use, Much neater, And easy to remove panel if needed, I think you may struggle with the sikaflex, But it can be cut with a cheese wire type windscreen saw.
I've only just joined TZ and happened upon this thread...........I'm really enjoying the story of the rebuild. More so than reading about watches TBH
The aluminium panels are a stressed member on these types of chassis. Rivets and sikaflex is the standard way of putting them together as the combination is incredibly strong. I tend to dunk the rivets in grease before I pop them in to reduce any galvanic corrosion but given that these cars aren't usually used in rain or winter conditions it's not a huge issue. Sure the panels are hard to get off when they're glued up but hopefully that only happens once every 20 years or so.
Last edited by Groundrush; 27th February 2014 at 23:39.
Credit to you for the quality of the work on putting the thread together let alone actually putting the car together !
It makes me want to have one too.
I think this will be a keeper, but then Ive thought that before (bit like watches...).
Perhaps: its been sat in there for quite a while now.
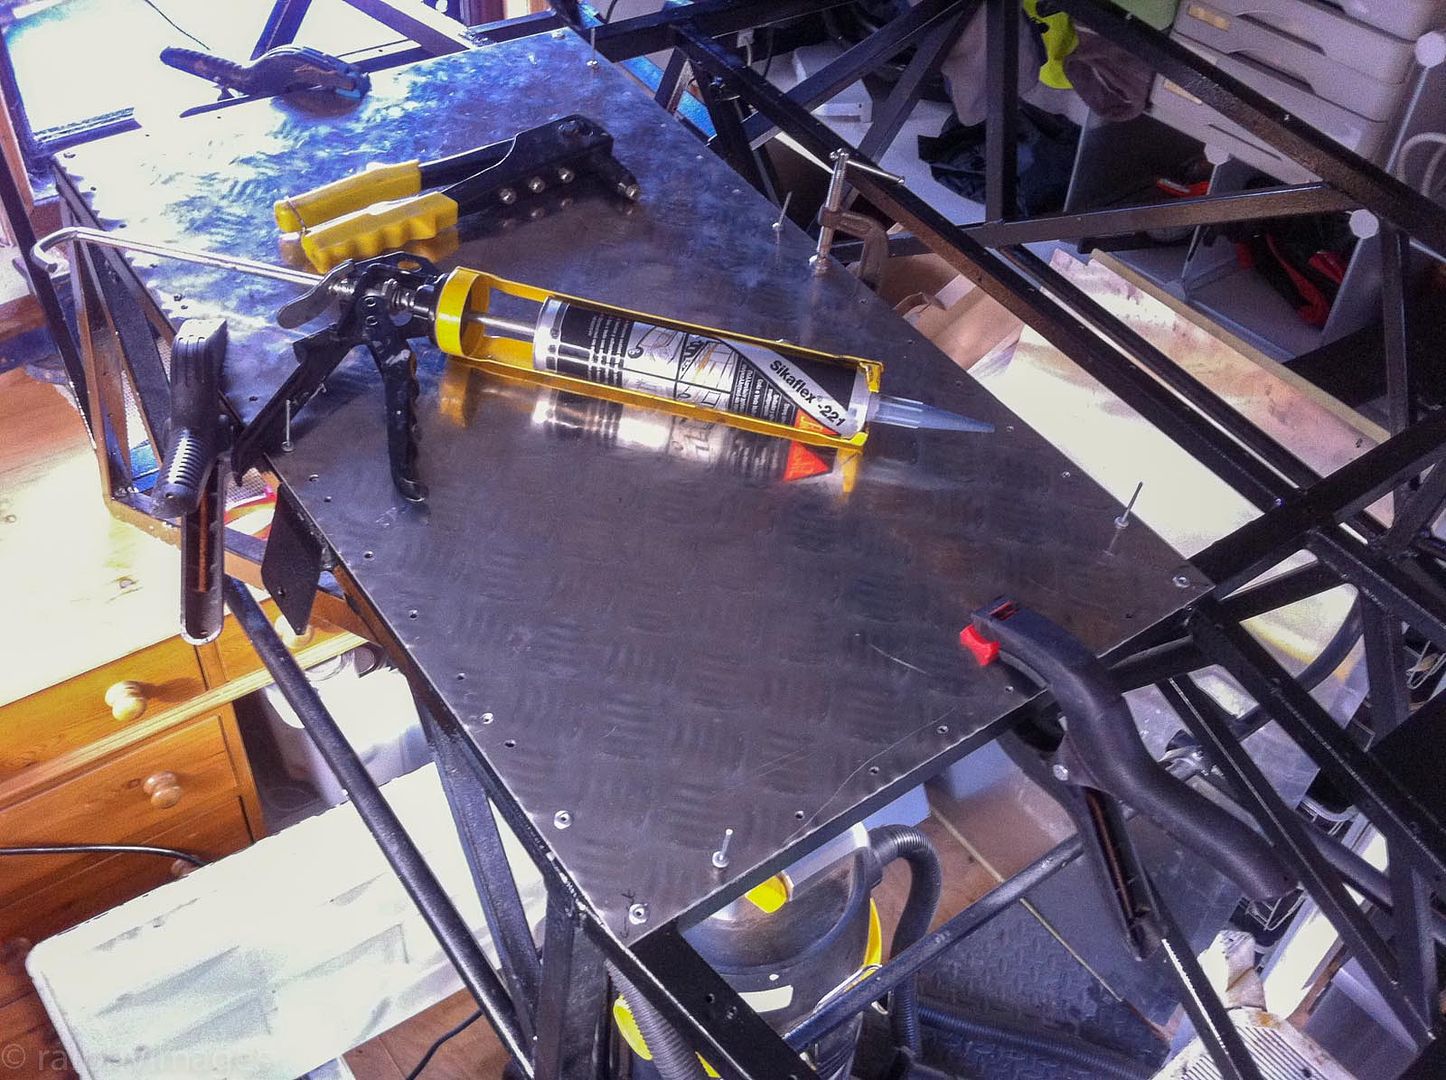
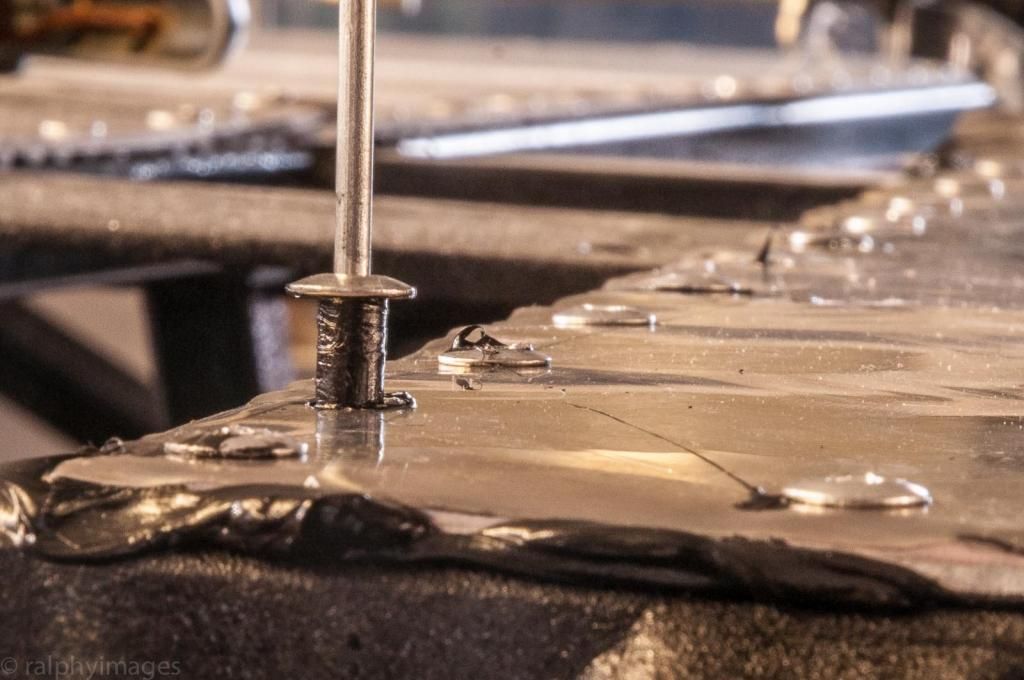
Sealed rivets indeed. As Groundrush has said, future removal isnt a prime consideration in restoration & Im a confirmed Sika fan having used it and also seen the long-term effectiveness of it on other applications. Regarding galvanisation, Im applying a second dose of Dynax into the metalwork (which comes through the holes):
Then when I apply the Sixaflex along the chassis I ensure it goes into each rivet hole and allow a short while for it to start curing before inserting the rivets, also Im using 4.8mm fasteners into a 5.0mm hole which minimises any scraping of the protectant on insertion.
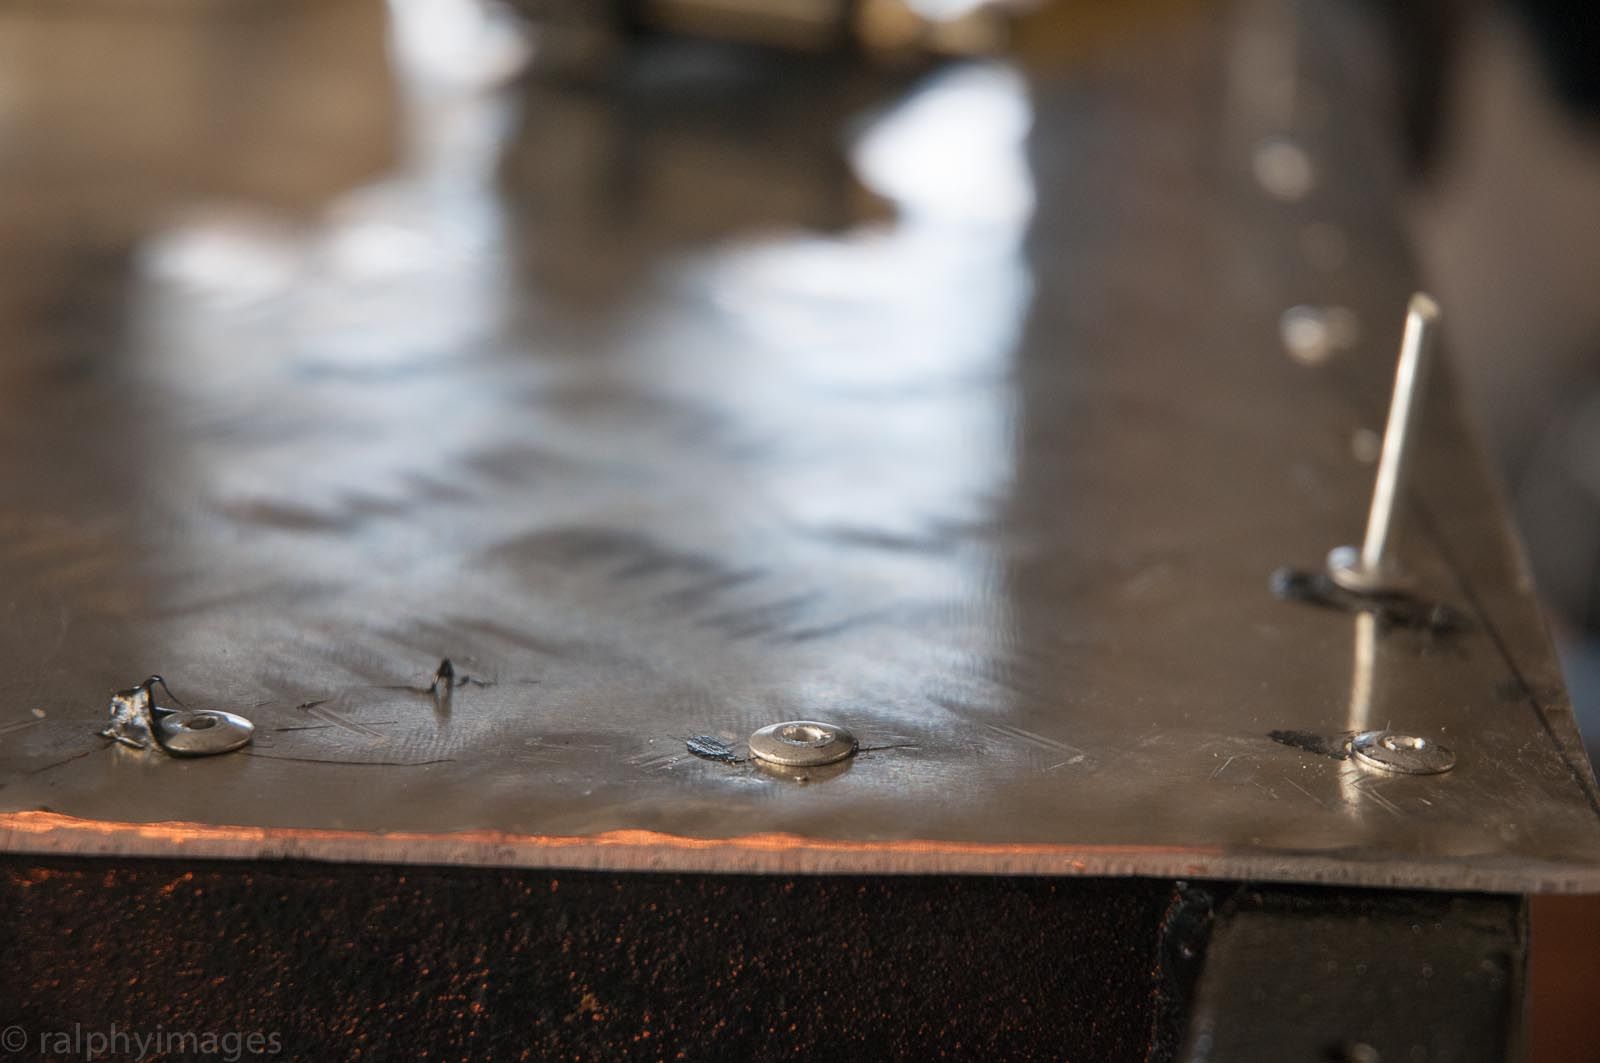
You can see the result of nearly five hours effort yesterday in the above pic and heres the panel prior to the start:
Yes, just one more panel added. :-) With the original ones they were overlapped and due to their thinner spec that worked reasonably well, but because Im using thicker aluminium the lower panel wouldnt allow the second one to seat so well. So I filed down the two mating surfaces to allow for a better fit and also used longer rivets to give a thorough bond. This coupled with the sealing/bonding preparation took the time.
Ive primed the vice and used some spare paint on it, not a traditional colour for the tool but itll do for now whilst Im using it & then Ill try to match the traditional blue:
R
Ignorance breeds Fear. Fear breeds Hatred. Hatred breeds Ignorance. Break the chain.
Was not being funny Re rivets http://www.bayrivet.com/closed_end_pop_rivet.htm. This type of fixing usually used in applications where water might get through, One or two open holes at set distances would give some idea of preservative travel distance.
I appreciate your input and didnt take it as anything other than constructive.
The interior preservative (S-50) is lanced throughout the chassis bars and as you pull the lance through it coats the interior with its multi-spray nozzle. Progress can be monitored by the liquid escaping out of the rivet holes along the route and on non-riveted sections you can check afterwards by endoscope. Prior to riveting I warm up the chassis rails and then apply the Sikaflex along the surface and ensure that it goes into the rivet holes. Once the panel is placed in position I set them by clamping them down, which causes the Sika to exude through the holes:
As part of my usual overkill approach I dip each rivet in the Sika prior to insertion too:
Finally (not that thats more than enough anyway) I then pump yet more S-50 through the chassis. :-)
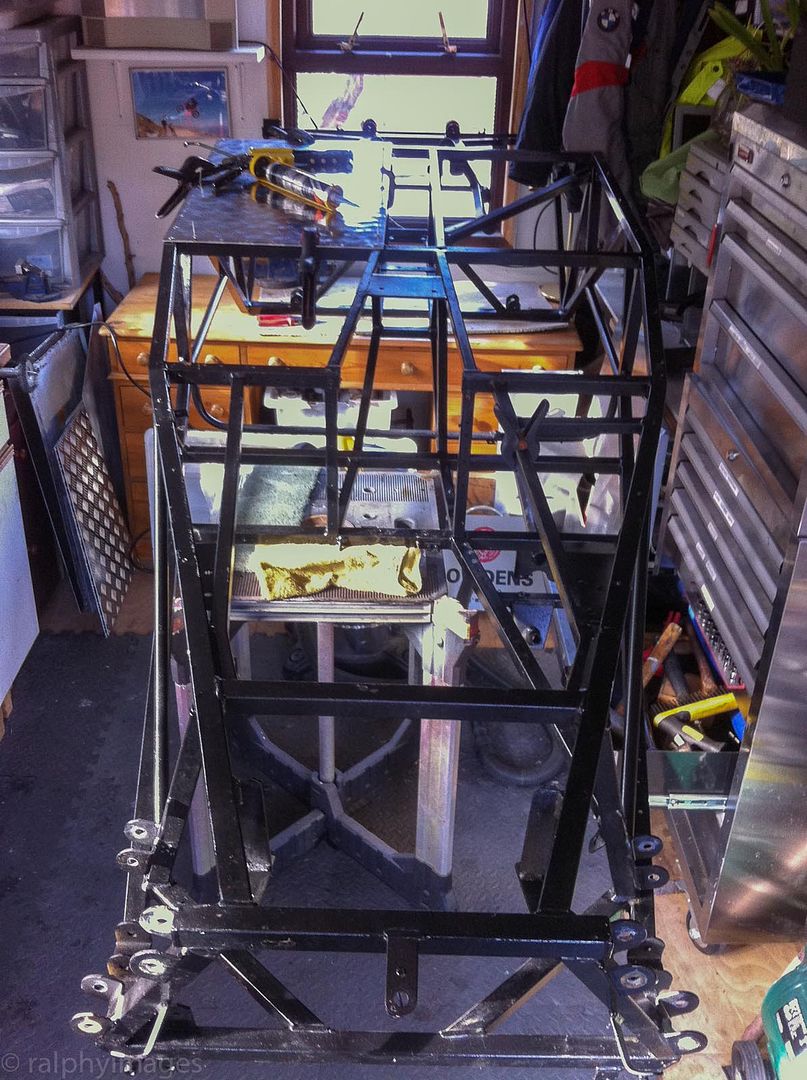
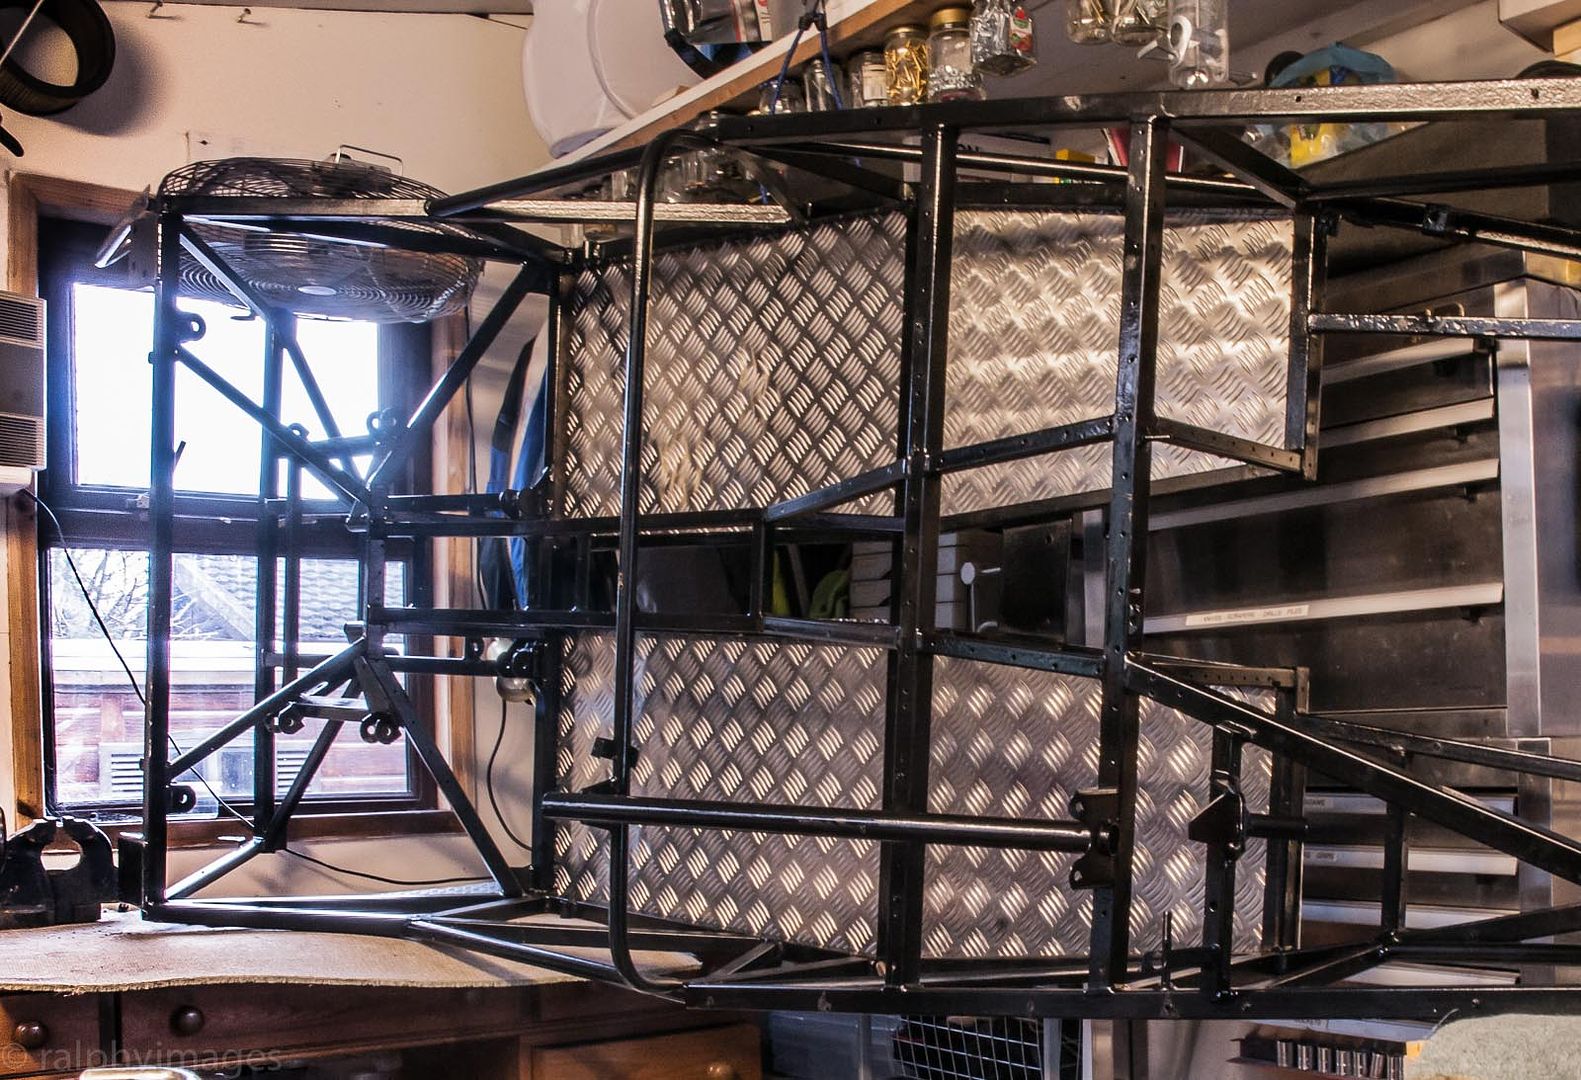
Today I completed the final panels and so now the car has a floor, so back onto its side for ease of access and the next thing is to fit the rear bulkhead:
R
Ignorance breeds Fear. Fear breeds Hatred. Hatred breeds Ignorance. Break the chain.
Looking good Ralphy and you seem to have it covered, The biggest problem I found with std rivets is that the bit of stalk that falls out (sometimes) can rust VERY easily setting it off in touching areas, We have done repairs on bodywork and found that in previously repaired sections the snapped off bits were quite bad, But if you are blowing more preventative in it should stop that. Should you ever be stuck Sika products are superb but before being held up look for TIGER seal/ panel adhesive. Little bit cheaper and just as good. Other than that it's coming on brilliant, I might have been inclined to blow some aerosol etching primer round edge of aluminium where it meets hollow section, Not in any way a criticism just a thought. Your solution for marking holes to re drill is one I have used many years so well thought out, Another way that works sometimes is to measure VERY carefully position of first hole and jot this on paper then just run down the line with a rule ie 120mm, 100mm, 110mm, and so on, writing them down! Lay on your panel and simply follow you plan and measurements. Drilling as you go, This only works well on say 20mm or so hollow section where centre can't be too far out, Drill will usually find it easy. Also available should you ever need them are big head rivets ! Don't know if you have seen them but can be very handy, They have heads up to about five pence piece size and are brilliant for worn holes in panel. Keep up the great work mate it's a credit to you.
 Posting Permissions