closing tag is in template navbar
timefactors watches


TZ-UK Fundraiser
Page 1 of 2 12 LastLast
Results 1 to 50 of 60

Thread: Tales from the bench - a beginners guide to dissembly

  1. #1
    Master Omegary's Avatar
    Join Date
    Apr 2006
    Location
    Oxfordshire
    Posts
    8,844

    Tales from the bench - a beginners guide to dissembly

    Quite a few people have asked me where would be a good starting point to get some hands on experience with watches and movements. So I thought I’d put together a little guide covering the basics by dissembling a very simple watch. In this case it’s a pocket watch housing a movement by Molnija which is a Russian copy of a Cortebert 616, as used by Rolex and Panerai in their early days.

    I chose this example for a few reasons:
    1 They’re relatively cheap and easy to buy off ebay
    2. The movement parts are nice and big, so it’s easy to work on
    3. Although it’s a simple movement it demonstrates all the basic principles still used in most mechanical watches

    Here’s my patient


    So without further ado the first task is getting into the case. Most pocket watch cases and for that matter snap back watch cases will have an entry point. Usually it’s a slightly lip or gap in the case back where you can insert a opening knife, push and twist. Although I’ve got a proper case opening knife I actually use the small blade on a Swiss Army knife as personally I find it easier. Obviously take care, especially if you’re using a knife, the last thing you want to do is slip and scratch the watch or even worse, cut your finger.

    The lip in the case back


    After opening


    Now you’ve got access to the bottom of the movement


    The next step is to remove the case front, so we can then remove the movement. The same technique as the caseback applies.

    First find the access point


    Then prise open the case front. As with the case back be careful not to slip as you don't want to damage the dial or cut yourself.


    More to follow...

  2. #2
    Master Omegary's Avatar
    Join Date
    Apr 2006
    Location
    Oxfordshire
    Posts
    8,844
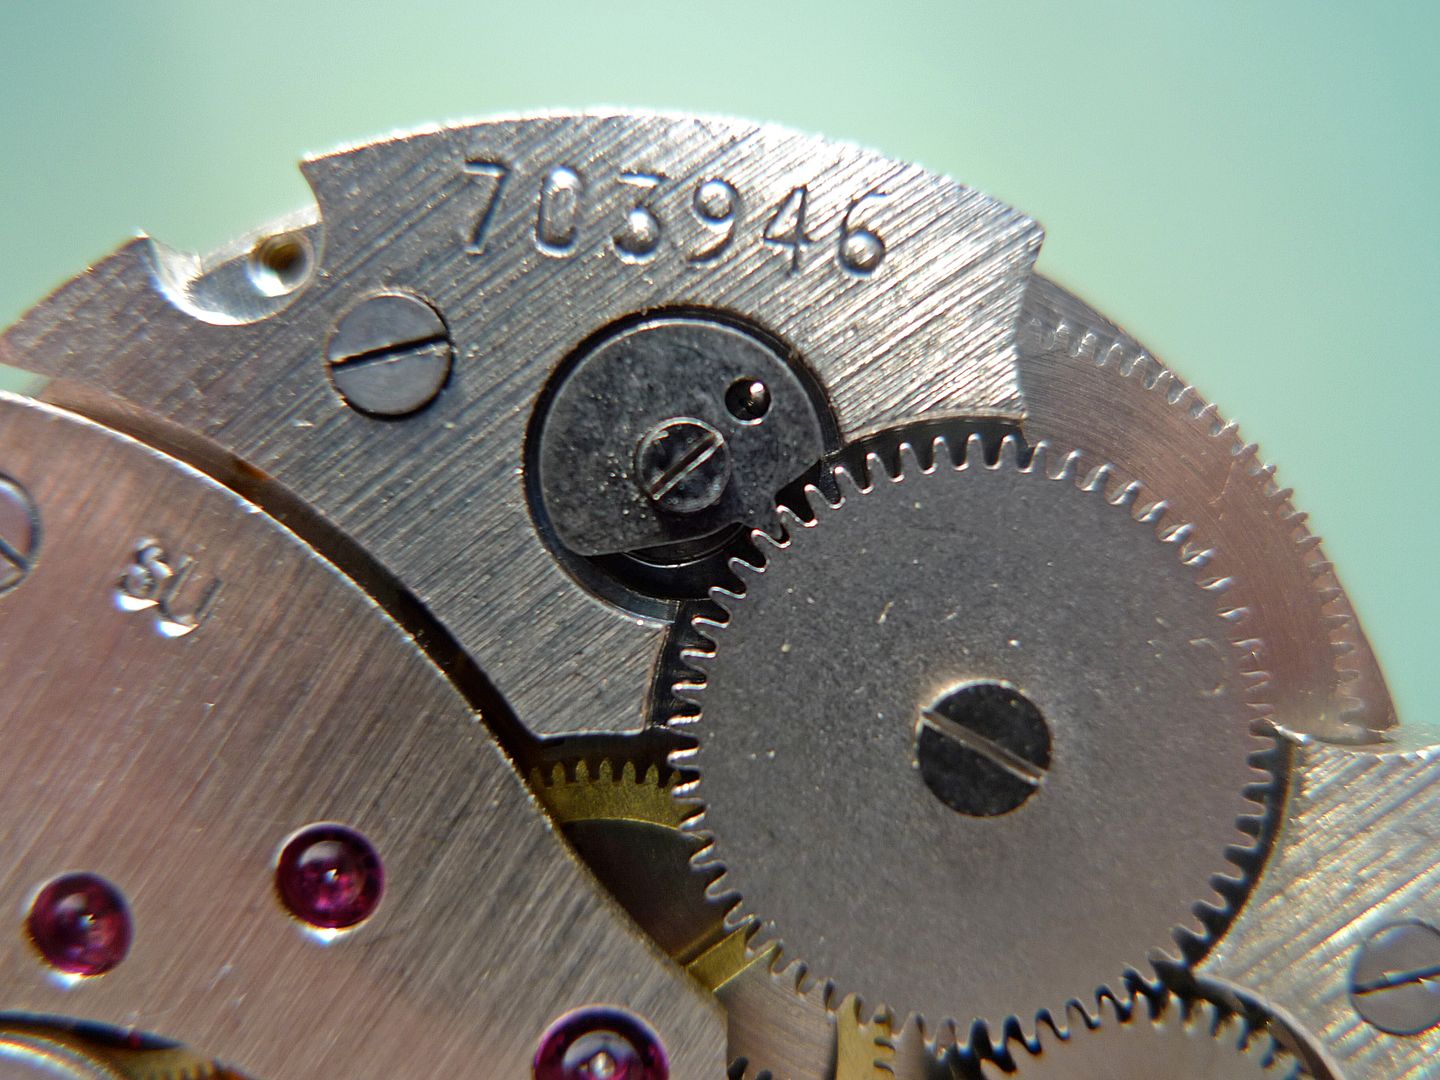
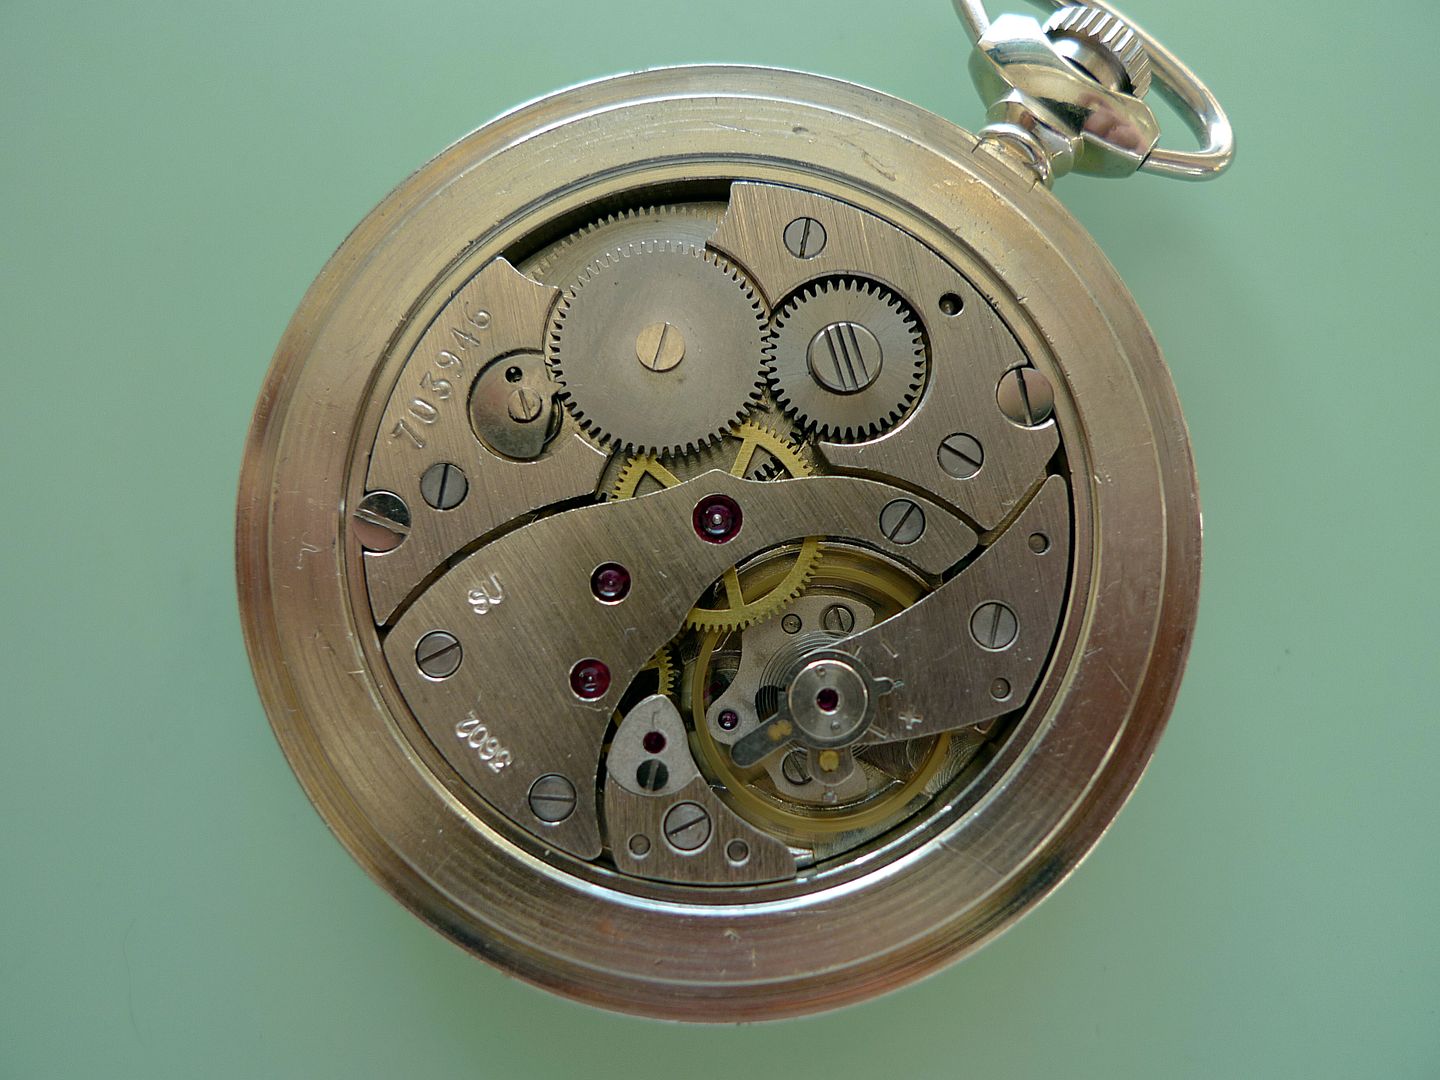
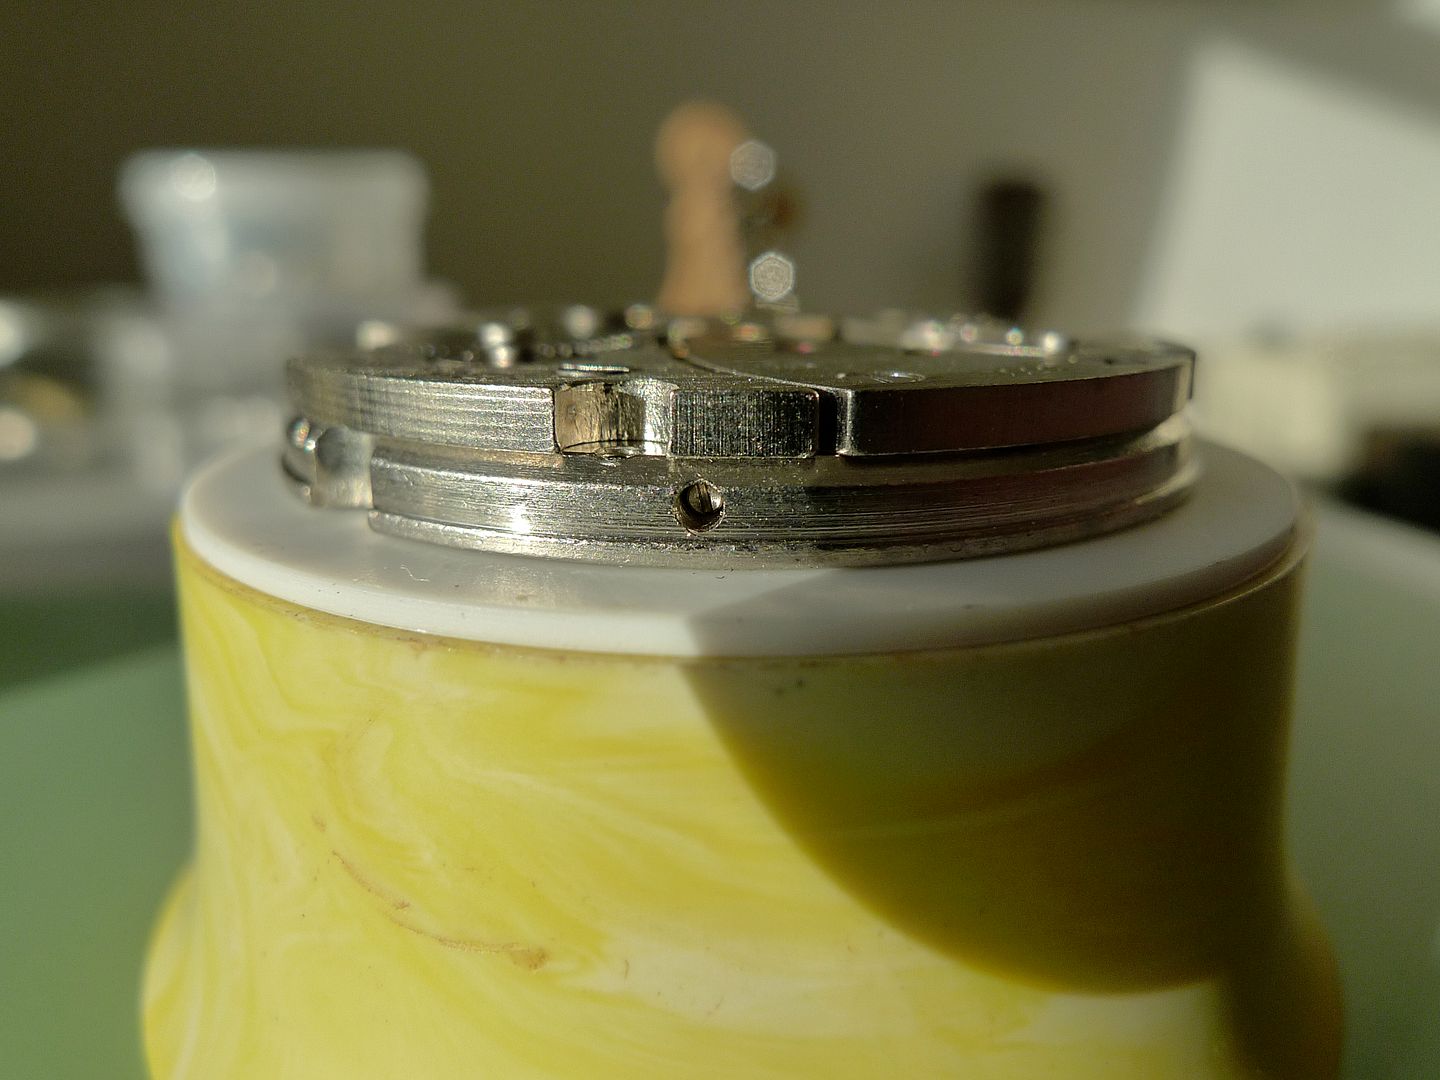
    Next up is removing the movement from the case. It’s held in place by two screws which secure the movement to the inner rim of the case wall. They can be seen on the pic below. You’ll also notice that I’ve placed the watch dial down on a movement holder, this protects the dial and handset, never place a dial face down on a flat surface as you’ll invariably mark it.


    Remove the screws and use a screwdriver head that’s the same width or just marginally smaller than the slot in the screw. You don’t want to mark the screw heads at all.


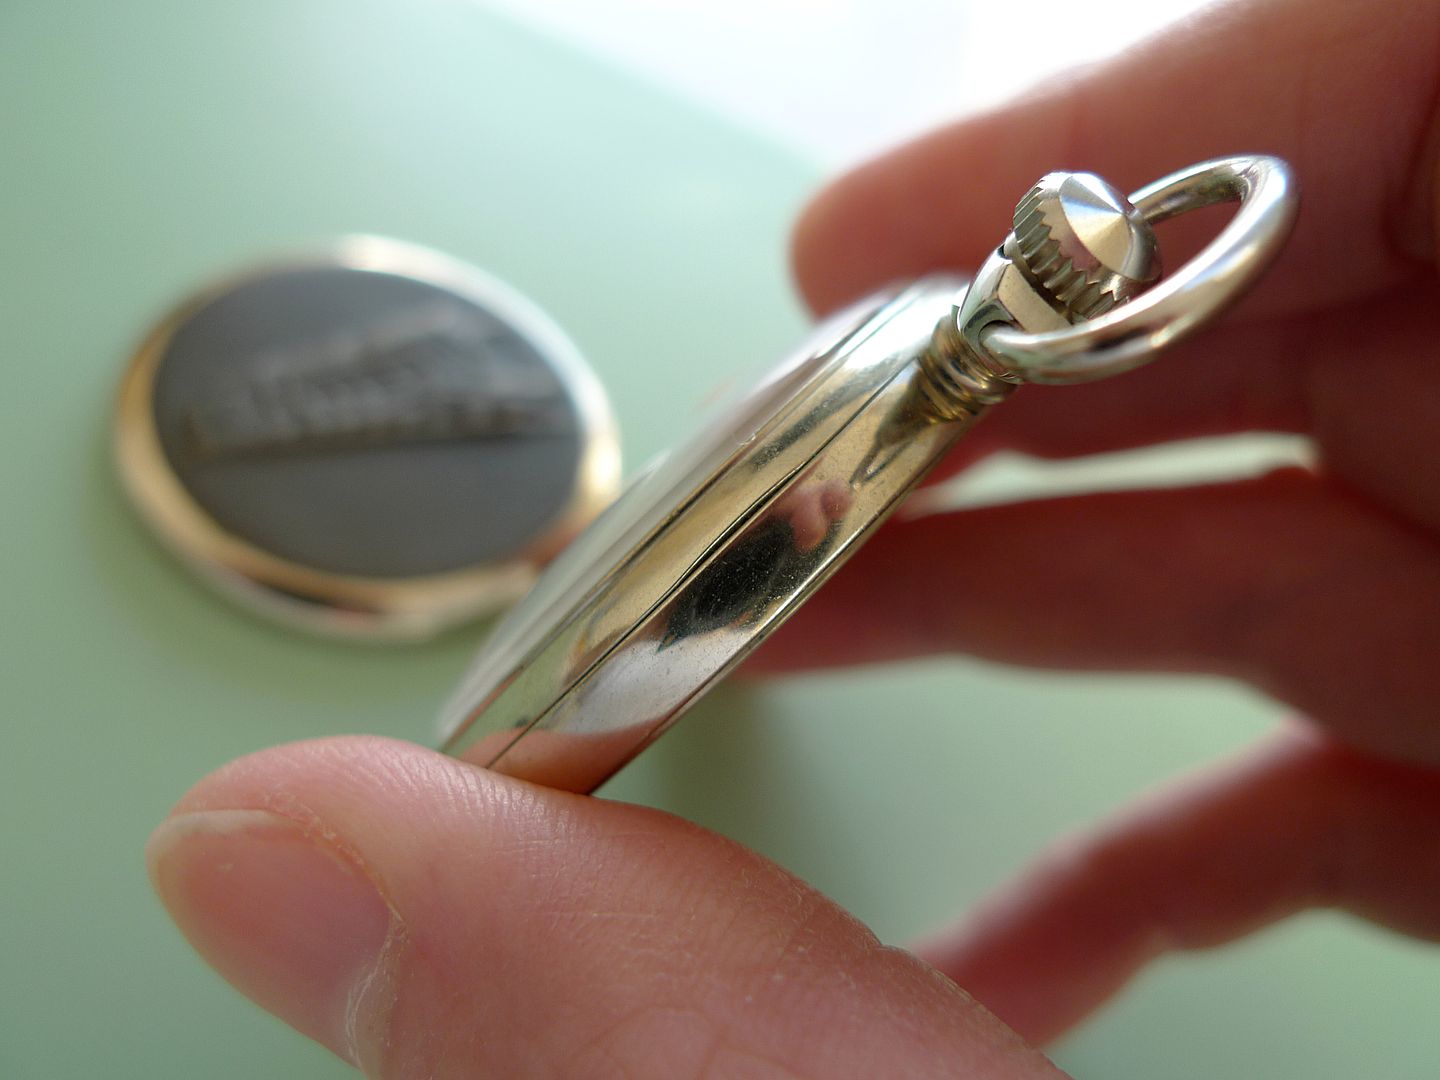
    Both screws removed and stored safely the only thing that’s now keeping the movement in place is the stem. To remove this you press down the little button that’s near the stem entry point and pull the crown to release. This can be a little tricky and will feel fiddly at first but you soon get used to it. Some movements use a little screw which you loosen off a little to remove the stem which is a lot easier.


    Stem removed you can now you can remove the inner section of the case.


    To make handling the movement easier it’s then best to replace the stem. Most will just push back into place but some require you to press the stem release button to refit.

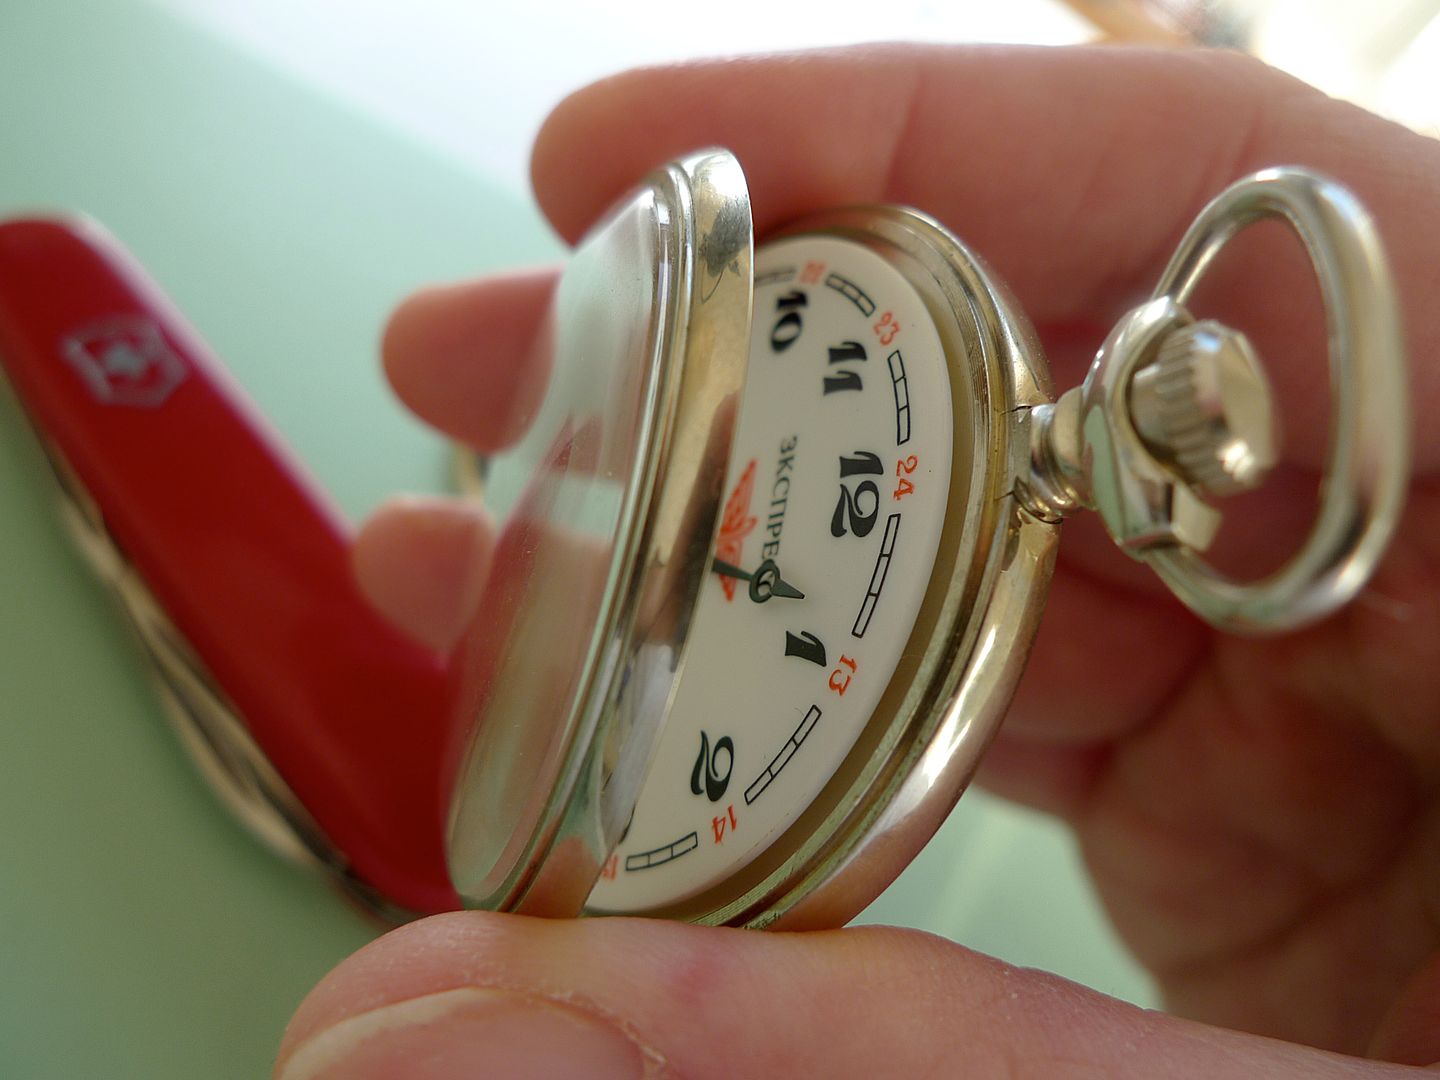
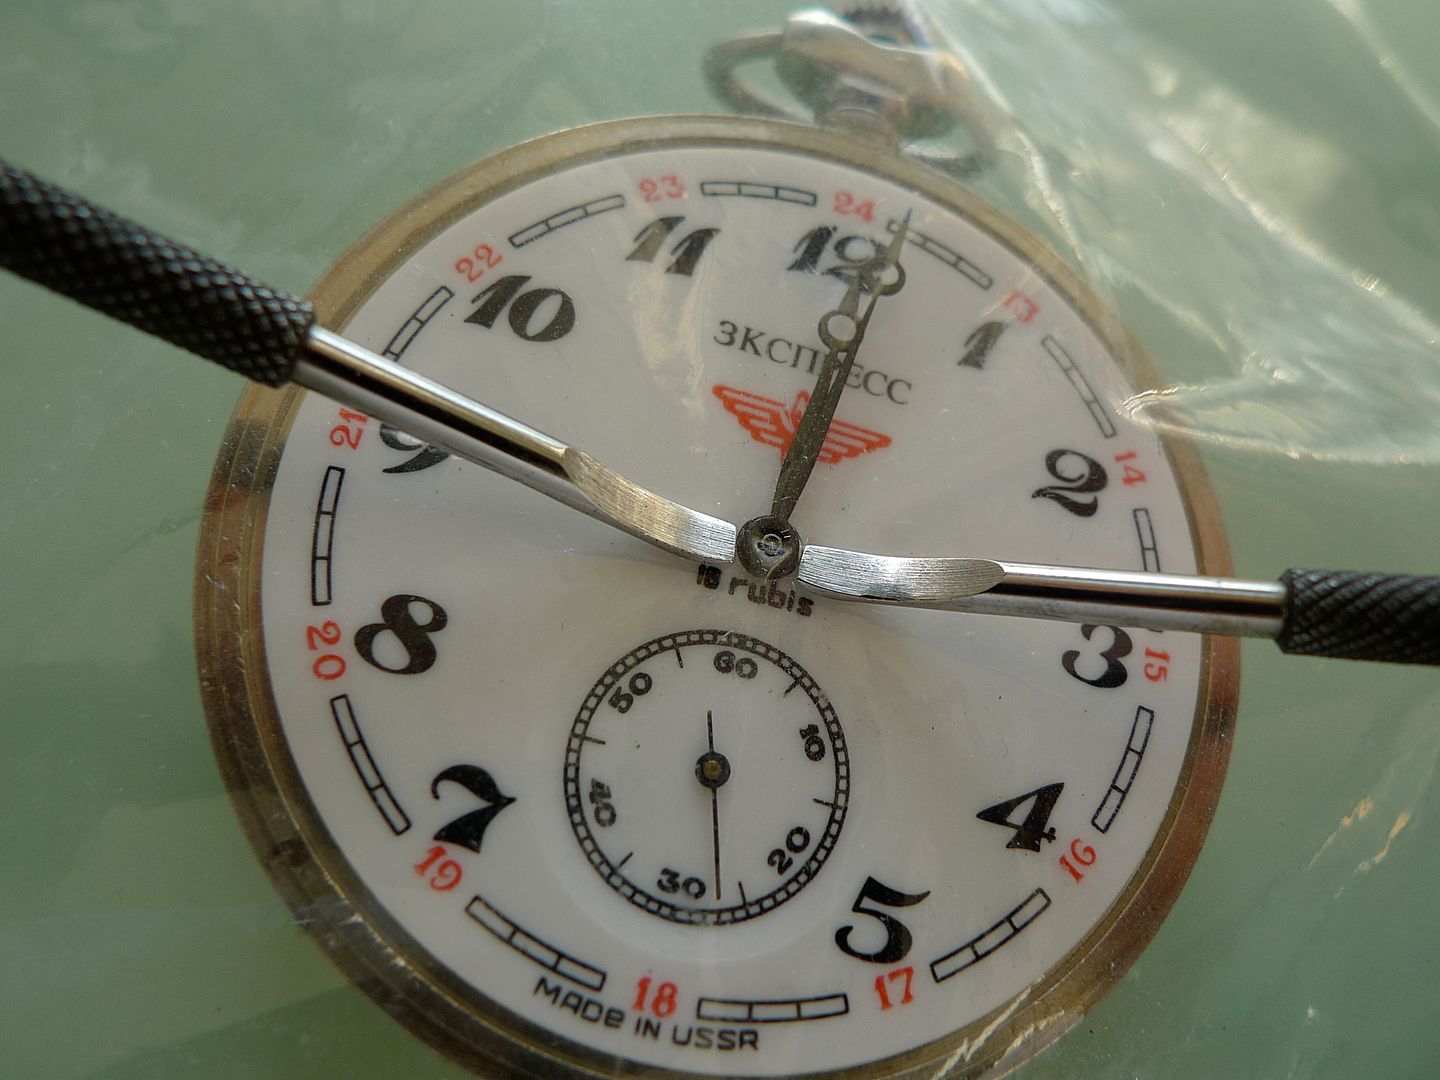
    Then it’s time to remove the hands. I’m pretty old school so I use a traditional pair of hand levers to do this. First step is to put the watch on a stable base, then protect that dial, you don’t want to damage it or indeed touch it if you can help it. For this I use a sheet of plastic film, exactly like the film that watches and bracelets are protected by when they’re new. This not only protects the dial well but it has an added benefit, because it’s a little bit sticky it keeps the hands in place and prevents them from going flying. Not so important on a big watch like this but it can certainly save a lot of time searching for sub dial hands on a chronograph that have made their maiden voyage into thin air for example.

    First set the hands to 12 o-clock, than place the film over the dial. Place the levers under the hour hand and gently lever upwards. They can be a pretty tight fit so don’t be afraid to apply a bit of pressure.


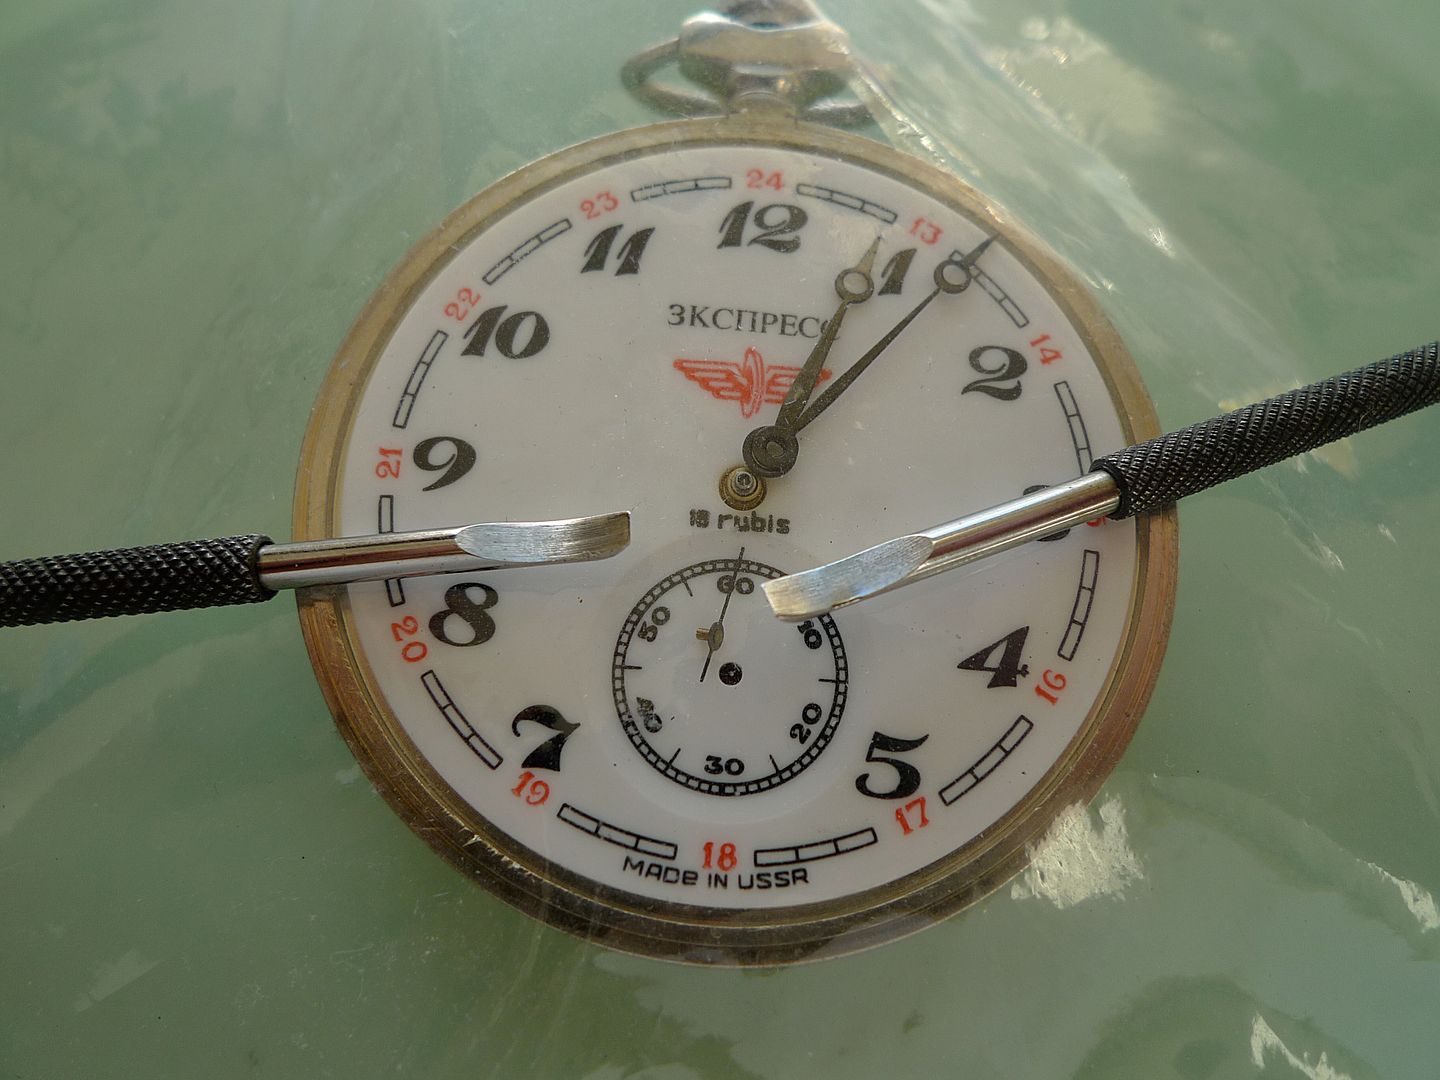
    Then do the same with the seconds hand at 6, obviously you have to do this relatively quickly otherwise you might damage the hand.


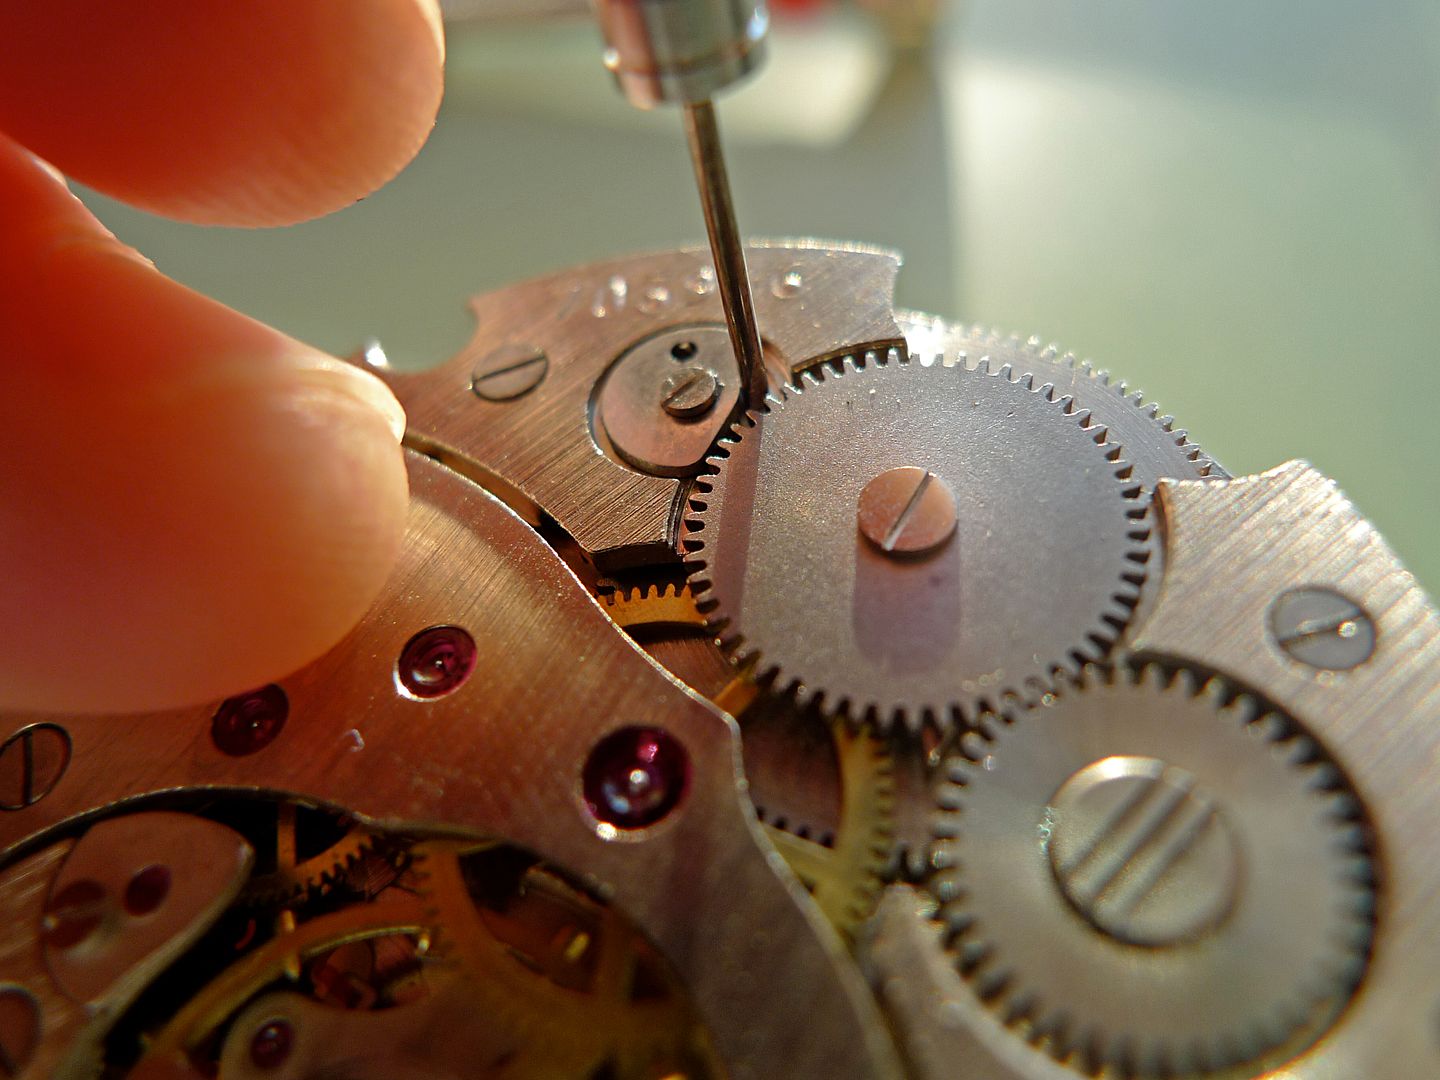
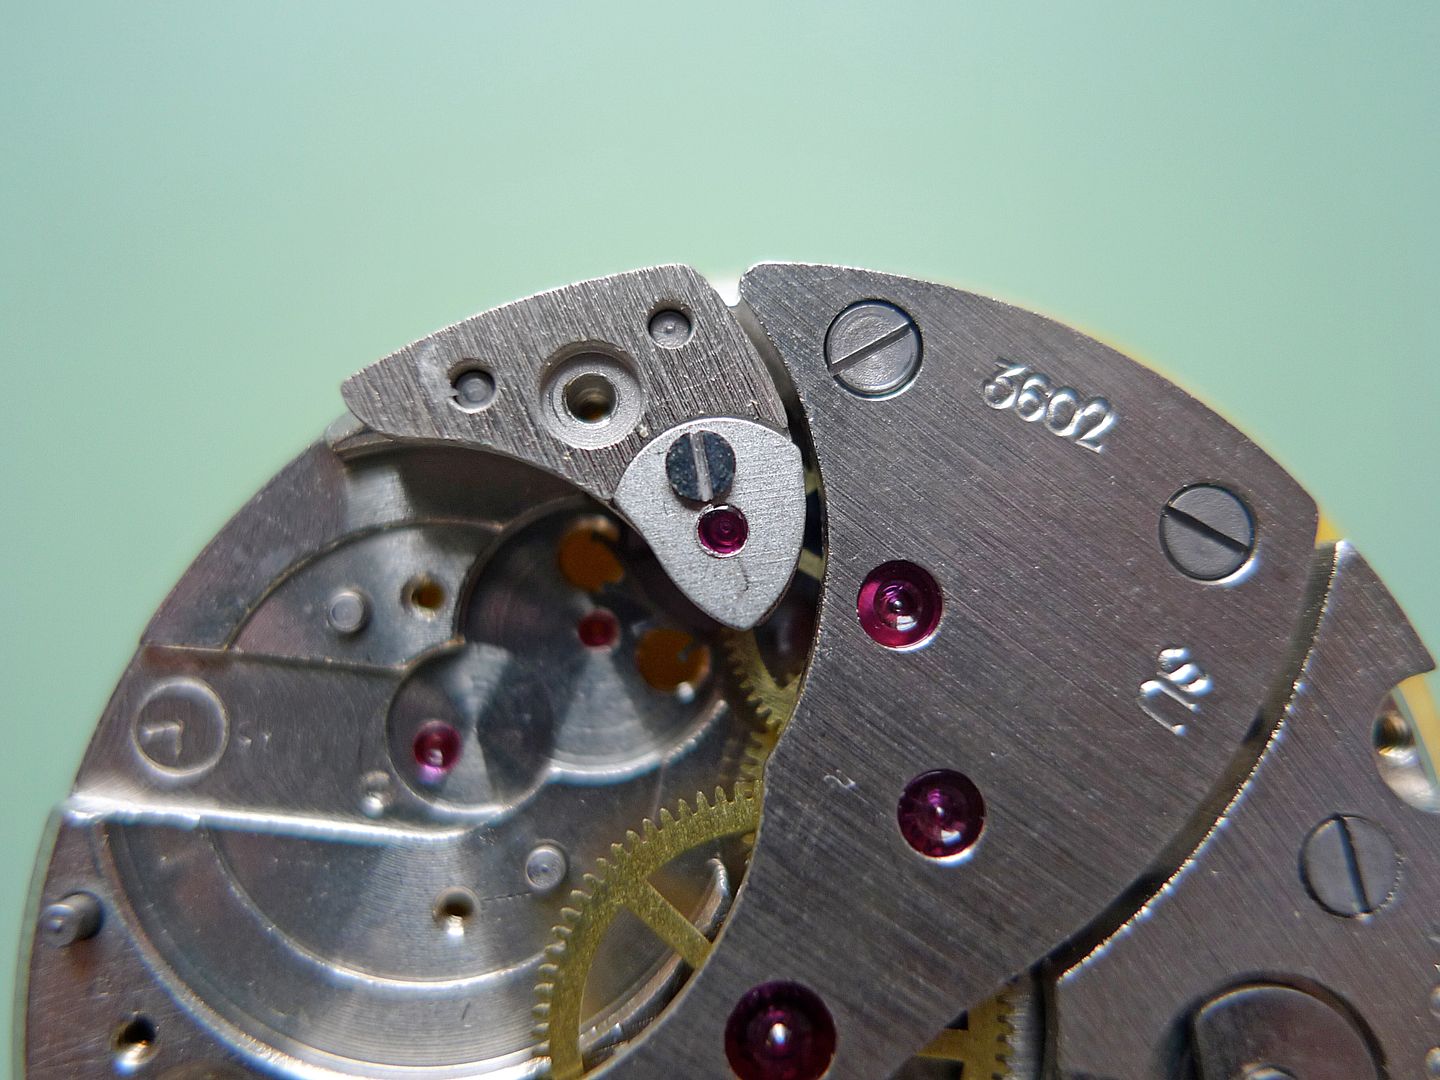
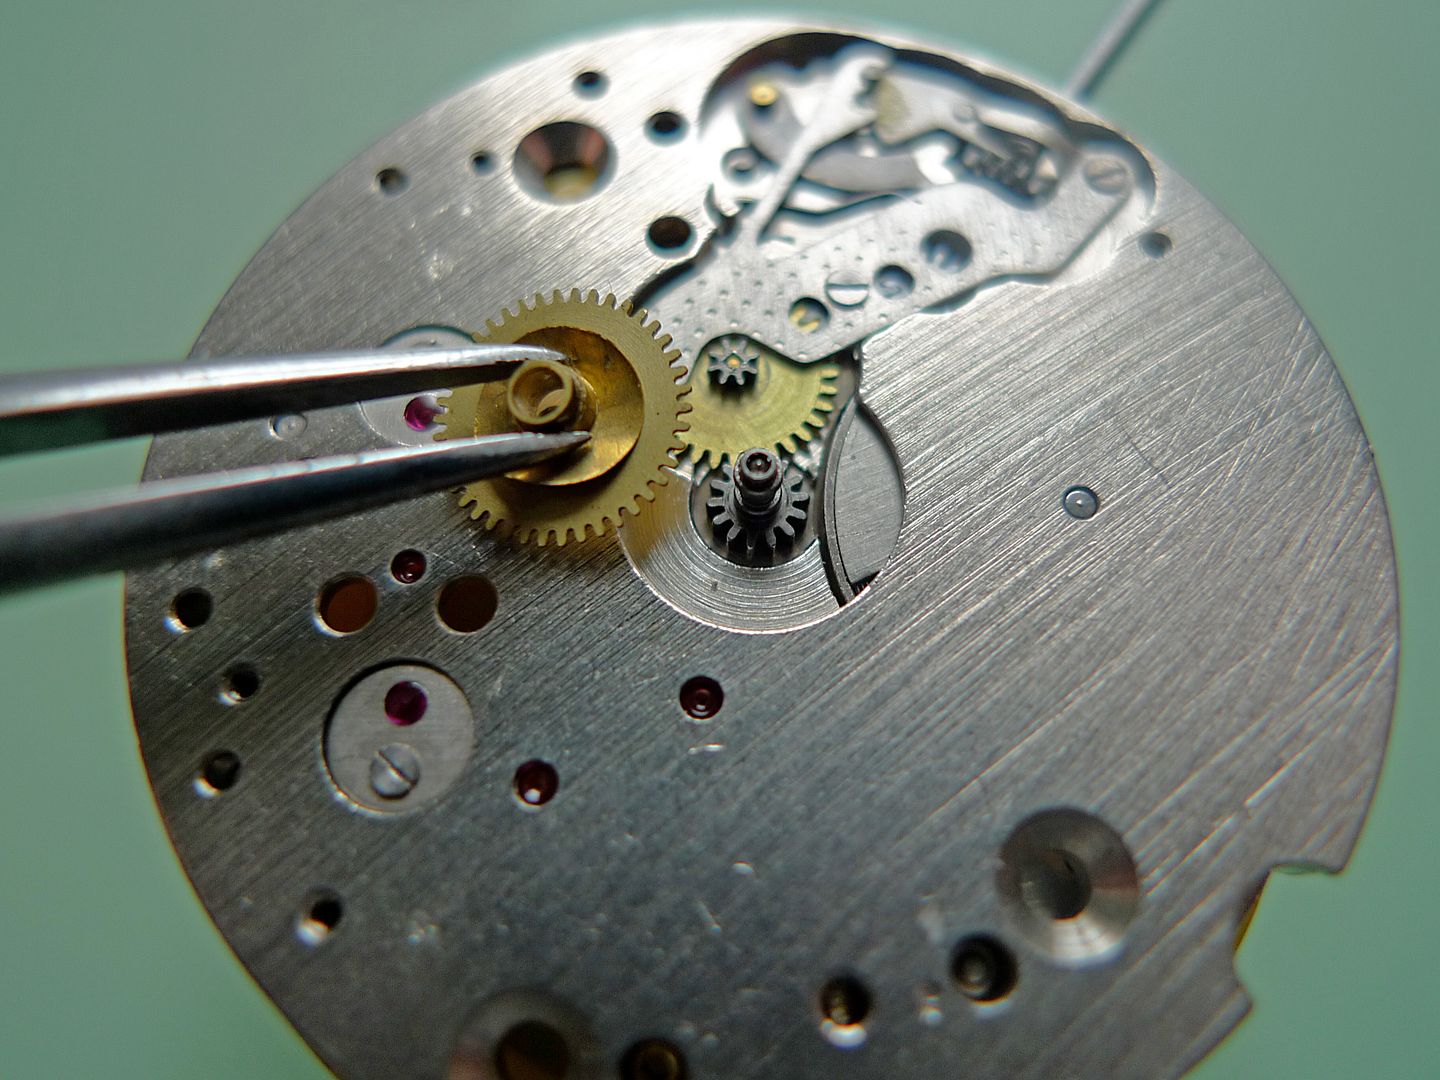
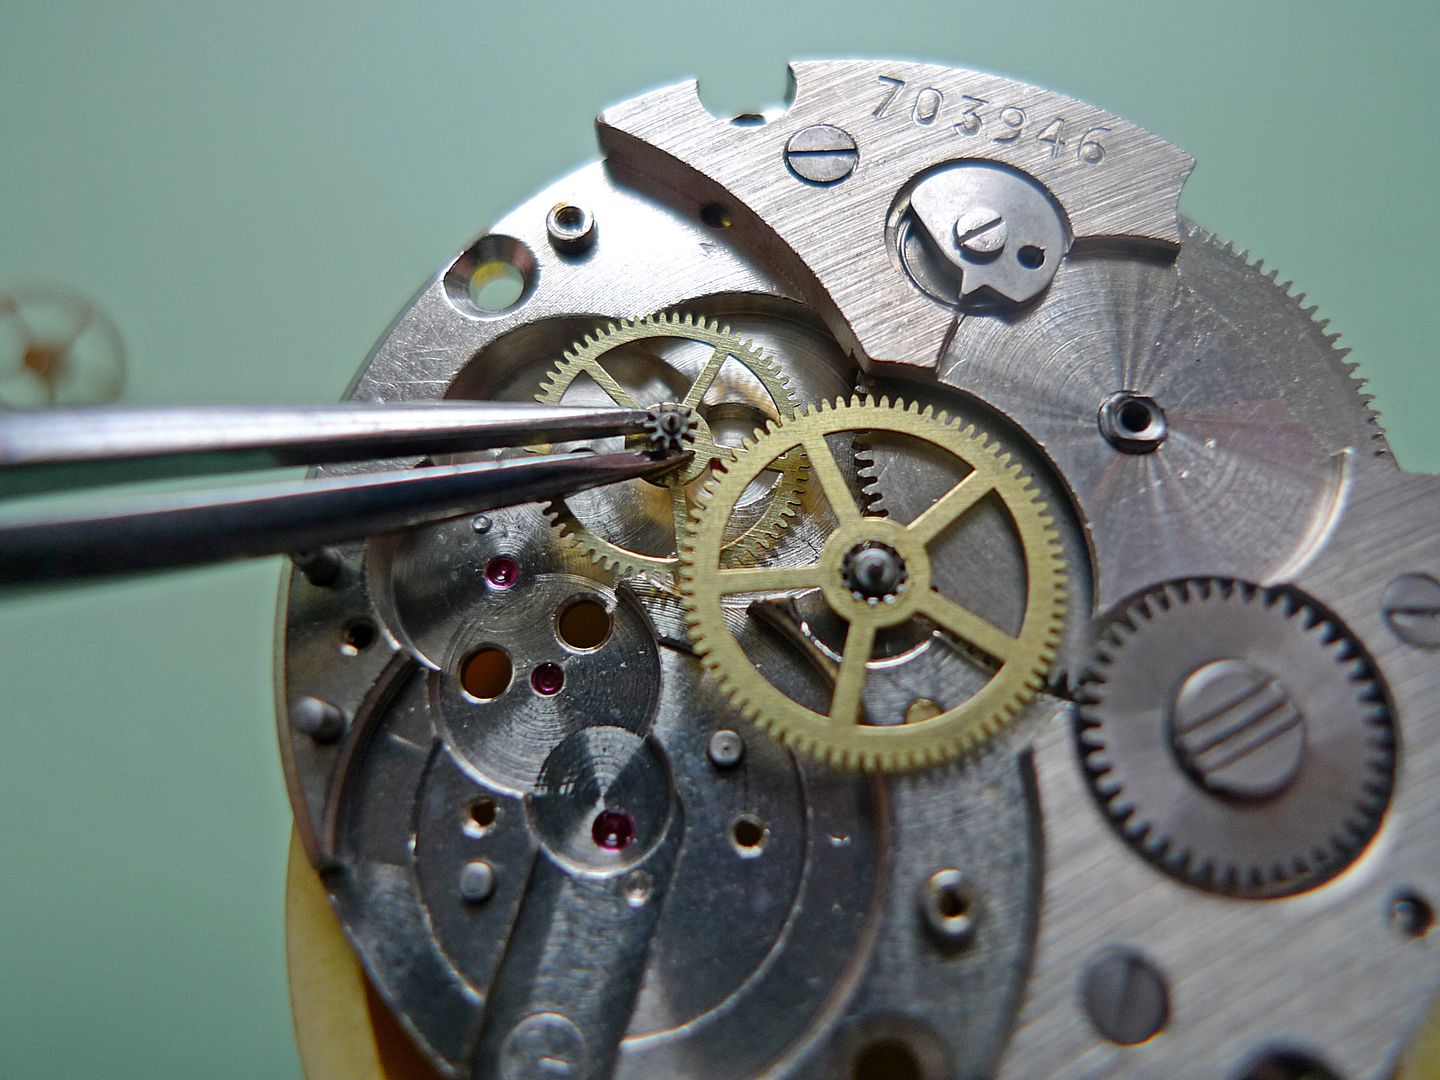
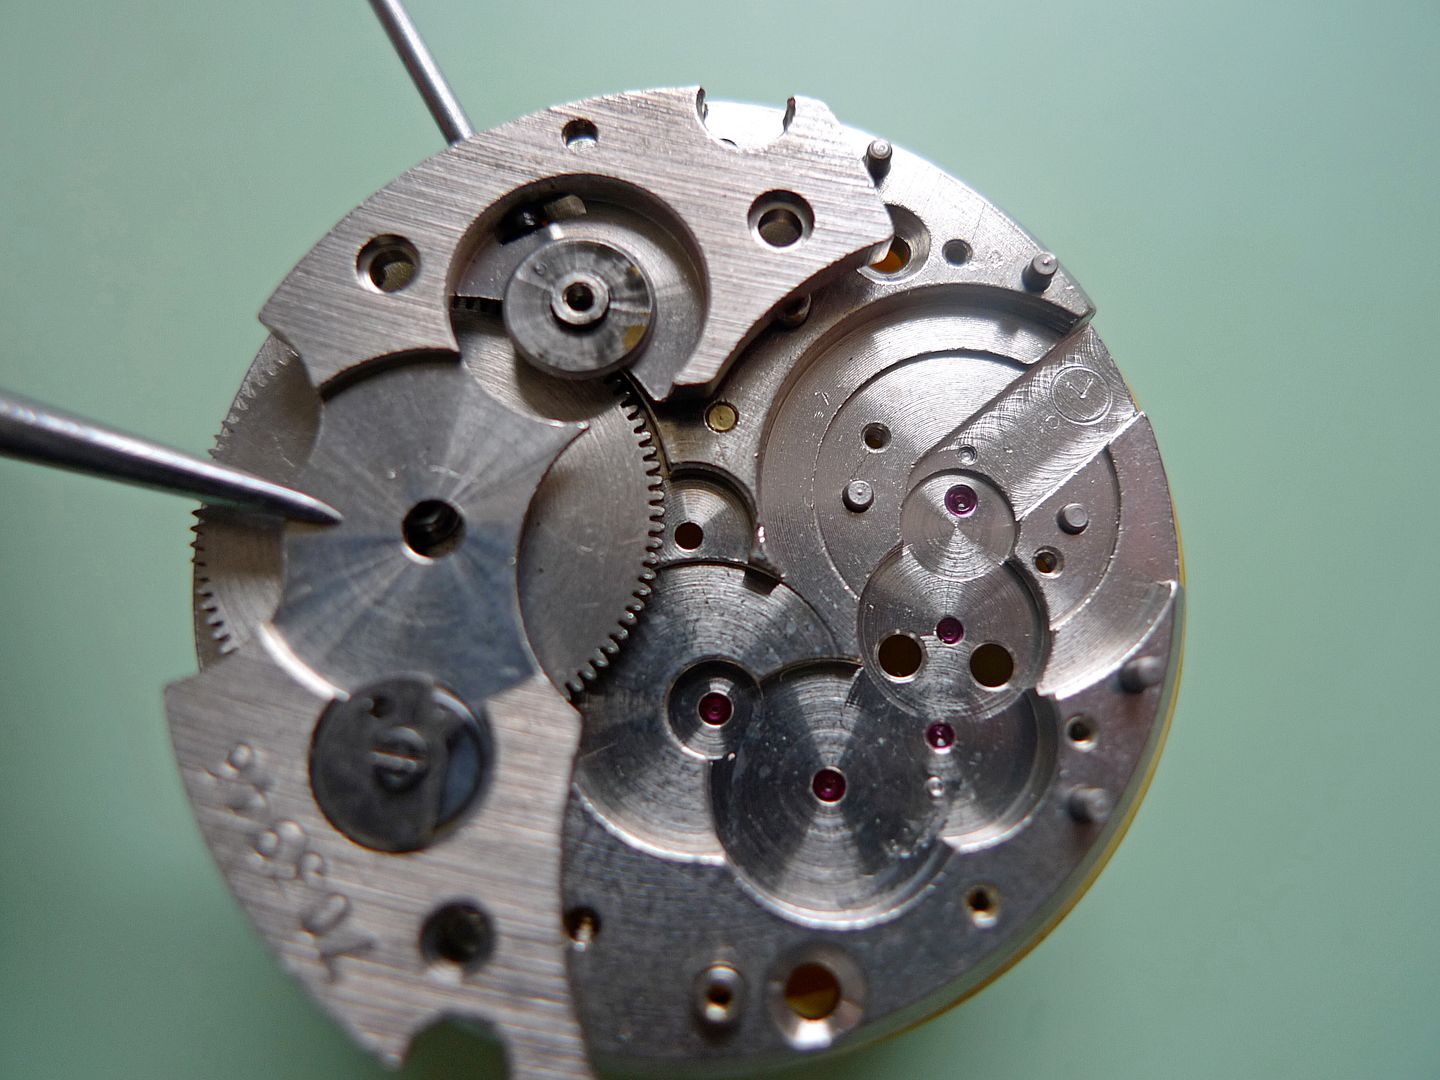
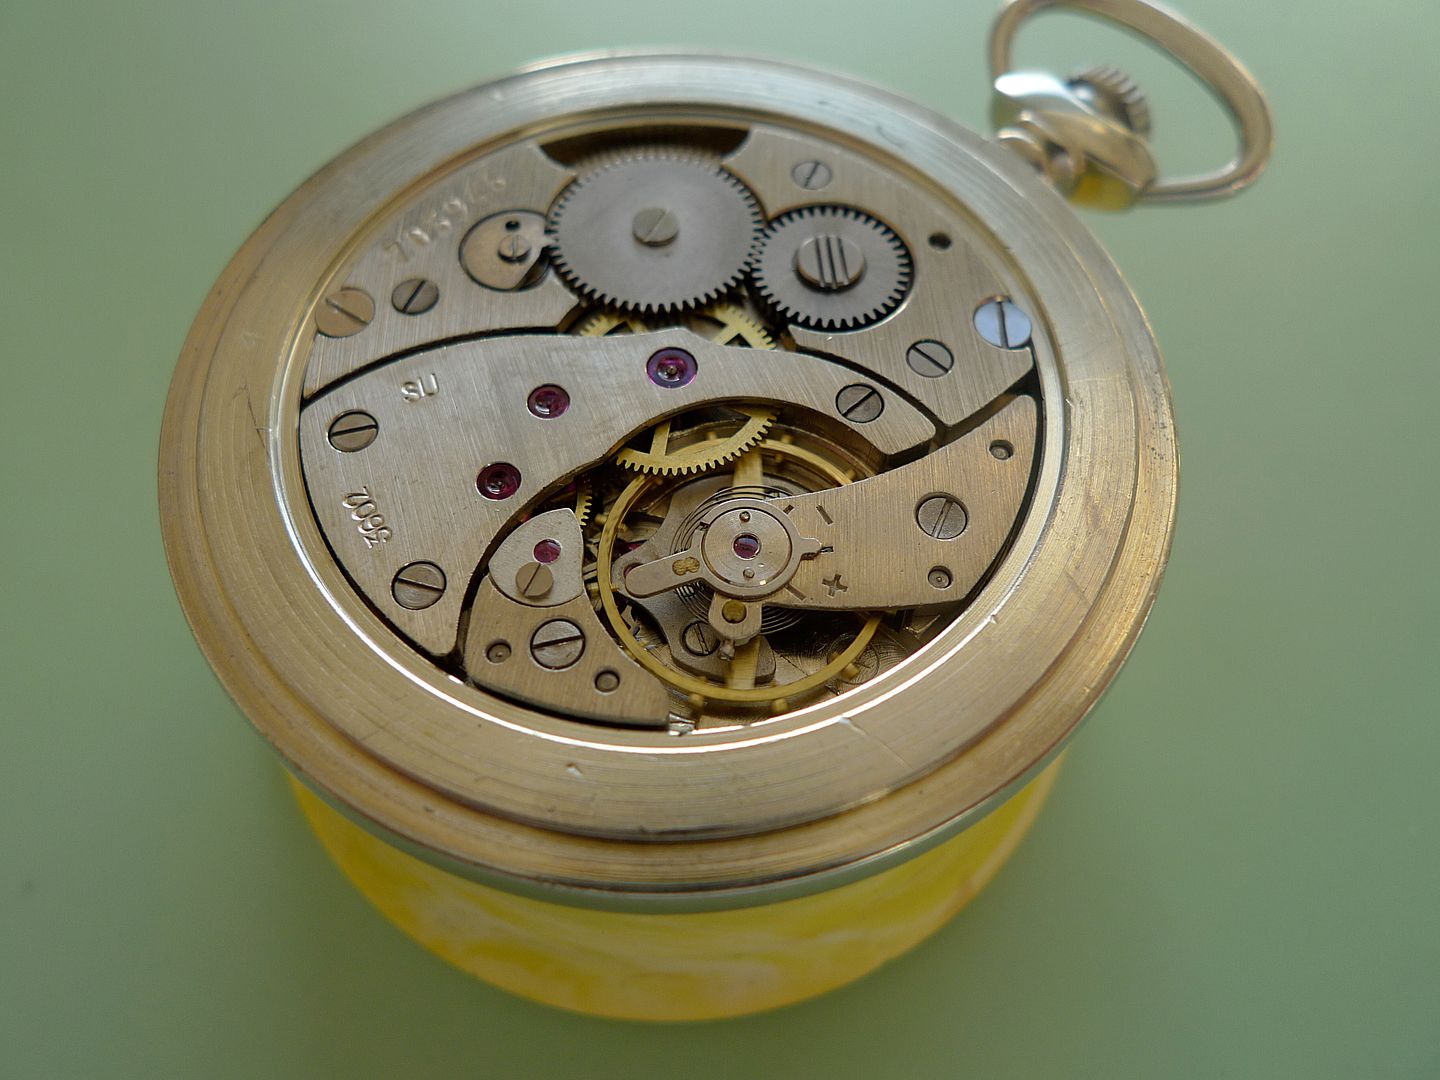
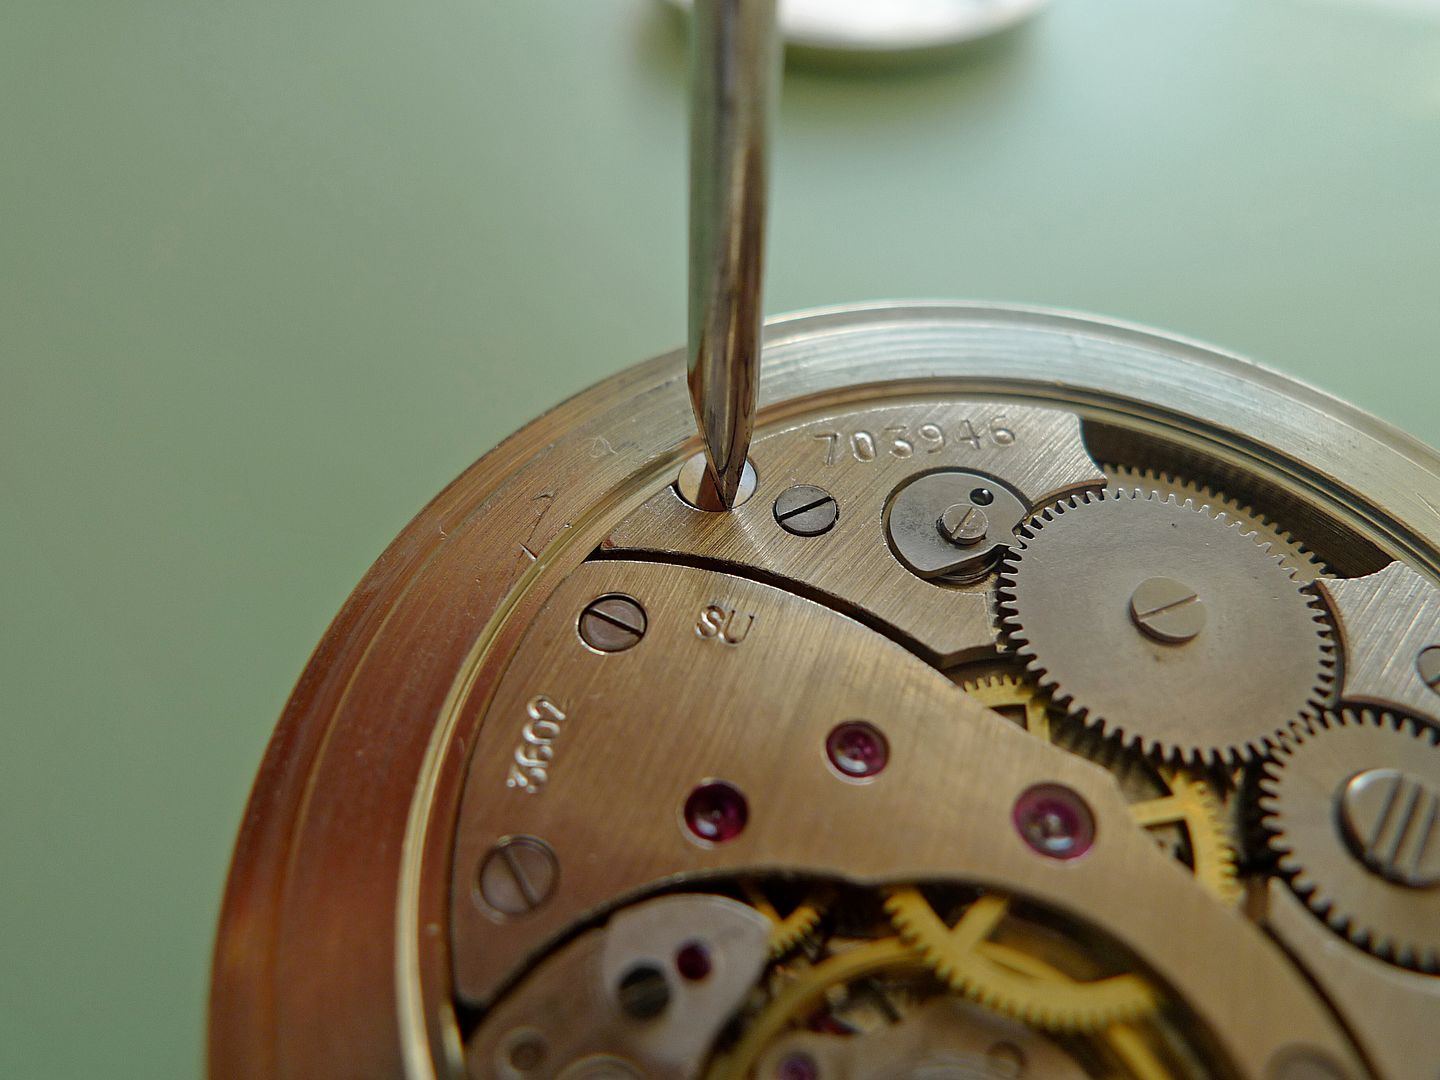
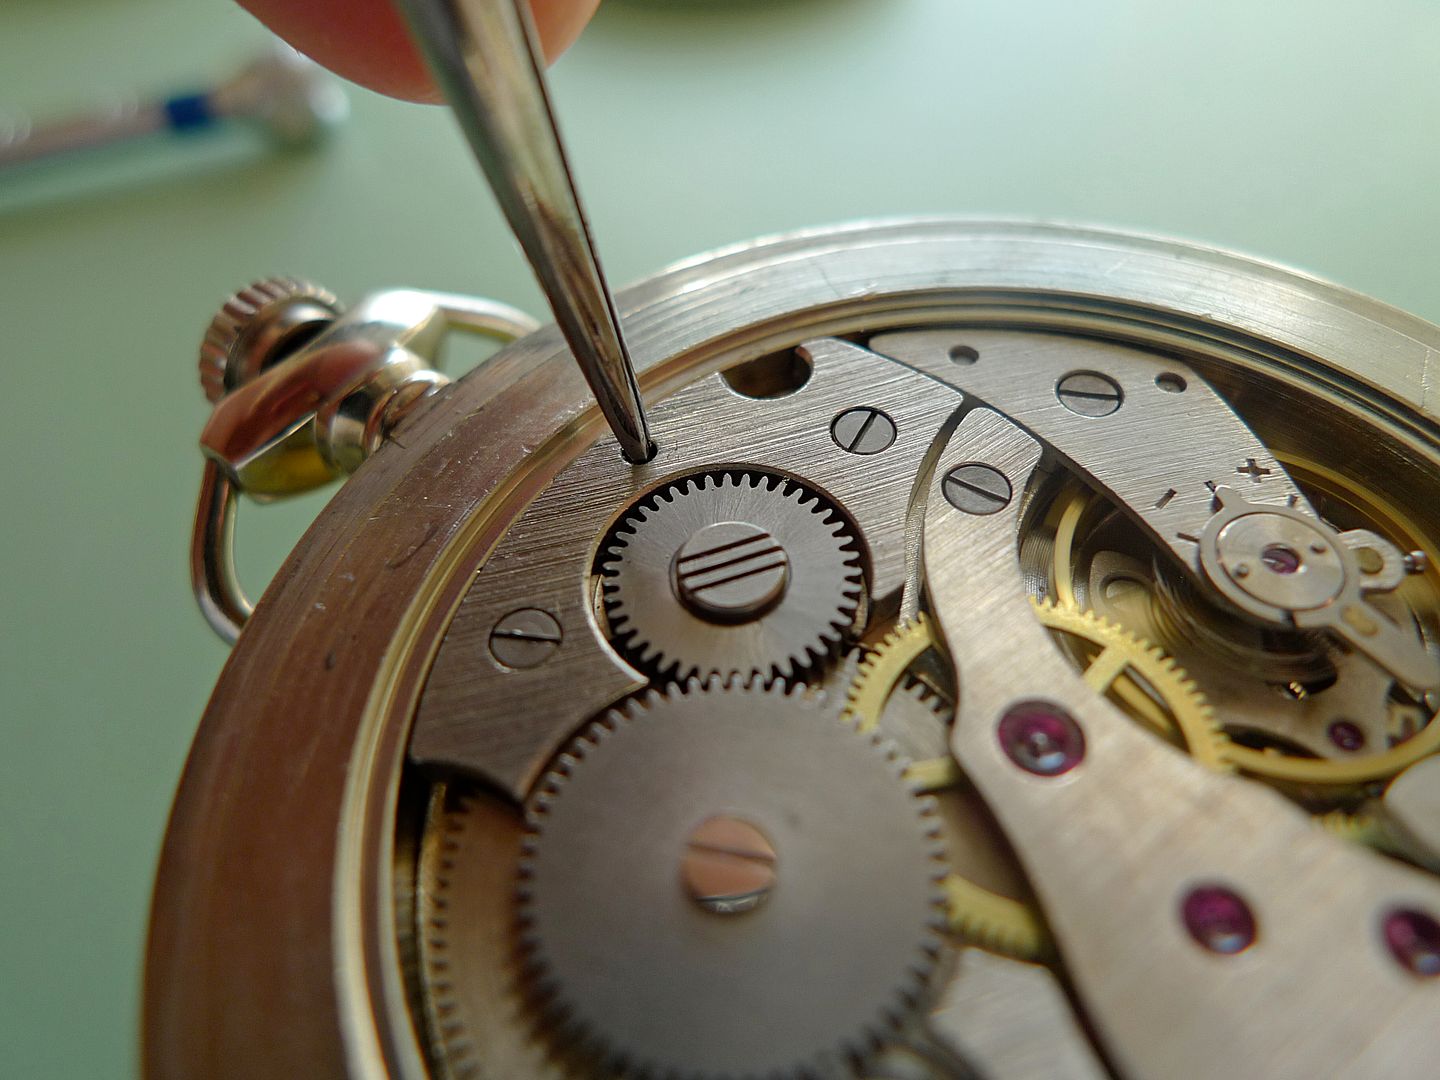
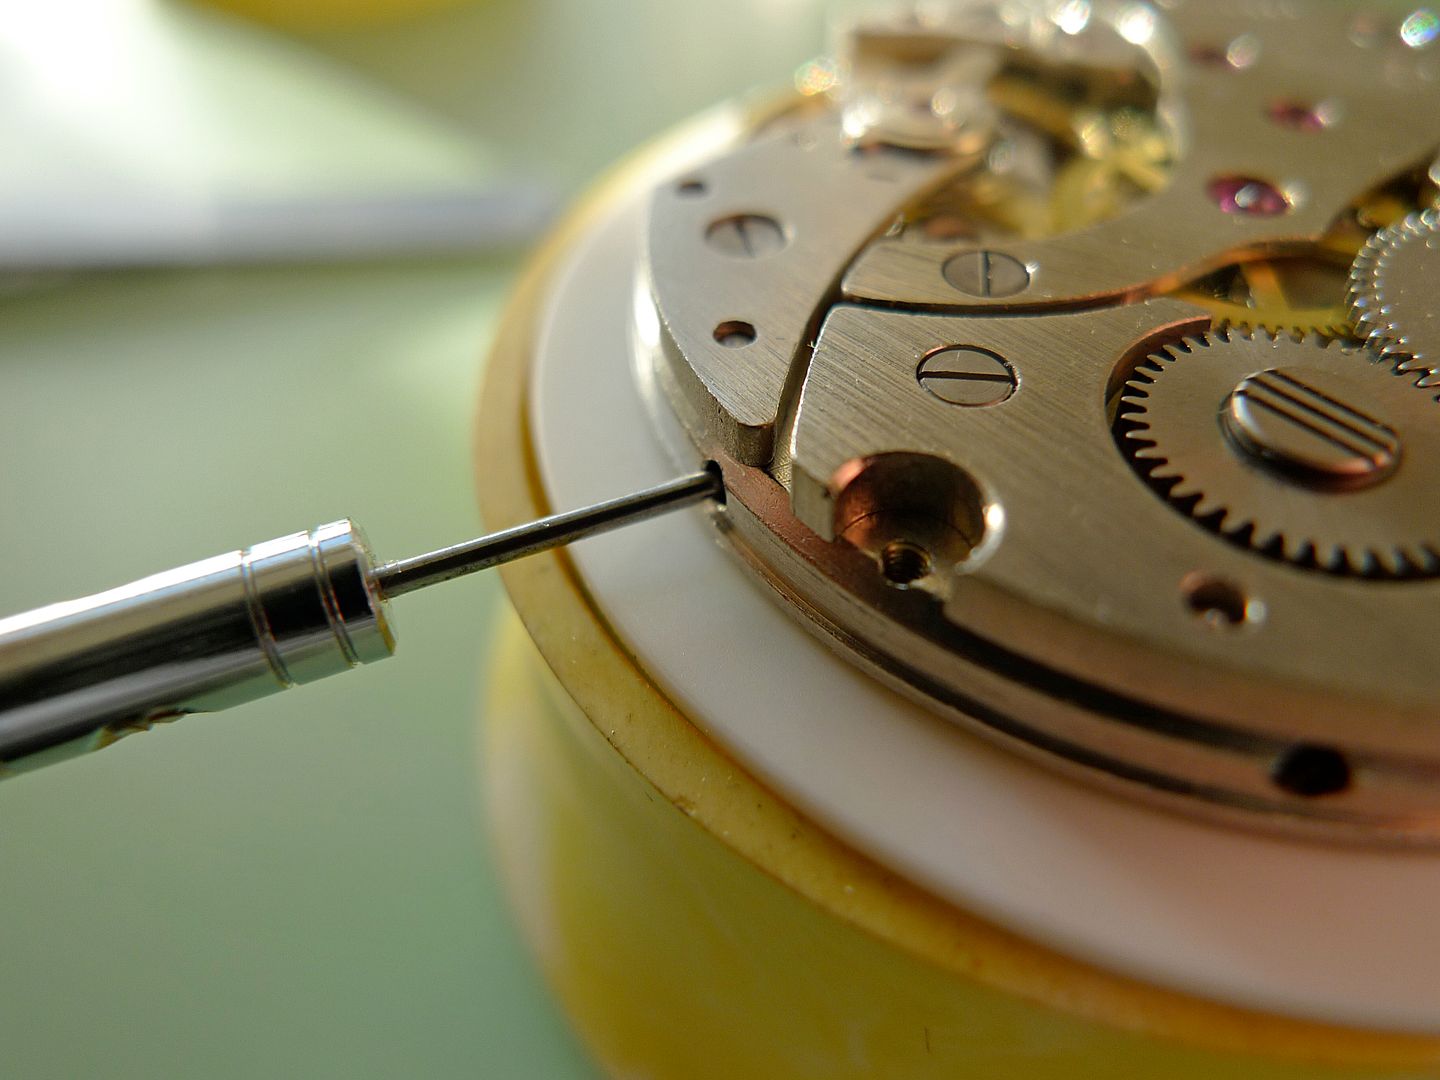
    Hands off and stored safely it’s time to remove the dial. Most modern ETA movements have little hinged hooks that hold the movement in place, however older movements have screws on the side of the movement like this Molnija.


    Loosen off both screws but don’t remove them completely.


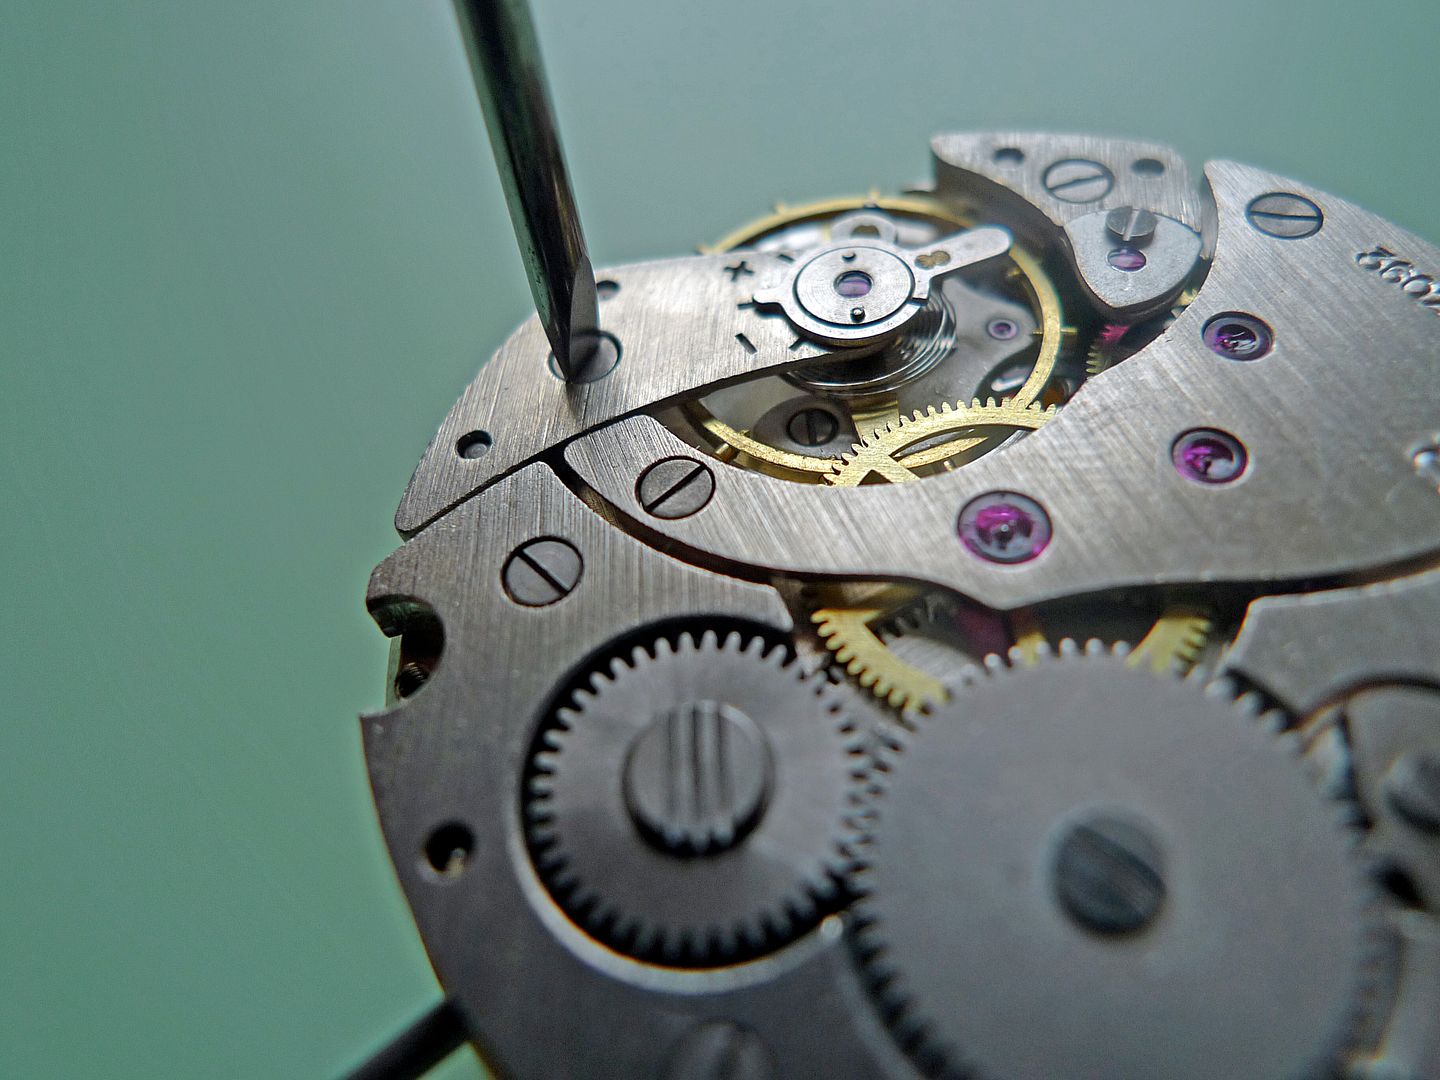
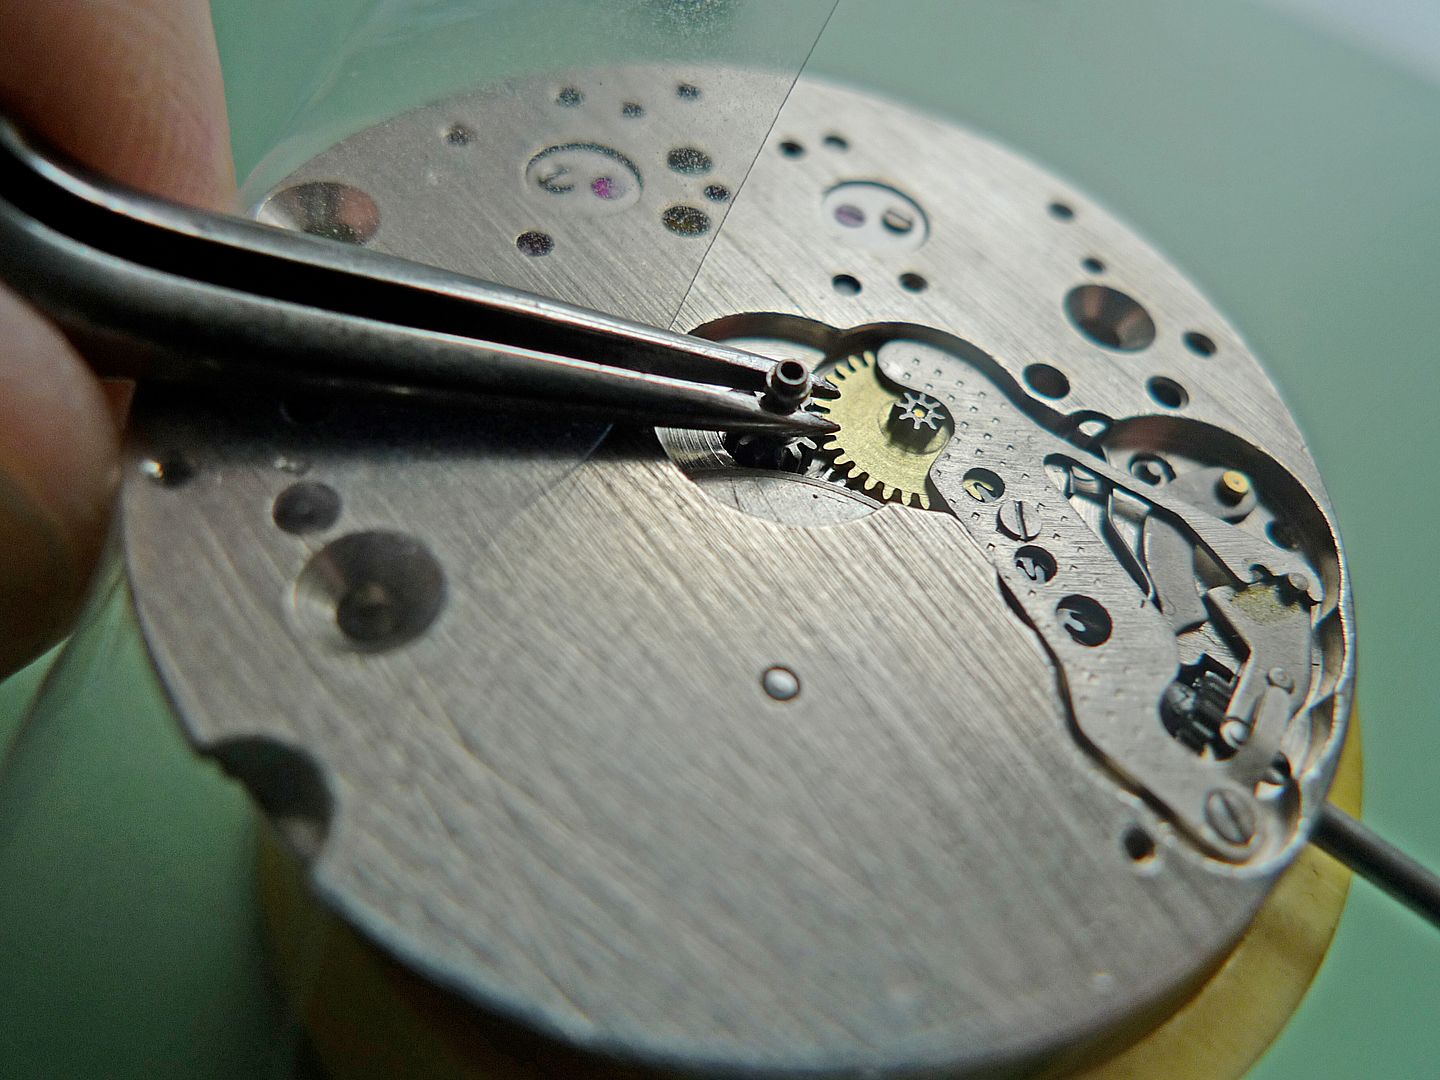
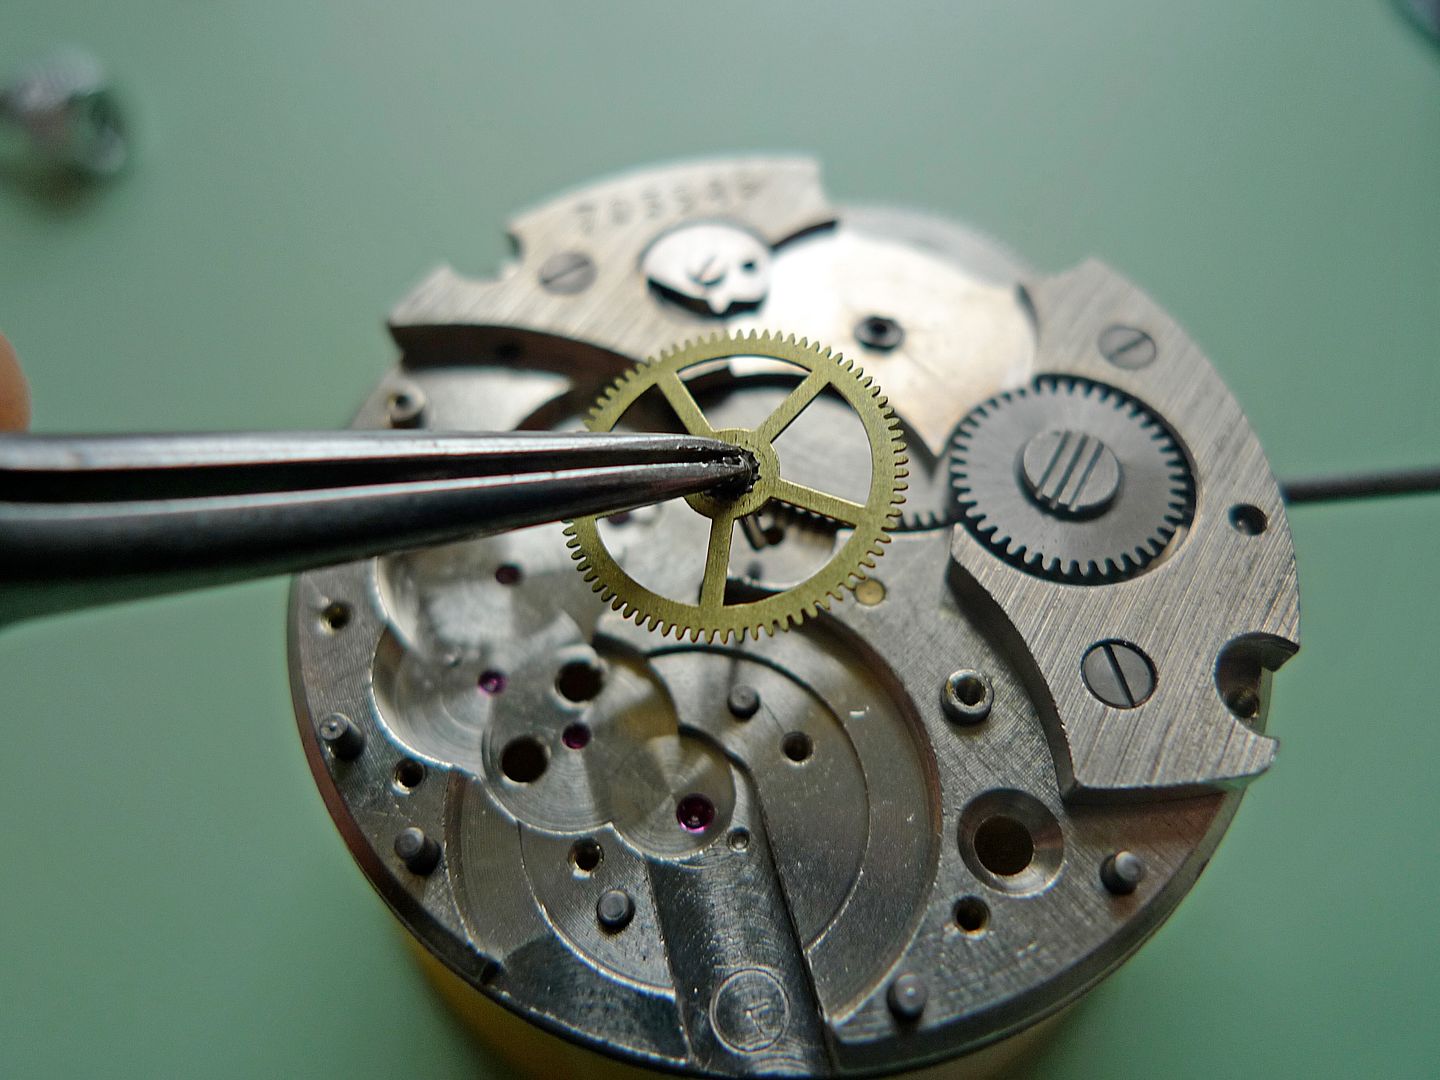
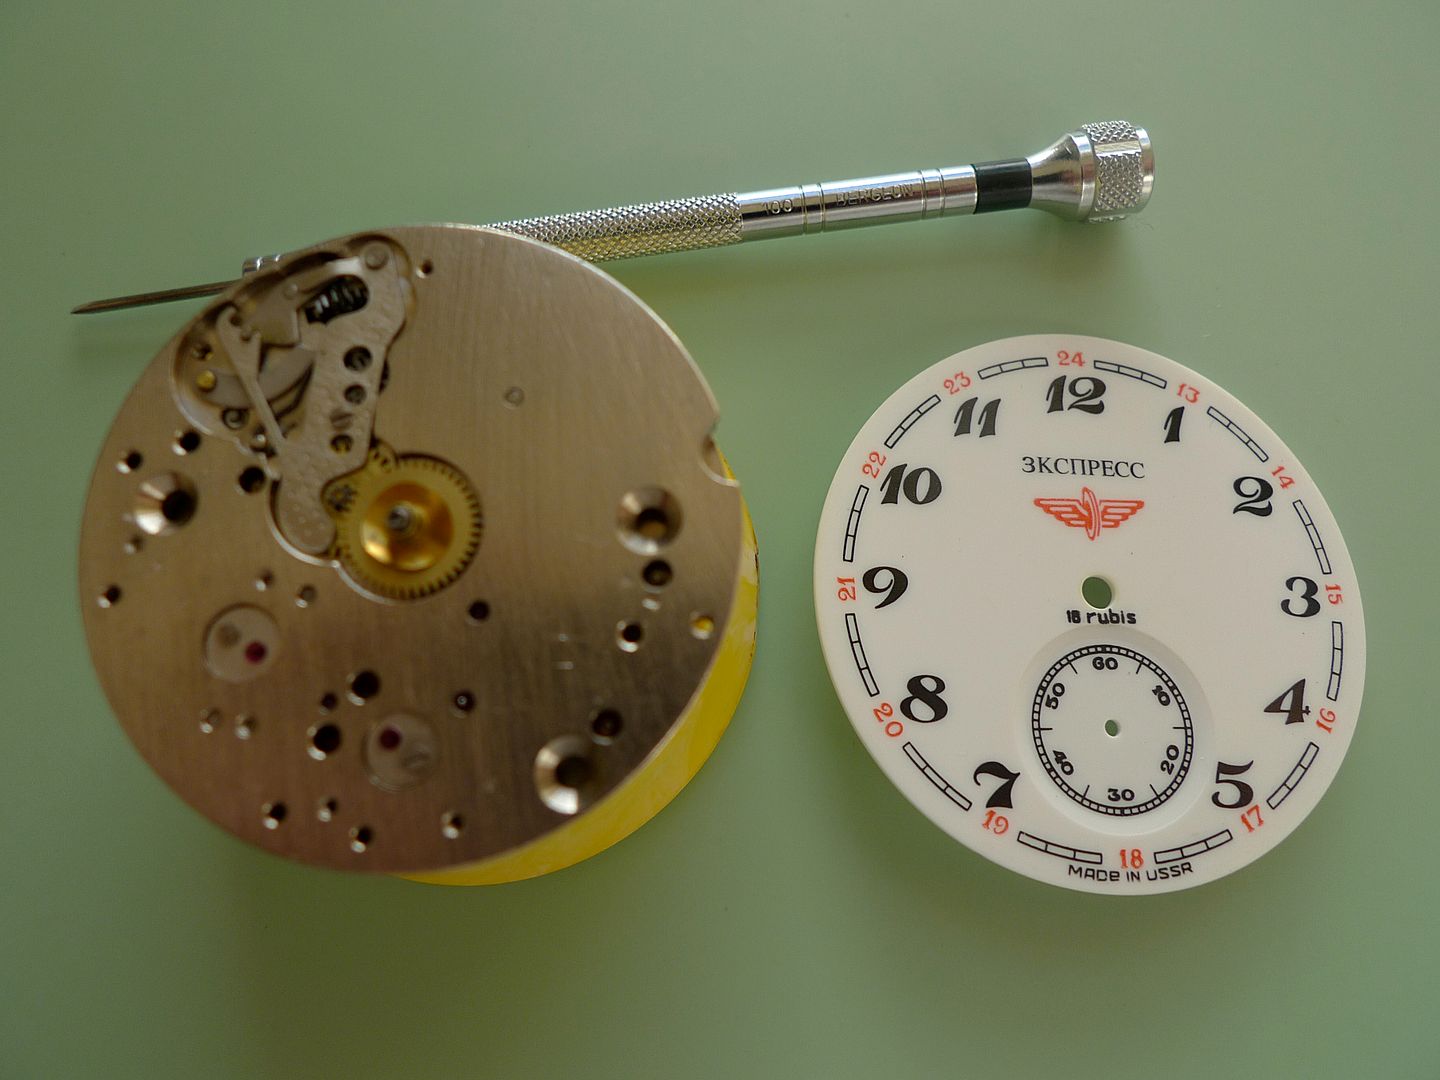
    It might take a little bit of levering to remove the dial, my example was a pretty tight fit.


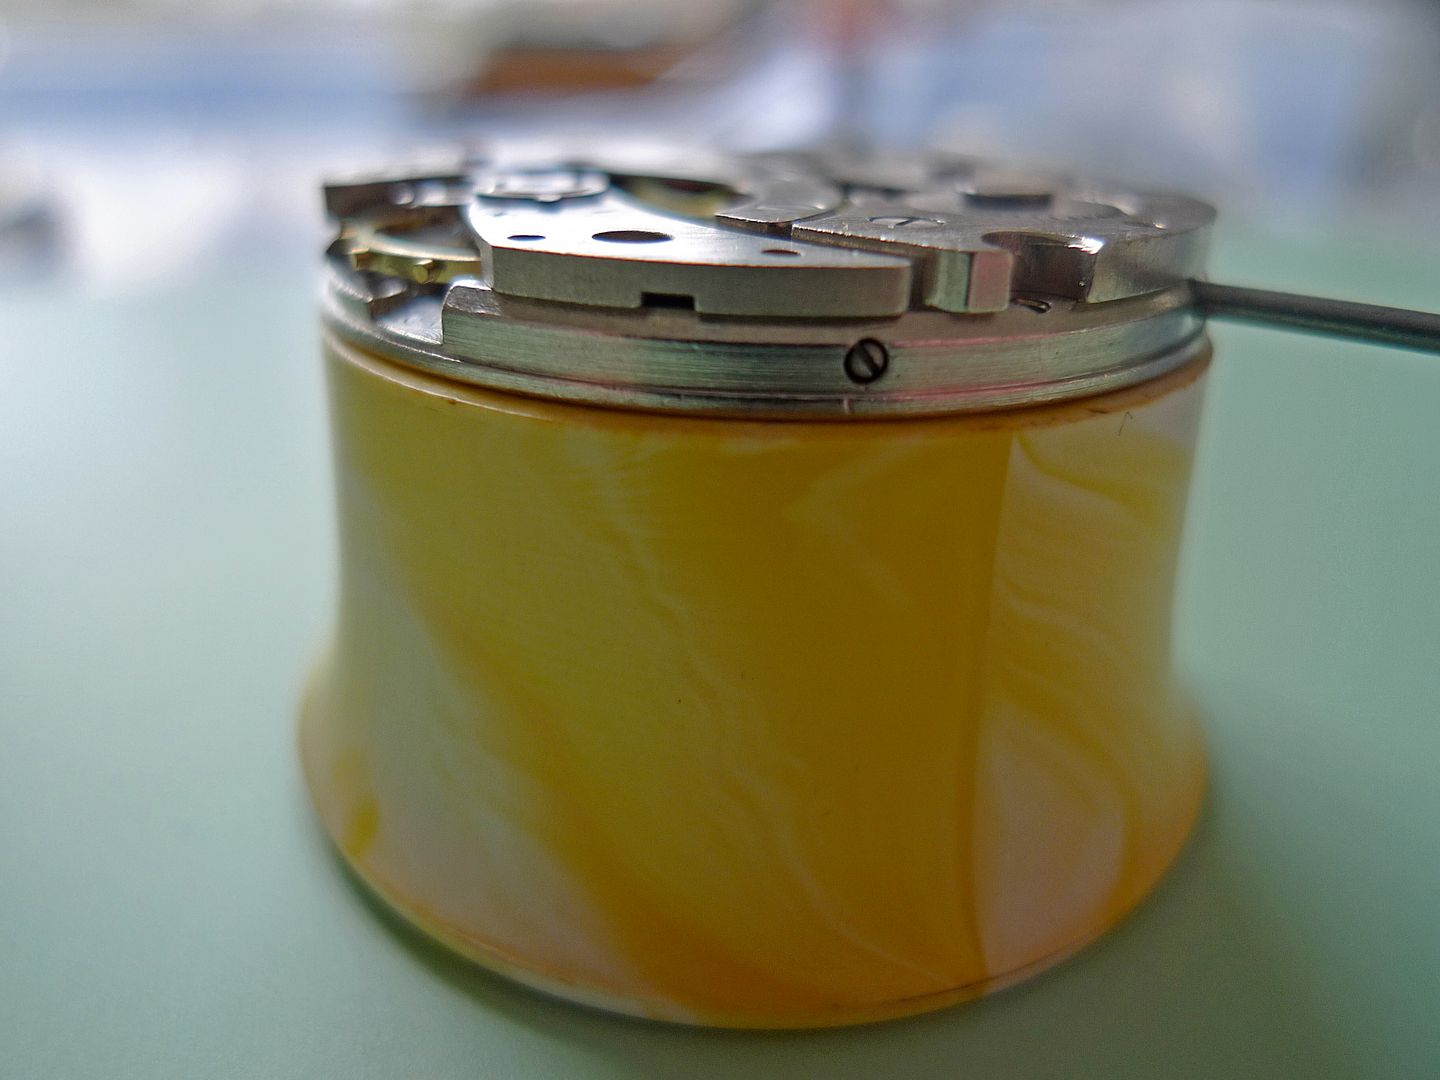
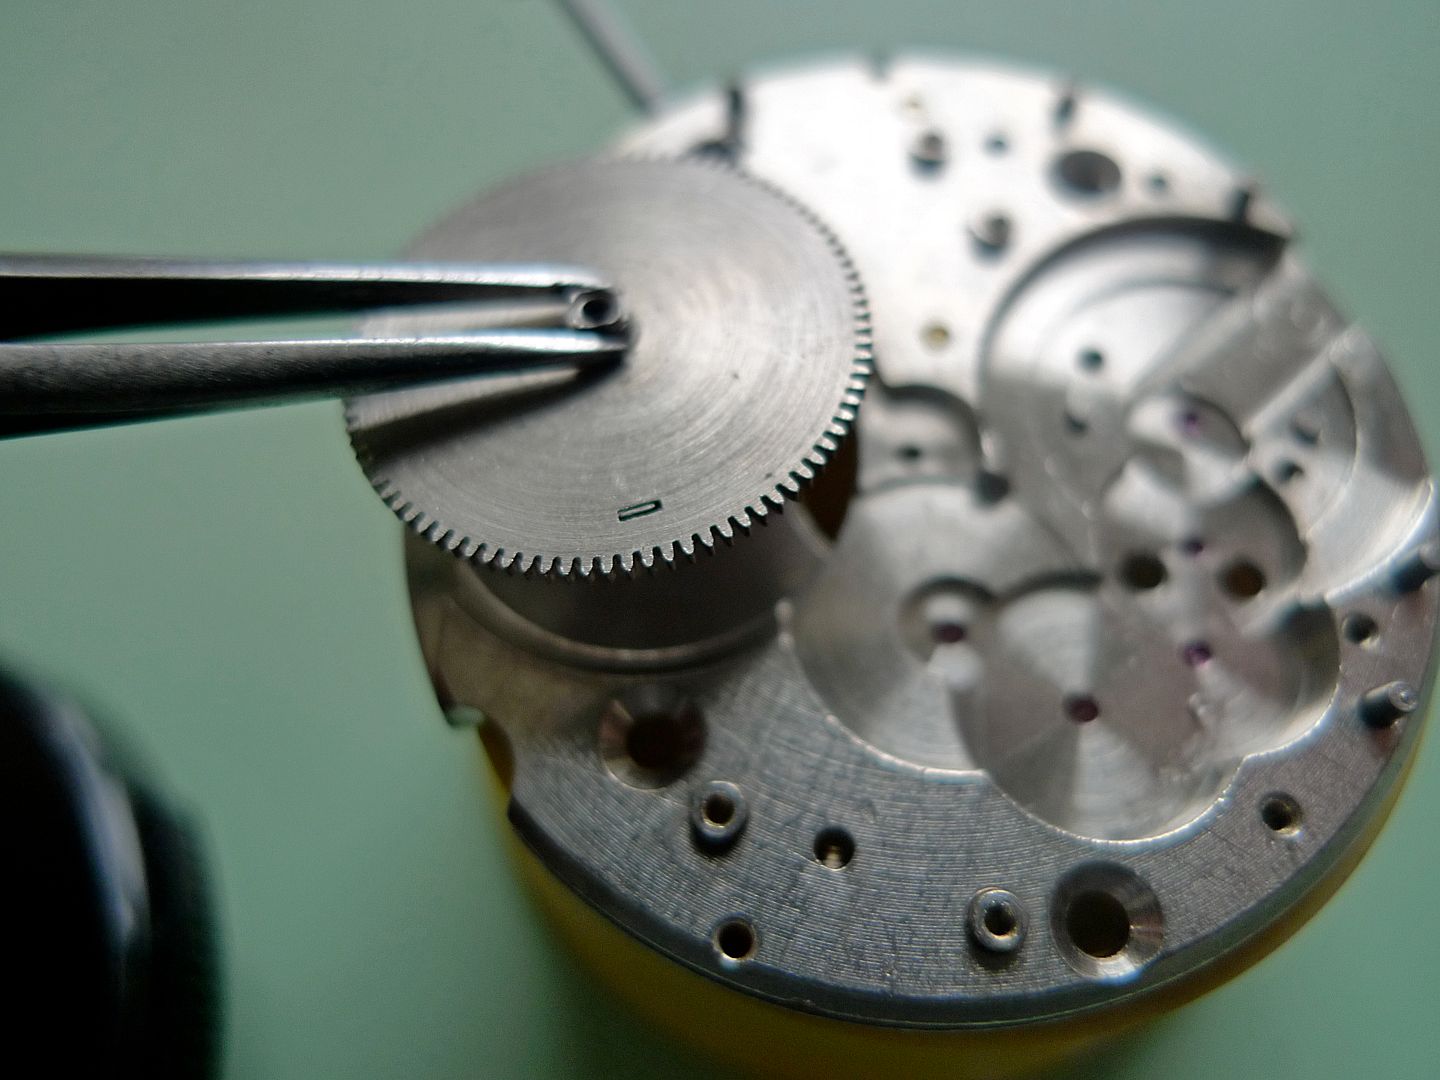
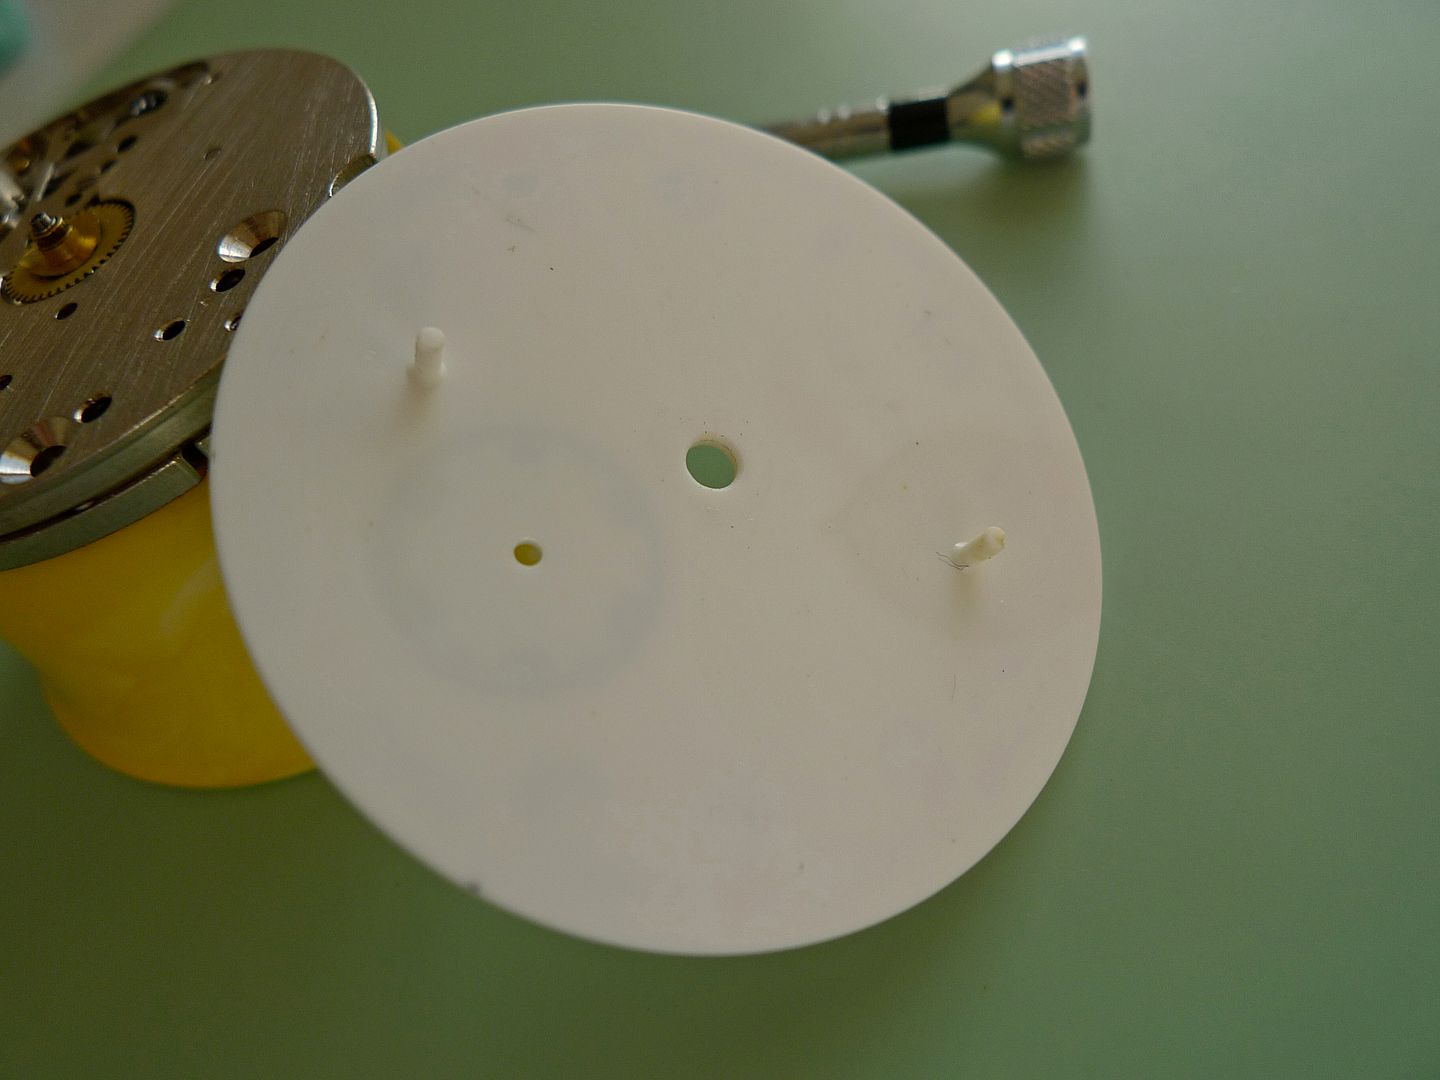
    Here’s the reverse of the dial showing the two dial feet.


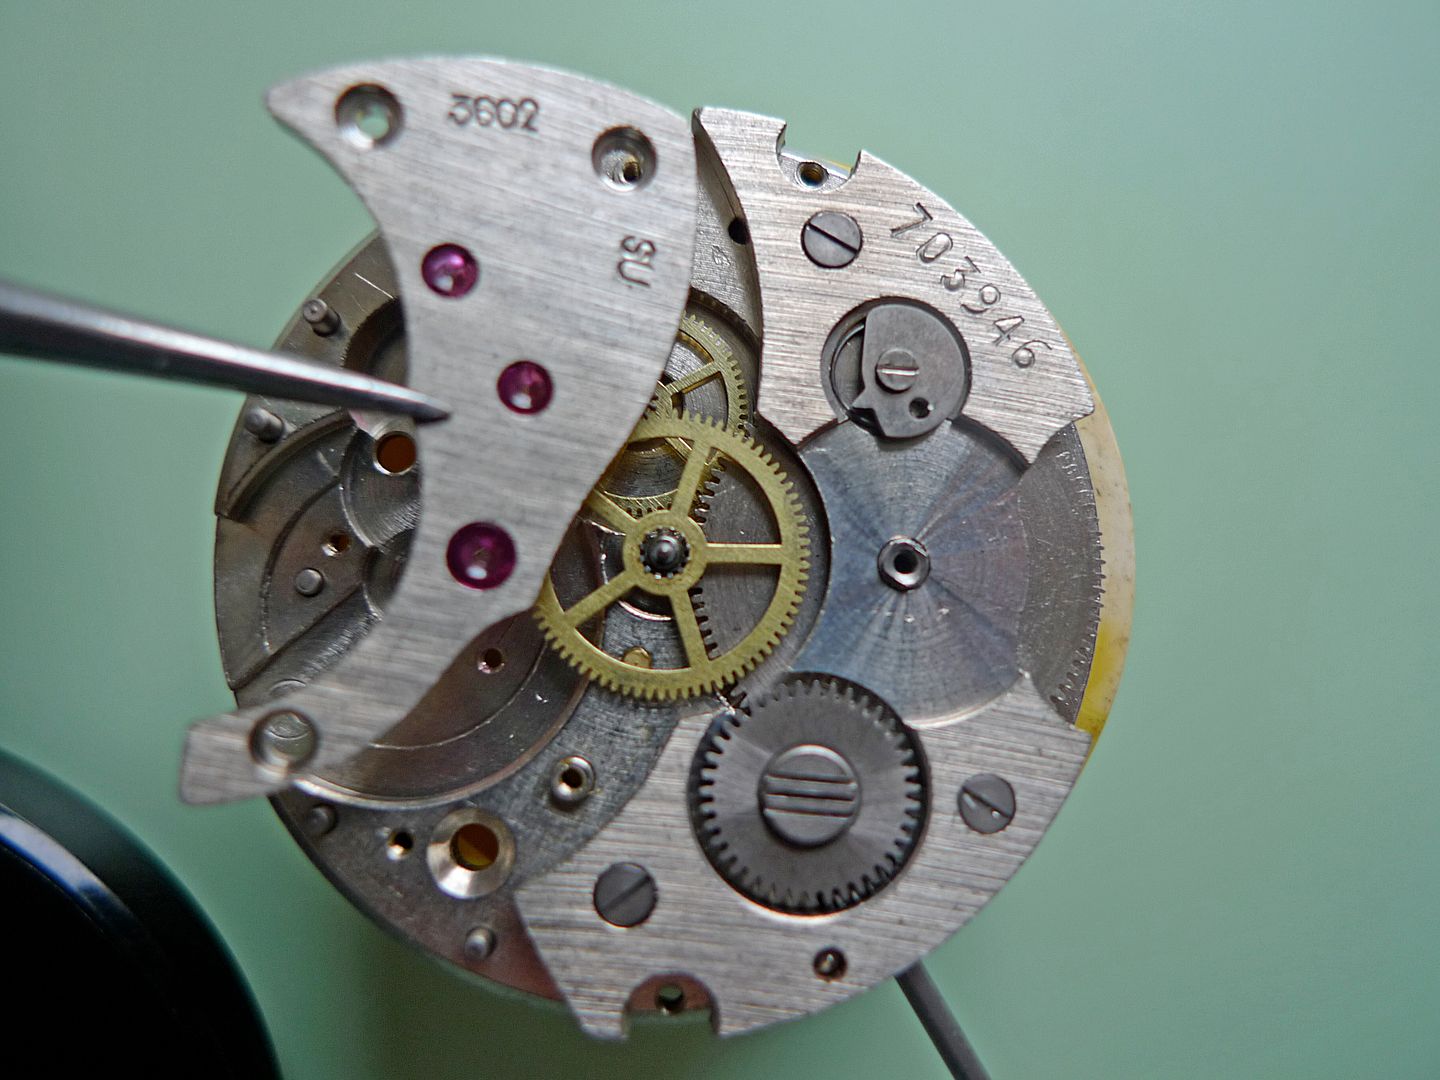
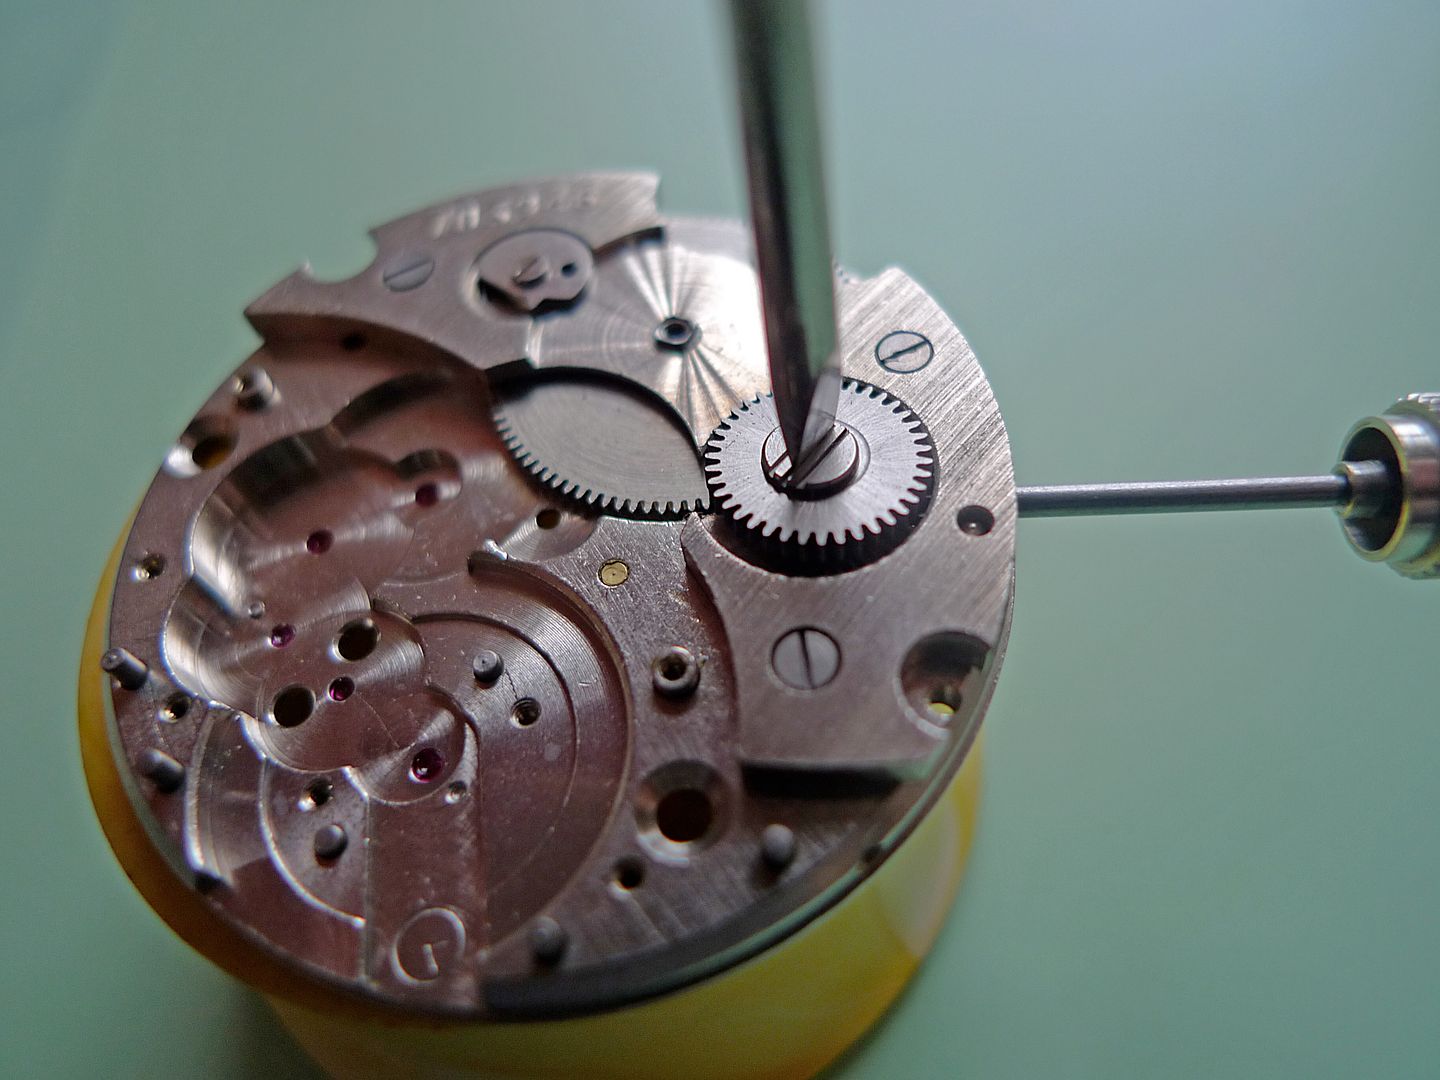
    Once the dial is removed tighten the dial feet screws back up. If you don't and the movement goes into an ultrasonic cleaner they'll work loose and you'll lose them.

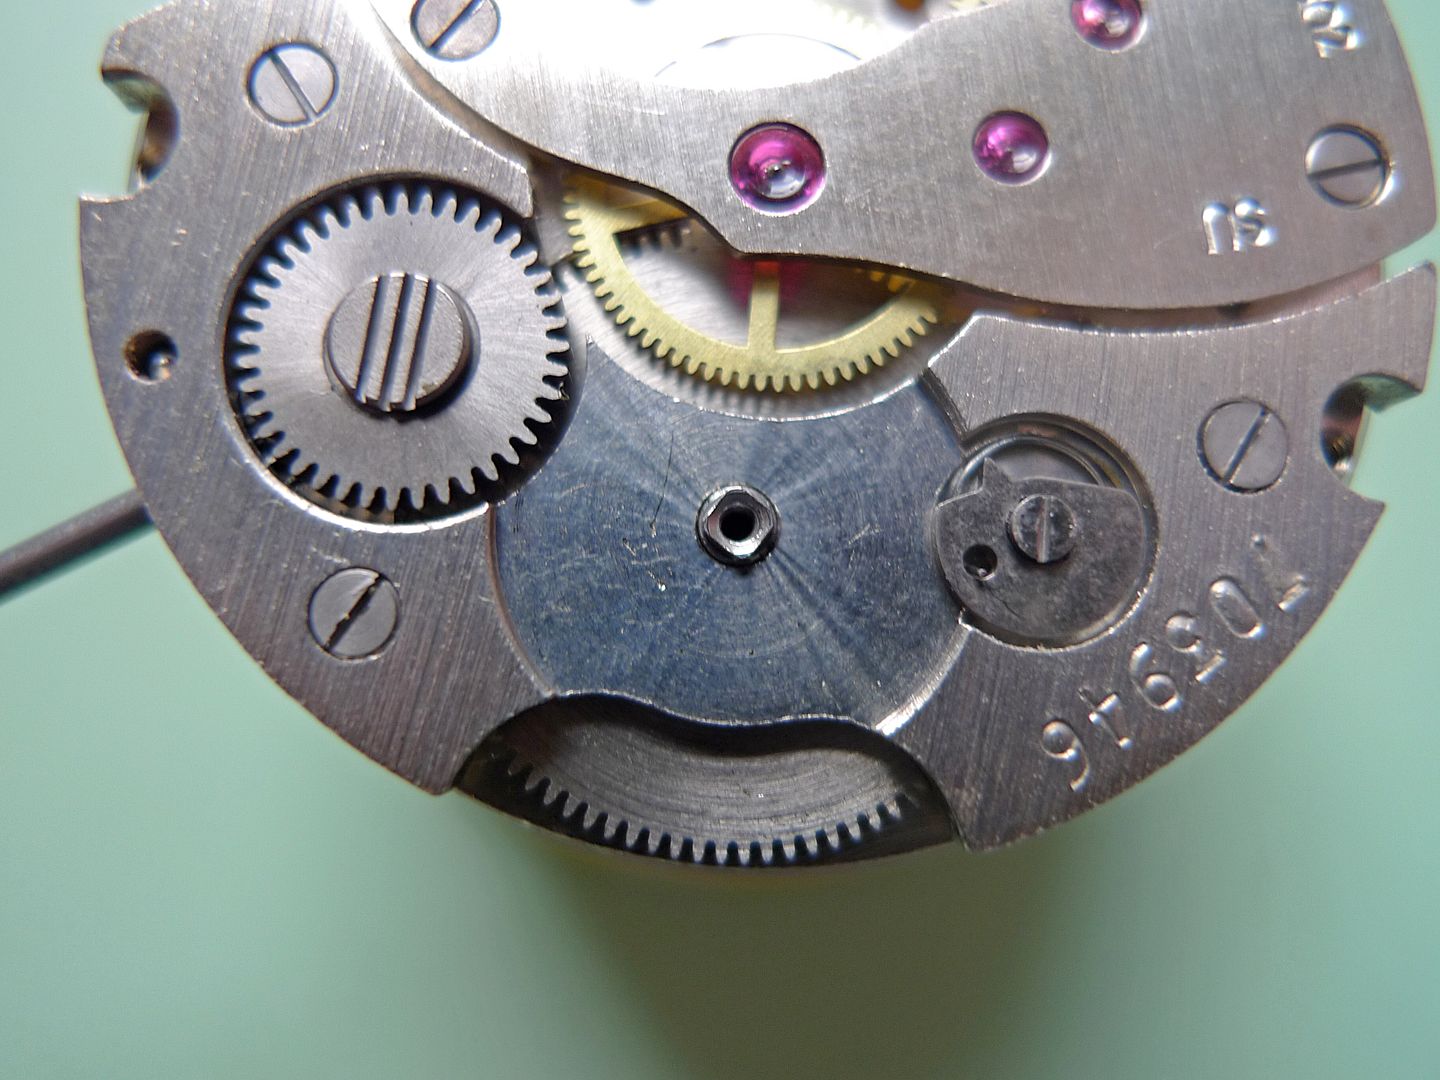
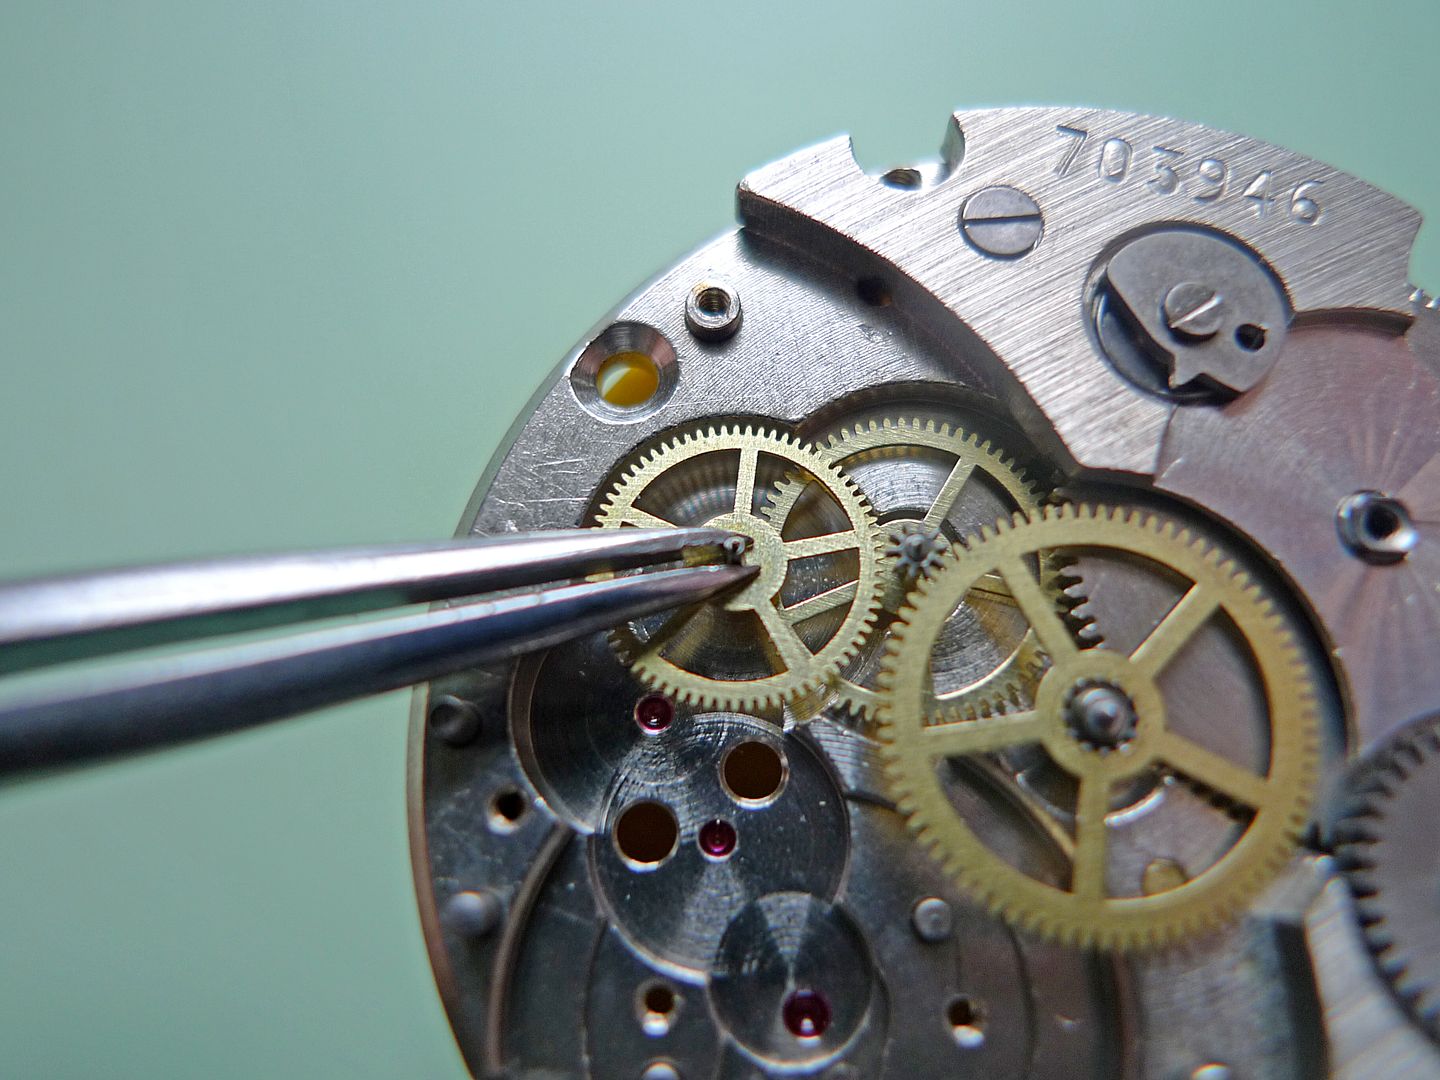
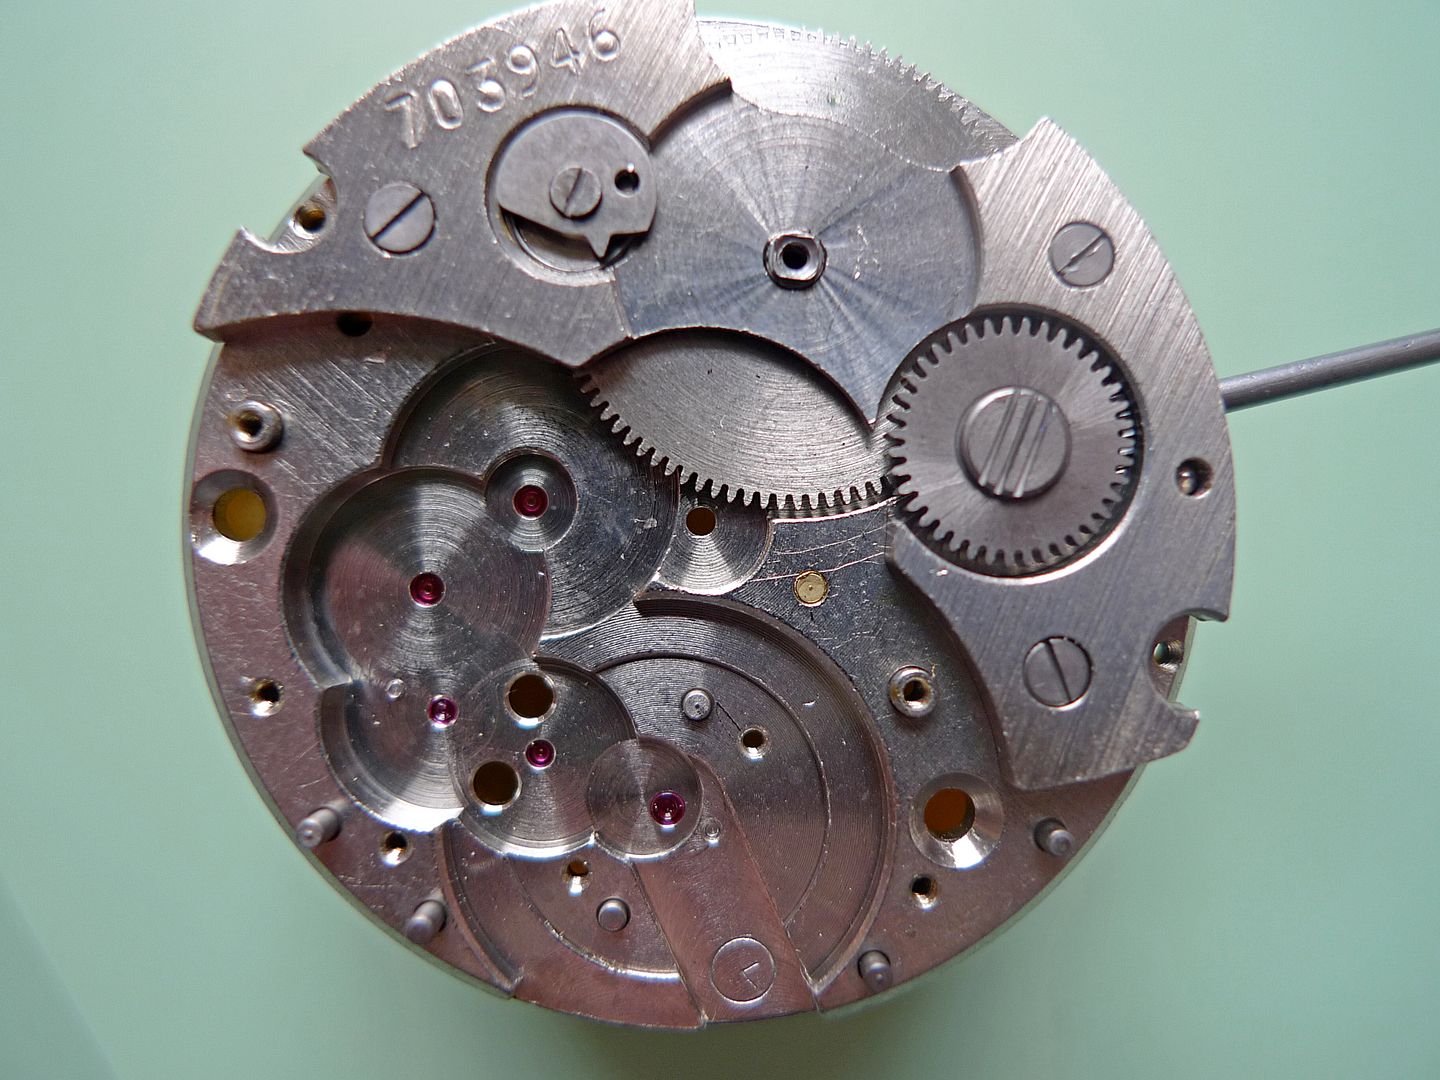
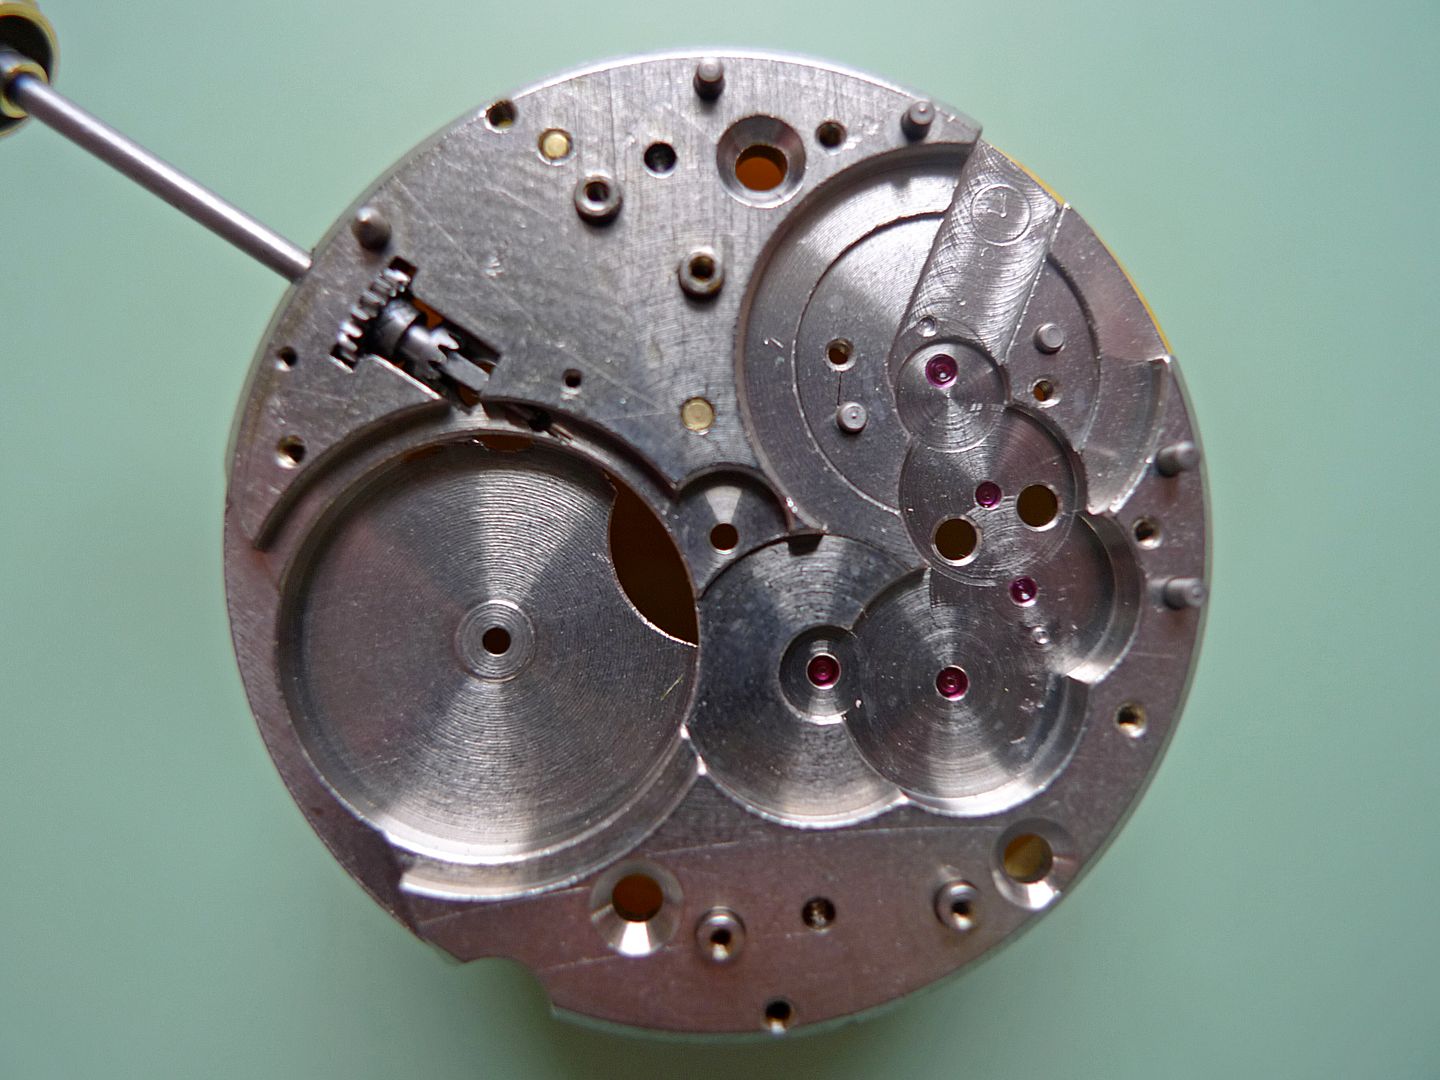
    So now we have complete access to both sides of the movement. Hope it wasn’t too boring and it helped to illustrate the basics and how much goes into working with watches. If anyone’s interested in seeing dissembly of the movement I’ll add to this thread when I get the time and some light.

    Thanks for reading.

    Cheers,
    Gary
    Last edited by Omegary; 2nd January 2013 at 00:43.

  3. #3
    Master adzman808's Avatar
    Join Date
    Apr 2012
    Location
    Porto & the UK
    Posts
    2,736

    thanks for posting

    another superb 'tales from the bench' Gary, I for 1 would love to see the continued dismantling of this watch and perhaps gain more than a vague understanding of how watches work, (my intelligence permitting of course )

  4. #4
    I am another one who would like to see the disassembly, when you have the time.

  5. #5
    Grand Master gray's Avatar
    Join Date
    Jul 2003
    Location
    New Brighton
    Posts
    11,555
    Cheers Gary. I look forward to future instalments.

    I've never had much trouble with disassembly - that's usually a few days before a parts sale - I await the reassembly with interest
    :-)
    Gray

  6. #6
    Craftsman
    Join Date
    Sep 2010
    Location
    Dartmoor, Devon
    Posts
    529
    Cheers Gary

    I'll have to invest in one of these movements from ebay, along with some tools and follow along with the instalments.

    Hopefully see you at a SWHES in the new year.

    DS

  7. #7
    Thanks for the 1st part of the story. I am another one who would like to see the tale continue as and when.

  8. #8
    Craftsman
    Join Date
    Sep 2003
    Location
    Barrow-in-Furness UK
    Posts
    354
    I look forward to the rest of the dismantle, it was very interesting, good work.

  9. #9
    Master numberjack's Avatar
    Join Date
    Mar 2009
    Location
    Glasgow
    Posts
    2,688
    Blog Entries
    1
    Looking forward to next instalment , thanks for taking the time to post this.

  10. #10
    Craftsman dixie's Avatar
    Join Date
    Feb 2009
    Location
    UK
    Posts
    335
    Fantastic! Thank you Gary, excellent post as always.

  11. #11
    Cheers, mate. Top stuff. :thumbup:

    Looks like you're settling into this pretty well - how are you taking the photos, by the way?

  12. #12
    Grand Master Neil.C's Avatar
    Join Date
    Sep 2003
    Location
    SE England
    Posts
    27,100
    Nice work Gary.

    Is that dial plastic?
    Cheers,
    Neil.

  13. #13
    Great to see - I am still not even 25% tempted to try myself, yet. But it is great to see all the same.

    Many thanks for posting.
    It's just a matter of time...

  14. #14
    Great post! All of us that are interested in watches should have some idea about working on them whether or not we are going to try it ourselves.

  15. #15
    Grand Master
    Join Date
    Aug 2008
    Location
    Surrey
    Posts
    19,843
    Gary,

    Thank you for taking the time a effort to produce this excellent photo demonstration
    RIAC

  16. #16
    Master hellominky's Avatar
    Join Date
    Jul 2012
    Location
    sunny poole, dorset
    Posts
    1,093
    Another great post Gary. I think we would all be interested to see the movement being taken to components.

    Steve

  17. #17
    Journeyman Fatpants's Avatar
    Join Date
    Dec 2012
    Location
    Chalkwell
    Posts
    119
    Great post, thanks Gary.

  18. #18

    Tales from the bench - a beginners guide to dissembly

    Great post - thanks :-)

  19. #19
    Master IVK's Avatar
    Join Date
    Mar 2009
    Location
    Leicester
    Posts
    2,375
    Excellent as usual, thanks Gary. Would love to see the disassembly of the movement if you have the time.

  20. #20
    Very interesting again! Cheers for talking the time.

  21. #21
    Master Omegary's Avatar
    Join Date
    Apr 2006
    Location
    Oxfordshire
    Posts
    8,844
    Thanks for all the positive comments guys, much appreciated as always

    Quote Originally Posted by Broussard View Post
    Cheers, mate. Top stuff. :thumbup:

    Looks like you're settling into this pretty well - how are you taking the photos, by the way?
    Hi M, I'm struggling with the pics tbh, obviously I've only got two hands so I have to set some of them up a little and certain things I just can't photograph unfortunately. Hopefully it's enough to get the gist of what I'm blathering on about though.

    Quote Originally Posted by Neil.C View Post
    Nice work Gary.

    Is that dial plastic?
    Thanks Neil and yes the dial's plastic. I've no idea about the age of the pocket watch, as it was given to me. I'm guessing it's fairly new, probably from the '90's.

    Cheers,
    Gary

  22. #22
    Grand Master magirus's Avatar
    Join Date
    Nov 2003
    Location
    Up North hinny
    Posts
    39,473
    Excellent. Succinct, and very good photography.
    F.T.F.A.

  23. #23
    Master blackie's Avatar
    Join Date
    Oct 2010
    Location
    Up north wit cowd weather
    Posts
    4,222
    I can confirm that the knife does hurt if it slips........

  24. #24
    Master PreacherCain's Avatar
    Join Date
    Aug 2011
    Location
    London, UK
    Posts
    3,950
    Quote Originally Posted by magirus View Post
    Excellent. Succinct, and very good photography.
    What he said.

    I agree that it would be fascinating to see the next phase of disassembly: the mechanics of the movement are things I broadly understand on a theoretical level but practice beats theory every time, even at one remove. And as always, Gary, your photography and explanations are crystal clear.

  25. #25
    Master Swissz's Avatar
    Join Date
    May 2011
    Location
    Switzerland/France
    Posts
    1,106
    Very nice explanation and great photos, thank you!

  26. #26

    Tales from the bench - a beginners guide to dissembly

    Really enjoy reading this. Would love to have a go but can see I'd be well into it and at a vital stage when the kids decide they need me.

    Malc

  27. #27
    Master Chris W's Avatar
    Join Date
    Feb 2006
    Location
    Staffordshire, UK
    Posts
    2,053
    Great post - thanks for sharing.
    Would love to see this develop as/when you have the time to update it.

    Have you thought about putting the camera on a small tripod and using the self timer? - would give you both hands free for a few seconds!

  28. #28
    Well done Gary, looking forward to further developments!


    Quote Originally Posted by blackie View Post
    I can confirm that the knife does hurt if it slips........
    Ha! I thought of you when I read that in Gary's post!

    R
    Ignorance breeds Fear. Fear breeds Hatred. Hatred breeds Ignorance. Break the chain.

  29. #29
    Craftsman
    Join Date
    Sep 2011
    Location
    Up north
    Posts
    738
    Also be interested to see next stage. Thanks for the post, I found it really easy to follow.

  30. #30
    Craftsman
    Join Date
    Dec 2007
    Location
    West Scotland
    Posts
    471
    A couple of suggestions for learners. With the movement in the case,take off the mainspring power first, remove the stem before undoing the movement holding screws, take out the movement & refit the stem to keep the keyless work in place . Take out the balance and set aside for safe keeping. This sequence helps learners to avoid breaking the stem if the movement accidently 'hangs' on the stem, crossing up the keyless, or breaking the balance staff while removing the dial. I always insist that learners use a movement holder rather than rings to avoid early heavy handedness tipping the movement off the ring . Hope this helps.

  31. #31
    Master
    Join Date
    Apr 2004
    Location
    Harrow
    Posts
    4,403
    An enjoyable read, and like others, I am looking forward to the next instalment.

  32. #32
    Master Omegary's Avatar
    Join Date
    Apr 2006
    Location
    Oxfordshire
    Posts
    8,844
    Thanks again for all the positive comments chaps

    Quote Originally Posted by Malcolm68 View Post
    Really enjoy reading this. Would love to have a go but can see I'd be well into it and at a vital stage when the kids decide they need me.

    Malc
    I know what you mean Malc, one of my cats favourite perching places when the sun's out is my work bench. When I was taking pics for this post she was at my side threatening to jump up and any moment, she was quiet indignant that i was in her place, lol!

    Quote Originally Posted by Chris W View Post
    Great post - thanks for sharing.
    Would love to see this develop as/when you have the time to update it.

    Have you thought about putting the camera on a small tripod and using the self timer? - would give you both hands free for a few seconds!
    Thanks Chris. I have thought about getting a small tripod or bean bag type thing for taking pics, but it's complicated and time consuming enough already as it is. Plus I might have to resort to reading my cameras instruction book and that'll never do. lol!

    Quote Originally Posted by CLOCKMAN View Post
    A couple of suggestions for learners. With the movement in the case,take off the mainspring power first, remove the stem before undoing the movement holding screws, take out the movement & refit the stem to keep the keyless work in place . Take out the balance and set aside for safe keeping. This sequence helps learners to avoid breaking the stem if the movement accidently 'hangs' on the stem, crossing up the keyless, or breaking the balance staff while removing the dial. I always insist that learners use a movement holder rather than rings to avoid early heavy handedness tipping the movement off the ring . Hope this helps.
    Thanks Clockman. I'm all ears when it comes to hearing how watchmakers work so your suggestions are more than welcome. The chap who'd been tutoring me has been a doing it for over 30 years, which is probably why I'm a bit old school and use hand levers and movement rings etc. Plus, if I'm honest, I've been trying to build up a basic tool kit on the cheap.

    It's interesting how different watchmakers prefer different tools. The guy who works alongside my watchmaker much prefers a movement holder but I find that they slow you down a little, it's a lot quicker to flip over a movement on a ring than to unscrew retainers etc on a movement holder. Plus I find that they impede access to the movement a little. You're right though, if a newcomer is a bit uncertain or clumsy a movement holder definitely inspires more confidence and potentially prevents an expensive mistake.

    Cheers,
    Gary

  33. #33
    Craftsman
    Join Date
    Dec 2007
    Location
    West Scotland
    Posts
    471
    Hi,again, You are in good hands with your tutor, I've just clocked up 50 years and still going strong. An experienced tutor or mentor is really essential as self teaching only leads to bad habits. I've done a lot of training over the years and have a more basic approach when teaching. Like experienced drivers, busy watchies often simply forget the difficulties faced by learners who are often disheartened by early failures & give up. You could well give us a class on photography some time soon. Your pics and script are excellent. However I am always aware that this is mainly a hobbist site soI try to keep it simple BC.

    Just a thought ,would the member Raulgonzalez care to contribute, he is on the right track for future stardom and more up to date on modern methods than I could be.

  34. #34
    Craftsman jivaka's Avatar
    Join Date
    Jul 2008
    Location
    Midlothian
    Posts
    280

    Tales from the bench - a beginners guide to dissembly

    Thanks for this!

  35. #35
    Like CLOCKMAN, I prefer removing the stem before removing the case screws but there is no right or wrong way to do things, its really down to personal preference. I also prefer to use a movement holder because I find it more secure, particularly if you want to manoeuvre the movement to look at something from a different perspective. Such as the division of the escapement for example.

    We are taught one way of doing things but are encouraged to find our own methods as long as the end result is the same. Practice is the only way to find your own methods, if your finding something difficult try doing it another way. I didn't pick everything up straight away, sometimes it took hours of practice other times I just got it straight away. Working on these larger pocket watches is definitely a good start as the components are a lot larger which helps with both handling and with learning how the movement works. We worked on the ETA Unitas 6498 for the first year before slowly moving on to smaller and more complicated watches.

    There are two things that I would say are vital when working on watches, Patience and Practice. HTH.

    Luke

  36. #36
    Master Omegary's Avatar
    Join Date
    Apr 2006
    Location
    Oxfordshire
    Posts
    8,844
    Quote Originally Posted by CLOCKMAN View Post
    Hi,again, You are in good hands with your tutor, I've just clocked up 50 years and still going strong. An experienced tutor or mentor is really essential as self teaching only leads to bad habits. I've done a lot of training over the years and have a more basic approach when teaching. Like experienced drivers, busy watchies often simply forget the difficulties faced by learners who are often disheartened by early failures & give up. You could well give us a class on photography some time soon. Your pics and script are excellent. However I am always aware that this is mainly a hobbist site soI try to keep it simple BC.

    Just a thought ,would the member Raulgonzalez care to contribute, he is on the right track for future stardom and more up to date on modern methods than I could be.
    Thanks again Clockman. I'm extremely fortunate in having an excellent tutor who mentors me for one day a week when possible. Without him I doubt I'd have had the courage to start working with movements on my own and I'd have certainly found it far more frustrating, if not given up completely. Let's face it, it can be really, really frustrating at times. In short I'm indebted to him and eternally grateful for his help and guidance.

    He say's he enjoys teaching me as he likes my enthusiasm and willingness to learn. Plus he seems to be be under the delusion that I'm a natural, the daft sod, lol! As he say's, if somebody's not interested there's no way in the world you can teach them, so he appreciates my natural curiosity.

    I've only been under his tutorage for around 6 months so can remember how unnatural working on a movement seemed at first. Thankfully I seem to be fairly dexterous though and have a good eye for detail, so it's slowly falling into place.

    Quote Originally Posted by RaulGonzalez View Post
    Like CLOCKMAN, I prefer removing the stem before removing the case screws but there is no right or wrong way to do things, its really down to personal preference. I also prefer to use a movement holder because I find it more secure, particularly if you want to manoeuvre the movement to look at something from a different perspective. Such as the division of the escapement for example.

    We are taught one way of doing things but are encouraged to find our own methods as long as the end result is the same. Practice is the only way to find your own methods, if your finding something difficult try doing it another way. I didn't pick everything up straight away, sometimes it took hours of practice other times I just got it straight away. Working on these larger pocket watches is definitely a good start as the components are a lot larger which helps with both handling and with learning how the movement works. We worked on the ETA Unitas 6498 for the first year before slowly moving on to smaller and more complicated watches.

    There are two things that I would say are vital when working on watches, Patience and Practice. HTH.

    Luke
    Thanks for replying Luke, it's fascinating to hear the perspective of someone undertaking professional training. I must say your blog is inspiring and very well written and illustrated. If I'm honest a lot is over my head but I keep re-reading it as I learn and more of it makes sense and is sinking in (that's no small task I can tell you, lol!). I'm sure it'll go on to become text book reading for anyone interested in a career in watchmaking and considering undertaking the WOSTEP course.

    It's interesting to hear that you tutors say to find your own way. I'm left handed and Rocco is right handed, so I have to mentally transpose his demonstrations and instructions to make them work for me. Sometimes my solution is completely different to his but it seems to work and he's always encouraging me to just practice until I find my own approach. Okay there's certain fundamentals and orders of doing things that have to be adhered to, however I'm sure most watchmakers have their own techniques and little secrets. As you say it's the practice to find these that's important and not getting frustrated with yourself because something seems to have the better of you temporarily.

    Cheers,
    Gary

  37. #37
    Grand Master
    Join Date
    Jul 2007
    Location
    Wakefield, West Yorkshire
    Posts
    22,519
    The point about removing the stem first is a good one; I don`t always do this but I`m always careful to check for pressure on the stem when the movement retaining screws are loosened, especially on old watches that have been taken apart many times.

    I tend to do a fair amount of stripping down with the movement in the case; it's an ideal movement holder. Taking the balance out first is generally a good idea to avoid the risk of damage. Also best to check/double check that the spring's been powered down.

    I`ve learned to spend some time inspecting the watch v. carefully before dismantling. Once it's in pieces it can`t tell you anything; a lot can be learned by running it and observing very carefully rather than 'wading in' and taking it apart as quickly as possible. I learned this lesson the hard way!

    Paul

  38. #38
    Master Saxon007's Avatar
    Join Date
    Nov 2010
    Location
    Texas
    Posts
    1,262
    Well, that was just superb.

    Thanks very much!

  39. #39
    Master markosgr28's Avatar
    Join Date
    Mar 2008
    Location
    Heraklion, Crete, Greece
    Posts
    3,578
    Great post! Thanks for sharing!

  40. #40
    Master Omegary's Avatar
    Join Date
    Apr 2006
    Location
    Oxfordshire
    Posts
    8,844
    Had a spare hour this morning and the light wasn’t too bad, so I thought I’d carry on with the dissembly of the Molnijar.

    I’m going to carry on with the bottom of the movement and the next step is to remove the balance. Before this though you must remove the power from the mainspring. Otherwise parts will fly off in all directions and you’ll spend the rest of the day on your hands and knees cursing (probably me).

    This feels like a slightly complicated procedure at first as it seems you need 3 hands. As ever though practice makes it easier.

    First, very, very slowly wind the watch, you’ll see a part called the click move interact with a large cog called the ratchet wheel which sits directly on the mainspring barrel. The click holds the power from the mainspring and stops it from unwinding itself instantly. So you need to hold the click back so it can’t engage with the ratchet wheel and slowly let the power from the mainspring unwind, controlling the speed with the crown.

    The click.


    Hold the click back with either tweezers or a small screwdriver.


    It’s very important that the power doesn’t escape too quickly so use the crown to slowly release it. Sorry I can’t show you this as I’ve only got two hands so can’t take pics whilst doing it.

    Power released its time to remove the balance which is held in place by one screw.


    Next to lift the balance. On a lot of movements there’s slots or gaps in the movement where you can place tweezers to remove parts. This is to help you and hopefully stop you from damaging surrounding delicate parts or marking them. It’s always worth looking out for them.

    In the case of this Molnija there’s a slot on the side of the balance cock.


    Use this to lift and slide the balance away from the movement. Be very careful not to touch or stretch the hairspring as they’re very delicate.

    Once removed place the balance in a safe place, I usually use a separate container for them as you don’t want anything near that hairspring.


    Underneath the balance you’ll see another plate called the pallet bridge which holds the pallet fork in place. The pallet fork stops the power from the mainspring spinning away and regulates the rate of power, along with the escape wheel.

    Pallet bridge.


    Pallet bridge removed to reveal the pallet fork.


    Pallet fork next to my finger nail togive na idea of size. Obviously on a large pocket watch movement like this the parts a lot bigger than a standard watch movement.


    With the pallet fork removed now’s the ideal time to check that the train wheels are perfectly flat with no signs of a buckle and parallel. You can wind the watch up a little and because the pallet fork is removed the train wheels will wind down and no power will be stored in the mainspring.


    More to follow shortly...
    Last edited by Omegary; 6th January 2013 at 21:56.

  41. #41
    Master Omegary's Avatar
    Join Date
    Apr 2006
    Location
    Oxfordshire
    Posts
    8,844
    The next step is to remove the escape wheel bridge and escape wheel. Not all movements have a separate escape wheel bridge, most of the time the escape wheel is held in place by the train wheel bridge, which we’ll get to later.

    Escape wheel bridge with screw removed.


    Escape wheel bridge removed to reveal the escape wheel.


    That done it’s time to remove the ratchet wheel so you can get better access to the train wheels after the train wheel bridge is removed.


    Ratchet wheel removed.


    Before we remove the train wheel bridge you’ll need to flip the movement over to the top or dial side and remove the hour wheel (if it hasn’t fallen off already) to access the cannon pinion. This little part holds the centre wheel in place which is the largest train wheel in the centre of the movement. If you don’t remove the cannon pinion you’ll struggle to remove the centre wheel.

    Hour wheel and spacer removed.


    The cannon pinion should be a tight fit to the centre wheel. If it isn’t the hands will be loose and will move backwards if the watch has a knock to the side of the case. A certain amount of leverage is required to remove it. I use my tweezers and lever them against the main plate to do this. I use a bit of plastic film (the same one I use to pretect the dial when removing the hands) to protect the main plate.


    Cannon pinion removed we can now flip the dial back over and start removing the train wheel bridge. Remove the three screws that hold it in place and lift off the bridge.


    More to follow shortly...

  42. #42
    Master Omegary's Avatar
    Join Date
    Apr 2006
    Location
    Oxfordshire
    Posts
    8,844
    Then remove the wheels.

    Fourth wheel.


    Third wheel.


    Centre wheel.


    Bottom of the movement so far.


    Now to remove the crown wheel. As the name suggests this connect the crown and stem to the movement via the keyless works. It connects to the ratchet wheel in order to wind the mainspring.

    First remove the crown wheel screw. These go the opposite way than normal, so to loosen it you turn it clockwise and anti-clockwise to tighten.


    Then remove the barrel bridge which holds the barrel in place. Remove the three screws that hold it in place then lift off the bridge.


    Then you have access to the barrel which you can lift out.


    And finally you have the bottom of the movement stripped revealing the mainplate.


    Thanks for reading, I hope it was instructive and easy to follow and I’ll continue when I get the time. If I’ve missed anything out (I usually do) or you’re unsure about anything just ask.

    Cheers,
    Gary
    Last edited by Omegary; 7th January 2013 at 12:08.

  43. #43
    Master adzman808's Avatar
    Join Date
    Apr 2012
    Location
    Porto & the UK
    Posts
    2,736
    utterly brilliant Gary,

    excellent pix and clear steps, bet it's a lot harder than you've made it look tho!

    I might have to take apart that mech sekonda I've got and ask you how to put it try to put it back together myself

  44. #44
    Grand Master AlphaOmega's Avatar
    Join Date
    Jun 2009
    Location
    Trinovantum
    Posts
    11,313
    Quote Originally Posted by 100thmonkey View Post
    Gary,

    Thank you for taking the time a effort to produce this excellent photo demonstration
    +1

    Looking forward to any updates.

  45. #45
    Craftsman
    Join Date
    Apr 2007
    Location
    Herts
    Posts
    643
    Superb thread, great photos reinforces what great pieces of engineering watches are!

  46. #46
    Master Omegary's Avatar
    Join Date
    Apr 2006
    Location
    Oxfordshire
    Posts
    8,844
    Quote Originally Posted by adzman808 View Post
    utterly brilliant Gary,

    excellent pix and clear steps, bet it's a lot harder than you've made it look tho!

    I might have to take apart that mech sekonda I've got and ask you how to put it try to put it back together myself
    Thanks mate. If your Sekonda is hand wound all the same principles will apply but some of the parts might be different shapes. One of the great things about watches is the individual parts can only go in one place on a main plate, so it's a bit like a 3D puzzle, you can work it out given time and a lot of patience. Having said that it's well worth taking photo's of each step though just in case.

    Bear in mind though that this Russian movement is about 36mm in diameter so it's nice and bit, a watch movement will be about a third smaller. So far I haven't had to use a loupe with the Molnija but you'll definitely need to use one working on a watch movement.

    Quote Originally Posted by AlphaOmega View Post
    +1

    Looking forward to any updates.
    Give me time mate, I've only updated this tonight!

    Quote Originally Posted by tvralan View Post
    Superb thread, great photos reinforces what great pieces of engineering watches are!
    Thanks Alan. Watches are fantastic pieces of engineering and I marvel at their ingenuity and design every time I work on one. The thinking and precision behind them is breathtaking.

    Cheers,
    Gary

  47. #47
    Grand Master Neil.C's Avatar
    Join Date
    Sep 2003
    Location
    SE England
    Posts
    27,100
    Quote Originally Posted by Omegary View Post

    First remove the crown wheel screw. These go the opposite way than normal, so to loosen it you turn it anti-clockwise and clockwise to tighten.


    Sorry to butt in Gary but shouldn't that be, to loosen turn clockwise?

    I realise you stated it was the opposite way to normal but for the sake of clarity and no doubt the horde of watchers who are taking apart their JLC's as we speak.

    It is easy to spot these reverse fitment screws as they have the double slots on them.
    Cheers,
    Neil.

  48. #48
    Master hellominky's Avatar
    Join Date
    Jul 2012
    Location
    sunny poole, dorset
    Posts
    1,093
    Excellent as ever Gary.

    I can see the parts and follow the photos but still find it hard to understand how something so minute and complex can be mass produced and robust. Fantastic.

  49. #49
    Superb, Gary! Again, a really interesting post.

  50. #50
    Master Omegary's Avatar
    Join Date
    Apr 2006
    Location
    Oxfordshire
    Posts
    8,844
    Quote Originally Posted by Neil.C View Post
    Sorry to butt in Gary but shouldn't that be, to loosen turn clockwise?

    I realise you stated it was the opposite way to normal but for the sake of clarity and no doubt the horde of watchers who are taking apart their JLC's as we speak.

    It is easy to spot these reverse fitment screws as they have the double slots on them.
    No problem Neil, it's always good to hear from you and as usual you're 100% correct. The sad thing is I had to think which way the screw turned. Never was very good with my lefts and rights either, lol! Anyhow I'll amend my original post.

    Cheers,
    Gary

Posting Permissions

  • You may not post new threads
  • You may not post replies
  • You may not post attachments
  • You may not edit your posts
  •  

Do Not Sell My Personal Information