closing tag is in template navbar
timefactors watches


TZ-UK Fundraiser
Results 1 to 18 of 18

Thread: Jewellery lesson

  1. #1
    Master Thewatchbloke's Avatar
    Join Date
    Dec 2010
    Location
    Oxfordshire UK
    Posts
    7,248

    Smile Jewellery lesson

    I've been servicing quite a few of these 6206b calibre Seiko movements from the sixties recently and I thought I'd put up a post about one of the aspects I find quite tricky, namely refitting the jewels, end caps and springs after cleaning.

    Diafix and diashock jewels are the type of shock protection employed by Seiko in the sixties. Before watches had shock protection a common failure was a broken balance staff (the staff is the very fine axle that supports the balance wheel) caused by a jolt to the watch. As the polished bearing ends of balance staffs were so fragile in relation to the mass of the balance wheel it didn't take much of a shock to snap the end clean off. This problem was addressed in 1934 by Swiss engineers Georges Braunschweig and Fritz Marti who invented the Incablock shock protection system. The balance staff end jewel is mounted in a housing called a chaton. To provide shock protection there is a separate jewel cap that fits on top of the end jewel, and this cap is held in place by a spring clip. This spring absorbs any jolts or shocks the balance staff may encounter. Some chatons are capable of absorbing sideways as well as vertical shocks due to their construction. So successful was this system that it was mimicked by all watch manufacturers who called their systems various proprietary names. Seiko used the name diashock for their balance staff protection and diafix for shock protection of lighter components, notably the third wheel and escape wheel staffs. The diafix system doesn't have separate chatons, it just utilises a jewel end cap and spring covering a fixed jewel in the plate.

    This is what a set of jewels, end caps and springs look like for a 6206b movement.


    The larger pair of end caps (the pink coloured discs) are diashock, the smaller four are diafix. The two housings are the balance chatons and the larger three pronged springs hold the end cap on. The smaller 'fallopian tube' type springs are for the diafix end caps. The jewel caps are flat on the side that is presented to the staff and slightly domed on the other side.The three top jewel caps fit into the mainplate from the calendar side. You can see I've arrowed the diafix positions in red and the diashock in yellow.


    The lower diafix jewel caps fit into the wheel train bridge plate and the lower balance diashock one fits into the end of the balance cock. I wont cover the lower ones here as they are exactly the same procedure as the mainplate ones.The jewels, springs and chatons have all been cleaned in the ultrasound bath. To 'polish' the flat surface of the jewel ready to accept oil I place the jewel flat face down on a sheet of printer paper and rub it back and forth with my finger! This is the best method I've found for removing any old oil deposits that the ultrasound didn't loosen. The correct method of lubrication is to use your oiler to deposit a tiny droplet of oil into the centre of the flat side of the jewel cap. You can just about make out the oil on this diafix jewel - apologies for the poor pictures!


    The jewel is then picked up and placed flat side down into the diafix hole in the mainplate.


    The spring is then maneuvered into a groove that runs around the circumference of the recess. I've found the easiest way to refit them is to put the spring in standing up and clip the two legs under the groove.


    Then you can fold it flat and tuck the last tab under to fully locate it at three points.


    The same procedure is used for the other diafix jewel caps.


    The diashock is fitted using a similar approach. First the parts are laid out.


    Then the jewel cap can be lubricated on its flat side and located in the chaton.


    The chaton is then placed into its housing in the mainplate.


    *Edit* - Spelling!

    Continued in part 2 (ten picture rule!).
    Last edited by Thewatchbloke; 26th November 2012 at 17:04.

  2. #2
    Master Thewatchbloke's Avatar
    Join Date
    Dec 2010
    Location
    Oxfordshire UK
    Posts
    7,248

    Jewellery lesson part 2

    Continued....

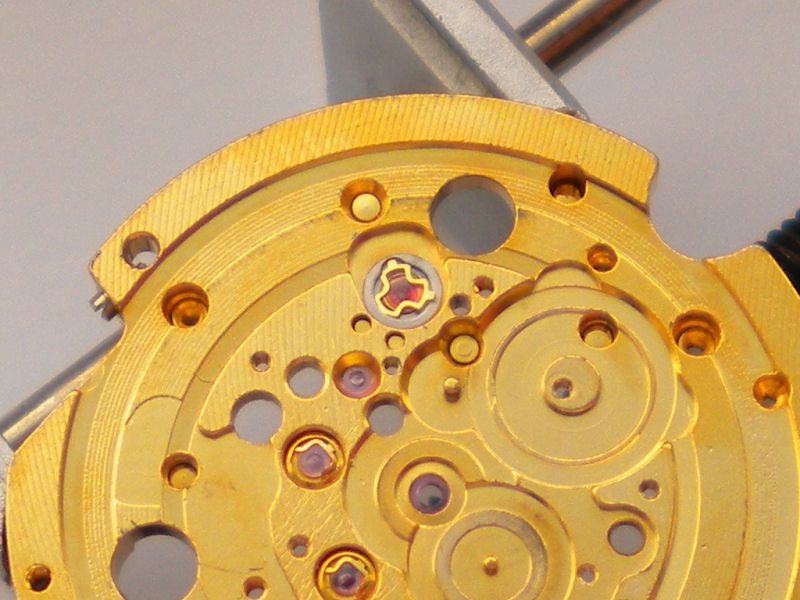
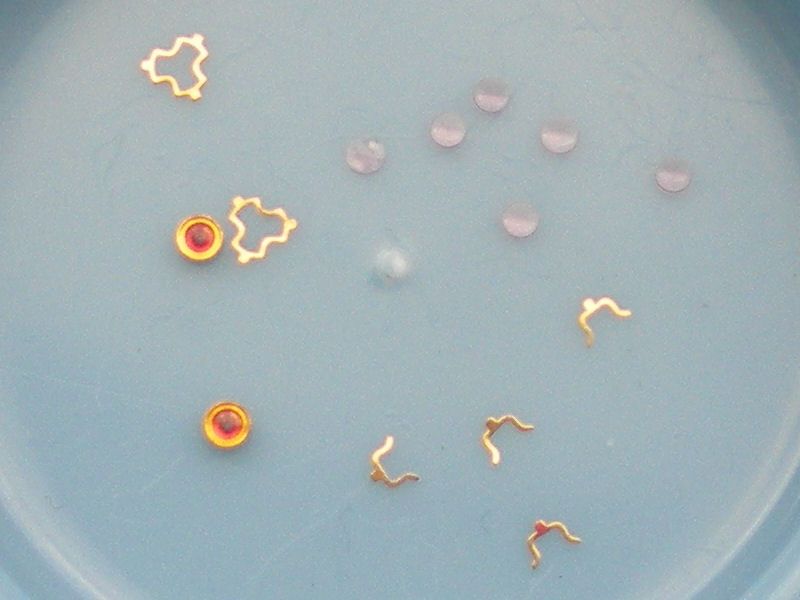
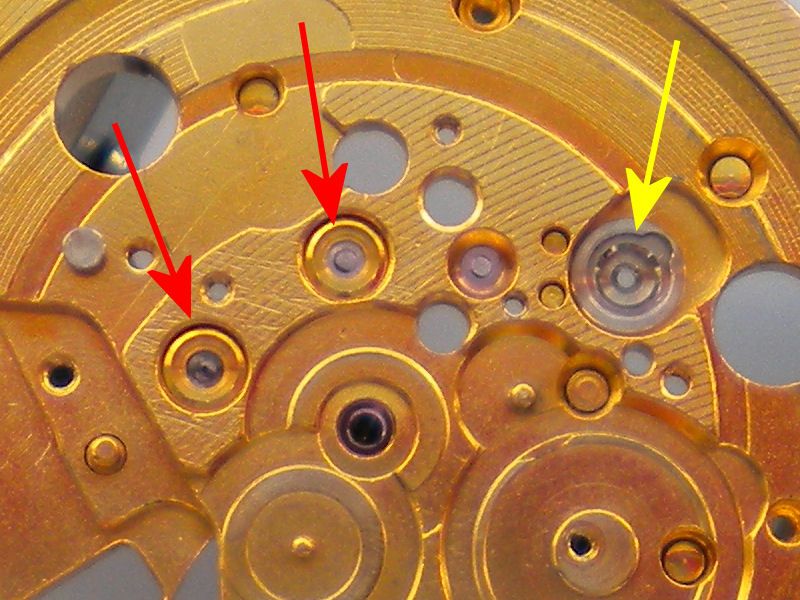
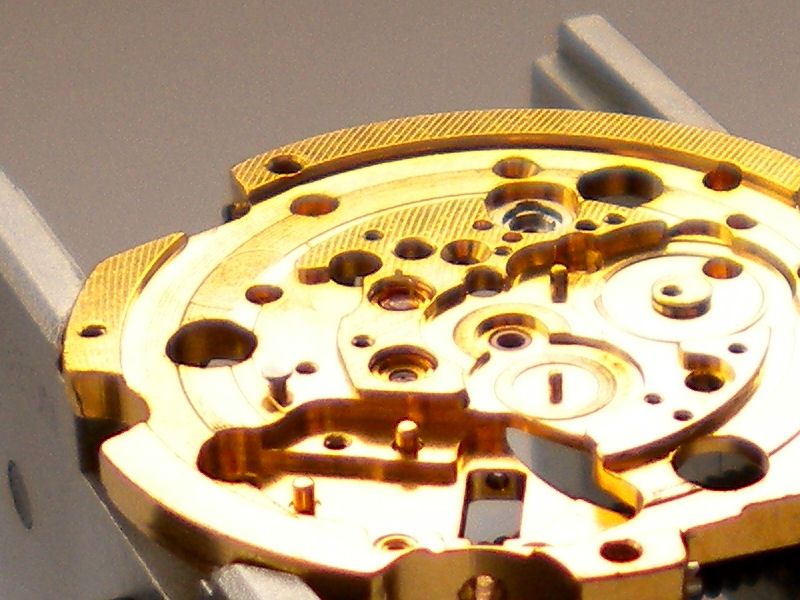
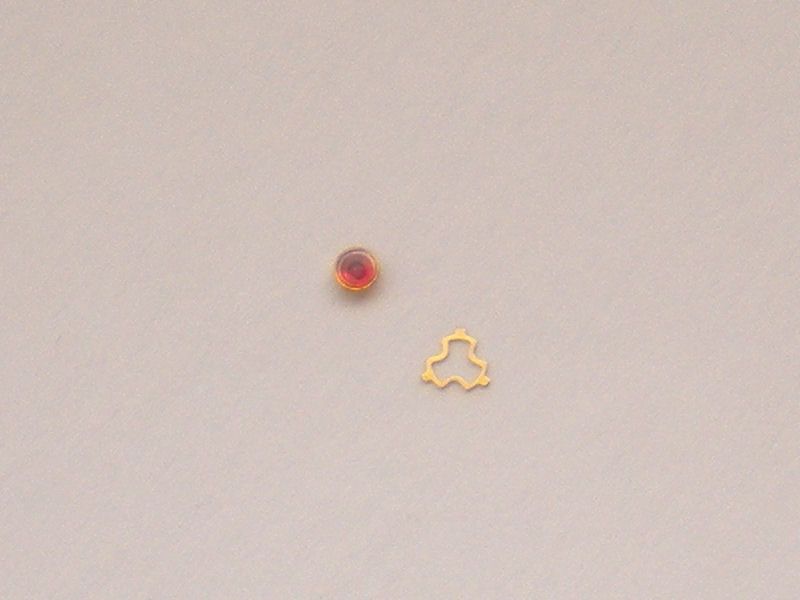
    The groove in this housing is similar to the diafix ones, but it has a crucial difference, there is a small cutaway point that allows the spring tabs to be located into the groove one at a time. The first tab can just be tucked under the groove but the second one has to be rotated until it's located over the cutout.


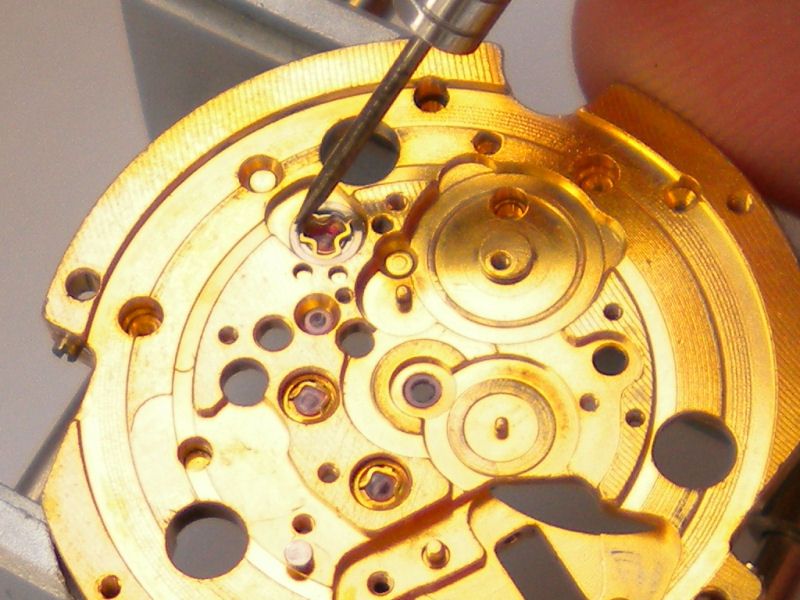
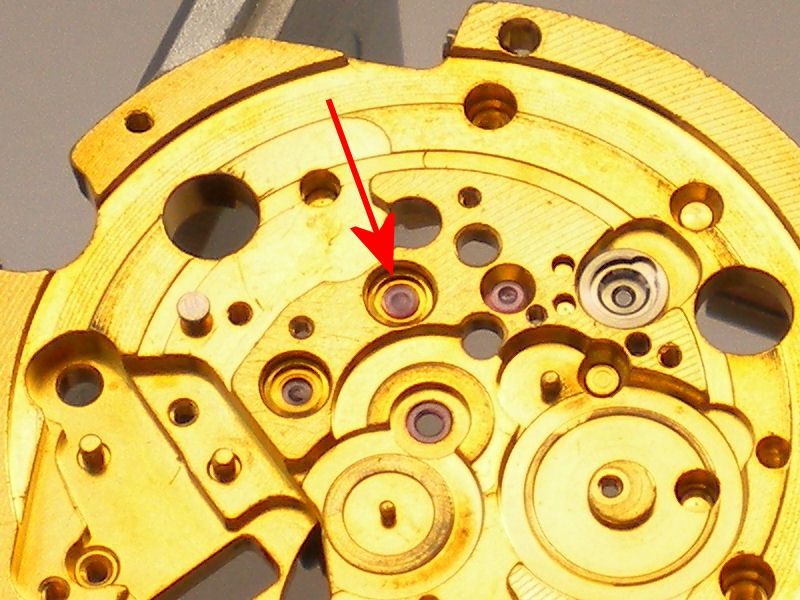
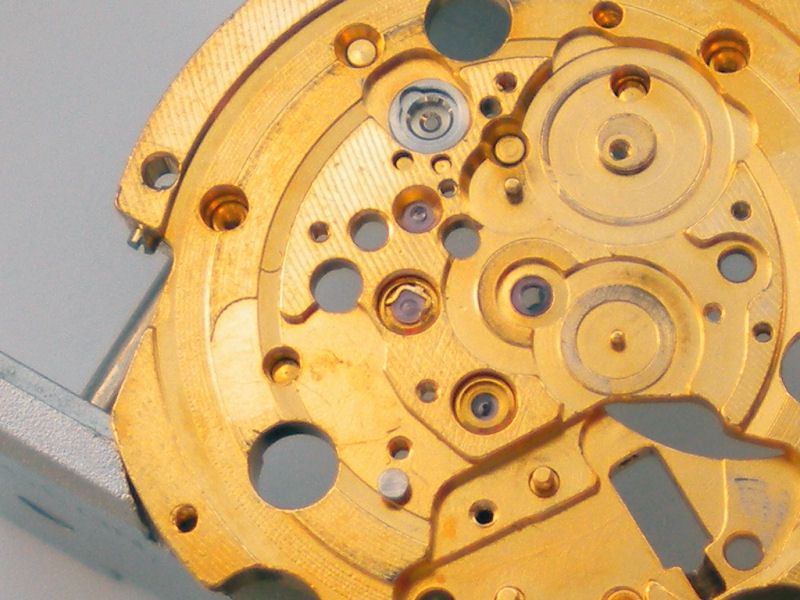
    It can then be depressed and rotated with a very fine screwdriver tip until the third tab is over the cutout.


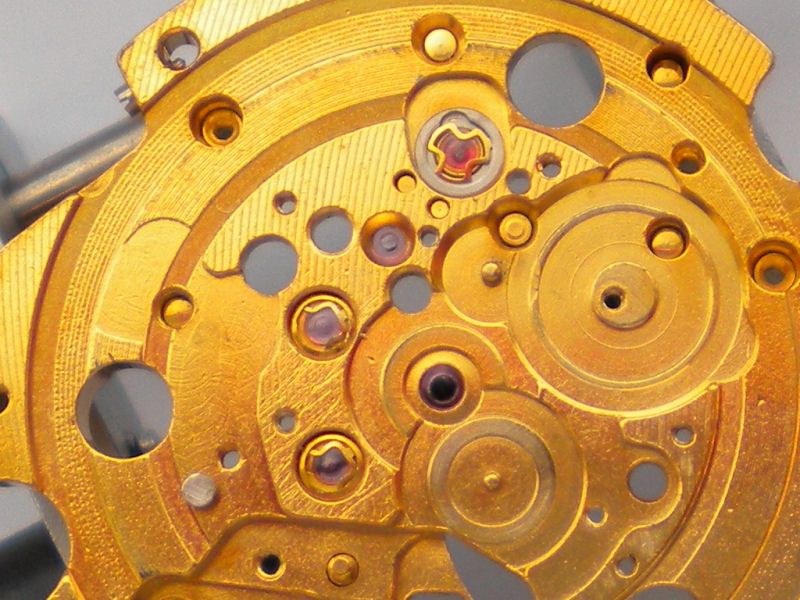
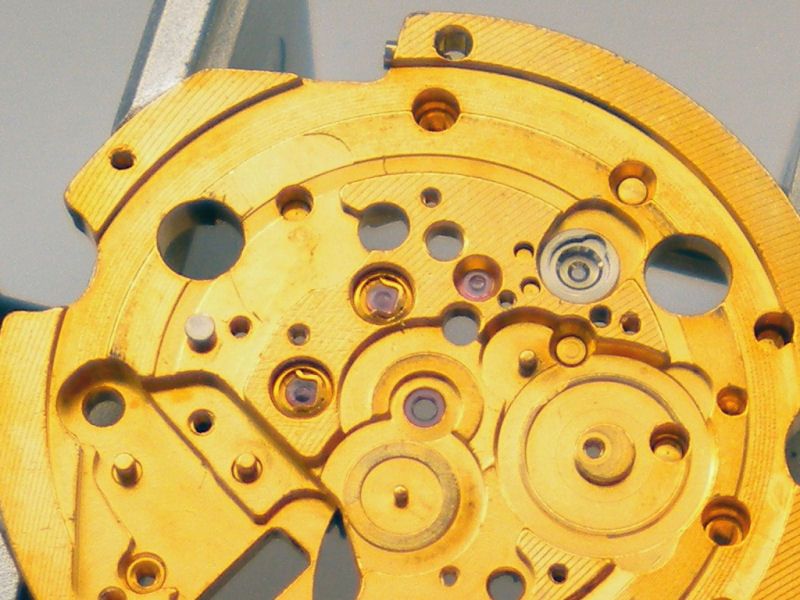
    The last tab can then be depressed and rotated until all three ends are located in the groove.


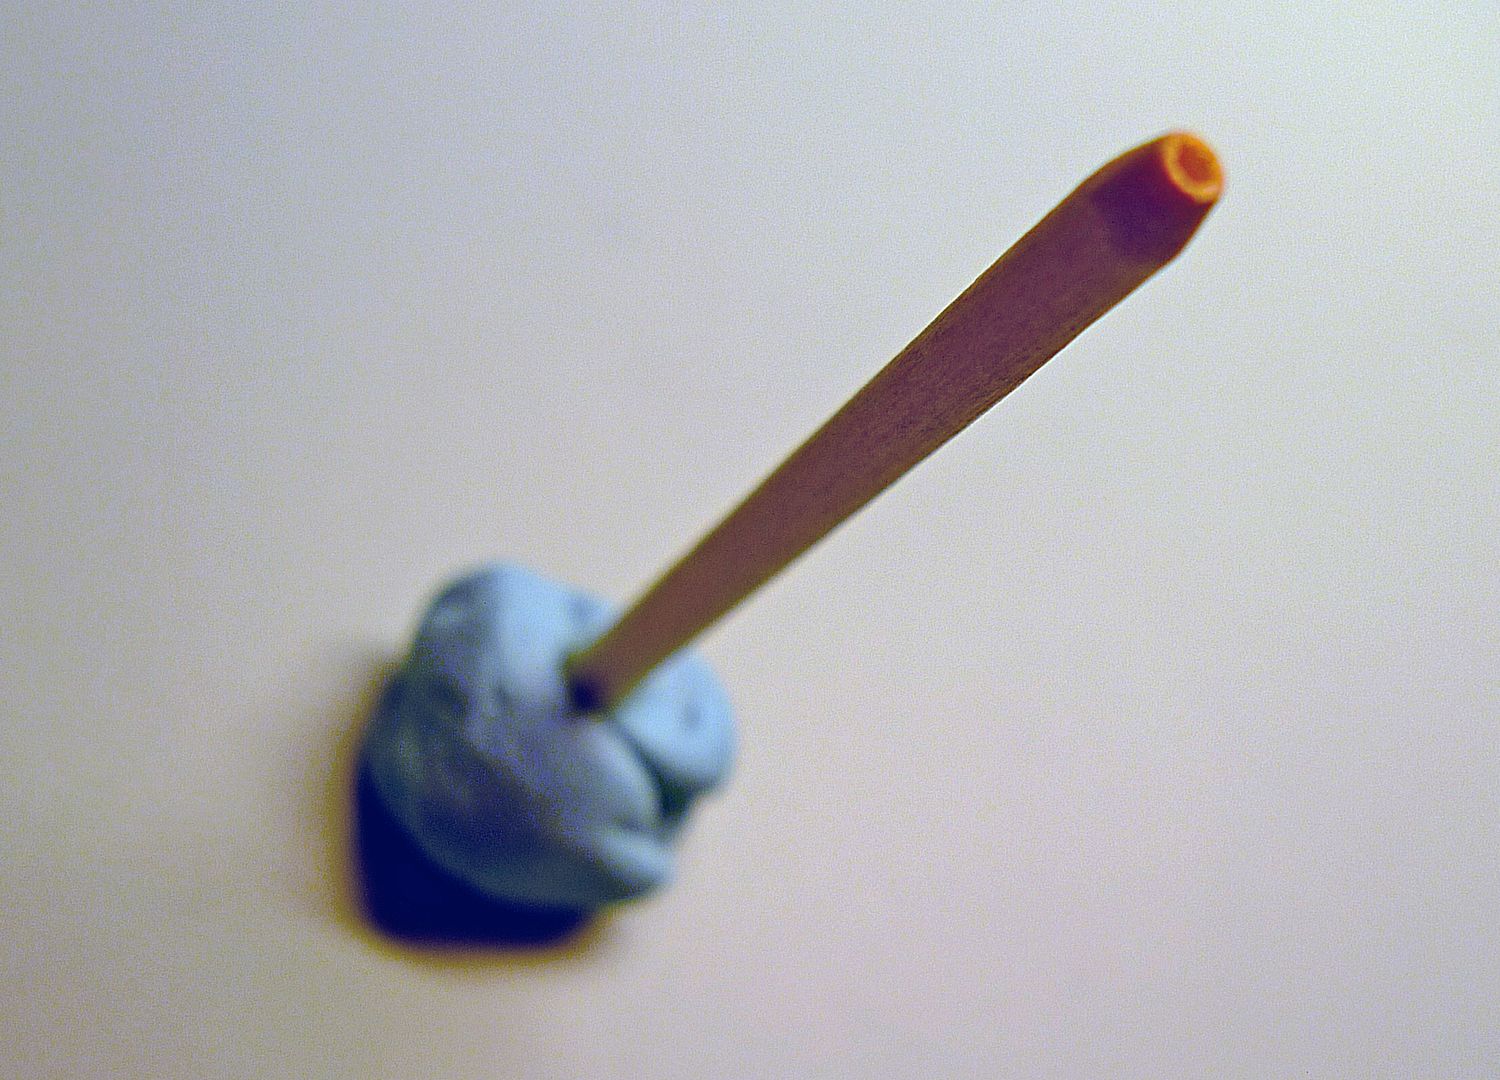
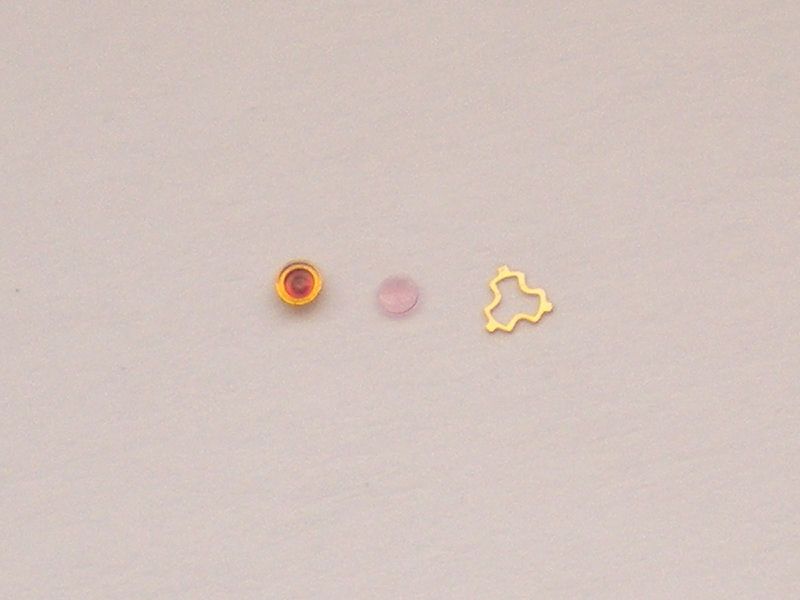
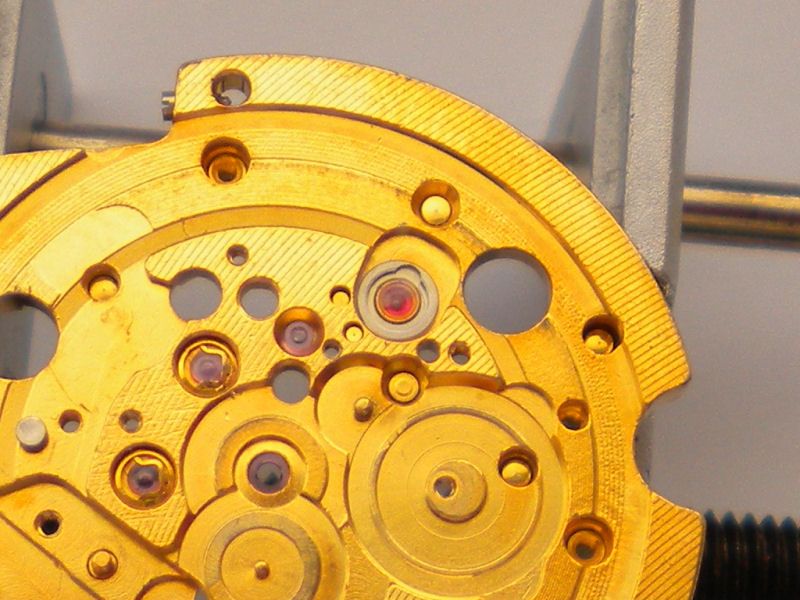
    I find refitting these jewel caps the trickiest part of rebuilding a movement, but I have a system in place now that is quite successful. When I first started I was losing caps and springs like there was no tomorrow. I hope you found this interesting and once again, apologies for the poor pictures. I really need a more capable camera!

  3. #3
    Master Omegary's Avatar
    Join Date
    Apr 2006
    Location
    Oxfordshire
    Posts
    8,844
    Great read with excellent photo's to illustrate it too, thanks for posting. Strangely enough I've just been talking about the same subject in my Oris Super thread.

    For diashock or kif springs I use a little tool fashioned from some pegwood. You chamfer the end to the diameter of the spring and then drill a little recess in the centre to accommodate the jewel. Put the spring in the slots, place the tool over the top, press gently and give it as little turn and hey presto the spring is in position. Saves a lot of faffing around locating each three prongs individually.

    A quick and out of focus shot that hopefully gives an idea of what I'm talking about.


    Cheers,
    Gary

  4. #4
    Master Thewatchbloke's Avatar
    Join Date
    Dec 2010
    Location
    Oxfordshire UK
    Posts
    7,248
    I'm going to give that a go next time Gary - cheers

  5. #5
    Master Omegary's Avatar
    Join Date
    Apr 2006
    Location
    Oxfordshire
    Posts
    8,844
    No problem and good luck. It's worked every time for me so far, so you should be fine.

    Out of curiosity how did you manage to get so much light on the main plate in your pics? When I try and photograph a movement in any detail I get shadows from my camera as it's so close to the subject matter. Mind you I'm just using a point and click camera so it's hardly surprising I guess.

    Cheers,
    Gary

  6. #6
    Master Thewatchbloke's Avatar
    Join Date
    Dec 2010
    Location
    Oxfordshire UK
    Posts
    7,248
    My camera's just a compact point and click too Gary, but when I decided to do a post on this subject I moved the components to the window every time I took a picture. A bit long winded but it's the only way I know to get decent light as I don't have any lighting rig.

    By the way Gary what camera do you use for your pictures? It seems to have a very capable macro feature, looks like several steps up from mine. I'm hoping to change mine soon (it will just be another compact though) to something with a better macro feature.

    Regards

    Duncan

  7. #7
    Master Omegary's Avatar
    Join Date
    Apr 2006
    Location
    Oxfordshire
    Posts
    8,844
    Thanks for the explanation Duncan.

    I use two cameras, a Lumix LX3 for quick work-in-progress and wrist pics and a Nikon D200 with a 60mm macro lens when I've got the time and inclination.

    On the thread below the last 7 pics on the second post are taken with the D200, the rest are taken with the LX3
    http://forum.tz-uk.com/showthread.ph...age-Oris-Super

    I do have to adjust the results from the LX3 quite significantly to get them lighter, hence the noise in some of the pics.

    Cheers,
    Gary
    Last edited by Omegary; 26th November 2012 at 19:42.

  8. #8
    Master
    Join Date
    Jan 2011
    Location
    Aberdoom
    Posts
    1,267
    great tutorial there sir. Thanks for taking the time to write it all up. Servicing a movement is the last step for me. I've gone as far as fixing keyless works, fitting new parts and oiling as needed. Even complete dismantle of a 6497 and managing to get it all back together and working! I just need to take the step into the next level. I have a borked 2824 asian clone movement that I can start on.

  9. #9
    Master ed335d's Avatar
    Join Date
    Aug 2012
    Location
    Surrey
    Posts
    5,665
    Thanks for taking the effort to write his up. I'm a long way off getting anywhere near this, but it's nonetheless less very interesting for me

  10. #10
    wow that's some great work you're doing

  11. #11
    Grand Master
    Join Date
    Jul 2007
    Location
    Wakefield, West Yorkshire
    Posts
    22,515
    Great thread, I`ve never worked on a Seiko before so this is all useful stuff for me.

    When oiling the endstones, do you treat them with an epilame such as Fixodrop first? I was taught (at the BHI) to do this to ensure the oil stays on the endstone and doesn`t run off.

    As for cleaning/polishing endstones on paper, I've never found this necessary. I clean them in degreasing fluid (trichloroethylene) in a small vial in the ultrasonic bath. I always inspect them under a strong glass, but so far (approx 40 watches) I`ve had no problems.

    Paul

  12. #12
    Master Thewatchbloke's Avatar
    Join Date
    Dec 2010
    Location
    Oxfordshire UK
    Posts
    7,248
    Hi Paul, no I don't use an epilame - I find that the correct amount of oil will bead in the centre of the stone and stay there, too much and it spreads to the edge and needs cleaning off. It amazing how quickly you get used to applying the correct amount when the alternative is a bit of a faff. The sliding of the endstones over paper was mentioned to me by an old watchsmith as a method he had always used. To be honest I probably don't need to do it as I clean them in a small pot of horozone in the ultrasonic, but it's just habit now.

    I'm glad you found the thread useful!

  13. #13
    Is there an easier way to oil the jewel than oiling the end cap jewel and THEN having to turn it over before placing it in the chaton, without the blinkin jewel end cap flying off into the unknown (My carpet must be littered with them!!)

  14. #14
    Master Thewatchbloke's Avatar
    Join Date
    Dec 2010
    Location
    Oxfordshire UK
    Posts
    7,248
    Once I've oiled the end cap I leave it where it is, pick up the chaton, invert it and place it on the cap. It will stick to the jewel in the chaton housing, and the chaton is a lot easier to handle than the end cap.

    Of course this can't be done with the diafix end caps, you just need a steady hand and a decent set of tweezers, I use Dumont ones now.

  15. #15
    Quote Originally Posted by Cannop View Post
    Once I've oiled the end cap I leave it where it is, pick up the chaton, invert it and place it on the cap. It will stick to the jewel in the chaton housing, and the chaton is a lot easier to handle than the end cap.

    Of course this can't be done with the diafix end caps, you just need a steady hand and a decent set of tweezers, I use Dumont ones now.
    Dumont tweezers..not cheap, you don't know of some cheaper variants?
    The problem I find is getting a good grip on the assembled jewel cap & chaton.
    Oiling it is fairly easy to do but especially on the balance wheel extremely important!

  16. #16
    Master Thewatchbloke's Avatar
    Join Date
    Dec 2010
    Location
    Oxfordshire UK
    Posts
    7,248
    Quote Originally Posted by odyseus10 View Post
    Dumont tweezers..not cheap, you don't know of some cheaper variants?
    The problem I find is getting a good grip on the assembled jewel cap & chaton.
    Oiling it is fairly easy to do but especially on the balance wheel extremely important!
    I used to use Vetus tweezers which are OK, however I do find Dumont give much better feedback, and seem to last a lot longer between stoning the ends.

  17. #17
    Master Omegary's Avatar
    Join Date
    Apr 2006
    Location
    Oxfordshire
    Posts
    8,844
    Another Dumont user here, no.5. Mine were given to me by my watchmaker who bought the 32 years ago when he was an apprentice. A little tlc and they're as good as new. You do get what you pay for sometimes.

    Cheers,
    Gary

  18. #18
    Bump from the depths for this fine thread

Posting Permissions

  • You may not post new threads
  • You may not post replies
  • You may not post attachments
  • You may not edit your posts
  •  

Do Not Sell My Personal Information